August 31st, 2012 · by Cyndi · 4 Comments
This me mining for gold in a creek at the Heritage Center. I found about 5 or 6 pieces.

This is me in a ship back in the old days laying down in the beds they slept in.

This is some leather I put stamps on and a necklace I made in the crafts center in the Heritage Center.

This is me in the woodworking place drilling a hole into something.

Categories: Miriam's Trip Blog
Tags: · photos-family, photos-places
August 31st, 2012 · by Cyndi · 5 Comments
We’re driving across the Nevada desert. It is very beautiful. Seeing all the mountains. But it was very very hot.
This is me eating coconut tapioca pudding. It is delicious.

I am at a playground at Wendover town. This is spinning very fast. So fast I can’t even get on it to stand up. This is playground is AMAZING. It’s like the best playground in the world that I’ve ever been to. The playground was very big and it had lots of stuff that I like to do.

If you click on this blue thing it will go to a video of me on a slide at that playground.
VIDEO of Miriam on West Wendover playground slide.
This is a double rainbow. My mom took the picture. The other rainbow you can barely see. We didn’t think it would get a double rainbow. We only saw one rainbow then it turned into a double one.

This is the sun setting over the mountains. It is beautiful. My mom took lots of pictures of it but we only put one on the blog.

Stay tuned for our next blog about the Heritage Center in Salt Lake City.
Categories: Miriam's Trip Blog
Tags: · photos-family, photos-places
August 30th, 2012 · by Cyndi · 6 Comments
This is me posing for a picture for my mom at Meeks Bay beach in Lake Tahoe.

This is me jumping off a rock in the water.

The water in the lake was VERY cold. I could barely even swim in it.

This is me reading a book with my sunglasses on because the sun was shining in my eyes.

Look out for our next post about driving through the dessert to Salt Lake City.
Categories: Miriam's Trip Blog
Tags: · photos-family, photos-places
August 28th, 2012 · by Cyndi · 13 Comments
This is the first day of our trip, driving to Tahoe.
This is my mom and me by a lake. By Donner Lake.

These are some people we met. They bicycle all around the US. The person’s name is Ron and the dog’s name is Buddy.

This is Meeks Bay lake. This is where we went in the cold at night.

This is also Meeks Bay lake with the moon.

I am the girl in the blue sweater at the beach, same lake.

Categories: Miriam's Trip Blog
Tags: · photos-family, photos-places
August 26th, 2012 · by Cyndi · 17 Comments
My name is Miriam Norwitz. I am 7 years old. I am in second grade but I can’t go to school because my school sprayed pesticides and they make me sick. I can’t go back until we have a really hard rain. My mom and I are taking a trip instead of me going to school.
This is how far we’re going. Just follow the purple line. We start in Petaluma: Then we go to Tahoe. Then Salt Lake City. Then we are going camping in the desert for three days. Then we’re going to New Mexico and then Phoenix. Then Los Angeles and then we’re going back home to Petaluma.

Categories: Miriam's Trip Blog
Tags: · photos-misc
February 3rd, 2012 · by Cyndi · 2 Comments
One of my pet peeves is when people tell me that buying produce at a local farm or farmer’s market is too expensive. Because they can go to Lucky’s or Safeway and get “the same thing” for less per pound.
Except it’s not the same thing.
Most supermarket produce comes from far away. Here in California we have many farms, from tiny to huge, but supermarkets favor huge and that’s a few hundred miles from here. Though some comes from Florida or other countries too.
When you ship produce from far away you make sure to grow varieties that ship well. Varieties that ship well tend not to taste great. And you pick them under ripe, so they won’t be mush when they arrive. Not only does ripe produce taste better, but it has more nutrients.
Most supermarket produce uses a lot of pesticides and herbicides and antifungals during the growing process, and some for shipping too. Some might even be genetically engineered. Organic produce avoids all that but, if it comes from a big farm, it is probably still the same boring varieties.
Our local farms grow heirloom varieties that are bred for flavor and nutrition, not shipping power or long post-picking life. And not uniformity or perfect outsides either.
The local produce tastes fantastic, and has a lot more nutrition than the supermarket varieties.
And here’s the kicker, it’s not more expensive. Sure, sometimes it is. And you have to buy in season and only what grows locally. But if you shop carefully, you can do very well.
My favorite local farm is Green String Farm in Petaluma, California.
And this is what I bought today:

That’s 3 savoy cabbages (the one in the back is about 9″ across), 1 red cabbage, 3 big pieces of buttercup squash, 3 cauliflower, 1 large bag stuffed with collard greens (would be 3-4 bunches in the store), and 1 large bag stuffed with baby broccoli.
Total cost? $20 even.
Can your supermarket do better?
Categories: Budgeting · Farms · Food · Food Markets · Places to Go
Tags: · petaluma, photos-food, sonoma county
October 11th, 2010 · by admin · 3 Comments
It’s October, so it’s prime tomato processing time here in California. I headed back to Greenstring Farm in Petaluma for 60 lbs of red Romas and a few miscellaneous paste tomatoes thrown in. Biodynamically (and organically) grown heirlooms of all possible types, for $1/lb. This was my second time canning and I made marinara sauce.
I’ve made marinara many times before. Usually in 20 lb batches, which I then freeze. When I was researching amounts and technique for this project, the page that was the most useful was my own: Homemade Marinara Tomato Sauce for the Freezer. I also drew on the lessons of my most recent (and very first) canning project: September Salsa for Canning.
I like my marinara sauce simple—tomatoes, onions, seasoning—so I can doctor it up later with whatever I have on hand. This turns out to be perfect for canning since it’s the tomatoes that carry the acid and too many other ingredients could raise the pH out of the safe zone (should be no higher than 4.6) for water bath canning. I did check my tomatoes and the pH was less than 5.5 (which is as low as my paper goes).
Ingredients:
60 lbs Roma tomatoes
4 very large yellow onions
Olive oil for sauteing (a couple tablespoons)
Sea salt to taste
6 bay leaves
2 branches (about 18″ total) fresh rosemary
Fresh herbs (I used parsley, sage, thyme, oregano, and basil, about a quart of loose leaves)
Red wine (I used just under half a bottle of cabernet sauvignon, an excellent $4 wine from Whole Foods)
Cane sugar (optional but helps counter the inevitable burnt spots), about 2 TB
Preparing the Equipment:
Fill your canner with the approximate amount of water you’ll need to put in all the jars and cover them by an inch, cover it, and get it boiling. It can take a long time to boil this much water, so it’s best to start it early then just keep it warm.
Wash jars and lids.
Put jars into a 200*F oven. This tip was pure genius! All the other instructions I read say to boil the jars and that means you have no room on the stove, have your canning pot in use (or have to use two), and the jars are wet. With the oven they were out of the way and dry.
Last time I put lids into a pan of water which I boiled on the stove then kept warm. But I didn’t have any spare pots or burners, so I put them in a stainless steel bowl of water in the oven instead. Worked great.

Sanitizing jars and lids for canning
Making the Sauce:
You want to start this sauce the day before you can. The tomatoes take a long time to simmer down. Normally I’d prep the canner and the sauce separately but, with this much sauce, I needed the canner to cook it.
Wash tomatoes and remove any bad spots. I don’t seed or skin them, I just toss them in whole, except for really big ones, which I cut in half lengthwise. If the tomatoes have a tough stem end, I cut it out.
I used the big canner (21 quarts) plus two good sized soup pots. No way would I have fit all those tomatoes in though. But, by the time I finished washing and prepping the last of 4 tomato boxes, the first couple boxes worth mushed down enough to make room. I’m guessing raw and whole, that’s 40-45 quarts of tomatoes (more if you try to pack them into jars).

Fitting 60 lbs of tomatoes into 3 pots
Now you want to cook them. A lot. Start with the heat on low. The bottle layer will burn if you don’t get some liquid in there. Either add some water (just enough to give you 1/4 to 1/2″ on the bottom) or dice up the first few tomatoes and cook them for a minute first. You can dice all the tomatoes if you want, but it takes a long time. They fall apart fairly quickly with heat and it’s fun to smoosh them with your spoon.
Stir them frequently and keep the heat high enough to see some bubbles but low enough to avoid boiling. Boiling may reduce it faster but it greatly increases the risk of burning and it will mute the flavor.
I cooked these down for about 8 hours on Friday and perhaps as long on Saturday. I was sick on Saturday so had to wait until Sunday to can. I always turn the heat off overnight or if I need to leave the house for more than 5 minutes. As time passed, those 3 pots turned into 2. You can add salt at any point after a few hours. I recommend undersalting because when you concentrate the tomatoes, you also concentrate the salt. Salt will help the tomatoes fall apart.

Tomatoes reducing
On the second day, when the pots were cool, I moved them to my counter and used a stick blender to puree the tomatoes. Then I added fresh rosemary spears and bay leaves to the pots. Be sure to count how many you put in and don’t add them until after you puree.
About an hour before I was ready to can, I fished out the whole herbs (count them) and added the other ingredients. Since I had to wait an extra day, I made sure to bring the sauce up to a brief boil for safety reasons, then I turned it back down to a simmer before adding. At this point, I was able to fit everything into the big canning pot.

Sauce simmering down with herbs
I peeled and quartered the onions and put them through the shredder of my food processor. While I prefer a more square cut, this job took less than 5 minutes, vs about 15 if I did them by hand (even longer because I’m a crier). Saute the onions in some olive oil until they have a bit of color but don’t brown them. Add the wine and onions to the sauce.
I food processed the leafy herbs until minced and added them very close to the end. Go ahead and salt to taste. If the sauce has any bitter, sour, or burnt undertones, add a bit of sugar.
I had to transfer the sauce to smaller pots and wash the canner.
Filling the Jars:
The sauce should be hot when you fill the jars so I was sure to keep one pot on a burner and turn it on a few minutes before each fill. Take the jars and lids out of the oven right before you need them so they don’t cool too much.
I ladled the sauce into a canning funnel. I couldn’t find my real canning funnel so I used a make-shift one, the cut off top of a gallon plastic jug (the sturdy plastic).
Processing the Jars:
Wipe any spills off the rims, put the rubber rings on the plastic lids (I use Tattler BPA-free lids), and put the metal rings on loosely. Tighten ring with finger pushing down on the lid. Then loosen lid 1/4″. (If you’re using Ball lids, follow the directions on the box.)
I don’t own a canning rack but found a perforated baking rack that fit well.
Have the water at a boil before adding jars. Adjust water so it is at least 1″ over the top of the lids. Bring back to a boil then set a timer for 45 minutes. Using a jar lifter, remove finished jars to a rack (or in my case, boxes with towels) to cool. Tighten the lids. You don’t do this with Ball lids, just with Tattler.
Tattler lids do not ping. There are no sounds at all with them. When jars are cool (the next day), remove the rings and make sure the lids are secure. Label and store.
How Much did I Make?
20 pounds of tomatoes made a little over 6 quarts of sauce when I did it for the freezer. This recipe was pretty similar. I used 60 lbs of tomatoes and ended up with 18.5 quarts. I processed 17 quart jars and saved 1.5 for the fridge. One of the jars didn’t seal (the rubber ring wasn’t positioned right) so I put it in the freezer. The lid fell off as soon as I removed the metal ring, so there was no guesswork there.
Cost? The tomatoes were $60, the onions around $4, and the wine about $1.50. The herbs came from my garden (except for the bay leaf, which is minimal). $65.50 divided by 18.5 comes out to $3.54 per quart jar. Not cheap but much thicker and better than anything I can buy. And it’s all organic too.

Finished marinara sauce
Categories: Dressings & Sauces · Food · Recipes
Tags: · canning, dairy-free, egg-free, gluten-free, photos-food, vegan, vegetarian
September 25th, 2010 · by Cyndi · No Comments
September means tomatoes here in California. They’re still green on my plants but Greenstring Farm in Petaluma, has bushels of them. Biodynamically (and organically) grown heirlooms of all possible types, for $1/lb. I bought Golden Romas and tomatillos (plus a few extras for fresh eating) and made salsa. I’ve made fresh salsa before. It’s pretty easy: chop tomatoes, onion, cilantro, add lemon or lime juice and some heat. But this was my first cooked salsa, and my first ever attempt at canning (unless you count a few thank-god-I-didn’t-kill-anyone sessions in the 90’s). When you can, it’s not just about making something delicious. Or something that can take the extra cooking time. You have to make it safe too. Some canning resources evoke more fear than longing. Don’t dare change a single teaspoon of this recipe or you will all die! Where others are more laissez faire. Sure, do whatever you want, in any jars you can find, just heat it enough for the lids to stick. My aim was for something a bit more practical. I started with a basic canned salsa recipe that’s all over the web. Here’s the official “government” version. And here’s a home canner’s version with lots of pictures. And, yes, I altered it. But I’m not too worried. To can safely in a water bath canner, the pH of your food needs to be no greater than 4.6. Most tomatoes are below that and a few are slightly above. But add in a large amount of vinegar (pH of 2.4-3.4; apple cider vinegar 3.1) or lemon/lime juice (pH of 2-2.4) as this recipe calls for, and you’re golden. For more details, read the uber cautious government study on salsa. Their basic safe recipe is 200 g tomatoes, an equal amount of onions and peppers, and 1/4 cup lemon juice, per pint of finished product. I have pH paper but it doesn’t register below 5.5. I checked my salsa when it was on the stove with all the ingredients except for the vinegar and lime juice. The pH was less than 5.5.

Tomato box
Ingredients:
Golden Roma tomatoes and tomatillos, about 8lbs total
Fresh peppers to taste (I used 1 medium-hot pepper about 2×3″ to get mild heat)
2 large white onions
2 tsp sea salt
1 tsp black pepper (didn’t measure but did 30 turns of the grinder)
2 tsp cumin seeds
1.5 TB fresh oregano
1/2 bunch fresh cilantro
Fresh lime juice (used 7 limes which came to just under a cup)
Apple cider vinegar to bring acid liquid total to 2.5 cups
Preparing the Equipment:
Fill your canner with the approximate amount of water you’ll need to put in all the jars and cover them by an inch, cover it, and get it boiling. It can take a long time to boil this much water, so it’s best to start it early then just keep it warm. Wash jars and lids. Put lids into a pan of water and bring to a boil then keep warm. Put jars into a 200*F oven. This tip was pure genius! All the other instructions I read say to boil the jars and that means you have no room on the stove, have your canning pot in use (or have to use two), and the jars are wet. With the oven they were out of the way and dry.
Making the Salsa:

Seeding golden roma tomatoes
Peel and quarter the onions and put through shredder of food processor. Wash tomatoes and remove any bad spots. Cut in half lengthwise and seed (just stick your fingers in there and push the seeds into a bowl, don’t worry about being perfect). Set aside seeds/juice for another use (I froze them for soup). I considered following everyone’s advice and peeling the tomatoes, but their skin is thinner than most and I really really didn’t want to. I’m told that regular tomato skins get tough if left in. To peel, immerse tomatoes for 30-45 seconds in a pot of boiling water. Immediately place in to ice water. The skins should come right off. Wash tomatillos and remove any bad spots. Put in oven to roast (I should have cut them in half first and put them in a well-heated oven, but I just put them whole into the 200*F oven that was holding the jars). You do not need to peel or seed tomatillos. Feel free to make the recipe with just tomatoes or just tomatillos. Run tomatoes and tomatillos through food processor shredder. In the empty food processor, with the regular blade, put all tomato and onion scraps that didn’t shred plus the seasonings and herbs and the peppers you’re using, washed with stem and seeds removed. Mince well. Put everything into a pot, along with the acid liquid. Bring to a simmer. Apparently this is all that is needed for safety and easy canning. The recipe I had says to cook it for half an hour. I wasn’t going to but it was very liquidy. Since my sauce was yellow and green, I didn’t want to add the recommended (red) tomato paste. So I did cook it down some, but it’s still pretty liquid.

Salsa ready for canning
Filling the Jars:
Keep the salsa hot while you’re filling. Take the jars out of the oven and the lids out of the pot of hot water right before you need them so they don’t cool too much. I used an 8oz ladle (same size as the jars) into a canning funnel. I couldn’t find my real canning funnel so I used a make-shift one, the cut off top of a gallon plastic jug (the sturdy plastic).

Filling jars with salsa
Processing the Jars:
Wipe any spills off the rims, put the rubber rings on the plastic lids (I use Tattler BPA-free lids), and put the metal rings on loosely. Tighten ring with finger pushing down on the lid. Then loosen lid 1/4″. (If you’re using Ball lids, follow the directions on the box.) I don’t own a canning rack so I put extra canning rings on the bottom of the pot and then layered them on top of the first layer of jars. They were not all perfectly not touching each other but I’ve seen other canning folks do this without any center racks, so I’m not worried. I did a double layer of jars (which left some for a second processing session, oh well). Have the water at a boil before adding jars. Adjust water so it is at least 1″ over the top of the lids. Bring back to a boil then set a timer for 15 minutes. Remove finished jars with to a rack to cool (my jar lifter was a great investment!). Tighten the lids. You don’t do this with Ball lids, just with Tattler. I forgot to with the salsa, but it all sealed just fine. Tattler lids do not ping. There are no sounds at all with them. When jars are cool (the next day), remove the rings and make sure the lids are secure. Label and store.
How Much did I Make?
The recipe I based mine on called for 15 lbs of tomatoes and makes around 8 pints. I only had 8 lbs of tomatoes and tomatillos and I cooked my salsa down as long as the other recipe does. I thought I’d get 5 pints or so. Somehow I ended up with 12! (You may notice that the original recipe called for 2 cups of acid liquid but I used 2.5 cups. That was because I realized at that point I had more salsa than expected so added some extra just in case.) I canned 2 pint jars and 18 half pint jars and had a full pint for the fridge.

Salsa canned, labeled, and in the pantry
Categories: Food · Recipes · Spreads & Dips
Tags: · canning, dairy-free, egg-free, gluten-free, latin food, lowcarb, photos-food, vegan, vegetarian
August 1st, 2010 · by Cyndi · 1 Comment
Who doesn’t love a fair? Even if you don’t have a child to share it with. I grew up on the Del Mar (San Diego County) Fair, which is one of the biggest county fairs around. Our local fairs here aren’t as big but they’re fun.
There’s one right here in Petaluma, the Sonoma-Marin Fair, which, despite the name, is pretty darned small. They are home to the World’s Ugliest Dog Contest (a fabulous event, drawing folks from around the country, that brings love and attention to dogs that might otherwise be unadoptable). They also have no nonsmoking policy. I normally skip it but this year some friends had free tickets, so we went. I had to use my respirator when outdoors, except in the kiddie carnival section (which consisted of about half a dozen rides) and it was insanely hot that day. So I checked out the (air conditioned) exhibits then went home after an hour. Michael and Miriam stayed another hour then I came to pick them up.
Sonoma-Marin Fair
Petaluma, Calif
5 days in late June
At least 6 acres
Adults (13+) $15, Kids (4-12) $10, Kids 0-3 free, Seniors (65+) $8. Admission includes rides
Parking free but tight
I also enjoy the Marin County Fair, which is a bit bigger with lots of exhibits, booths, and shows. Plus fireworks every night over a lagoon. Smoking is only allowed in a few well-marked smoking tents (that smoke does not easily escape from), though there are always a few who think the rules don’t apply to them. The Marin Fair doesn’t use pesticides and tries to use less toxic cleaning and other products, well as green projects to save energy.
Marin County Fair
San Rafael, Calif
5 days in early July (always includes the 4th)
28 carnival rides, at least 6 acres (for carnival)
Adults (13+) $15, Kids (4-12) $13, Kids 0-3 free, Seniors (65+) & disabled $13. Admission includes rides (extra charge for 3 rides)
Parking $6, very crowded (can take a long time to get in or out), & often a hike
But the fair I consider local is the Sonoma County Fair. A good number of booths, huge livestock/animal section, the “largest themed flower show in the United States,” and horse racing. This fair suffers from a confused (and unmotivated) smoking policy. Two days, kids days, are entirely nonsmoking until 7pm, with so-so enforcement and signage (though it was much better this year, possibly because I spoke with the staff about it ahead of time and they promised to do better). The other days smoking is allowed everywhere except for a spot here, a spot there, and so on (with poor signage). They seem to believe that only children need to avoid cigarette smoke (nearly all the outdoors nonsmoking areas are the kids’ areas and their signs ask people to protect children’s health) and that smoke does not travel (or that people don’t ever travel from one “safe” spot to another). My hope is that I can convince them to follow Marin’s example and set up comfortable and convenient, but contained, smoking areas and make the rest smoke free.
Sonoma County Fair
Santa Rosa, Calif
13 days in late July, early August
Entire complex 200 acres; carnival 5 acres plus large separate kiddie carnival
Adults (13+) $9, Kids (7-12) $3, Kids 0-6 free, Special free days for kids or seniors. A couple events and big name concerts are extra. Rides are not included with admission. Pay $3-5/ride or get a wristband for unlimited rides for $25 ($15 if purchased in advance)
Parking $6-8

Miriam's first real ferris wheel was at the Marin Fair last month, but this one in Sonoma was far bigger
Last year was the first time I’d ever entered a Fair contest. Miriam entered 3 photographs and won 2 ribbons. I won 3rd place for my blog (out of 5 entries) and nothing for my date nut bars.
This year, only I entered. How thrilled was I to enter the exhibit hall and see this:

I won 2nd place for my dried apricots!
Until I went looking around for my competition and discovered this was it.

All entries for dried food
Yep that’s right. There were 4 entries for dried meat and only one for produce. Apricots were their own class (so were apples and pears). I asked the staff why, if I was the only one, I didn’t get first place. Apparently, it’s not just about the order you fall in but about meeting certain standards. If you look at the meats though, you’ll see that only one of them won a prize, despite there being 5 ribbons available for each class. So my fruit might not have been top notch (probably because I cut them before drying; they’re delicious but not the flattened globes most people are used to) but it was prize-worthy.
I fared much better with my other entry. There were at least a dozen poems in my class, free verse, and I won 3rd place.

My poem, Suddenly Fall, wins 3rd place!
This is the poem, Suddenly Fall, I wrote after William’s death. You can read the text more easily on its blog page.
I discovered this year that the Marin Fair, with huge numbers of contest entries, allows entries from neighboring counties. And I might do the Sonoma Harvest Fair this fall. For the Sonoma County Fair, fine arts (especially painting/drawing and photography) are well populated, but food contests are mixed.
As for the rest of the Fair, we had a swinging good time for 4 hours, until we went into the Pavilion to check out the business booths and Miriam suddenly started crying to go home. She has been extra sensitive to foods and chemicals lately so who knows. Unfortunately, we never did get to see the animals this year, see the flower show, go to most booths, play any games, or finish with our rides. Ah well. We’ll be back next year.

Miriam & Cyndi on the Fair swings
Categories: Fairs · Family Life · Food · Food Contests · Places to Go · Poetry · Writings
Tags: · photos-family, photos-food, photos-misc, santa rosa, sonoma county
July 3rd, 2010 · by Cyndi · 6 Comments
A couple of years ago, I came up with a glorious recipe for fried fish minus gluten, dairy, or egg. Everyone I made this for loved it, but boy was it a pain to make. Not just the breading, but standing over a hot frying fan (or two) for about an hour. And I’m not a lowfatter but it really did suck up the oil too.
Welcome to the new and improved version. Now I bake the fish in the oven, which reduces the oil use but still leaves it crispy, and cuts the time I spend in the kitchen way down. Plus now I can make 4 meals at once.
Just like before, you want to choose a flat boneless fillet. I’ve tried several, but really can’t get better than dover sole. It’s reasonably sustainable, wild caught, sold boneless, and cheap. I usually buy it at Costco (can’t vouch for all branches, but mine has a excellent fish counter).

Dover sole washed and drying
The basic directions are to take fresh (or defrosted) fish that is reasonably dry (I always rinse fish before using), coat it in flour, coat it in “egg,” and coat it in flour again. It really makes a big difference to do the double coating, so I recommend you don’t skip it. I use the same container of flour for both dips, you could do different ones if you wanted…some people do a fine flour for the first dip and a coarse one for the second. Use a large roasting pan for the flour. The 2-3″ lip helps keep the mess down and the large size lets you work with 7 or 8 pieces of fish at once.
It helps a lot to have a wet hand and a dry hand. I use my right hand to lay the fish on the flour and turn it over, then I use my left hand to dump more flour on the fish to make sure it’s fully coated as I pile them up to one side of the container. You can follow my suggestions of plates from my old recipe, but I’ve found that to be an unnecessary step.
Next I use my right hand to dip each piece one at a time in the “egg” and let it drip before laying it in the flour and turning it over. The dry left hand piles flour on top to make sure everything is coated.
The Flour:
In the past I used half soy flour and half brown rice flour plus salt (a tsp or two for every 3 cups) and pepper. The soy cuts down on the carbs but is too heavy alone. Brown rice works well but is very carby. This makes a nice but thin coating.
Then I started using cornmeal, the standard fine grind from Arrowhead or Whole Foods. Because it isn’t as fine as flour, I do 3 parts cornmeal to 1 part brown rice flour. Plus salt and pepper. This batter is slightly thicker and has a nice flavor.
Azure Standard sells a corn flour which turns out to be an actual flour grind. It gives a thin coating to the fish and isn’t very good on its own. They also sell a medium grind cornmeal which turns out to be pretty coarse. Not quite as coarse as polenta but way beyond “meal.” My last fish batch was about 3 parts medium cornmeal and 1 part corn flour. Came out thick and very good. And the “scones” I made with the leftover flour was fabulous.
Do experiment with flours if you don’t like, or can’t have, my choices. Heck, even wheat.
I’ve changed my seasoning too. I still use salt and pepper but add cumin powder and paprika. You can’t taste them in the final product but it gives it a depth and richness it lacked before.
The Egg:
You can use real egg here if you want. But we use flaxseed, which works very well. Heat up water and add well ground flax seeds (I use a way oversized glass measuring cup in the microwave). Stir and let cool. The standard amount is 1/3 cup water to one tablespoon of meal equals one egg. I usually make a bunch of eggs worth and then add more water as I get down to the bottom. I find that a thinner “egg” coating works better on the fish.
Amounts:
Plan on around 1/2 pound of fish per person (measured before coating). This is an average for children and adults. A group of just adults will eat more.
It’s very hard to give the amount of flour mix because it varies so much based on how thick the fish fillets are (it’s surface area that counts, not weight), how coarse your grains are (coarser ones weigh less per cup due to more airspace and also make a thicker batter), and your technique. Count on at least 3 cups of flour mix per 5 lbs of thin fish. But I add extra to make hushpuppies with.
About 6 eggs or egg equivalent will do 5 lbs of thin fish. For flax I usually use 6-8 tablespoons of flaxmeal to 2 cups of water, then add 1-2 cups as I go along. Since I like it thinner, this is enough for 7-9 lbs of fish. Plan to have extra for hush puppies.
I like to make 9 lbs of fish at a time. It’s not that much more work than making 4 or 5 lbs but it’s about all I can handle. Fried this would be way too hard, but baking makes it easy. I generally bake up 1/4 of it then freeze the rest, for an additional 3-4 meals for 3 people (each time we usually have a serving or two leftover for lunch the next day).
Ingredients:
Dover sole fillets
Seasoned flour mix
Beaten eggs or flax goo
Oil for baking (I use olive)
Baking the Fish:
Coat the fish in flour, dip in egg/flax, coat again in flour, shake off excess and put on a cookie sheet with a good deal of olive oil on it (just enough that it moves around when you tilt the pan). Do not use baking pans. The fish will not crisp up. Use sheets that are flat or have a lip no higher than an inch.
Bake at 400*F until the bottom is browning nicely. Flip fish over and brown the other side. Take care not to burn it or let it get too brown. But you want it crispy.
Freezing the Fish:
Coat the fish in flour, dip in egg/flax, coat again in flour, shake off excess and put on a cookie sheet or baking pan with a piece of parchment or waxed paper on the bottom. Do not use oil. The fish can touch but should not overlap. You can make 3-4 layers of fish as long as there is parchment or waxed paper between each layer. Stick in freezer.
In theory, you can move the fish to zipper bags once frozen, but we’ve never bothered. You will want to do this if your freezer gets freezer burn easily though.
When you want to cook them, just remove from freezer. No need to defrost. Put the fish (minus the paper!) on a well oiled cookie sheet and bake at 400*F as per above.

Frozen battered fish, direct from freezer (right) or ready for the oven (left)
Leftover Batter:
I’ll make a separate hush puppy post at some point. I make mine more like scones and they are fabulous. Mix the leftover flax goo or egg with the leftover flour mix. Add water or milk (I’ve used soy milk to good effect) or more flour until the batter is thick enough to only partially hold its shape on a pan. Add more seasoning (dill weed, dill or cumin seeds, chipotle pepper powder are all good) and a pinch of baking soda. Bake on an olive oil coated pan until fully cooked but not too hard.
Recipe for Tarter Sauce:
Relish (I prefer dill but sweet is fine)
Veganaise or mayonnaise (1-3 times the relish)
A squeeze of fresh lemon
A bit of salt
Serving the Fish:
Serve with tarter sauce and lemon slices (or catsup if you’re like my daughter). The fish is delicious with coleslaw but goes well with a wide variety of vegetables.
Leftover fish is great cold or heated.

Oven Fried Dover Sole with tarter sauce and roasted vegetables
Categories: Food · Main Dishes · Recipes
Tags: · egg-free, gluten-free, photos-food, seafood
June 21st, 2010 · by Cyndi · No Comments
Reading reviews of Lemongrass Thai Cuisine, I’m shocked by how many people love it. Did we go to the same place? Did they change chefs? Are all the reviewers blown away by anything a step above fast food?
Lemongrass Thai Cuisine
109 N McDowell Ave, Petaluma, CA 94954
(707) 789-9777
As we perused the menu, the waitress brought us a bowl of styrofoam. I mean shrimp chips. In pretty colors. With dip. I asked if there was egg (my daughter is quite allergic) and she was sure there was not but offered to show us the box. She was right but, given they were from a box and the list of artificial food dyes in them was longer than the list of the other ingredients, we asked her to take it away.
We started with the coconut soup, or at least we tried to.

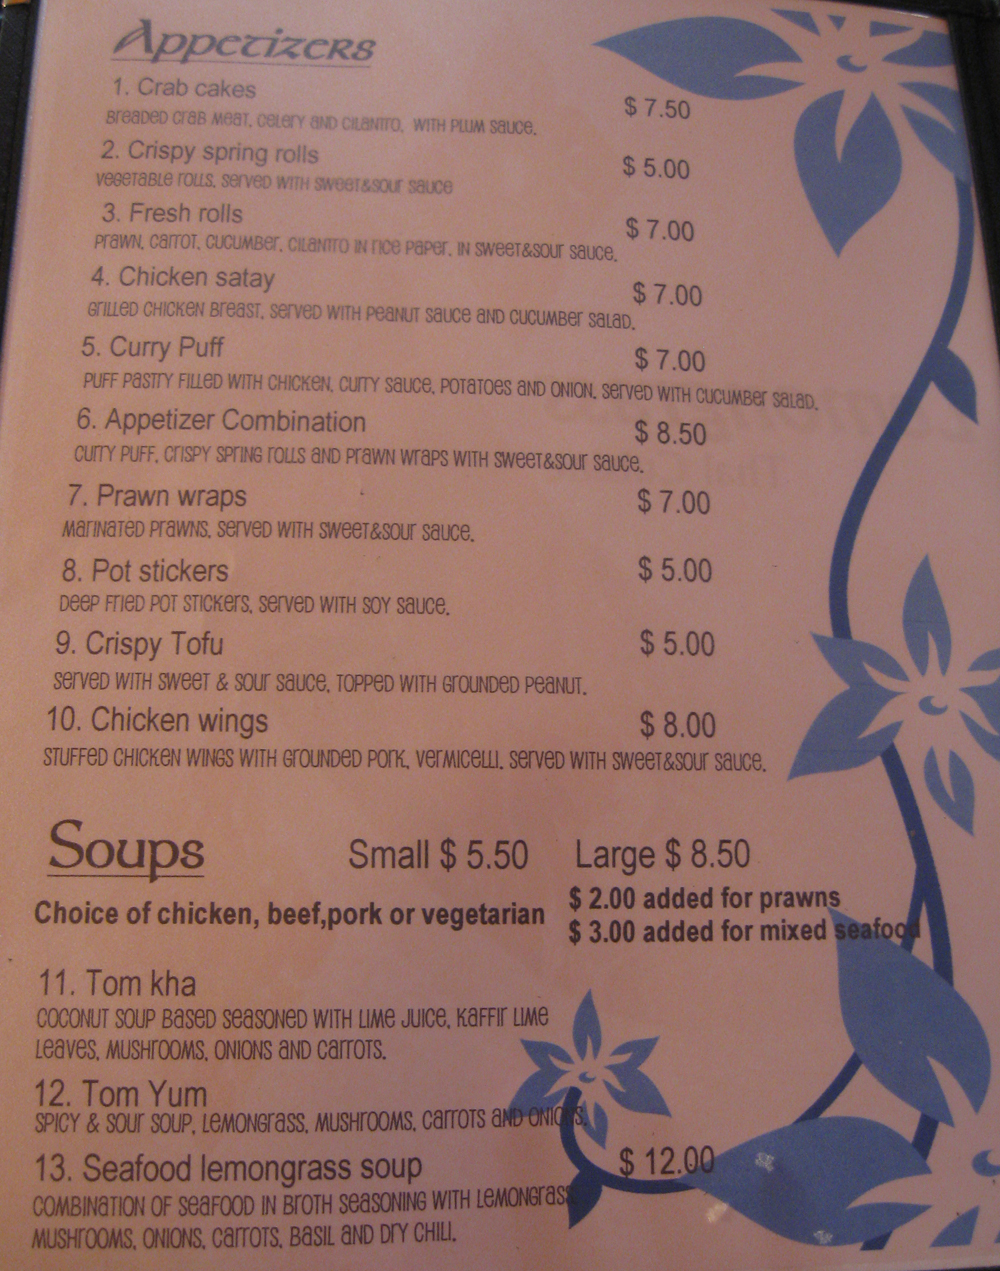
Tom Kha, “coconut soup based seasoned with lime juice, kaffir lime leaves, mushrooms, onions, and carrots.” $8.50 for a large (ordered with 3 bowls) plus $2 for “prawns.” It was served with the rest of the meal, not in the 15 minutes or so while we were waiting. It came with no bowls and the only spoon was a soup spoon, nothing to serve with.
I love coconut soup and order it whenever I get the chance. Picking out all the pieces of roots and leaves that make up the complex flavors is part of the fun. Except there weren’t any. No flavors from them either. The mushrooms were white button, cut in half, the onions were undercooked slices of plain yellow onion, and the carrots were flavorless and too uniformly cut (with scallops) to be house prepped. There were at least a fair number of shrimp (does keeping the tails on turn them into prawns?) for the $2.
How do you make coconut soup? I imagine fresh coconut milk seeped in herbs and spices and tangy from lime. I don’t know what recipe Lemongrass used but it was something like: open cans of coconut milk, add to pot with several cups of sugar, add vegetables, cook until light gel stage. I make coconut ice cream with canned coconut milk and the soup was actually sweeter. Finally, I gave up and asked for fish sauce (which came in a small bowl, tasting mostly of water and salt) and dumped it, plus the “hot” sauce from Michael’s dish into my soup bowl, but nothing cut through all that sugar.
Unfortunately, I also ordered a peanut sauce dish. I expect this to be sweet, but it should fundamentally be savory, with complex flavors. Like the soup, it felt more like dessert.

Pad Peanut Sauce, “stir fried mixed vegetables and fried tofu with peanut sauce.” $8.50.
More of the same mushrooms, carrots, and onions, plus some welcome nicely cooked green beans, red bell pepper, pod peas, and a bit of raw cabbage. No sprouts, no chopped peanuts, just some cilantro and a slice of orange. We knew this version didn’t come with noodles and we asked for all our dishes to be egg free. The sauce was not thick or cloying, like I feared, but the overwhelming flavor was sugar.
We fared a bit better with the other two dishes. Miriam of course wanted some chicken.

Barbecue Chicken Rice Pot, “vegetarian fried rice, with sliced barbecue chicken on top.” $10.50.
Miriam loved the soup and tofu (such a sad comparison to when she was a toddler sucking on a piece of ginger pulled from a bowl of soup at a different, better, Thai restaurant) and ate plenty. She claimed to enjoy this dish but barely touched it. Michael says the chicken was pretty good, though a little bit–surprise–sweet.
The oddity was the rice. Since we saw brown rice on the menu we asked if they could use it here, done with no egg. Yes, we’ll give you steamed brown rice. We don’t want steamed rice, we said, the menu says stir fried. They promised they would do it, in a freshly washed pan. So what did we get? steamed white rice with raisins. I’m not joking…raisins. Had I noticed this early enough I would have sent it back.
Michael’s dish was the best of the night, though not for him.

Prig Pow Seafood, “prawns, calamari, mussels, scallops, and sole. Sauteed with vegetables in dry chili paste.” $12.95.
Since it was Father’s Day, I encouraged him to order the dish the way he liked it, even if no one else would touch it. So he asked the waitress (a different one from above) to make it extremely hot. What followed was a comedy of sorts. So no spice? she asked. No, I want spice, make it the way you would for a Thai person, not an American. So do you want spice or no spice? Very spicy, he insisted. He ended up with a nice bowl of seafood, some beans, peas, carrot, and cilantro, in a sweet mildly spicy sauce. Mild enough for me to pour into my soup and onto my plate. At least it had a flavor beyond sugar.
Most of the reviews I’ve seen talk about the wonderful friendly service. Again, I have to wonder if we went to the same restaurant. The waitresses were nice enough, and always topped up our water, but they messed up the soup and didn’t provide serving utensils for all the dishes (plus included a steak knife with the already sliced chicken). There were no condiments and it took some doing just to get fish sauce.
Our primary waitress laughed, actually laughed, each time we asked for something or made a comment. I am sure it was just a nervous titter over her English being so poor she didn’t understand us, but my mind couldn’t help interpreting it as rude. This is how we ended up with things like mild vs hot spices or the disaster which they called rice. Instead of telling us she didn’t understand, or grabbing the other waitress (which she did at times), she nodded and told us it was fine.
My guess is that other reviewers have both a higher sugar tolerance than we do (it’s the next day and my head is still buzzing) and happened to hit the better dishes but miss the awful ones. In fairness, it’s a huge menu and we only had 4 dishes. If we hadn’t had the soup, we probably wouldn’t be panning the place so badly. The food was cooked well. The problem was the ingredients.
Menu Pages:
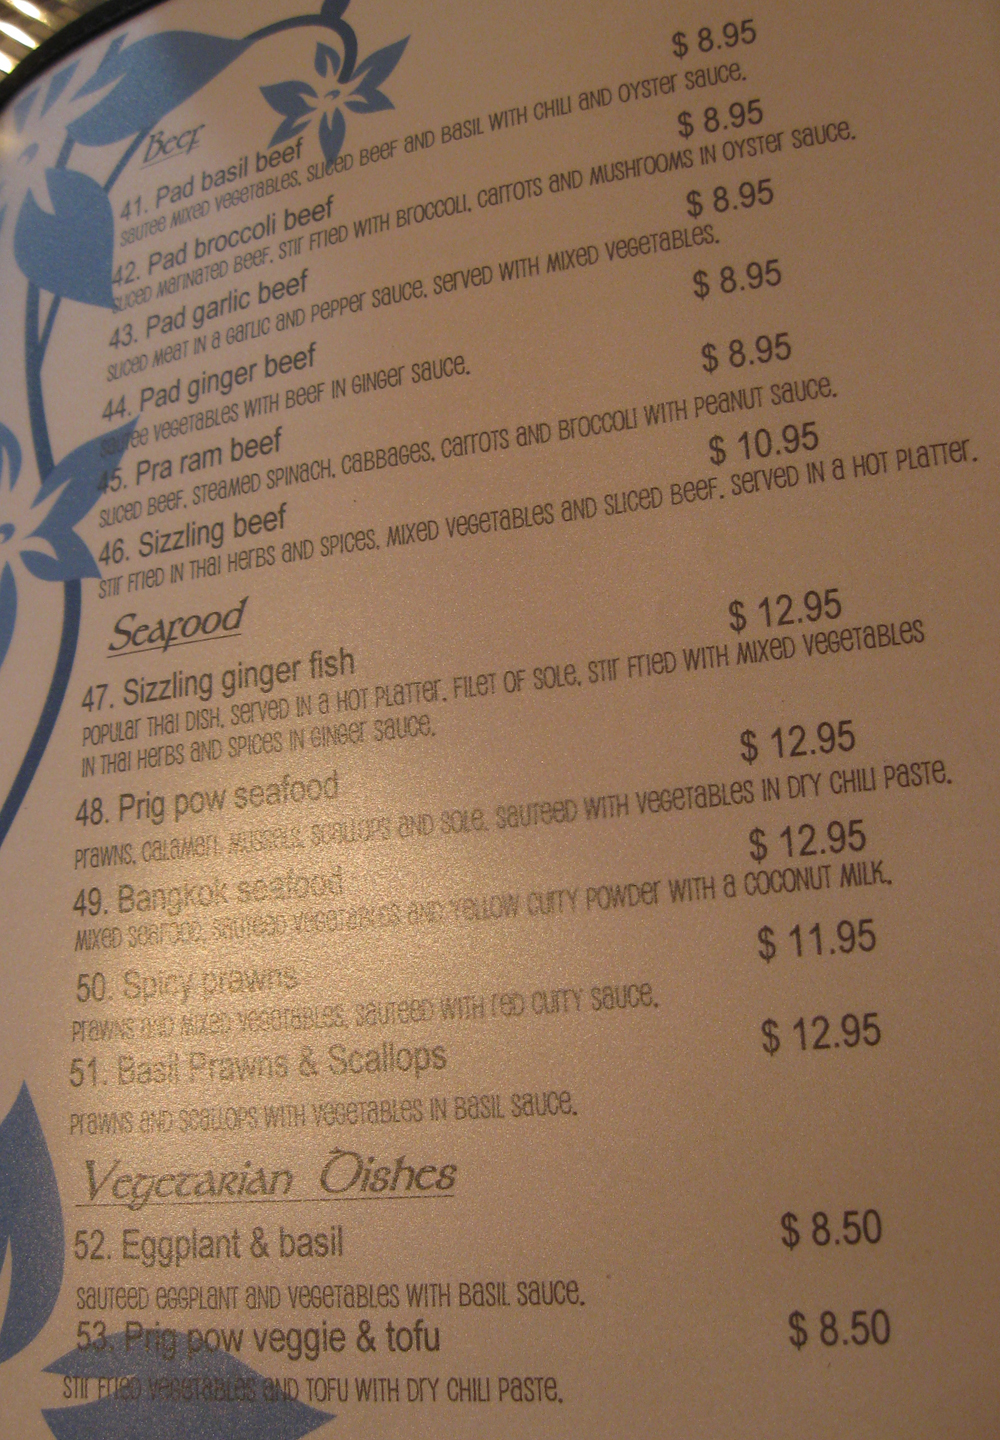
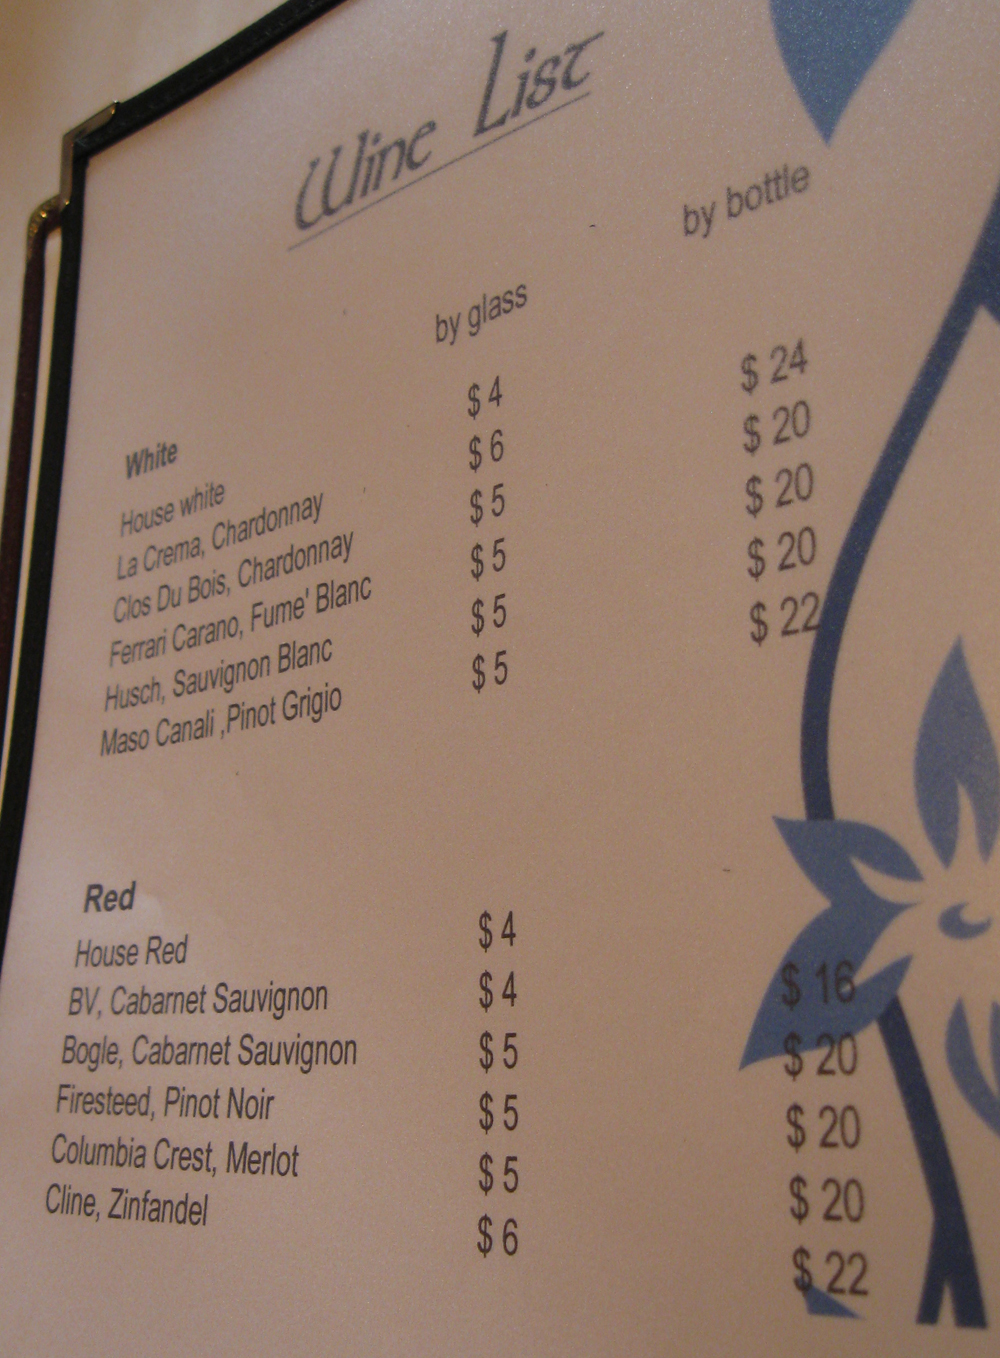
Page 1 – Page 2 – Page 3 – Page 4 – Page 5 – Page 6 – Page 7 – Wine
Categories: Food · Restaurant Reviews · SF Bay Area Restaurant
Tags: · asian food, dairy-free, egg-free, gluten-free, petaluma, photos-food, seafood, sonoma county, vegan, vegetarian
May 22nd, 2010 · by admin · 5 Comments
Quick, name some fermented foods. What did you come up with? Beer? wine? cheese? pickles? Let’s not forget yoghurt, kefir, sauerkraut, miso, kombucha, natto, tempeh, vinegar, and bread. These and more were the focus of the second annual Freestone Fermentation Festival in Sonoma County, California, May 15, 2010.
This was my first time at this “low-waste, alcohol free, pet free, smoke free and must have fun event.” I went with my blogging friend Laureen Hudson, her daughter (Michael stayed in Petaluma with Miriam and Aurora’s big brothers), and Laureen’s friend Lisa.
Held at the beautiful and green Salmon Creek School (pause a moment to lament that we don’t live near enough for my daughter to attend a school with such clean air and lack of chemical stink), it was a mix of hippie aesthetic with practical advice, local businesses, and of course samples galore.

Fermentation roughly falls into two categories: dead and alive. This event covered both. Alcohol and bread are the two best examples of the former. You can’t make them without fermentation (excluding things like crackers or tortillas) but we eat them for the taste and general nutrition (and they preserve foods without winter or electricity). There are few to no probiotics. Probiotics are what make ferments live. You eat these for all the usual reasons but also for the nutritional powerhouse of the yeasts and bacteria. Yoghurt, kefir, krauts, and pickles are the best known live ferments (though they aren’t always sold live).
As regular readers of my blog know, I make a variety of vegetable ferments (krauts and pickles). And I long to make more. I’ve tried my hand at coconut yoghurt and have plans to make water kefir next. Another project on my list is dairy-free cheese (something pungent, like blue).
Many attendees lamented the lack of alcohol at a festival dedicated in part to its production. But there were workshops covering spirits; my guess is logistical concerns kept out the samples. Cheese (from cow, sheep, or goat milk) was another large component. Since dairy and I don’t get along well, I had to skip that part. No one there makes non-dairy cheese but I will make this my mission to find out how.

The Beverage People in Santa Rosa has classes and equipment/ingredients for sale for a wide variety of fermented products, but their specialities are beer, wine, and cheese. My friend Gabe Jackson, who works there, even made us a case and a half of blackberry wine (picked from our garden–and yes, a post on that is coming!). He’s promised to keep his eyes open for information on non-dairy cheesemaking. His dairy cheese class at the festival was a big hit.
I attended classes on sauerkraut and pickle making, both with demos and fairly straightforward advice for beginners. Kathryn Lukas, the owner of The Farmhouse Culture, demonstrated a simple cabbage ferment. The woman next to me sounded peals of joy when Kathryn said don’t bother to pound your cabbage, just massage it a bit with salt to release the juices. Since it had never occurred to me to pound my veggies, I just smiled, but now I wonder what I do that isn’t necessary or what little things I might be missing. Kraut making is pretty easy, but there is a lot that can go wrong too.
Another thing that that hadn’t occurred to me was the sugar content of the vegetables. Usually with ferments sugar is a good thing, even necessary, as it feeds the yeasts. But *aha moment* what makes krauts go off often is the yeasts gaining control; krauts and pickles are a bacterial ferment, not so much yeast.
Most of our kraut is red onion. Most of the time it comes out fabulous. Once in a while we get an unwelcome surprise. I asked Kathryn her opinion and she said it was likely the sugar in the onions. Which can vary a lot. I don’t know how to fix this…can I add some acid? Can I measure the sugar to know which onions to avoid? I don’t want to mix with large amounts of other vegetables.
Kathryn says to keep your vegetable blends no less than 75% cabbage so they come out well every time. That works great for kim chee, which I also make, but sometimes you want something different. I asked her if there was a chart of different buggies (desirable and undesirable) but she didn’t know of one. I would find that very helpful, since I know what my off ferments look/smell/taste like and could match the bugs.
Jill Nussinow (the “Veggie Queen“) taught pickles. These should be easy but even more can go wrong than with krauts. I’ve made cucumber pickles and had one fantastic batch, a couple okay batches, and one batch we couldn’t eat. Turnip pickles were so-so and tomato pickles were a total fail (though I sat near someone who said her green tomato pickles come out great, so I’ll give it another try). Cool temperatures seem to be pretty important (you can get away with summer temps with kraut) and so is good technique. Other than that, I’m not exactly sure why mine fail so often.

This very expensive crook was much touted at the festival. What do the experts say? does it make better kraut or pickles? The answer is no, but it does make it a lot easier. You still have to weigh down the veggies (you never want them to contact air); this crock does come with weights. But apparently when you fill the outside rim with water and put on the lid, you get a seal that lets CO2 leave without letting air in. So less chance of trouble.

In addition to the pricey rimmed crock, Cultivate in Sebastopol had a variety of crocks and other equipment, at decent prices.
One ferment I’ve been wanting to make for a while is water kefir. Dairy kefir is pretty common and makes a drink similar to liquid yoghurt, though the buggies are totally different. Instead of using a bit as a starter, like you do with yoghurt, you strain and save the kefir grains, which are like tapioca. You put the grains into your new liquid and go again. The grains will multiply with time so there are plenty to share.
You can use dairy kefir grains in a non-dairy liquid and they will turn into water kefir grains. It’s the same minus a few cultures that only reproduce with dairy. So you can’t make dairy kefir with water kefir grains.
Water kefir is delicious and can be made fizzy or flat. Apple juice is a common base, so is coconut water (not to be confused with coconut milk). But you can make it with water too, as long as you add some sugar to feed the yeastie beasties. Like with all ferments, the bugs eat the sugar and you’re left with a low (or at least lower) carb product.

The folks at Cleansing Ministries Rejuvenation Center in Santa Rosa gave a demonstration on making ginger root beer water kefir. I can’t wait to make it. Once I get my hands on some water kefir grains, I’ll blog the full recipe and my results. Miriam adores kefired apple juice, which she had at a friend’s once, but I am allergic to raw apples and apple juice and found that the symptoms kicked in after too many samples of apple ginger kefir.
Nowhere could you see the hippie/mainstream dichotomy of the festival better than by looking at the water kefir demo and the “Fermented Foods and your health” talk. Karen Miller-Youst admonished us not to make kefir in a room where there had been anger and Dr. John La Puma gave us isolated sounds bites about the medical wonders of fermented foods.
John started us off with his credentials (part his resume and part the famous people he’s worked with), accompanied by a glossy flyer advertising his book. The flyer was similar to the talk, filled with little tips like “cooked carrots and cooked tomatoes are better for you than raw” (something that is not only banal but wrong: soft or ground carrots make it easier to get the nutrients out but raw whole ones still have them and there is exactly one nutrient, lycopene, in tomatoes that is present in higher amounts when cooked, not exactly a reason to give up raw produce).
But onward to the talk. What would you consider the number one reason to eat live fermented foods? John’s was that probiotics lower the incidence of antibiotic-induced diarrhea (he even said it twice and had it on a slide). Yep, it’s true, but… His other reasons were about how probiotics are good for various gut conditions. Also true. But very allopathic. You can’t be a doctor unless you treat disease, and all bodily workings are mostly separate from each other. Right? Not really.
Granted, I left the talk before the end (the room was giving me a headache, the only problem I had in the building), but not once did I hear him say anything about the normal role ferments play in human health. How every traditional culture has them in spades. How they exist in nature as well and are part of non-agricultural societies cuisines. How they work and why they are not just “healthy” things we can eat but essential to keeping our bodies balanced.
Fortunately, the organizers and attendees in Freestone needed no convincing. The emphasis was on how to get more ferments in our lives, not why. A nice playground and a butterfly ride for the kids, tons of samples (I could could have drunk Farmhouse Culture’s pickle juice all day), foods for sale, and live music rounded out the day. I’ll be back next year!

Categories: Food · Food Commentary · Meals & Events
Tags: · dairy-free, egg-free, fermented foods, gluten-free, lowcarb, photos-family, photos-food, photos-friends, photos-misc, photos-places, raw food, sonoma county, vegan, vegetarian
October 5th, 2009 · by Cyndi · 1 Comment
I’ve written poetry since I was small, then heavily in my teens and twenties, including many public readings. But after some experiences 15 years ago, for some reason, I put down my poetry pen and mostly wrote essay-style works.
Yesterday morning I woke with a poem on the brain. And wanted to share it.
Suddenly Fall
The signs are small
In the land of sun.
Morning’s chill wind,
Fog’s shattered tears,
The angle of shadows.
Here, from my window
That does not open,
I see only the sun
Rising and setting.
As if the universe goes on.
Inside this room
My body heals
And my mind stalks my soul
Demanding why? why? why?
Ripped from me too soon
Was the sun.
Placed into a world of air
Where he flickered and dimmed
Unable to accept the wind.
Yet outside the seasons turned
Without my knowing.
Till finally I walked outside
Into the cold slap of Fall.
Alone.
(For my son William, born September 28, 2009 by emergency c-section, and died a few hours later due to under-development of the lungs.)
Categories: Family Life · Poetry · Pregnancy · Writings
Tags:
October 3rd, 2009 · by Cyndi · 14 Comments
Riddle: What is harder than taking care of a baby after having major surgery?
This will be my last pregnancy update.
I was 36 weeks pregnant on Saturday, September 26, 2009. 40 weeks is the “due date” and 37 weeks is considered “full term.” But 36 weeks is considered safe and close enough to full term. It is the minimum gestation to have a home birth, which is what I was planning.
The pregnancy was very very hard on me with lots of fatigue and discomfort, but was going quite well from all other ways of looking at it. The baby was growing at just the right rate. He moved a lot and his heartbeat was always perfect. I had an ultrasound at 20 weeks which showed he was a boy and that everything looked normal. My blood pressure was 110/60 or a bit less every time. My last midwife appt was Wednesday before this all happened and my blood pressure was normal, along with everything else.
On Sunday, he only kicked and moved twice, at 11am and 6pm, no matter how much I poked and prodded. And each of those times it was weak and short-lived. When his position dropped a week and a half earlier (normal pre-birth occurrence), his movement also decreased but he checked out fine and started kicking at normal levels shortly afterward. So I kept telling myself it was nothing.
Sunday night was the start of Yom Kippur services and we were at synagogue. When services were over around 10pm, I went to one of the members who was a doctor and got her advice. She said to call my midwife immediately. I did and the midwife said to head directly to the ER. The ER close to our house isn’t very home birth friendly and doesn’t have great OB services so we were going to go to my backup hospital way south of us. But we already 10 mins north of our home and Michael was too tired to drive far, so we decided to go to Sutter Santa Rosa which our midwife often uses as a backup and where several doctor members of the synagogue happen to work. The plan was to get monitored for an hour or two then go home.
We arrived about 11pm and were immediately sent up to labor and delivery and put on a monitor. When I heard the perfect strong heartbeat I felt so relieved and thought that was it, we’d be sent home. But the heartbeat was too perfect. It’s supposed to go up and down with movement, only he didn’t move.
My blood pressure was high, in the 140’s to 160’s, with the bottom number in the 70’s I think (hard to remember) and there was protein in my urine. I had had edema in my lower legs for ages. Those three things together are not good though and I was diagnosed with pre-eclampsia.
They sent me for an ultrasound. They do a rating out of 8 points. He got a 2. The heartbeat was strong but there was nothing but tiny movements and the blood flow through the cord was impaired. One of his lungs was collapsed and they didn’t know why. They told us he was better off outside of me than inside. They thought his brain was probably not affected at this point and that he would probably be okay, though he’d need some intervention. A c-section was the only possible choice.
They waited until my midwife Claudette arrived (once in the hospital she became my doula). I am very anti-c-section except for medical emergencies but I knew this was the only option. I chose my midwife precisely because she does not follow mainstream thinking and has the skills and experience to safely help women choose to avoid interventions they are sometimes pushed into. She told me to have the c-section.
I spoke with the surgeon and the anesthesiologist about my chemical sensitivities and drug reactions and they were very accommodating and worked with me well. I was still scared to death and crying. But I would do anything to save my baby’s life and this seemed to be it.
At 2am they took me to the operating room. The surgery was just awful. No pain or anything but it felt just horrible all around. It was an emergency but not the full-out get the baby out right away kind so I had a spinal vs general anesthesia and they were able to take their time so my internal organs didn’t get too messed up. Claudette held my hand the whole time and Michael stayed with Miriam in the room where she was sleeping on a mattress the staff set up.
William Gabriel Norwitz was born at 2:54am.
They wouldn’t let me see him. I had almost no updates. They had a team of doctors working on him. He didn’t cry. They intubated him but it took 3 tries. I had to stay there for another long long while (I’m guessing half an hour but it felt much longer) to be sewn up.
I went to the recovery room but still didn’t know how my son was. I knew he had been intubated and was in the NICU and that he had a cleft lip. Post-surgery, my blood pressure went up. And up. At first they weren’t too worried and gave me meds. But my pressure was more than 200/100 (dipping down to the 170’s or 180’s as well) for a couple of hours after several doses of a couple different meds. I could tell how freaked out everyone was. I knew I was in danger of a stroke or seizure or death. I didn’t care.
They let Michael go see William and told him he was “probably not going to make it.” I was shocked when I heard this. I was worried about brain damage but thought he would survive. We woke Miriam up. A few minutes later, Michael and Miriam went to see him and Michael asked for some hard numbers. What are his chances? He was told “zero.”
I told them over and over again, do not let my son die before I can see him. It took a very long time but they finally brought him into my room in an incubator. I couldn’t move my lower body yet and could only reach his hand to hold it. He looked so unhappy and uncomfortable. I told them I wanted to hold him. Our Rabbi was on her way and they were afraid of transferring him before she arrived. I kept insisting but logistics kept it from happening.
When the Rabbi arrived it still took a while but they did give him to me. I opened my gown and placed him skin to skin on my chest and arm, then we put a blanket over both of us. He had the ventilator breathing for him and his eyes were gooey so I’m not sure he could see anything (I still don’t know what color his eyes were). But he was awake. Once on me he relaxed and seemed much more comfortable.
I held him for about half an hour while the Rabbi performed a naming ceremony for him. Gabriel is his Hebrew name. Michael held him for a little bit as well. Miriam chose to stay in the room at times and to go out with Claudette at other times. We gave her many chances to decide what she wanted to do. She understood her brother was going to die and was very very upset about it.
This entire time was when my blood pressure was through the roof. I had been getting over a cold and the crying and stress filled my sinuses and nose so I couldn’t breathe at all except through my mouth. And then my throat started to swell up and I had trouble breathing. I asked for oxygen and they said my sats (O2 saturation) were fine but I said give it to me anyway and they did. It helped slightly. The BP stuff didn’t scare me because I didn’t care at that point. But my throat swelling did. I did not want to not be able to say goodbye to my son. The staff monitored me closely of course but they thought it was stress.
I did not find out until Thursday that my surgeon had given me an antibiotic during surgery that was a “cousin” to penicillin. (I didn’t quite catch the name but it sounded like Ciprosporin.) I told him about the throat swelling and how that is the reaction I got to amoxicillin (penicillin family) and his eyes got real big. He said that was anaphylaxis and that I needed to add that class of antibiotics to the list of ones I couldn’t have.
When the 3 of us had said our goodbyes, we asked them to remove the ventilator. They said we could have kept it in longer but we didn’t want William to suffer anymore and we knew there was no hope at all he would survive. His lungs were hard and wouldn’t not inflate properly even though they were putting through pressures that were much higher than any newborn would get. And his cord blood pH was so low that no baby ever survived it. And the placenta was small with poor blood flow.
The neonatologist said he might live and gasp for a couple of hours, but he went in just 10 minutes. Peacefully on my chest, in my arms. He died with his little thumb in his mouth. William died around 6:30am, after only 3 1/2 hours of life.
I held him for another hour or so. My breathing improved and my blood pressure went down to insanely high but out of the danger zone (they’d cheer when it got down into the 170’s). Michael held his body then and Claudette did briefly as well. Miriam said goodbye but chose not to touch him. Then they took him away and began the transfer to send me to my hospital room.
Although my doctors were still from Labor and Delivery, they put me one floor down, in Cardiac & Telemetry, in a private room. Losing a baby is a rare occurrence in that hospital and they treated me with the utmost respect. For my entire stay, every single person, from my nurses to the dietitian, was told what happened before meeting me. Claudette had brought my birth plan (which had my chemical and medication restrictions listed) and my door sign, which they put up (asking perfumed people not to enter). They also put a sign on the Purell dispenser outside my room asking people not to use before entering.
They took some care to get me unscented nurses though we had some laundry product issues. Other staff with scent stayed away or worked with me by phone. And the next morning Michael brought some safe liquid soap that staff used instead of the sink soap dispenser. With the door closed and the air conditioner on (the window didn’t open) my room wasn’t too bad.
I left for home Thursday late afternoon. It’s been a difficult recovery, with lots of physical pain and a lot of work to find pain meds I tolerated that worked. My blood pressure is still not normal but is mostly in the 140’s and 150’s now. They gave me meds when it spiked to 161 and I spent the night feeling like half my head had been sawed off (this while being on heavy narcotics) so I know now that the recovery room migraine was caused by Labetalol (as opposed to any of the 100 other things it could have been caused by). And I know I tolerate Toperol (anti-inflammatory) and Dilaudid (narcotic). My incision is healing well but I have welts and blisters and severe itching from the bandage adhesive.
My synagogue, Congregation Ner Shalom, was amazing and, between them and friends and family, I had visitors and phone calls nearly around the clock, which comforted me to no end. Being alone were the worst times, especially night and early morning. Although we had to delay the burial, we counted it as sitting Shiva.
As of Saturday afternoon. I can get out of bed by myself (that feat took several days), use the computer, use the toilet, and stand for brief periods of time (a minute, maybe two). I took a shower in the hospital which wiped me out and caused terrible pain. I took one at home yesterday but needed much help with it. Today I used a borrowed shower seat and was 95% independent. I am eating and drinking normally.
We will meet with the neonatologist in a couple of weeks when all the test results are in. They are waiting on some pathology slides and a chromosomal report. But the diagnosis so far is pulmonary hypoplasia. Or severe underdevelopment of the lungs, which were 1/10th the size they should have been. This condition is usually secondary to other issues but, in this case, they think it is caused by a random genetic disorder, which also caused the other birth defects, and led to the failing placenta which led to my pre-eclampsia. They say it is not related to my age or health but can happen to anyone, though it is rare.
The funeral was yesterday. It was brutal but I needed to see him buried. The cemetery is walking distance from our house with trees and grass.
That’s about all I have in me for now. Thank you again to all who have visited, called, emailed, prayed, or otherwise supported us through this. It means more than I can say.
William Gabriel Norwitz
Born and died September 28, 2009
10th of Tishrei, 5770
Goodbye my sweet boy.
Categories: Family Life · Health · High Holy Days · Judaism · Miriam Updates · Pregnancy · Religion & Holidays
Tags: · MCS, sonoma county
September 4th, 2009 · by Cyndi · 106 Comments

Hand shaped tortillas from homemade masa
Masa, the corn dough used to make tortillas, tamales, pupusas, and more, is quickly becoming one of my favorite kitchen staples. Unfortunately, it’s hard to get good quality product. Even in Mexico, shops with fresh masa for home use are disappearing in favor of the powdered stuff.
I began my quest in early 2008. My daughter’s 3rd birthday was coming up and I wanted to have a taco bar. I looked and looked for plain fresh tortillas for sale but found nothing suitable. I live in a semi-rural agricultural part of the San Francisco Bay Area. You can’t do a cartwheel without hitting a Mexican neighborhood, market, or restaurant. But almost every last tortilla I found had preservatives in it. Why on earth?? Trader Joe’s has some pretty good ones, the “handmade” ones, but they’re a bit pricey for a large party, and they aren’t organic. Whole Foods has organic tortillas with good ingredients but they’re dreadful. Okay if fried hard but just horrible if you try to make them soft, like a real taco.
The first stop in my masa journey was the powdered stuff. Masa harina. Maseca brand. I made pretty good (and very cheap) tortillas from it. They tasted much the same as commercial tortillas…because most of those are made from the powder too. It’s not organic, it’s probably GMO, it leaves a junky feeling in my stomach, but it’s easy to find, easy to store, and moderately easy to make. It’s good in a pinch but is sort of like buying squishy “wheat” bread from a bag instead of baking your own from whole grains.
I’ve looked but haven’t found organic masa harina (harina means flour). Bob’s Red Mill makes a non-organic one that is pretty decent. Worlds better than Maseca but it still gives me that icky tummy and, like all masa harina, is difficult to work with and shape into anything but basic tortillas.
My next discovery was a true masa shop, practically in my backyard. Primavera in Sonoma, California. For a mere $1.50 a pound, I could buy beautiful organic whole grain masa, ready to cook. Unfortunately, “practically” means a 45 minute drive each way and I have been having trouble sourcing it anywhere else. The only Farmer’s Markets they sell at are an hour away and the stores they sell their finished products at don’t carry the masa because it’s so perishable (you can’t freeze it and it’s best used within a couple of days, though it will not go bad for a week or slightly more). I was special ordering it from my local Whole Foods but they decided this was too much trouble. I met their early morning delivery truck in parking lots a couple of times but, with a child in tow, this got to be a hassle.
The next step was obvious, I was going to have to make my masa myself. But how? First I (re)discovered the Good Eats (Alton Brown on the Food Network) episode where he makes it, effortlessly of course.
Then I worked on ingredients. You need field corn for this, which simply means the kind of corn used for cornmeal, not for corn on the cob or popcorn. Azure Standard to the rescue! They grow their own and a 5 lb bag of organic dried field corn is a mere $3.05. Note: you really do want organic here (or at least buy from a farmer you know isn’t using GE seeds or spraying). Almost all field corn in the US is genetically engineered (and heavily sprayed). Organic is not.
Next you need Cal, short for calcium hydroxide aka slaked lime (get food grade, not the grade for cement or whitewashing walls!). Most Mexican markets will have this.

Calcium Hydroxide for making masa
The only other ingredients are water and salt but you do need a stainless steel (or other non-reactive) pot, a stove, and a food processor. In my net searches, I came across another blogger, Rancho Gordo, who made masa using Alton Brown’s recipe. My heart sank as I read their difficulty in getting the food processor method to work. But I decided to plow ahead anyway. And I’m glad I did, mine came out wonderful!
It’s pretty easy. Measure 6 cups of water (I use filtered since the corn will absorb it) into a pot, add 2 tablespoons of cal, and stir as you gently heat the water.

Soaking the corn in lime water
When the lime is dissolved (a few seconds), add 2 cups of corn. Rinse it first, though I forgot the first time and it didn’t seem to matter (since you will rinse later). Bring to a boil then turn off the heat. Alton Brown insists that you do this slowly, with the time to boil taking half an hour or more. I did that the first time but the second time I forgot to watch it carefully and it boiled quicker and stayed at a boil for a few minutes. Oops. Didn’t make a big difference, though it absorbed more water.
Turn off the heat, cover, and let it sit overnight (I’m not sure what the minimum time for sitting is). If you can’t get to it the next morning, no problem. My second batch sat for almost 24 hours. It swelled up more but was still firm enough to rub and rinse.
Dump into a colander and drain out the excess lime water.

Corn after soaking in lime water
Now comes the fun part. Soak in fresh water (I use tap water here), rub, rinse, repeat. Alton Brown says 5-6 minutes of rubbing while rinsing. I wasn’t that throgho. I put the colander in a larger bowl, fill with water, rub for a while, pour off the skins, add more water, rub, drain and rinse, etc. Remember the purpose of the lime is to change the protein content and texture. It’s not essential to remove the skins.
At the end, soak in fresh water for a couple minutes and repeat. Then drain and process along with a teaspoon of salt. Alton Brown makes it seem easy, with just a few pulses and 4-5 TB of water. I found it takes more than that. I pulse at first, scrapping down the sides as needed, but then just let it run.

Masa after a trip in the food processor
The first time I did use way too much water, as you can see above. I put in about 10 oz (20 TB). It made a nice smooth product but not one I could shape with my hands. I still managed to make yummy tortillas though, so no great loss.
The second time I used half as much water (about 5 oz or 10 TB) and the masa came out lovely. Not quite as smooth as my first batch, or as Primavera’s gorgeous product, but very usable and delicious. It was still a little wetter than I would have liked but I could shape it by hand (see tortillas at the top of the page) and could have made pupusas or other foods from it. See below.

Finished masa ready to shape and cook
Cost is pretty low too. One batch (2 cups of corn) costs 61 cents for the corn (would be less if I bought it in 25 or 50 lb bags), 13 cents for the cal (again, I could buy in bulk and save), and another couple pennies for the water, salt, and electricity. So let’s say 75 cents for enough masa to make 15-20 medium organic whole grain tortillas (masa weight will vary depending on how long you soaked it for and how much water you added). This is expensive compared to Maseca masa harina, which runs $4-6 for enough flour to make a couple hundred tortillas. But less than Primavera masa or any finished tortillas you can buy.
All in all, is it worth it? So far, yes. My masa has a wonderful corn flavor, a great texture, and is making excellent tortillas (and soon to be making pupusas, challah, and other cool things). It takes 2 minutes to set up at night, another few minutes to watch it and then cover, and 10 minutes to make the next day. Tortillas take a couple minutes to make and cook. Someone into convenience foods would be put out, but it’s really nothing in the great scheme of things.
Categories: Food · Grains · Recipes
Tags: · dairy-free, egg-free, gluten-free, latin food, photos-food, vegan, vegetarian


