Masa, the corn dough used to make tortillas, tamales, pupusas, and more, is quickly becoming one of my favorite kitchen staples. Unfortunately, it’s hard to get good quality product. Even in Mexico, shops with fresh masa for home use are disappearing in favor of the powdered stuff.
I began my quest in early 2008. My daughter’s 3rd birthday was coming up and I wanted to have a taco bar. I looked and looked for plain fresh tortillas for sale but found nothing suitable. I live in a semi-rural agricultural part of the San Francisco Bay Area. You can’t do a cartwheel without hitting a Mexican neighborhood, market, or restaurant. But almost every last tortilla I found had preservatives in it. Why on earth?? Trader Joe’s has some pretty good ones, the “handmade” ones, but they’re a bit pricey for a large party, and they aren’t organic. Whole Foods has organic tortillas with good ingredients but they’re dreadful. Okay if fried hard but just horrible if you try to make them soft, like a real taco.
The first stop in my masa journey was the powdered stuff. Masa harina. Maseca brand. I made pretty good (and very cheap) tortillas from it. They tasted much the same as commercial tortillas…because most of those are made from the powder too. It’s not organic, it’s probably GMO, it leaves a junky feeling in my stomach, but it’s easy to find, easy to store, and moderately easy to make. It’s good in a pinch but is sort of like buying squishy “wheat” bread from a bag instead of baking your own from whole grains.
I’ve looked but haven’t found organic masa harina (harina means flour). Bob’s Red Mill makes a non-organic one that is pretty decent. Worlds better than Maseca but it still gives me that icky tummy and, like all masa harina, is difficult to work with and shape into anything but basic tortillas.
My next discovery was a true masa shop, practically in my backyard. Primavera in Sonoma, California. For a mere $1.50 a pound, I could buy beautiful organic whole grain masa, ready to cook. Unfortunately, “practically” means a 45 minute drive each way and I have been having trouble sourcing it anywhere else. The only Farmer’s Markets they sell at are an hour away and the stores they sell their finished products at don’t carry the masa because it’s so perishable (you can’t freeze it and it’s best used within a couple of days, though it will not go bad for a week or slightly more). I was special ordering it from my local Whole Foods but they decided this was too much trouble. I met their early morning delivery truck in parking lots a couple of times but, with a child in tow, this got to be a hassle.
The next step was obvious, I was going to have to make my masa myself. But how? First I (re)discovered the Good Eats (Alton Brown on the Food Network) episode where he makes it, effortlessly of course.
Then I worked on ingredients. You need field corn for this, which simply means the kind of corn used for cornmeal, not for corn on the cob or popcorn. Azure Standard to the rescue! They grow their own and a 5 lb bag of organic dried field corn is a mere $3.05. Note: you really do want organic here (or at least buy from a farmer you know isn’t using GE seeds or spraying). Almost all field corn in the US is genetically engineered (and heavily sprayed). Organic is not.
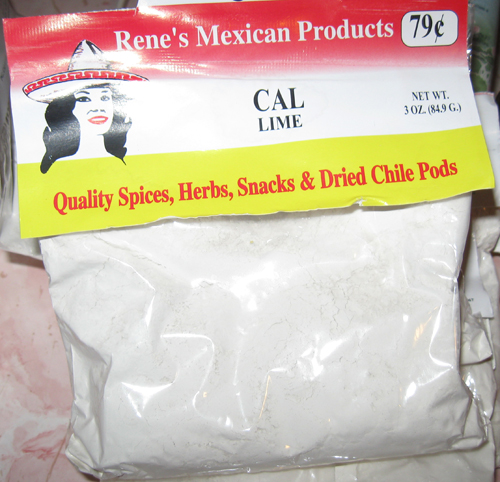
Next you need Cal, short for calcium hydroxide aka slaked lime (get food grade, not the grade for cement or whitewashing walls!). Most Mexican markets will have this.
The only other ingredients are water and salt but you do need a stainless steel (or other non-reactive) pot, a stove, and a food processor. In my net searches, I came across another blogger, Rancho Gordo, who made masa using Alton Brown’s recipe. My heart sank as I read their difficulty in getting the food processor method to work. But I decided to plow ahead anyway. And I’m glad I did, mine came out wonderful!
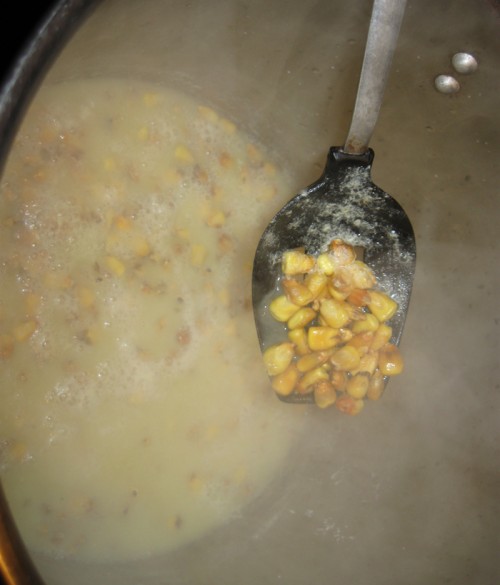
It’s pretty easy. Measure 6 cups of water (I use filtered since the corn will absorb it) into a pot, add 2 tablespoons of cal, and stir as you gently heat the water.
When the lime is dissolved (a few seconds), add 2 cups of corn. Rinse it first, though I forgot the first time and it didn’t seem to matter (since you will rinse later). Bring to a boil then turn off the heat. Alton Brown insists that you do this slowly, with the time to boil taking half an hour or more. I did that the first time but the second time I forgot to watch it carefully and it boiled quicker and stayed at a boil for a few minutes. Oops. Didn’t make a big difference, though it absorbed more water.
Turn off the heat, cover, and let it sit overnight (I’m not sure what the minimum time for sitting is). If you can’t get to it the next morning, no problem. My second batch sat for almost 24 hours. It swelled up more but was still firm enough to rub and rinse.
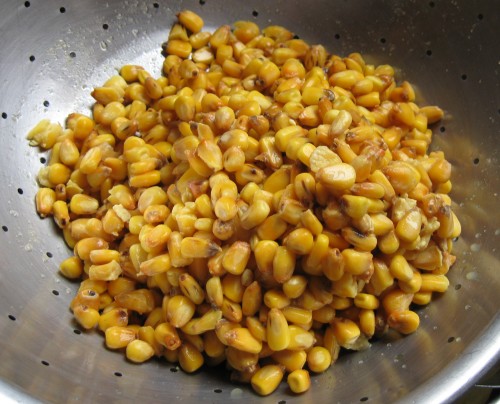
Dump into a colander and drain out the excess lime water.
Now comes the fun part. Soak in fresh water (I use tap water here), rub, rinse, repeat. Alton Brown says 5-6 minutes of rubbing while rinsing. I wasn’t that throgho. I put the colander in a larger bowl, fill with water, rub for a while, pour off the skins, add more water, rub, drain and rinse, etc. Remember the purpose of the lime is to change the protein content and texture. It’s not essential to remove the skins.
At the end, soak in fresh water for a couple minutes and repeat. Then drain and process along with a teaspoon of salt. Alton Brown makes it seem easy, with just a few pulses and 4-5 TB of water. I found it takes more than that. I pulse at first, scrapping down the sides as needed, but then just let it run.
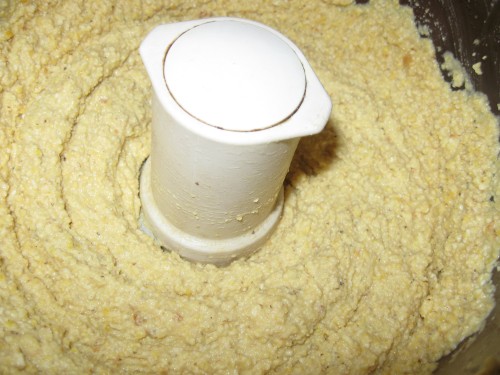
The first time I did use way too much water, as you can see above. I put in about 10 oz (20 TB). It made a nice smooth product but not one I could shape with my hands. I still managed to make yummy tortillas though, so no great loss.
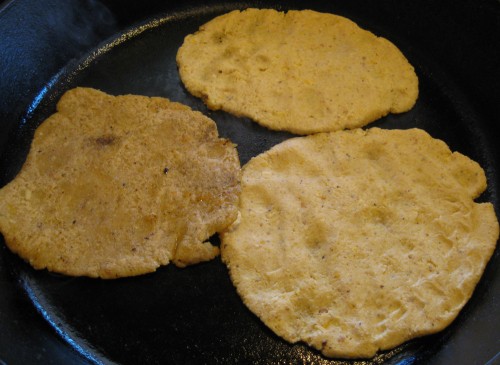
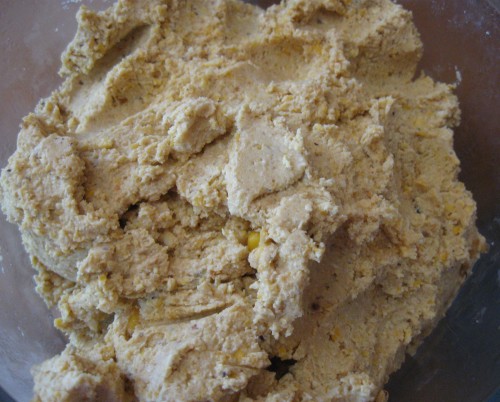
The second time I used half as much water (about 5 oz or 10 TB) and the masa came out lovely. Not quite as smooth as my first batch, or as Primavera’s gorgeous product, but very usable and delicious. It was still a little wetter than I would have liked but I could shape it by hand (see tortillas at the top of the page) and could have made pupusas or other foods from it. See below.
Cost is pretty low too. One batch (2 cups of corn) costs 61 cents for the corn (would be less if I bought it in 25 or 50 lb bags), 13 cents for the cal (again, I could buy in bulk and save), and another couple pennies for the water, salt, and electricity. So let’s say 75 cents for enough masa to make 15-20 medium organic whole grain tortillas (masa weight will vary depending on how long you soaked it for and how much water you added). This is expensive compared to Maseca masa harina, which runs $4-6 for enough flour to make a couple hundred tortillas. But less than Primavera masa or any finished tortillas you can buy.
All in all, is it worth it? So far, yes. My masa has a wonderful corn flavor, a great texture, and is making excellent tortillas (and soon to be making pupusas, challah, and other cool things). It takes 2 minutes to set up at night, another few minutes to watch it and then cover, and 10 minutes to make the next day. Tortillas take a couple minutes to make and cook. Someone into convenience foods would be put out, but it’s really nothing in the great scheme of things.


106 responses so far ↓
1 Cyndi // Oct 19, 2016 at 7:14 am
Jeanne, wow I love this comment. Thanks for sharing the results of your test cooking. Amazing what a difference things that seem equivalent can have.
2 anuj kumar // Oct 20, 2016 at 6:37 am
Thanks, this hominy doesnt have skin, its a little bitty, last nights soaking made a nice masa,if slightly wet, but too bitter to eat. So this one is just 1 level desertspoon of cal. i take it theres no point in kneading the dough?
3 Cyndi // Oct 20, 2016 at 7:25 am
Hi Anuj, I’m a bit confused when you say hominy and masa. Did you use already made hominy to make masa? If so, it’s bitter because it went through nixtamalization twice (you also use cal to make hominy). The nixtamalization process is done in large part to remove the skins from the corn (it does a lot of other things too). So if yours didn’t have skin, it tells me it already had the processing done, even if it was dried corn.
On your end, be sure you rinse the cal off the soaked kernels really well. Many changes of water.
4 Bridget // Dec 23, 2016 at 6:15 am
This is the simplest recipe for homemade masa I have seen. I have gotten organic masa harina from Amazon. But I had bought some organic corn from Azure a while back in order to make some organic hominy, which I have not been able to find anywhere for sale. Aren’t you basically making hominy in the first process?
5 Cyndi // Dec 23, 2016 at 4:42 pm
That’s a good question. I’ve never made hominy before so I am not sure. I went and looked it up and it appears that they are similar but for hominy you soak the dry corn in the lime solution for much longer and cook it while doing so. Then you rinse well.
6 miss lady // Jan 23, 2017 at 10:25 pm
There is plenty of organic masa around. I’ve bought both certified organic fresh masa and masa harina. Lime is a non-agricultural ingredient that is on the Organic List, meaning it is allowed for use in organic products. I have no idea why that site you cite thinks products processed with lime water can not be organic. It’s utterly untrue.
Leave a Comment