It’s October, so it’s prime tomato processing time here in California. I headed back to Greenstring Farm in Petaluma for 60 lbs of red Romas and a few miscellaneous paste tomatoes thrown in. Biodynamically (and organically) grown heirlooms of all possible types, for $1/lb. This was my second time canning and I made marinara sauce.
I’ve made marinara many times before. Usually in 20 lb batches, which I then freeze. When I was researching amounts and technique for this project, the page that was the most useful was my own: Homemade Marinara Tomato Sauce for the Freezer. I also drew on the lessons of my most recent (and very first) canning project: September Salsa for Canning.
I like my marinara sauce simple—tomatoes, onions, seasoning—so I can doctor it up later with whatever I have on hand. This turns out to be perfect for canning since it’s the tomatoes that carry the acid and too many other ingredients could raise the pH out of the safe zone (should be no higher than 4.6) for water bath canning. I did check my tomatoes and the pH was less than 5.5 (which is as low as my paper goes).
Ingredients:
60 lbs Roma tomatoes
4 very large yellow onions
Olive oil for sauteing (a couple tablespoons)
Sea salt to taste
6 bay leaves
2 branches (about 18″ total) fresh rosemary
Fresh herbs (I used parsley, sage, thyme, oregano, and basil, about a quart of loose leaves)
Red wine (I used just under half a bottle of cabernet sauvignon, an excellent $4 wine from Whole Foods)
Cane sugar (optional but helps counter the inevitable burnt spots), about 2 TB
Preparing the Equipment:
Fill your canner with the approximate amount of water you’ll need to put in all the jars and cover them by an inch, cover it, and get it boiling. It can take a long time to boil this much water, so it’s best to start it early then just keep it warm.
Wash jars and lids.
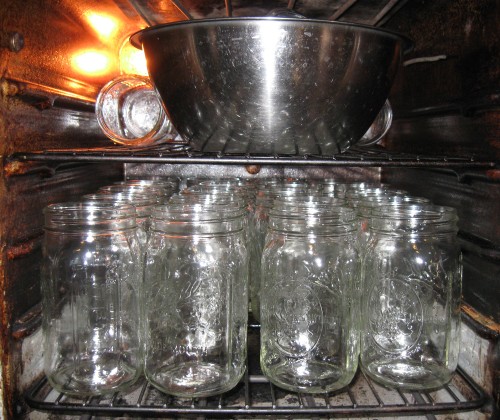
Put jars into a 200*F oven. This tip was pure genius! All the other instructions I read say to boil the jars and that means you have no room on the stove, have your canning pot in use (or have to use two), and the jars are wet. With the oven they were out of the way and dry.
Last time I put lids into a pan of water which I boiled on the stove then kept warm. But I didn’t have any spare pots or burners, so I put them in a stainless steel bowl of water in the oven instead. Worked great.
Making the Sauce:
You want to start this sauce the day before you can. The tomatoes take a long time to simmer down. Normally I’d prep the canner and the sauce separately but, with this much sauce, I needed the canner to cook it.
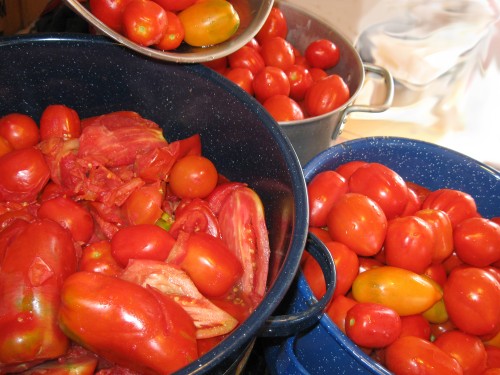
Wash tomatoes and remove any bad spots. I don’t seed or skin them, I just toss them in whole, except for really big ones, which I cut in half lengthwise. If the tomatoes have a tough stem end, I cut it out.
I used the big canner (21 quarts) plus two good sized soup pots. No way would I have fit all those tomatoes in though. But, by the time I finished washing and prepping the last of 4 tomato boxes, the first couple boxes worth mushed down enough to make room. I’m guessing raw and whole, that’s 40-45 quarts of tomatoes (more if you try to pack them into jars).
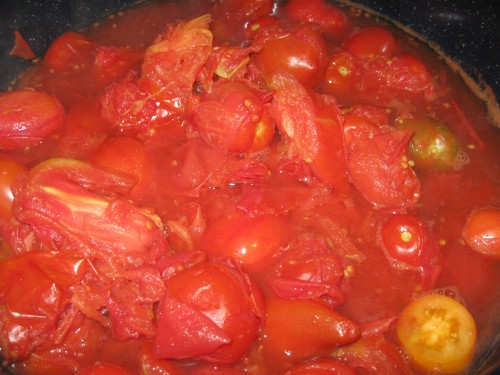
Now you want to cook them. A lot. Start with the heat on low. The bottle layer will burn if you don’t get some liquid in there. Either add some water (just enough to give you 1/4 to 1/2″ on the bottom) or dice up the first few tomatoes and cook them for a minute first. You can dice all the tomatoes if you want, but it takes a long time. They fall apart fairly quickly with heat and it’s fun to smoosh them with your spoon.
Stir them frequently and keep the heat high enough to see some bubbles but low enough to avoid boiling. Boiling may reduce it faster but it greatly increases the risk of burning and it will mute the flavor.
I cooked these down for about 8 hours on Friday and perhaps as long on Saturday. I was sick on Saturday so had to wait until Sunday to can. I always turn the heat off overnight or if I need to leave the house for more than 5 minutes. As time passed, those 3 pots turned into 2. You can add salt at any point after a few hours. I recommend undersalting because when you concentrate the tomatoes, you also concentrate the salt. Salt will help the tomatoes fall apart.
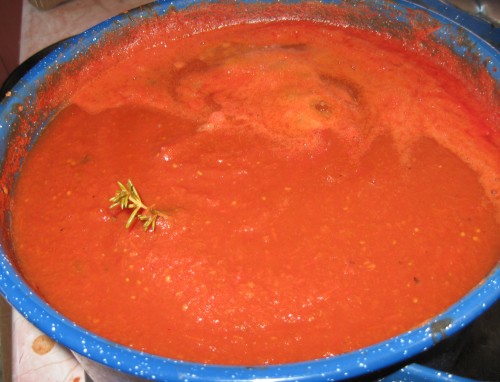
On the second day, when the pots were cool, I moved them to my counter and used a stick blender to puree the tomatoes. Then I added fresh rosemary spears and bay leaves to the pots. Be sure to count how many you put in and don’t add them until after you puree.
About an hour before I was ready to can, I fished out the whole herbs (count them) and added the other ingredients. Since I had to wait an extra day, I made sure to bring the sauce up to a brief boil for safety reasons, then I turned it back down to a simmer before adding. At this point, I was able to fit everything into the big canning pot.
I peeled and quartered the onions and put them through the shredder of my food processor. While I prefer a more square cut, this job took less than 5 minutes, vs about 15 if I did them by hand (even longer because I’m a crier). Saute the onions in some olive oil until they have a bit of color but don’t brown them. Add the wine and onions to the sauce.
I food processed the leafy herbs until minced and added them very close to the end. Go ahead and salt to taste. If the sauce has any bitter, sour, or burnt undertones, add a bit of sugar.
I had to transfer the sauce to smaller pots and wash the canner.
Filling the Jars:
The sauce should be hot when you fill the jars so I was sure to keep one pot on a burner and turn it on a few minutes before each fill. Take the jars and lids out of the oven right before you need them so they don’t cool too much.
I ladled the sauce into a canning funnel. I couldn’t find my real canning funnel so I used a make-shift one, the cut off top of a gallon plastic jug (the sturdy plastic).
Processing the Jars:
Wipe any spills off the rims, put the rubber rings on the plastic lids (I use Tattler BPA-free lids), and put the metal rings on loosely. Tighten ring with finger pushing down on the lid. Then loosen lid 1/4″. (If you’re using Ball lids, follow the directions on the box.)
I don’t own a canning rack but found a perforated baking rack that fit well.
Have the water at a boil before adding jars. Adjust water so it is at least 1″ over the top of the lids. Bring back to a boil then set a timer for 45 minutes. Using a jar lifter, remove finished jars to a rack (or in my case, boxes with towels) to cool. Tighten the lids. You don’t do this with Ball lids, just with Tattler.
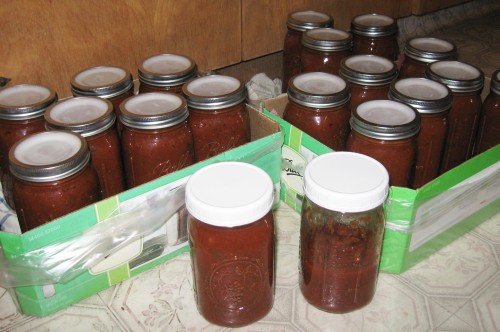
Tattler lids do not ping. There are no sounds at all with them. When jars are cool (the next day), remove the rings and make sure the lids are secure. Label and store.
How Much did I Make?
20 pounds of tomatoes made a little over 6 quarts of sauce when I did it for the freezer. This recipe was pretty similar. I used 60 lbs of tomatoes and ended up with 18.5 quarts. I processed 17 quart jars and saved 1.5 for the fridge. One of the jars didn’t seal (the rubber ring wasn’t positioned right) so I put it in the freezer. The lid fell off as soon as I removed the metal ring, so there was no guesswork there.
Cost? The tomatoes were $60, the onions around $4, and the wine about $1.50. The herbs came from my garden (except for the bay leaf, which is minimal). $65.50 divided by 18.5 comes out to $3.54 per quart jar. Not cheap but much thicker and better than anything I can buy. And it’s all organic too.


3 responses so far ↓
1 Carol Gaines // Nov 11, 2011 at 7:11 am
Read your Chimichuri recipe. Interesting in making this after traveling in Argentina.
I canned sauce for many years starting in the early 70s with ‘whatever’ was available from my gardens. I was not lazy, just usually slammed in the fall with canning. I found ‘short cuts’ where ever possible.
An easy way to shorten the cooking time of my sauce, I would stem and clean tomatoes. Romas preferentially, but whatever I had. Freeze them whole, either by the bag or spread on baking sheets. Thaw them as soon as frozen, OR when you have more time by placing in warm water for a few minutes, slip the tomatoes out of there skin with a light rub and place in a strainer, cooking pot or in a large bowl and simply pour off the excess water when they are thawed.
Is the sauce less tasty not using this excess water? It is a matter of personal taste, but I found sauce to taste better when you haven’t cooked for some many hours. You may need to watch more closely to avoid scorching, but for a significantly less time. Also lower fuel costs.
I would also quarter tomatoes and freeze on baking sheets and double bag in large freezer bags. In the middle of winter or tomatoes expensive or unavailable you can pull out a few and put into whatever dish you are preparing and they taste like you’ve used fresh.
Carol
2 Cyndi // Nov 11, 2011 at 10:19 am
Hi Carol,
Your methods sound great. I freeze a lot of things and agree that it can be really helpful. One of the big advantages of canning is you have a finished product that doesn’t have to be thawed. But with your method that’s not an issue for the whole/cut tomatoes.
I keep the excess water because I don’t like to waste food, but lots, perhaps even most, people routinely “seed” tomatoes as they prep them for cooking to reduce the cooking time. I’ve seen it on cooking shows a lot. I like well cooked tomato sauce but, if you prefer a fresher taste then, yeah, removing liquid makes sense.
3 Cyndi // Nov 11, 2011 at 11:49 am
Another note: if you do choose to seed fresh tomatoes or remove liquid after freezing, you can use it all in soup or stew in place of water. Or to make soup stock.
Leave a Comment