May 24th, 2008 · by Cyndi · No Comments
Michael and I were in the terrific produce section of the new branch of Farmer Joe’s market in Oakland last week. They had a wide chile selection and we got some that looked like poblanos, but turned out to be spicier. I made a filling for them the other night.
Recipe:
4 stuffing peppers (any kind you like, even bells), core
15 oz very firm tofu
A couple leaves of something firm and green (I used bok choy)
1 bunch fresh basil (leaves)
1/4 cup pine nuts
Salt & pepper to taste
Food process the tofu, greens, basil, and seasoning until fairly smooth. Add the pine nuts and process until chunky.
Stuff the peppers well with a spoon until full. I like to put a toothpick across the top to help keep them closed, though I’m not sure how much good it does. The middle pepper with the extra toothpicks had a bad bottom I had to slice off.
Tip: when you cut off the tops to prep the peppers, save the ring of flesh around the stem. Chop finely and save in fridge or freezer for future stir-fries.
I had leftover filling, so I grabbed a couple of mushrooms, removed the stems, and stuffed them too. Those are large criminis by the way, not small portabellas. What’s the difference? about $3/lb.
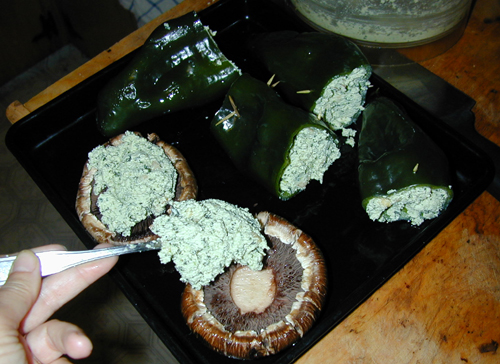
It was the tail end of our recent heat wave, and I didn’t want to waste energy either, so I baked these in the toaster oven (larger style convection oven). 350*F for 30 minutes (turning peppers over every 10 minutes) then 10 minutes at 300*F. The details aren’t important…just make sure the peppers are soft but not falling apart and don’t let them brown too much.
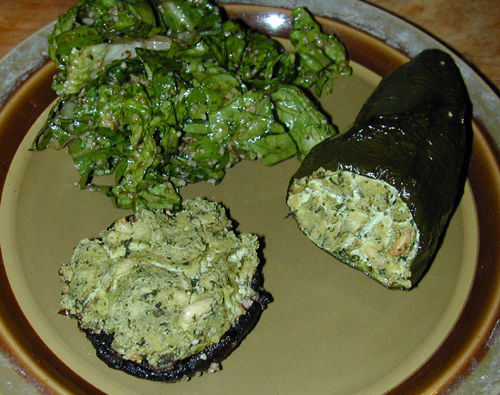
I served it with a quickie salad. Sliced romaine lettuce (fine to cut with a knife if you eat it right away…it makes for a different mouth feel), hemp seeds, and a simple vinaigrette.
Aside from the over-abundance of green, it was a fast and lovely meal.
Categories: Food · Main Dishes · Recipes · Vegetable Dishes
Tags: · dairy-free, egg-free, gluten-free, lowcarb, photos-food, vegan, vegetarian
May 24th, 2008 · by Cyndi · 10 Comments
We belong to a Shabbus potluck group that meets every month or two. Yesterday, it was at our home. Although Miriam (and I) can’t have gluten, traces aren’t an issue. Unfortunately, it’s not that way with egg. Even a little crumb can give her symptoms.
Challah is a braided egg bread that plays an important role in the weekly Shabbat prayers. As you pray, you touch the bread, or touch someone touching it. Though of course I don’t have any or allow Miriam to eat it, that isn’t enough when it’s happening in my house. We can’t leave the crumbs and contaminated surfaces behind when people go home. And cleaning well often isn’t 100%.
So I decided to make challah. Or at least a bread-like substance that was challah-like. Technically, challah should contain chametz (one of the 5 grains, also meaningful for Passover), but fortunately no one minded that it didn’t.
I’m not much of a baker (i.e., I stink) so I just bought a mix. The bread a friend made from Pamela’s Amazing Wheat-Free mix was so good, I got that one.
Pamela’s Amazing Wheat-Free Bread Mix
INGREDIENTS: Sorghum Flour, Tapioca Flour, Sweet Rice Flour, Brown Rice Flour, Organic Natural Evaporated Cane Sugar, Chicory Root, White Rice Flour, Millet Flour, Honey and Molasses; Rice Bran, Sea Salt, Xanthan Gum, Yeast Packet.
1 slice of bread (1/16th of loaf) has 25 usable grams of carbs (29 total minus 4 fiber).
As it happens, they even have a recipe for turning the mix into challah on their website.
We used the egg-free alternative directions but super-concentrated it. So for 3 eggs, I used 1/2 cup of water and 4 tablespoons flaxmeal. We also made it dairy-free
Recipe:
1 bag Pamela’s Wheat-Free Bread Mix
Equivalent of 3 eggs
1/4 cup palm shortening, melted
1/2 cup soy milk (use anything)
1/4 cup sugar
1/2 cup warm water
1 yeast packet (enclosed)
The recipe calls for a stand mixer, which we don’t have. It recommends a whisk attachment, which we do have on our stick blender. But that made the too-dry dough fly all over. Even adding some water didn’t help. So Michael mixed it by hand with a large whisk then kneaded it with his hands.
Now the mixture was too sticky, so I added some brown rice flour as Michael kneaded. And it turned out glossy and smooth and really nice. It was so easy to handle I just braided it by hand instead of the plastic bag piping business the website recommends.
I think I could have easily done a true braid, but I started easy by just making two long rolls and twisting them then sealing the ends. I did this on a floured (rice) cutting board then moved it (with a dough scraper) to a greased baking pan.
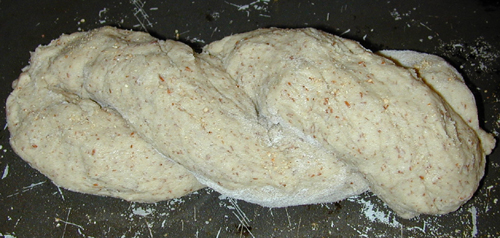
I wanted to put sesame seeds on the outside, but didn’t have any. So I did a light sprinkling of some ground sesame salt we had. I didn’t do anything in place of the egg wash for the outside.
I put this in the oven, turned it on to 150*F for a minute, then turned it off (it was a cool day), and let it rise for a little over an hour. Then we turned the oven on to 350*F and let it bake for one hour. The bottom got a bit over-brown, almost black, but was still edible, and the crust was strong and thick. The insides were soft and luscious. I didn’t do a good job sealing one of the ends. Also the two twists never really melded together and were like separate pieces of bread.
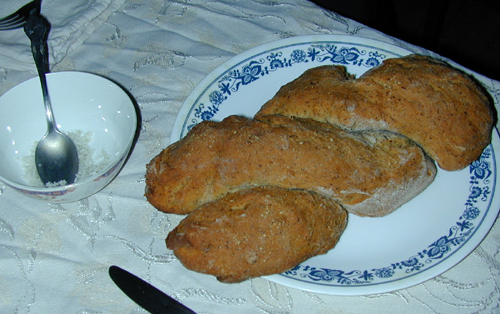
Our guests all loved the bread, though it didn’t really taste like challah and all of them were wheat-eaters. I’d gladly make it every week if it weren’t so carby. It’s definitely a winner for special occasions. I think dividing it into two loaves and baking it for less time would soften the crust while still cooking the insides.
Categories: Food · Grains · Judaism · Recipes · Religion & Holidays · Shabbus
Tags: · dairy-free, egg-free, gluten-free, jewish food, photos-food, vegan, vegetarian
May 14th, 2008 · by Cyndi · 1 Comment
This recipe comes from my friend Carys Starfire, who has kindly given me permission to post it here. The bagels look absolutely amazing, though I’ve been holding back on trying the recipe myself because I think I’d like them too much and I’m trying to keep my carbs down. I’ll give in sooner or later. – Cyndi
___________________________________________
I had a sudden craving for bagels and cream cheese and smoked salmon — and I made bagels! bagels I could EAT!
I’ve been playing around lately with this recipe from Gluten-Free Gobsmacked for flatbread — I can’t have potato, corn, tapioca, or xanthan gum as well as gluten grains, so I had to make changes and see what happened.
I’ve made some yummy flat breads so far — not quite flexible enough to fold, but oooh, GOOD sandwiches if it’s cut in squares and just used as a piece of bread, and yummy toasted, especially when I add caraway seeds and dried dill before cooking — the texture and taste are very similar to rye bread to me, and I love rye bread.
Here’s the latest version of the recipe I’ve been fiddling with:
1/2 cup warm water
1 spoonful dry yeast
1 spoonful sugar
Leave in a warm place until it gets foamy (10-20 minutes).
(I tried adding egg one time like the source recipe, but it was much less like what I wanted that way, so I’ve been leaving it out since.)
Mix together:
1 cup brown rice flour
1/2 cup white rice flour
~1/2-1 tsp salt
~2 tsps guar gum.
Add 1-2 tbls olive oil and 1-2 tbls apple cider vinegar to the foamy yeast water, then mix in flour mixture. Add more water or flour as needed to make a dough that forms a ball in the bowl once all the flour is incorporated. Continue to mix/sort of knead (oil your hands first! VERY sticky) 3-5 minutes, to get the guar gum sort of activated.
If you want to add herbs, do it now. I’ve added about 1-2 tbls each caraway seeds and dried dill weed, and loved the result. I’ve not tried other herbs yet. I’ve also added some chopped kalamata olives, about 1/4 cup, and that was wonderful. I’m planning some sauteed onions and some poppy seeds for my next trial…
Put some oil in the bottom of a clean bowl, put in the ball of dough, turn to cover. Let rise 30-40 minutes in a warm place. It won’t rise as much as a gluten dough, but it will still swell up a bit.
For flatbread:
Smoosh flat between 2 sheets of parchment until it’s about 1/4″ thick, then carefully transfer to a floured sheet. Put some more oil on top, smoothing it around with your fingers and sort of gently poking valleys all over. Let rise in a warm place about 30-40 minutes. Bake in a moderate oven til it’s
just done (it really depends on how big, how thick, how hot your oven runs, etc — I’ve had it done anywhere from 8 minutes to 20 minutes). Let cool. I’ve done the fork holes like the original and that’s good too, but more work for about the same result.
For bagels:
Roll balls of dough in your oiled hands until they feel good and solid. Gently poke a hole thru the center. Put on a floured sheet. Brush with oil. Let rise 10-20 minutes while you start a pot of water simmering.
Preheat oven to about 400.
When they’ve risen just slightly they will be sort of funky looking because the surface dough cracks without gluten to hold it together. Don’t stress about it. These are a bit more fragile at this point than regular bagels, I think, so be gentle. Lift with a pancake turner and lower into simmering water. They should not be crowded — my pot will do 3 at a time. Simmer 2-4 minutes, turn, simmer a couple more minutes, put on rack to drain.
When they’re all ready, flour a sheet and set them on it. Bake about 20-25 minutes, turn over, bake another 10.
These are flatter than regular bagels, but I can still cut them in half and each half is sturdy enough to put things on. Do let cool completely before trying to cut, and I find a tomato knife works best.
They are fresh right now and a bit crisp on the outside and chewy on the inside and omg BAGELS. After 2 years of not having any, I don’t CARE if they aren’t exactly right. They’re yummy and I love them.

(A plate full of bagels — recipe made 7 smallish ones)

(All doctored up with cream cheese and smoked salmon, and a bare half to see what it looks like)
Next day note: these are more like a heavy english muffin after sitting in a zipper bag at room temp overnight, but still really good, especially toasted.
Categories: Food · Grains · Recipes
Tags: · dairy-free, egg-free, gluten-free, jewish food, photos-food, vegan, vegetarian
May 13th, 2008 · by Cyndi · 7 Comments
Although I adore basil, I usually make my pesto from other herbs, simply due to availability and cost. My favorite combo is half cilantro and half parsley. If I don’t have cilantro, or I don’t have enough of it, I will use spearmint to make up the difference. All the herbs must be fresh.
Your classic pesto is herbs (usually basil), nuts/seeds (usually pine nuts, which are seeds), garlic, Parmesan or Romano cheese, and olive oil. Like with any well-known dish, there are always variations, often related to different areas where the dish is made.
Since I can’t eat dairy much anymore, and I’m not a fan of garlic, I just leave them out. I don’t even miss them. I make up the cheese feeling with method and I use chipotle and cumin instead of garlic.
The two tools you can use for your pesto are a blender or a food processor. The third is the mortar and pestle but, despite owning a nice one, I have never got the hang of it. They aren’t interchangeable. The techniques and the outcome are slightly different.
The food processor is the simple method: put the ingredients (except oil) in. Process until done. Add oil, mix. You end up with a thick wonderful spread that has texture to it (you can choose how much).
The blender is a bit harder to use but gives you a rich creamy pesto that melts in your mouth. If you’re not putting cheese into it, this is a good way to get some of that creamy mouth feel.
With the blender, you want to do the nuts/seeds first. Pine nuts work very well here because they blend up smooth. Blend a few of them dry at low speed to break them up. Add small amounts of liquid (the olive oil or some lemon juice) until they are totally creamy. Add more seeds/nuts then liquid as needed, until they are all as creamy as you can make them. Put the seasoning in at some point during this process.
The last thing is the herbs. Unless your blender is much better than mine, you can’t just put them in. You need to rough chop them first. Especially anything with stems.
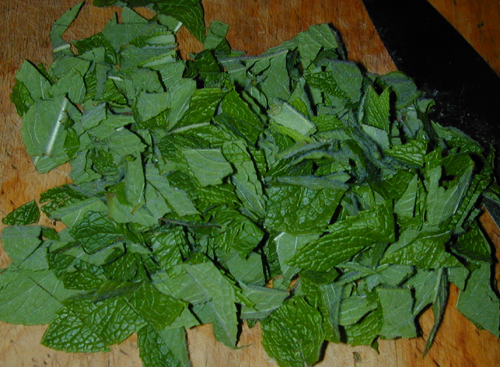
Add the herbs and blend until the sauce is green but the herbs still have some small pieces.
Recipe:
Notes: Amounts are approximations. Use whatever tastes good. Pinch basil and mint leaves off the stems. For parsley and cilantro, twist off the bottom half of the bunch and discard. Don’t bother removing stems beyond this, unless they are very thick or woody.
2 bunches herbs (all basil, 1 parsley and then either 1 cilantro, 1 spearmint, or both)
2 cups pine nuts (I use them straight from the freezer) or 1+ cups walnuts
Salt to taste
Black pepper if desired
Seasoning (a couple cloves of garlic or my favorite, chipotle pepper powder and cumin)
Fresh lemon juice if desired
Ways to serve pesto:
1) With tofu (or another firm protein) as a thick sauce.
I had it the other day with a big green salad as a base (with a light vinaigrette dressing), warm sauteed strips of tofu, then creamy blender pesto (cilantro, parsley, spearmint and pine nuts).
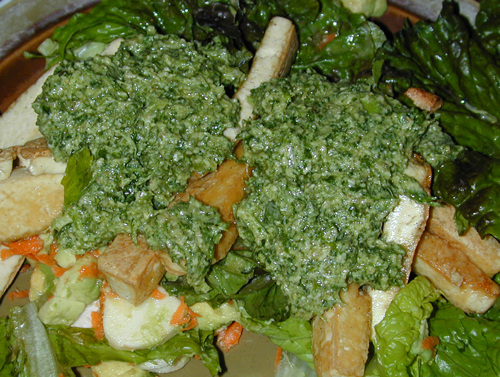
2) On pasta.
Here’s a recipe of mine from 2005:
1 package Nutrition Kitchen black soybean pasta, boiled and drained
6 large mushrooms (crimini, not white, and they were very large), sliced
1/4 cup red wine
Several handfuls fresh spinach
1/8 cup pine nuts
Salt and pepper
About 1 cup pesto (mine was frozen)
Saute the mushrooms until soft and flavorful
Add wine and simmer
Add pesto (I would add it at the end if not frozen)
Add spinach, put lid on pan, steam
Season with salt and pepper
I added a bit of water to thin out the very thick sauce.
Serve over the pasta. Fed two adults plus tastes for the baby (she loves mushrooms and seemed to really enjoy the pesto sauce–Miriam was 9 months old when I wrote this).
Another easy 30 minute meal (minus the cleanup). Even if I had to make the pesto from scratch, it wouldn’t add much time. I’d do it while the water was boiling and the mushrooms were sauteing.
3) In wraps, on sandwiches.
4) As a dip for vegetables, cold leftover sauteed tofu, on on a spoon.
5) On fish. Or meat if you eat it.
6) On salad (I’d make it with lemon juice).
7) Any way you want.
Categories: Dressings & Sauces · Food · Recipes · Spreads & Dips
Tags: · dairy-free, egg-free, gluten-free, lowcarb, photos-food, raw food, vegan, vegetarian
May 7th, 2008 · by Cyndi · 2 Comments
This is one of my favorite “fancy” meals that most everyone likes, even some people who don’t like fish (got my fish-hating brother’s seal of approval). It takes a while to make though (would be faster with thicker fish and a deep fryer) and it’s not exactly lowcarb. But yum.
Recipe:
(Makes enough for 8-10 people, or 5 adults/children for two meals)
About 5 lbs of fish fillets
About 3 cups of flour (I use half soy and half brown rice flour)
Teaspoon or two of salt
Black pepper
6 eggs (I use 6 TB flax meal in 2 cups hot water, add more water as needed)
Start with fillets (defrosted if previously frozen) of your fish of choice. They must be free of bones and fairly thin, in the neighborhood of 1/2″ is good. I like Dover Sole. Talapia is good too. Cod works well if you get the right thickness and there are no bones. Cod is the traditional fish and chips fish, but remember that thicker cuts need a deep fryer to cook all the way through without ruining the crust. 2 lbs of fish works well for 2 hungry adults, one fish-loving child, and lunchtime leftovers. Trader Joe’s is a good source for less expensive frozen fish of good quality (I only buy wild fish from them). Costco has excellent fresh, wild Dover sole at a great price.
Wash the fish if needed and lay on paper or cloth towels to get excess moisture. Partially frozen fish is okay if it’s thin and you get the ice off the outside.
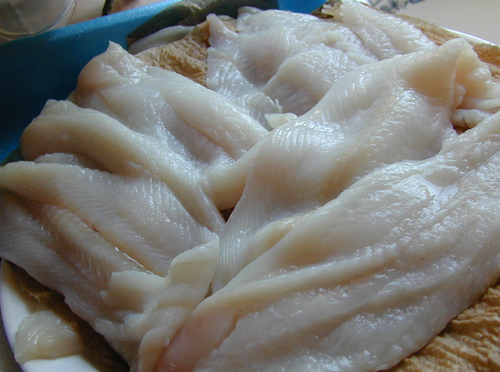
Make the egg substitute (or beat several eggs if you prefer). 1 tablespoon of flaxseed meal, ground fine in a coffee grinder or other machine, in 1/3 cup of water equals 1 egg. (Store flax whole in a cabinet then grind a bunch and stick in the freezer for easy access without anything going bad.) Put flax and water into a container that is 3-4 times the volume and nuke for a minute or so. Let cool to warm or room tempature. Mix with whisk or fork.
Mix in a flat bottomed container with sides. A baking pan is great and those plastic boxes 1 lb of salad comes in works well too. I like half brown rice flour and half soy flour. This reduces the high carbs of the rice and adds some protein. The soy alone is too heavy and the rice is too light, so this is a nice balance. I’ve also made it with 100% corn flour (fine cornmeal) and with half rice and half corn. These are fine but cornmeal has a distinctive texture and flavor so it’s personal preference if that is what you want. Add salt and pepper to the flour mix, stir with fork.
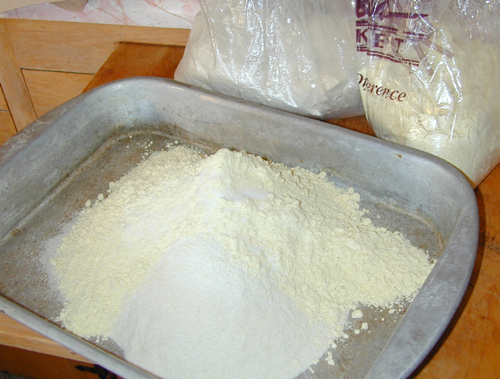
Coat fish with flour mixture, put aside on plate. I have done it without this initial coating several times and it really does make a difference. The finished breading not only is a bit thicker (this is not a thick commerical breading anyway) but it stays on the fish better.
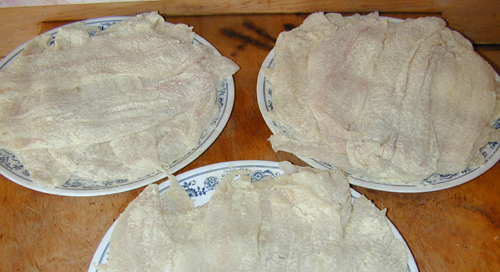
Dip fish in egg or flax goo. Let excess drip off but make sure all sides are well coated.
Dip again in the flour mixture and coat well. You can pile flour over the fish to ensure full coverage; don’t just dip lightly.
Fry fish in oil (I use extra virgin olive oil, but others are fine) at medium to medium-high heat. Too low and the breading gets really oily; too high and the breading browns and burns before the inside of the fish is done. Fry to golden brown on each side, adding more oil as needed. I use a 12″ cast iron pan which works very well. You might want to have two pans going if you’re doing a lot of fish.
Remove finished fish to a plate with a paper towel to soak up excess oil. Do not put fish on top of other fish, even with paper towels between them. This will make the breading soggy. You can use the microwave to warm fish or to finish cooking fish in the middle, but it will ruin the breading. You can use the oven for the same purpose but watch for burning.
Mix the leftover flour into the leftover egg, adjust with water or flour to make a very thick pancake batter. Add more salt if desired and some seasoning (I like an Italian herb mixture). Fry until light brown on the outside and set in the middle (I turn the heat off under the cast iron pan after the first flip). Good warmed up the next day.
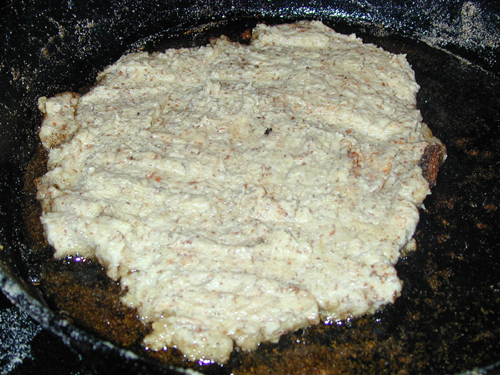
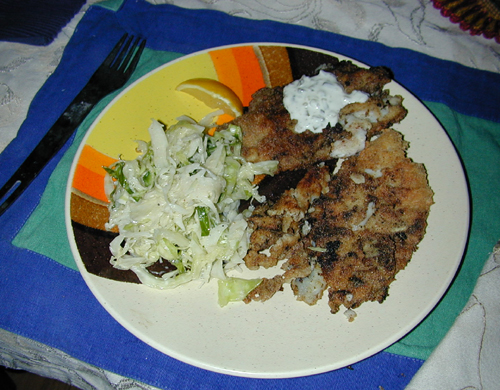
Serve the fish with condiments of your choice. I like fresh lemon wedges (not slices) and vegan tartar sauce. My niece uses catsup and turned Miriam on to it too. I usually serve with vegan coleslaw.
Recipe for tarter sauce:
Relish (I prefer dill but sweet is fine)
Veganaise (2-3 times the relish)
A squeeze of fresh lemon
A bit of salt
Leftover fish is great cold in a sandwich or wrapped in a tortilla. Or just as is. I always make extra because the leftovers are so good.
Tip:
I bought way too much fish and foolishly used only one pan, so I got sick of cooking and just took the floured fish (no batter) and lay them in a single layer in a baking pan with olive oil on the bottom. Then I baked it while we ate dinner. Although not as flavorful as the fried fish it was still delicious (had it cold for lunch the next day and warm for dinner, with tarter sauce & lemon)
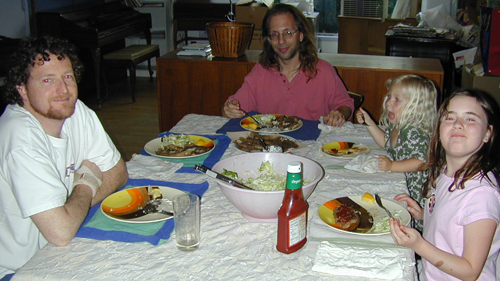
(My brother Mike, Michael, Miriam, and my niece Stephanie)
Categories: Food · Main Dishes · Recipes
Tags: · dairy-free, egg-free, gluten-free, photos-family, photos-food, seafood
May 6th, 2008 · by Cyndi · 1 Comment
Coleslaw is basically raw shredded cabbage, with or without some other vegetables, in a creamy and/or tangy dressing. I usually make it from green and red cabbage and carrot, in a mayo/mustard vinegrette. Comes out very pretty.
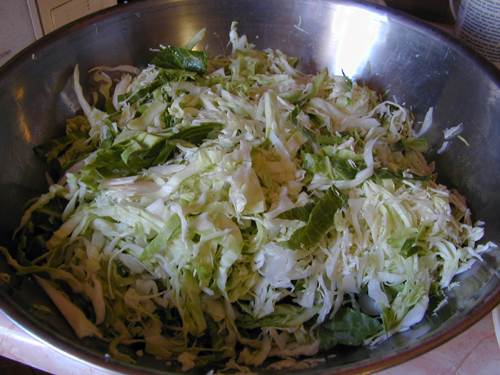
How you cut the cabbage makes an enormous difference. I have in the past used the shredder attachment of my food processer, but that makes a dense slaw without the right texture. It was much better sliced on a box grater. I used the slicing side for as much as I could and the coarse grating side for the end pieces and the carrot. You can also slice by hand, which I did for leaves that fell off, but it’s hard to get them thin enough.
The superior tool though is a mandoline. You get ultra-thin but long pieces. The shreds in this picture are wider than usual, but this was a different kind of cabbage and the ones on top were mostly handsliced.
Recipe:
- Grate cabbage very finely, but in long strands, not a fine dice. You can use shredded cabbage from bags if you prefer. I usually shred 1 green cabbage, 1 red cabbage, and 2 large carrots. This makes a lot of coleslaw. You can make a very nice amount with 1/4 each red and green cabbage and 1/2 carrot.
- Add good quality extra virgin olive oil to the cabbage, enough to coat all pieces lightly. Around 1/2 cup.
- Add not quite as much apple cider vinegar as you did olive oil. 1/4 cup or more.
- Add several big squirts (3-4 tablespoons) of good brown mustard. Don’t use yellow stuff! I like Annie’s Horseradish Mustard, Whole Food’s German Mustard, and others like that.
- Add salt and pepper to taste.
- Mix well then taste and adjust! My amounts are just guesses. The amount you will use will depend on the ingredients (they’re different each time) and your personal taste.
- Add mayonnaise (I use Vegenaise, but any good quality mayo is fine). Anywhere from 3 tablespoons to 1/2 cup, depending on how creamy you want it.
- Put in fridge. It is best the next day but you can eat it anytime, cold or room temperature.
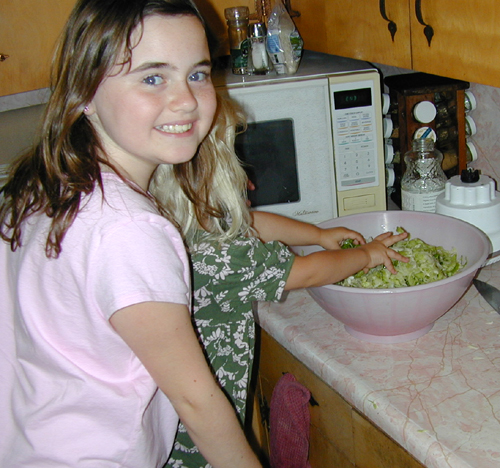
Stephanie & Miriam mix the coleslaw
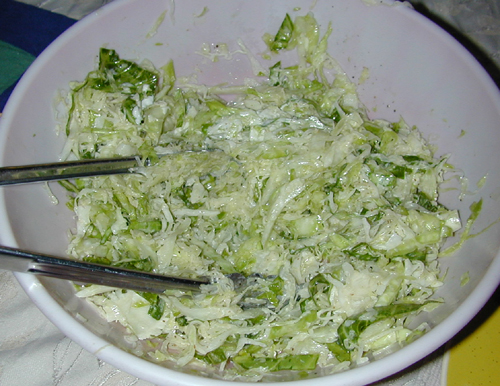
When I made cole slaw for these pictures, I used just green cabbage, an unusual variety from a local farm. I also decided to try a method from Good Eats (on the Food Network) where you salt the cabbage after shredding and let it sit for an hour or so, then squeeze out and discard the excess liquid.
It was different from my usual slaw but still good.
Categories: Food · Recipes · Vegetable Dishes
Tags: · dairy-free, egg-free, gluten-free, lowcarb, photos-family, photos-food, raw food, vegan, vegetarian
May 4th, 2008 · by Cyndi · 8 Comments
I’ve hosted a Passover seder at my home every year for the last 20 or so (except for the year my mother died the night before Passover 1996 and the following year, the first with Michael, when Michael and I both had the flu). Each one has a different mix of people, cultures, familiarity with the holiday, and food, as well as being held in any of several homes where I have lived, in two different states.
This year, a first-night seder on April 19, 2008, wasn’t the most stressful, but it was the weirdest. All the food came out well but, otherwise, everything that could have gone wrong did.
I always find dietary and other restrictions to be a challenge (in a fun competitive sense) and I pride myself on creating a safe space for all of my guests, with food they can eat (perhaps not everything, but a decent meal). But this year pushed me to the brink.
We had our own restrictions: no meat, nothing that Miriam is allergic to (she can get sick from crumbs and I want her to have a few days a year with other people where she can eat anything she wants), no chemical products on the guests, etc, but they’re seamless for us. And we can still have a full seder.
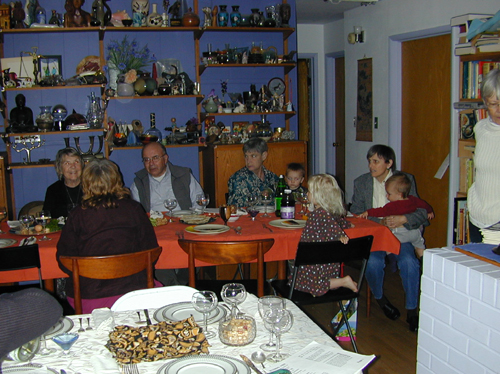
(In foreground: matzoh plate next to my seat; in background: the main table with Miriam (brown dress), her Aunties Connie and Jan (holding babies), 3 other friends, and Grandma Julie standing at right. The note on the door to our bedroom warns people not to open it, since that’s where the kitties spent the evening.)
This year, due to medical issues with guests, we had to leave the doors and windows wide open but couldn’t turn on the heat, we couldn’t light our candles (beeswax even), we couldn’t take photographs (except when the reactive guest left the room, so my food and other photos are lacking), we had two guests who invited themselves at the last minute (and one arrived scented and had to scramble to change clothes and wash-up), dinner was completely out of order and late, we had 4 (yes, four) cancellations the day of the seder, there were 2 guests who simply didn’t show up (medical emergency and they had a bad email address for me), oh and we nearly killed one guest (her fish allergy, which we always managed to accomodate in the past by being careful, was far worse that day, and we did more last minute cooking than usual, which made for more fumes)
Add to that the fact that I dropped a few of the usual rituals and customs to save time, but then ended up with even more gone due to the above restrictions. We didn’t start with eating hardboiled eggs like we have in most years, due to Miriam’s allergy. Two years in a row now I’ve had the idea of using whole walnuts instead, but then I can’t find any. We skipped the handwashing and didn’t sing a single song. And the post meal sections got lost entirely. No Elijah’s cup, which I’m still upset over. We only did the hunt for the affikomen. It felt more like a dinner party than a seder.
Oy.
We were supposed to have 20 guests (including 5 children) but, with all the additions and subtractions, we ended up with 16 (including 4 children). Three were new to our seder (2 had never been to any seder).
We had two tables. The main one is our regular dining room table. Michael always sits there, at the end furthest from the kitchen. Then we move a buffet and desk back to add another table. I always sit at this one, in the chair nearest the kitchen (behind the wood doors to the right).
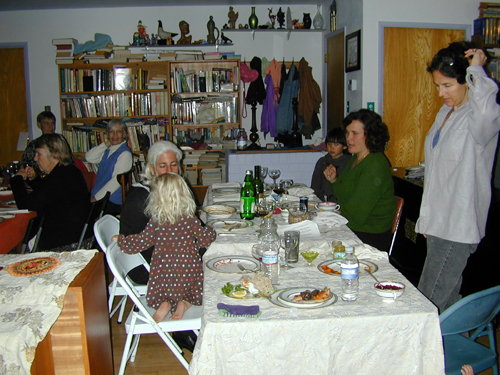
(Main table to left has Grandma Julie (white shirt) and 2 friends; secondary table has my cousin Sara next to Miriam (visiting from the other table) and 3 friends)
Ritual Foods:
Oat flour matzoh
Horseradish
Parsley
Wine
Grape juice
Charoset
Salt water
Roasted beet (an ancient alternative to a roasted lamb shank)
Roasted egg
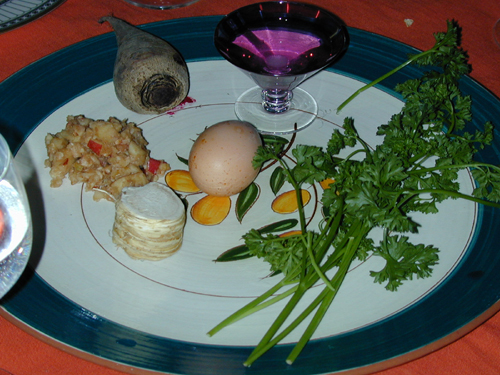
(Seder Plate: Parsley, horseradish root, roasted egg, roasted beet, salt water, charoset)
Dinner Menu:
Beet borscht
Gefilte fish
Mushroom and olive compote
Baked yams
Pan seared roasted halibut with rosemary
Drinks: Wine (red & white), grape juice, water, seltzer, lemon slices
Dessert: Macadamia Nut Torte
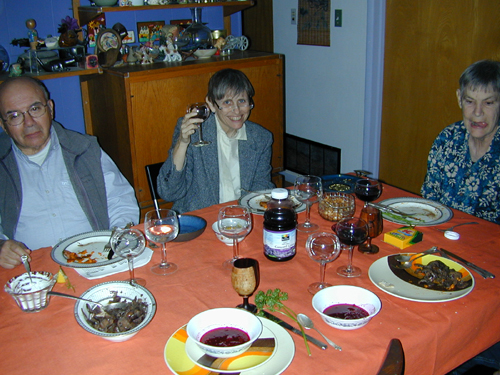
(Connie offers a toast)
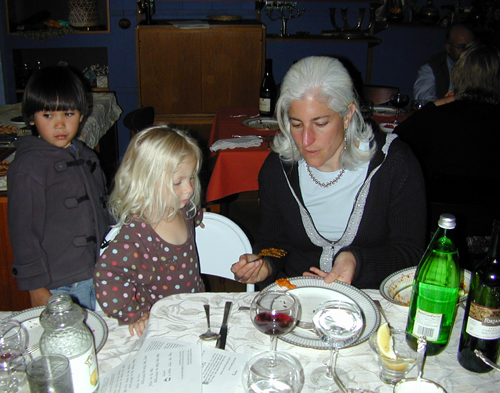
(Sara gets Miriam some yams, as a friend looks on)
Categories: Family Life · Food · Judaism · Meals & Events · Passover · Religion & Holidays
Tags: · dairy-free, egg-free, gluten-free, jewish food, lowcarb, MCS, petaluma, photos-family, photos-food, photos-friends, raw food, seafood, sonoma county
May 4th, 2008 · by Michael · 1 Comment
Success with horseradish has been extremely variable, both due to variation in the flavor of the unprocessed horseradish roots, and the fact that it is too strong to sniff or taste during preparation to make small modifications. The ones I made for Passover this year were pretty good.
I started with two horseradish roots. They were 8 – 12 inches in length, and fairly skinny, maybe an inch or two in diameter. I chopped them into inch-long segments like so:
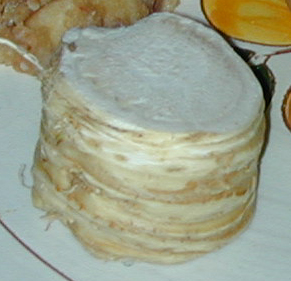
Then I loaded them into the food processor. Prepared Horseradish is either white or red, the latter colored by the addition of a small amount of beet; I find it augments the taste in a subtle but pleasant manner. I added in a small piece, maybe equivalent in size to one or two of the horseradish root slices.
A splash of white vinegar serves two purposes. First off, it lubricates the food processing so that the blades actually grind up the root slices; otherwise, they simply get moved around and jam the blades. Also. it acts as a preservative. The finished horseradish quickly loses its heat when exposed to air, and the more vinegar you add, the better it will retain its heat (although you don’t want to add too much, as it will be excessively moist and vinegary-tasting).
Process until it is finely ground, with no chunks of white root visibly remaining. Occasionally stop the blades so you can scrape the sides with a butter knife. But be careful … the mix at this stage is extremely powerful and it will bring tears to your eyes.
Once it’s done, immediately dish a few tablespoons out into small serving bowls. This should be one of the last tasks you do before the meal, because if it loses too much of its heat while sitting on the open table it will be bland and uninspiring. In the past, I have been shy about adding vinegar, and the result was almost tasteless by the time our guests bit into it (compensation perhaps for one year in which I somehow made it far too strong, and nearly killed all our guests simultaneously in the process).
After it’s served, be sure to return the lid of the food processor to its place so the mix is kept away from air as much as possible.
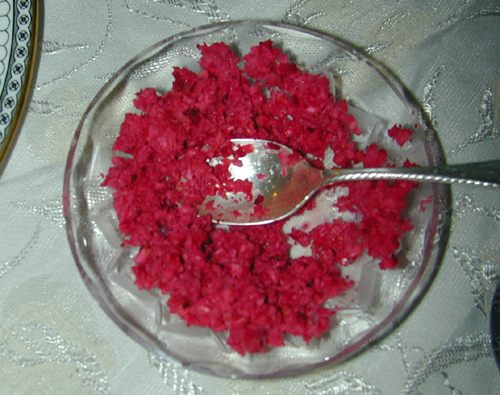
When we have leftovers, I transfer them again to glass jars, and make sure the lids are sealed tightly on at all times when they are not in immediate use.
Categories: Dressings & Sauces · Food · Judaism · Passover · Recipes · Religion & Holidays
Tags: · dairy-free, egg-free, gluten-free, jewish food, lowcarb, photos-food, raw food, vegan, vegetarian
May 4th, 2008 · by Cyndi · 1 Comment
Passover 2008: the year of the gefilte fish disaster.
This is only the second time we’ve made gefilte (gelfilte, gelfelte, gefelte) fish. The stuff in jars is pretty good (some people hate it but I grew up on and adore the stuff) but every last brand has eggs in it. And pretty much all have gluten (matzoh meal), many have MSG, and some even have preservatives. The eggs make it forbidden food in our house.
For Passover 2006, we used a recipe I adapted from two found online:
Yahoo Food
About.com Home Cooking
We used 3 lbs of halibut (I made the mistake of getting it on the bone–what a pain!–though it did mean we had skins for the stock) and simmered it in stock for a couple of hours. It came out well, with good texture (not as compact as the jarred kind, but still firm) but quite bland. With extra seasoning and horseradish, they were quite acceptable.
I would have liked to use carp, but the only decent source is 45 mins away and we didn’t have time. So this year I decided to use rockfish. Partly because it has more flavor than halibut and partly because we were serving halibut for the main course.
I used less fish because it was boneless. And I doubled most of the seasonings.
Gefilte Fish Recipe:
2.5 lbs fresh fish fillets (you can use any white fish or even non-white; we used 2.57 lbs of rockfish
6 large carrots
4 large onions
4 eggs or flaxseed goo replacement (we used 4 TB flaxmeal in 1 1/3 cups water, heated
8 TB almond meal
3 TB salt
1.5 TB white pepper
3 TB sugar
3/4 cup ice water (or as needed)
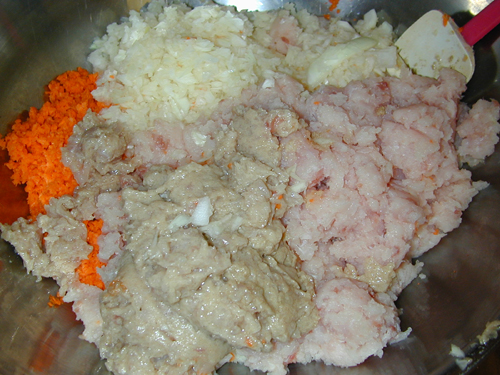
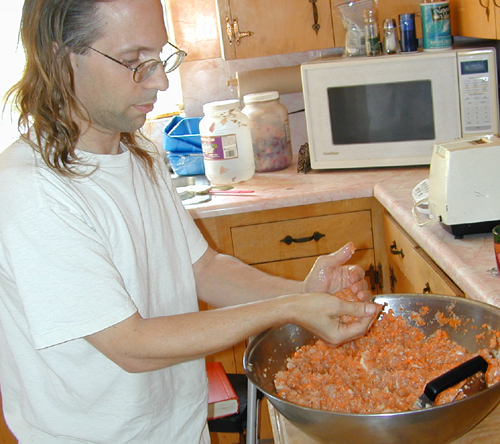
Bone and skin fish, if necessary (save for stock). Food process carrots and onions until fine, transfer to large bowl. Gently pulse fish in small batches. You don’t want total mush but it should be chopped well. Add seasonings in with a fish batch to distribute them more evenly.
Add the almond meal and cooled flax goo to the bowl and mix well with a pastry blender to break up chunks. As you mix, add the water as need to make the consistency right. Don’t add it all unless you need it.
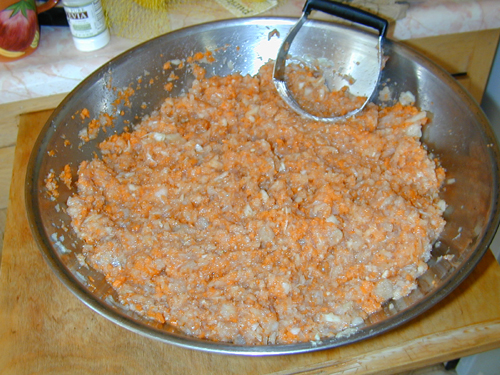
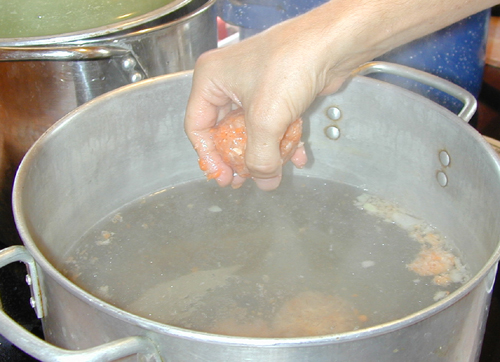
Get the stock going (we didn’t have stock prepared so we used plain water). Then form the mix into small firmly packed ovals.
Gently drop into the simmering water.
Okay, so now you simmer (meaning medium-low heat, no boiling) for 2 hours, remove with a slotted spoon, and chill completely before serving. Easy, right?
Well, no. Our balls totally and utterly fell apart. I figured out that much of the problem was that the water got up to boiling and the pressure of it (all those bubbles) destroyed the fragile balls. But what made them so fragile?
I have a few theories
- I made Michael a cup of water (chilled in the fridge), with strict instructions to add a little bit at a time, as needed, and not use it all. He misheard me and dumped it all in at once.
- The almond meal was homemade (most of it went into the dessert) and pretty coarse. Almond flour would have been better.
- Maybe there were too many carrots and/or onions.
Whatever the reasons, we had fish soup on our hands. Even the best balls were a mess. So I decided to try straining the fish (with pressure on it to squeeze out as much liquid as possible) and sticking it in a mold to chill. I saved the fish broth and froze it.
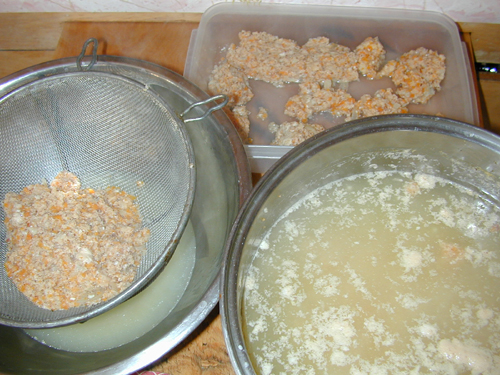
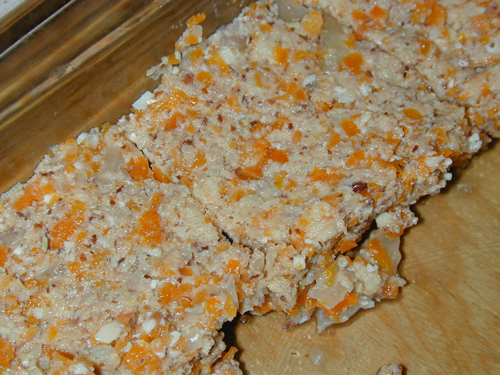
Guess what? it worked! I would have loved a pretty mold, but couldn’t find one (aside from a plastic Christmas mold I have no idea how I got). So I used a glass Pyrex baking/storage dish and cut the gefilte fish into squares.
It came out pretty good. Decent flavor and texture. But next year I’m going to stuff it in a mold and use the water bath method to cook it. Without eggs and wheat (and fancy machinery), it is always going to be a delicate dish.
Serve with plenty of fresh horseradish.
Categories: Food · Judaism · Main Dishes · Passover · Recipes · Religion & Holidays
Tags: · dairy-free, egg-free, gluten-free, jewish food, lowcarb, photos-family, photos-food, seafood
April 29th, 2008 · by Cyndi · No Comments
I make this simple (but time consuming) dish for Passover every year. It’s not a Passover dish persay but it’s become a tradition. Some of my guests count on it being there.
Use quality ingredients and watch the cooking methods and this dish will be perfect. Otherwise, it can be bland or just really off. Start the dish the day before, or at least early in the morning.
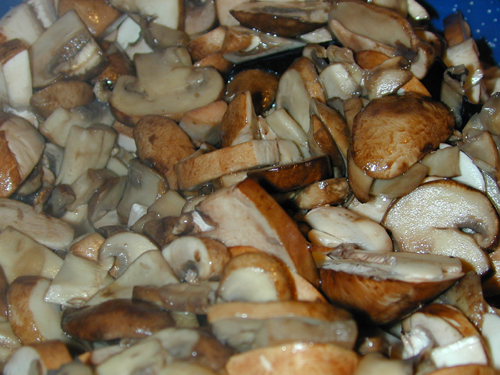
You can make this with white mushrooms, but I don’t recommend it. They have a lot of water and it takes forever to simmer it off (losing flavor as you do so). But be careful with the brown mushrooms too…I didn’t realize this but the Costco ones are almost as watery as white button mushrooms (this is what you see in the pictures). My preference is to get them organic from the United Foods buyer’s club but, when they aren’t available, I just get them (non-organic) from the bulk mushroom bin at Whole Foods.
The sage must be fresh, not dried.
The olives need to have flavor, so no canned “Mission” olives (they are green olives that are over processed and turned black chemically). I use Kalamata usually but have also made it with other black olives. Pitted saves you a ton of time, but you can use whole in a pinch.
Recipe:
5-6 lbs crimimi mushrooms
2 pints black olives (use more if your olives have pits or a lot of brine)
1/2 cup sherry or white wine (the latter if you need it to be kosher for Passover)
Olive oil as needed
Salt (not a lot)
2 small bunches fresh sage (1/2 cup of chopped)
Makes enough for a side dish for 15-20 people (or 8-10 if there aren’t other side dishes).
Note: This recipe is for watery mushrooms. If you are lucky enough to get nice dry ones, you can cut the amount of mushrooms you use by a third or more. Or increase the other ingredients.
Wash the mushrooms then slice. You don’t want to cut corners and chop them in a food processor. Add to a pot with enough olive oil to coat and keep them from sticking. Add more oil as needed. The dish takes a fair amount.
When the mushrooms have started to become glossy and lose that raw look (5-10 minutes or so), add some salt. This will draw out the water. White mushrooms (and cheap brown) will bring out a lot of water.
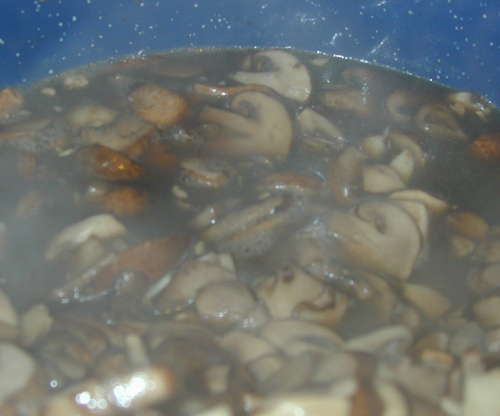
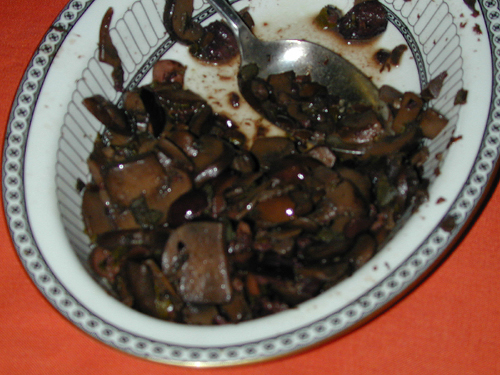
Now comes the tedious part. Keep the mushrooms at medium heat (simmer but don’t boil) and stir often. Don’t cook for longer at lower heat; you will lose a ton of flavor. It will take a couple of hours to get the water off so they look like this.
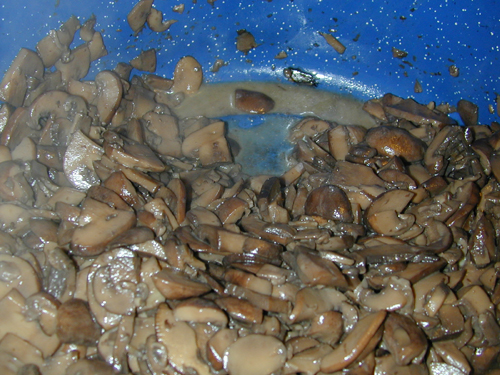
At this point, you are probably tired, so turn off the heat, cover, and leave until the next day. They’ll be fine. Note: if you start with quality crimimi mushrooms, you will only have to cook them for about an hour, you’ll end up with a much larger amount, and they’ll have more flavor.
With the pan hot, add the sherry or wine (sherry has a nicer flavor, but is hard to find kosher). Stir and let that burn off.
Drain the olives and pour one pint at a time on to a cutting board. Rough chop the olives (each one should be cut into at least 3 pieces–much easier with a large chef’s knife) and add them to the pot. Then cut and add the sage leaves.
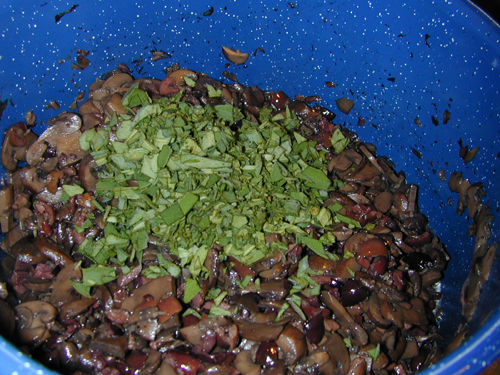
Cook on low heat until everything is warm and the flavors meld. Adjust for salt. You can turn off the heat at any point and let the pot sit there. Just before serving, reheat.
This dish keeps well in the fridge and can be reheated several times.
Categories: Food · Recipes · Vegetable Dishes
Tags: · dairy-free, egg-free, gluten-free, lowcarb, photos-food, vegan, vegetarian
April 28th, 2008 · by Cyndi · No Comments
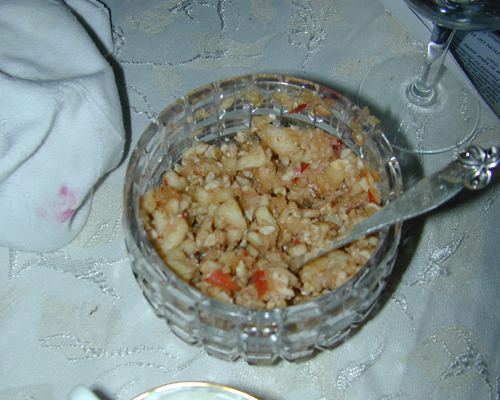
If you ask an Ashkenazi Jew (of Eastern/Central European origin, most American Jews) the recipe for charoset, you will generally get one answer: chopped apples, honey, wine, nuts (walnuts and pecans are popular), and (often) cinnamon. This version is so popular that many Haggadahs list it as such and I’ve had Jews tell me it isn’t charoset if it’s not made this way.
Fortunately for our taste buds, variety is allowed. This may be the most popular recipe in the US, but it’s far from the only possibility. Charoset is a ritual food used during the Passover seder so there are some qualities it needs to have. It is the reminder for mortar, which Jews in ancient Eqypt used to make bricks, one of the main tasks set upon them during centuries of slavery, according to the Torah.
I’ve had some wonderful non-apple-based charosets over the years, and I thought about making one of them for Passover this year (2008) but we were making several new dishes and that was too much. I love the traditional kind though.
No exact measures here. So much is personal preference. This recipe makes enough for 20 people, often with some leftovers. It depends how much your family and guests like to eat. And if you want enough to last you all week (makes a nice dessert, or works as a side dish with dinner, especially with leftover horseradish).
Recipe:
6 large apples (I’ve found Braeburn to be the best)
A bit of fresh lemon juice (optional, if you’re working with a lot of apples)
2 cups walnuts
Honey to taste
Splash of red wine (or grape juice; we’d use more wine if there weren’t children)
1 TB or so cinnamon
The rest is pretty simple. Chop the apples. Michael generally does half to a semi-paste in the food processor and half chopped by hand. You can add some nuts too to make a paste or grind them coarsely.
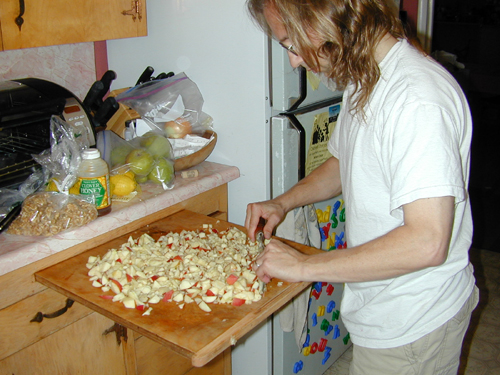
Then mix in the other ingredients. Serve chilled or at room temperature. Because of nut-allergic guests, we always make a nut-free version. Sometimes we make a grape juice one too.
Categories: Desserts · Food · Judaism · Passover · Recipes · Religion & Holidays · Spreads & Dips
Tags: · dairy-free, egg-free, gluten-free, jewish food, photos-family, photos-food, raw food, vegan, vegetarian
April 26th, 2008 · by Cyndi · 15 Comments
This year, I made my own Passover matzoh. Why on earth? Because Miriam and I don’t do well with gluten (we can cheat once in a while, but not two days in a row). So I wanted it to be gluten-free.
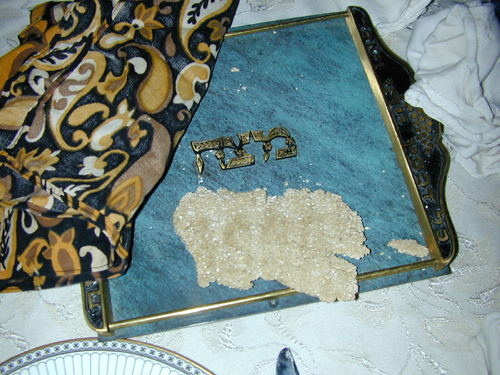
Matzoh (aka matzah, matza, matzo) used during a Passover seder must come from one of five specific grains: wheat, spelt, rye, barley, and oats. The first four are all gluten grains. These grains are forbidden during the eight days of Passover unless they are in matzoh form. There are other crackers you can make that are perfectly acceptable for use during Passover, but they aren’t from one of the five grains, so they can’t be used for the blessing.
This leaves oats. Oats are in the grass family but a different subsection from the gluten grasses/grains. They don’t have any gluten themselves but are closely enough related to gluten grains like wheat that a few gluten-intolerant folks also can’t have oats. But the vast majority of celiacs and others who are gluten-free who react to oats do so because they are almost always harvested and processed on the same equipment as wheat, so they are contaminated.
There do exist gluten-free oats; where the growers and processors take special care not to contaminate them. So far, they are expensive and don’t come organic. This will probably change in the future. Bob’s Red Mill is one supplier.
And there is a company that takes those gluten-free oats and makes Kosher for Passover matzoh from them. A Godsend for many Jews!
Shemura Oat Matzos
Also sold through MatzahOnline and distributed in stores in the US, Canada, South Africa, Israel, the UK, and Australia.
But, at $35 for a box of 3 (that’s the round handshaped, though the regular aren’t much less), plus shipping, yeah…well, maybe not.
So, I decided to make it myself. Some frum (strictly observent) Jews won’t make their own matzoh at all, because of some picky things that can go wrong. Others will do it but won’t accept my method, because I used oatmeal, which is already cut up. I would have tried oat grouts, but I wasn’t sure I could grind them with the equipment I have.
I’m not frum or Orthodox and my Rabbi (Conservative) is cool with my doing my own matzoh, so that’s good enough for me. I did take care with the preparation though.
The basic rules are:
- Every piece of equipment you use must be completely cleaned of grain residue.
- No yeast or other leavening may be added.
- The time from the first possible contact with water, until the matzohs are safely in the oven baking, must not exceed 18 minutes.
Technically, this means oatmeal or oat flour is out because it could have contacted water during the grinding process, but I used oatmeal anyway. I couldn’t find oat flour. I am not sure how acceptable oat grouts used in this way would be to a frum Jew and I would be curious to find out.
Recipe:
2 cups oatmeal
1 tsp salt
1/2 cup water
Makes 2 large matzohs
You can double (etc) the recipe, but be sure to have extra hands to help if you are doing this within the time limit. I think I could have easily doubled it and been fine by myself, but I wanted to test the recipe and make sure I could do it fast enough, so I made two batches, each with the above amount. I carefully washed everything in-between batches.
For my first batch, I used 1/2 tsp salt (not quite enough) and worked quickly without being hurried. I got them into the oven in under 10 mins. For the second batch, I worked slowly but without distraction. I made it in about 13 mins.
I started the clock when I poured the oatmeal into the measuring cup, since it was slightly damp from rinsing and drying.
Instructions:
Measure the oatmeal, pour into a food processor with a normal blade, or the grinder of your choice. Grind fairly fine, with the salt, at least so 2/3 is flour, if not more.
Set aside a bit of flour and put the rest into a bowl. Add most of the water (most of the recipes for wheat matzoh call for 2 or 3 times the amount of water. To my surprise, the oats on took half a cup).
Knead the dough well, adding more flour or water as needed. Spend a good 2-3 minutes on kneading.
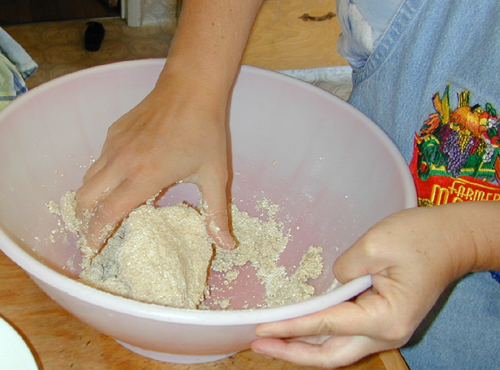
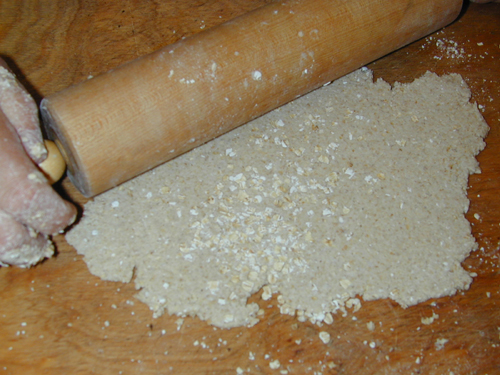
Put on to a surface, use the extra flour for the top and bottom, and roll out with a rolling pin. You want it as thin as possible without breaking. If you are a skilled baker, your results will not look like mine.
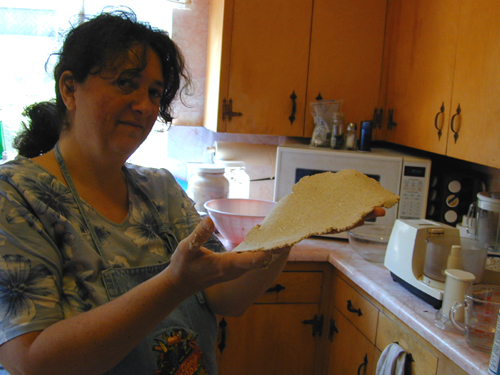
Use a dough scraper, or other wide thin utensil, to pick up dough in one piece.
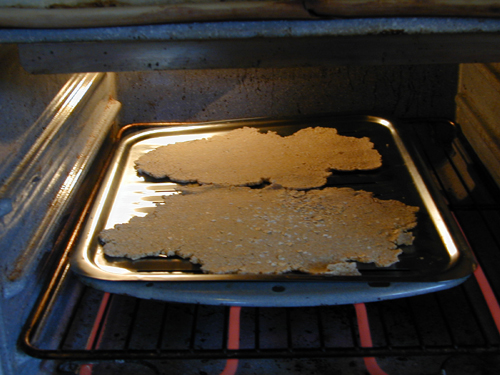
Place on to an unseasoned baking tray. I used a broiling pan so the heat would distribute more evenly. Bake at 400*F for several minutes, until crisp. Turn once halfway through. These took about 13 minutes or so to cook. They may be slightly bendy when they come out, but they’ll firm up as they cool.
Don’t make the mistake we did and store them in a container when still warm. Let them cool first. Otherwise, they start to get soft again. Ours were slightly leathery after a couple of hours.
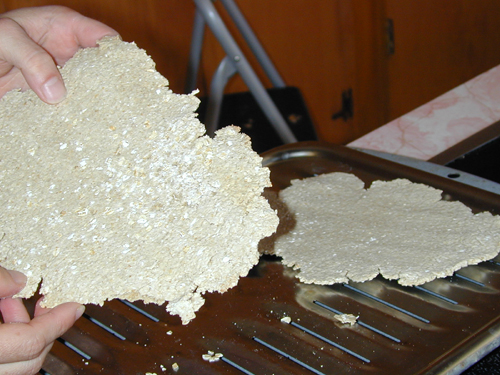
These matzohs have real flavor. No cardboard crackers here. Our seder guests inhaled them. Usually we have lots of leftover matzoh, but this time we were lucky to have enough for the Affikomen.
Links:
Matzoh Unleavened Passover Bread
Basic recipe and instructions for making your own. Assumes you are using wheat or spelt. 2 cups flour to 1 cup water.
How to Make Homemade Matzoh Bread
Recipe and instructions using a speciality flour (probably wheat). 3 cups flour to 1 cup water.
What is Matzah?
No recipes but general info and a cool picture of homemade matzah.
Mission: Possible – Gluten-Free (Mock) Matzo
Almond-based Passover-safe cracker recipe. Full recipe with pictures.
Categories: Food · Grains · Judaism · Passover · Recipes · Religion & Holidays
Tags: · dairy-free, egg-free, gluten-free, jewish food, photos-family, photos-food, vegan, vegetarian
April 23rd, 2008 · by Cyndi · No Comments
Borscht is a Russian and Jewish beet soup that can be made with or without meat, served hot or cold. The cold versions are often served with sour cream (unless it’s a Jewish recipe and it has meat). There are many variations. The addition of ginger and carrots is my own invention, though I doubt it’s unique. My borscht is vegetarian, served cold, with sour cream for those who want it.
Although you can serve borscht year-round, I almost always make it for Passover. This year was no exception. To me, beets are a necessary part of the holiday and, if I don’t make borscht, I will make another dish featuring beets.
Recipe:
6 large beets
8 large carrots
8 stalks of celery (about 1/2 bunch)
3″ fresh ginger root
Salt to taste
Fresh lemon juice (1 slice per bowl, or about 4 lemons’ worth per recipe)
Makes about a gallon of borscht, which is enough for 2 dozen bowls, plus some leftovers. Feel free to scale the recipe up or down to meet your needs.
Note that this is a raw recipe, aside from the beets. One day, I’d like to try it 100% raw, but I need to find a way to soften the beets.
Wash the beets well, cut off greens if any, and place in to a soup pot where they are covered with water (use filtered, not tap). Simmer until fork tender (a fork goes in but not with great ease), about an hour. Remove beets from liquid and soak in cold water to cool (or cool slower with no water). Don’t discard the cooking liquid.
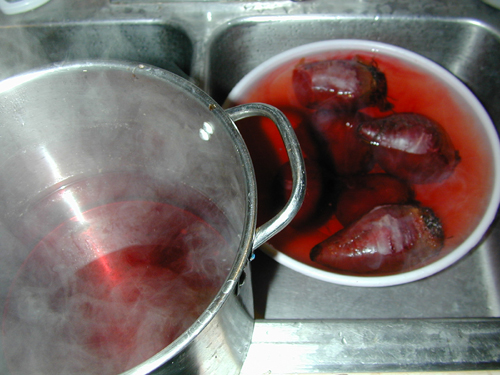
Once cool enough to handle, the skins and tops of the beets will slip off in your hands. Compost the skins and put the beets back into cool water if they are still hot.
Using a large-holed grater, grate the beets into another container. They can be completely cooked through or slightly raw in the middle, as per your preference. I like them more on the raw side.
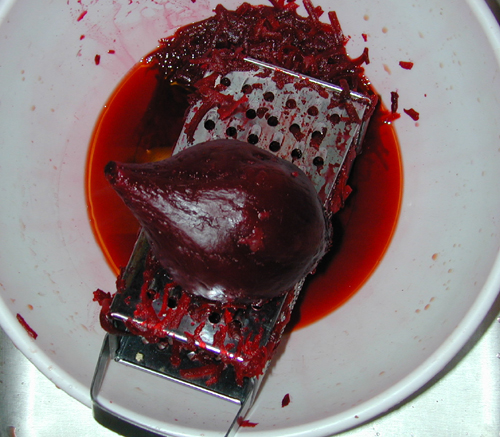
The liquid in this bowl is leftover from the pot (which I emptied for the carrots and celery). I removed two quarts of broth (one went back into the soup later and one got frozen).
Food process the ginger with the carrots and celery and put back into the empty pot.
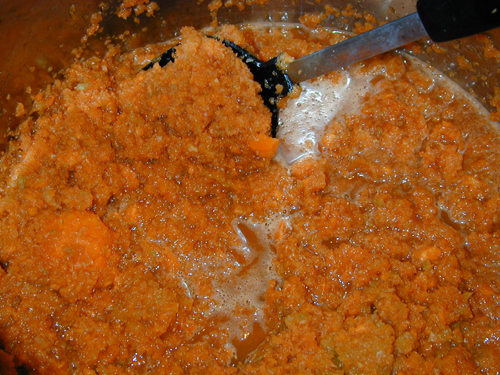
Add the grated beets, season as desired, then add as much broth as you wish to get the right consistency. I like this soup thick, almost like a stew, so I only added back one quart.
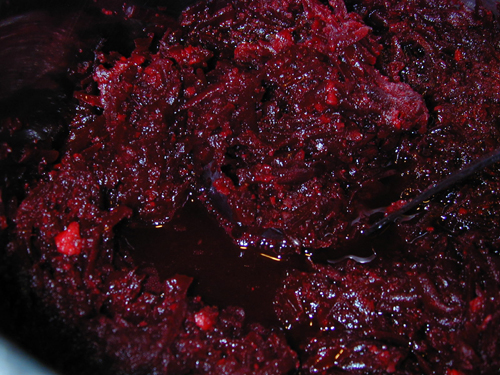
At this point, you can add the lemon juice. I generally do not because one of our regular Passover guests is allergic to citrus. I serve lemon wedges on the side and strongly encourage people to add the juice from a full wedge (1/6 of a lemon) to each bowl.
Chill until ready to serve.
Good as is or with a dollop of sour cream.
Categories: Food · Passover · Recipes · Soups
Tags: · dairy-free, egg-free, gluten-free, jewish food, lowcarb, photos-food, vegan, vegetarian
April 23rd, 2008 · by Cyndi · 4 Comments
I made this lovely torte (or is it a tart? or maybe a cheesecake?) for Passover this year. It was a gamble, since we had never made it before, and didn’t have much of a recipe to go on, but it came out wonderful. Many thanks to Jessica of Foodlab for the idea.
The original recipe was:
“For dessert, I’m going to make a fruit tart. The shell will be ground nuts (I’ll use almond meal, but any will do), coconut oil and honey pressed into a tart shell with removable bottom. I’ll bake the shell a bit and when cooled I’ll fill it with lemon flavored macadamia nut cream (soak nuts in water for half a day, drain and blend with enough water to make a ‘cream’ and add flavorings if you desire). Then I’ll top it with fresh berries and fruit.”
We’re not sure what a tart shell with a removable bottom is, so we decided to just make it in a springform pan. We’ve done nut crusts and nut creams before, so putting them together shouldn’t be too hard.
The day before the seder, I soaked the macadamia nuts in water.
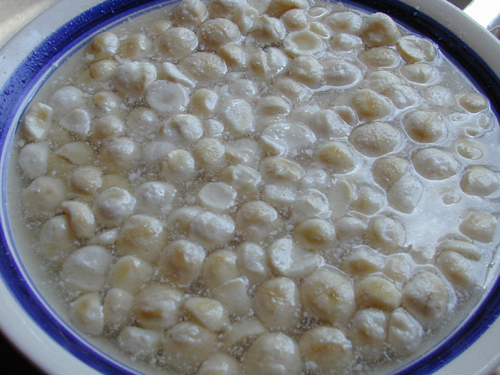
After about 18 hours, they come out pretty scuzzy looking. But, don’t worry, they clean up good.
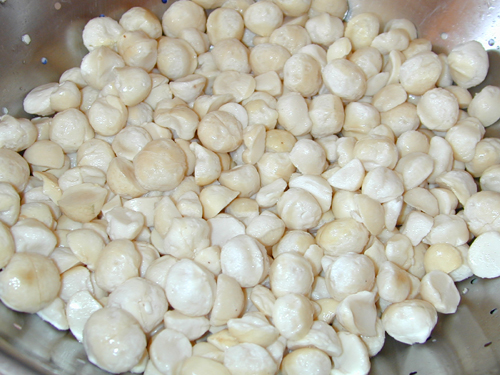
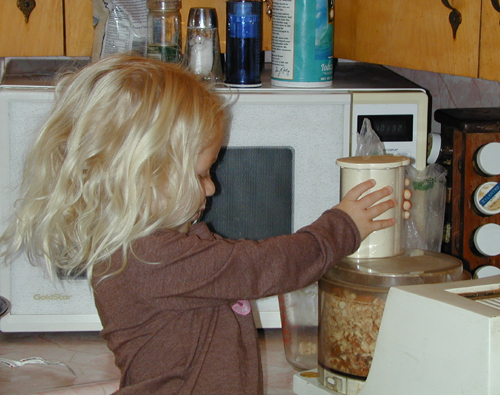
The day of the seder, we made the crust. First we ground the almonds into meal.
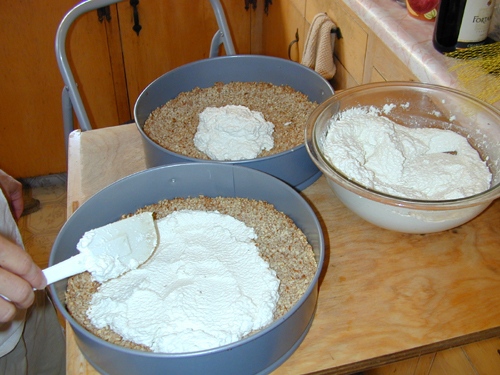
Next, Michael measured the meal in the springform pans (we used two) to gauge the correct amount.
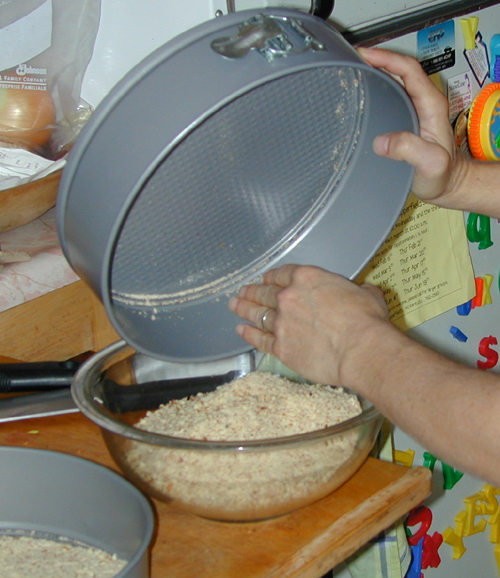
Crust Recipe:
6 cups almond meal
9 TB solid oil (we used a combo of coconut and palm shortening)
1 1/2 TB honey (I’d use 3 TB next time)
Makes enough to fill two 10.5″ diameter springform pans
Press finished crust into springform pans, making a lip of about 3/4″ up the sides.
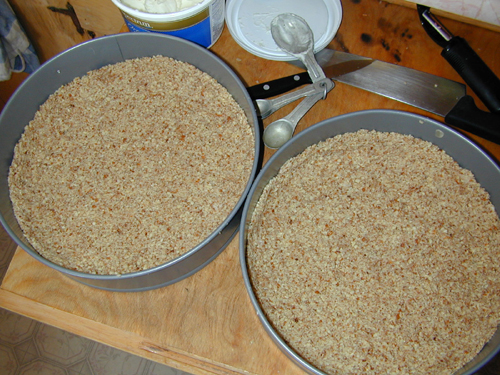
We baked the crusts at 350*F for about 10 minutes. If you want a totally raw dish, leave the crusts out for a few hours or pop into a dehydrator, just to help them stick together (and slightly tweak a couple ingredients).
Macadamia Cream Filling Recipe:
18 oz raw macadamia nuts (soaked overnight then rinsed)
Zest from 2 lemons (about 1 TB)
Juice from 1 lemon
3 TB honey
Several dashes stevia powder (to boost sweetening)
1 TB vanilla (we accidentally left this out)
1 tsp salt
2 1/4 cups water (use more or less, as needed)
Makes 7 1/2 cups.
Soak and rinse nuts. Grate the lemon peel to make zest.
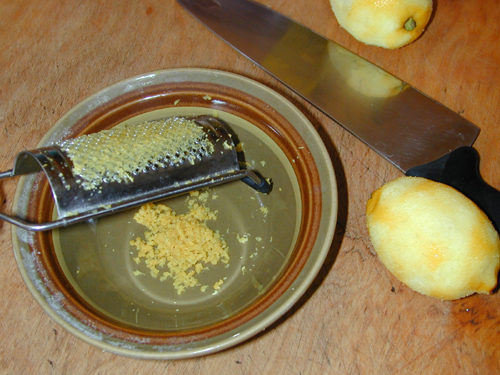
Add the rest of the ingredients (except all of the water, which should be added as needed) to the blender and blend until very smooth. It helps to do it in small batches, starting with very little liquid at low speeds. Add enough liquid to get it moving, increase the speed, and add more nuts. It’s hard to get this fully creamy–it had more of a ricotta texture than a cream cheese one–and I suspect we might need a better blender. But do make sure there is no grit, which takes several minutes. Put cream in fridge to solidify.
Put the cream into the crusts and pop everything back into the fridge until you’re ready to serve.
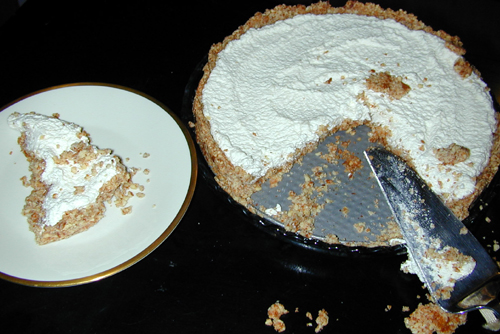
Remove the springform ring and you’re ready to cut and serve. Best with some berries or other fruit on top. We used blueberries.
Some notes: the crust could have been sweeter. Some extra honey would have done that and helped it stay together more. Or you can put dates into the food processor with the nuts. The nut crust was good but a bit chewy. Next time, I’ll leave some nuts as they are in the pictures but process others more finely. We also should have had more fruit, though it was great without any too.
Categories: Desserts · Food · Recipes
Tags: · dairy-free, egg-free, gluten-free, lowcarb, photos-family, photos-food, raw food, vegan, vegetarian
April 17th, 2008 · by Cyndi · 5 Comments
I go to Expo West for my soap business, Tikvah Organics but, for the past several years, Michael and Miriam have joined me and we turn it into a vacation. Miriam charms exhibitors by asking for seconds of foods like pickled herring, I make business contacts and get to stuff myself silly with the latest products, and Michael gets to carry increasingly heavy bags (he has fun too).
Expo West is held in the Anaheim Convention Center. As disability accommodation goes, it’s not terrible, but of course could be better. The spread out nature of the center, along with few elevators, make wheelchair navigation tedious, and the carpets everywhere don’t help (they are often plusher in the booths, which puts a strain on the shoulders).
The air quality is better than many other places, but that isn’t saying much. Last year, they made a huge effects to make the Expo “green” and they advertised lower-VOC carpets, safer cleaning products, and all sorts of stuff. And it really was better. I noticed the difference right away. This year, the bathrooms were cleaned (during show hours!) with nasty stuff and the carpets were the ordinary toxic variety.
The biggest problem for me is cigarette smoke. Of course it’s forbidden inside, but people smoke right outside the doors (in droves) so the lobby tends to fill up with smoke due to leakage and people going in and out of the doors. A few signs and some comfortable seating areas for smokers away from the doors would ease that considerably.
Driving there is a nightmare. We commuted from LA, which was a 30 to 90 minute drive, depending on traffic (even outside of rush hour). In the morning, the worst of it is in the last 2 blocks. On our first day there, it took us half an hour to go those two blocks, past Disneyland, to the parking lot. Parking is difficult at best (and expensive) but flashing a handicapped dashboard sign was like the key to the magic kingdom. We were ushered in to the main lot where there were plenty of handicapped spots (last year they were hard to get). Note: our friends with handicapped licence plates said that they had trouble getting into the lot because the folks directing traffic didn’t notice them (it’s very crowded and hard to get people’s attention as you get your 2 seconds by the entrance before traffic urges you on).
I would gladly get a local hotel and walk, but I’m not sure any of them will be MCS-safe. The show is toxic enough that I have to have a 100% safe place to go afterwards (we stay with a friend).

Over the next few weeks/months, I’ll be blogging about what I discovered. I shared some finds at the Los Angeles Foodlab get together and I have many more bags of samples and literature to go through.
Here are some of my favorite finds:
* Mary’s Gone Crackers now has a thick straight pretzel shape with new flavors. The best part is that, unlike the crackers, they are soy-free. All their products are organic, vegan, and gluten-free.
* Coconut juice/water was hot this year, with several booths, including some of the bigger ones that sample in the lobby. My favorite was ONE (which tastes like the real thing) but there are other good ones too.
* Gluten-free is also really hot, which isn’t necessarily a good thing. When you depend on a type of product, the last thing you want is for it to become trendy. That’s how you lose it. A couple years ago, the hot thing at Expo West was lowcarb. It had its own section and tasting buffet. By the next year, it was practically gone.
* Gluten-intolerance digestive enzymes. I found these at a booth specializing in enzymes. I am not one to be easily impressed by supplement claims, but these folks knew their stuff. The product is designed to reduce symptoms for accidental exposures to gluten. They are clear that celiacs must continue to avoid gluten. For people with non-celiac gluten-intolerance, they say increased ability to consume gluten is a possibility.
Stayed tuned for reviews of other products, including cosmetics, personal care, candles, pet food, a trillion food products, fiber/yarn, and more.
Reviews so far:
* Safer cosmetics
* Sharkies Organic Sports Chews
* French Meadow Bakery

Categories: Event Venues · Places to Go
Tags: · MCS, orange county, photos-family, photos-places


