October 18th, 2008 · by Cyndi · 3 Comments
We hosted a potluck for Sukkot this year and told everyone we would provide the challah. The last shabbus potluck we went to had regular challah and Miriam ended up with some symptoms due to cross-contamination from the eggs (part of the ritual is breaking the bread with your hands; while we don’t do that of course, others we ate with did and, despite their trying to avoid it, the crumbs spread).
At our last time hosting a Jewish potluck with these friends, we made a great challah from a Pamela’s bread mix. It came out great and worked well with a braid too. But Miriam had her first life-threatening allergic reaction in August and our top suspect is tapioca (negative in the allergy testing but we’re not letting her have it until we can do it in a controlled manner with medical backup). As anyone gluten-free for a while knows, pretty much every gluten-free bread mix or product on the market contains tapioca. It’s a great flour, but Pamela’s has it too and we just can’t take the chance.
I ordered some more of Primavera’s fabulous organic masa and was going to make tortillas (to go with the ceviche I made for the main dish). Then I thought…what if I braided and baked it instead?
First I took the fresh masa, scooped some chucks out of the bag with a spoon, evened them out, and rolled them into 3 balls.
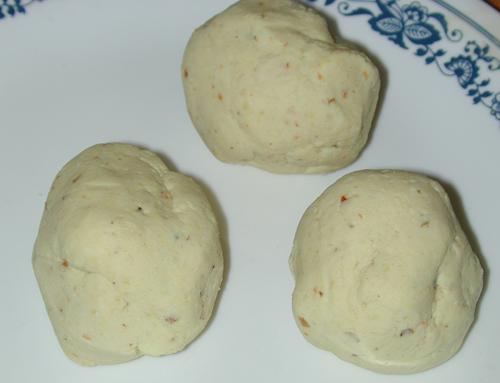
Masa rolled into balls
Then, I rolled each ball into a log.

Masa balls rolled into lengths
And braided it, crimping the ends well and pushing down on the dough so it wouldn’t come apart.
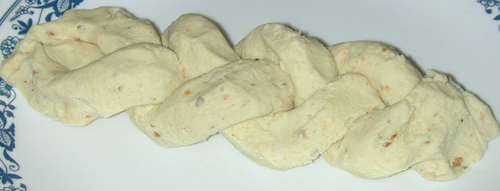
Braided dough
Then it went for a roll (all sides) in a plate of sesame seeds. I added some oatmeal so it would be “bread” we could say Hamotzi over. This is completely optional if you don’t need it for religious purposes. The oats didn’t change the taste or texture at all. If you react to the wheat contamination in most oats, use ones certified gluten-free. The sesame, on the other hand, was delicious and added a nice crunch.
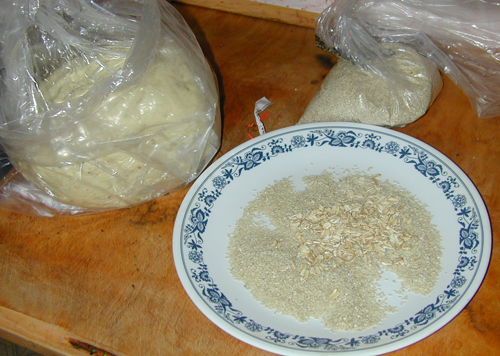
Sesame seeds and oatmeal
I carefully moved each loaf to a baking pan generously coated with olive oil.
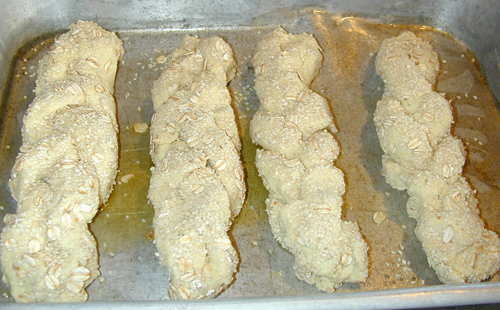
Challah ready for baking
I baked them at 325*F for about 35 minutes, turning once halfway through (use two spatulas so they don’t break apart). I left them in the oven with the heat off for another 10 minutes or so.
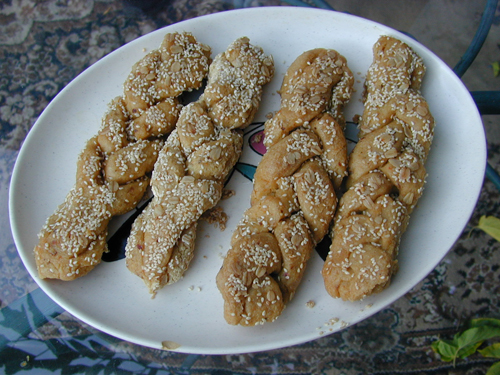
Finished challah
Miriam ate about half of what was there and the rest of us made sure the plate was empty. Even the nonallergic folks thought it was fabulous. It came out dense and chewy, almost like a bagel (hmmm…) but still light enough to have the mouthfeel of bread.
I’ll have to experiment a little. The oil kept it from sticking and also made it richer, which was what I was going for. Without the oil, it might taste more like a tortilla. But, overall, I’m very happy with how it came out.
Happiness is a little girl jumping for joy singing “it’s challah that doesn’t make me sick!!!”
Categories: Food · Grains · Judaism · Recipes · Religion & Holidays · Shabbus
Tags: · dairy-free, egg-free, gluten-free, jewish food, latin food, photos-food, vegan, vegetarian
October 12th, 2008 · by Cyndi · No Comments
We only had one day to spend in Portland, Oregon and it was a scorcher. We decided to do our neighborhood roaming in the morning and then find indoor spots for most of the day. We then met friends for dinner.
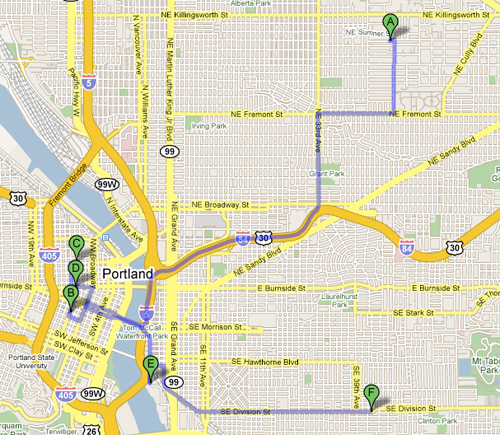
Portland Travels Overview
We drove up and down Alberta & Killingsworth Streets and walked about in an area with some interesting looking stores. It was mostly too spread out for walking and most places were closed early Saturday morning.
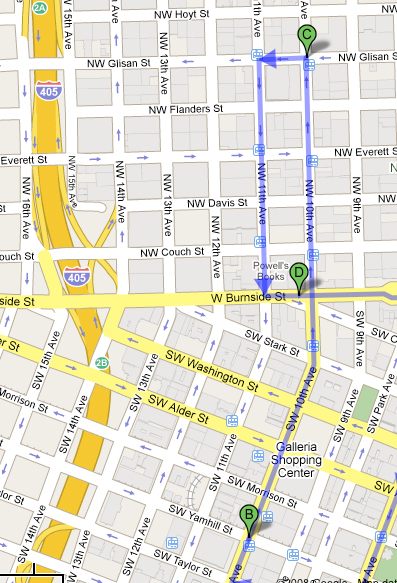
Portland Downtown Area
This was a great spot to kill a few hours. We drove there and managed to find parking. Note for Portland newbies: there is a huge difference between east and west. Many of the numbered streets duplicate. Downtown is west. (more…)
C) Portland Streetcar to the Pearl District. Downtown.
Right in front of the library, on SW 10th Ave, there is the Portland Streetcar that runs often and is free in the immediate downtown area. We took it north to a neighborhood called the Pearl District, which was a fun place to walk around and see the sights. We popped into Whole Foods for a quick bite to eat (including a grilled peach with berry sauce dessert which was a free sample) and a safe bathroom. Then we zigzagged a bit along the main parallel streets until we reached the southern edge of the district where Powell’s was.
This local chain is a Portland institution and this branch is the largest. Several stories on practically a whole city block. We could have spent days there. The bathrooms are scented. The building has elevators and is basically wheelchair accessible, if you don’t have to reach too high. There are plenty of places to sit, especially in the children’s section, which has tables and chairs like a library.
Known in Portland simply as OMSI, this 2 story building filled with exhibits for all ages was a nice way to stay cool. (more…)
F) Kalga Kafe. 4147 SE Division St.
Lovely vegetarian restaurant. Great place to meet friends and end the day. (more…)
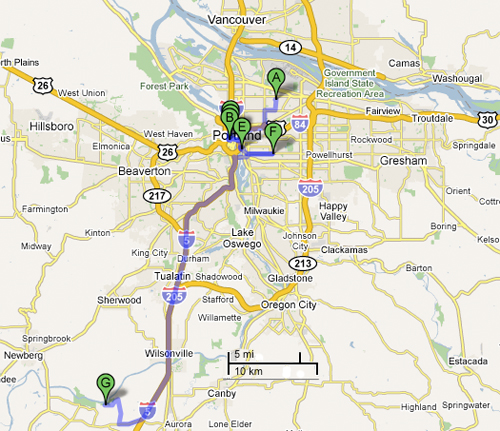
Greater Portland Area
After our day in the city, we went back to Champoeg State Park. A mere half hour drive away, it was an inexpensive way to be close to town.
Categories: Places to Go · Route Planning · Travel
Tags: · oregon, photos-misc
October 6th, 2008 · by Cyndi · 1 Comment
When we were trying to figure out what to do on our one day in Portland during a heat wave, we met some moms in Salem who said we should go to OMSI. To where? To the Oregon Museum of Science and Industry. An entity big enough in Portland to warrant its own set of freeway signs.
Oregon Museum of Science and Industry
1945 SE Water Avenue, Portland, OR 97214-3354
(503) 797-4000 or (800) 955-OMSI (6674)
http://www.omsi.edu/
Hours: Tuesday-Sunday 9:30am-5:30pm (plus Mondays of school holidays; summers open until 7pm)
Prices: $11/adults, $9 kids & seniors, under 3 free. Show your AAA card for a discount. OMNIMAX, Planetarium, some rides & shows, extra.
Parking: $2 but they didn’t actually charge us for it.
It was dinosaur month and they had a special exhibit. A couple of the dinosaurs moved and roared and it took Miriam a few minutes to believe they weren’t going to jump the wall and come after her. Then she asked to go see them and had fun. Even looking at the pictures as I was writing this, she said, “oh I am so scared” (half kidding) and added “are they alive?” We were there almost two months ago but she remembers…

Cyndi & Miriam
They had both full-featured dinos and some that were just skeletons.

Miriam & Michael
And of course some silly tourist stuff.

Michael & Miriam vamp for the camera
Since we had gone to A.C. Gilbert’s Discovery Villiage in Salem the day before, I was a little concerned about doing science museums two days in a row. But the places were quite different and Miriam had a blast both times.
OMSI features an OMNIMAX Dome Theater, a Planetarium, and Laser Light Shows, which all cost extra, so we didn’t go. The Featured Exhibit when we were there was the dinosaurs but now has switched to something else.
They also have a Science Playground for children 6 and under, which is a large room with places for parents to sit down and watch their kids play. Any child over 3 would be bored there. The Life Science Hall and Earth Science Hall have a bunch of interactive exhibits that range from fun to lecturey to broken. Most were geared for elementary school age children. Some were old and outdated and some of the newer ones were very patronizing.
They have several labs (chemistry, physics, marine science, etc) there which are mostly for elementary and secondary school aged children.
Where we spent the most time was Turbine Hall, which, ironically, is free to the public. Here you find all the hands on hard science fun that I experienced at science museums both as a kid and as a teacher a couple of decades ago. Miriam’s favorite was the Earthquake House, a little cottage on a moving platform that rocked and rolled to the sounds of Carole King (I felt the earth move under my feet…no, really).
Accessibility: The building is two stories and there are stairs, escalators, and elevators. There were plenty of places to sit and rest around all the exhibits and the hallways and lobby. As I recall, the bathrooms were pretty stinky (air freshener or cleaning product fragrance) but not completely unusable. Some of the labs (the chemistry lab mainly) emitted very strong chemical smells that wafted out the door into the Hall. Something was going on in the building at large because I had a headache and the typical spaciness/fatigue that comes with exposure. I can’t pinpoint it though.
For a 3 year old, this is a great place to go once in a great while. I hear that older children (in the 10 year range) love the place. And they seem to have enough fun to keep teens occupied too. A toddler would have enough interesting things to keep busy. It’s the 3-6 range that might be a bit weak, but then we didn’t explore every area they had. It certainly was a good way to stay cool on a hot day.
Categories: Museums · Places to Go
Tags: · oregon, photos-family, photos-places
October 2nd, 2008 · by Cyndi · 1 Comment
At the end of our day-long trek into Portland, we met up with a friend and her son at Kalga Kafe, a vegetarian restaurant in the southeast part of the city. Dinner hours are 5pm-midnight (it serves lunch weekdays) and it hosts live bands some evenings. Since this was a Saturday night, we thought we end up with more entertainment and less quiet conversation, but the restaurant wasn’t booked that night and we had the place nearly to ourselves (we had an early dinner; more customers arrived as we were finishing).
Kalga Kafe
4147 SE Division St
Portland, OR 97202
Phone: (503) 236-4770
Hours: Daily 5pm-12am
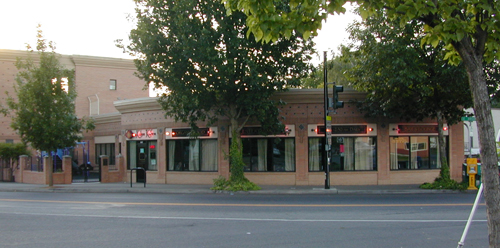
Kalga Kafe exterior
Despite what some reviews I read say about slow or indifferent service, ours was excellent. Our young pierced server was friendly (without being intrusive), knowledgeable about the food, and more than willing to deal with our various food restrictions. Actually, the restaurant is used to those: nearly any dish can be made vegan (most are already) and they’re good with gluten-free.
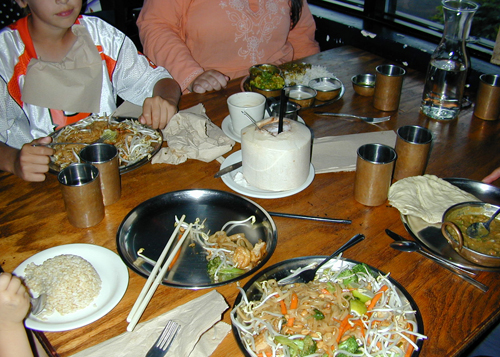
Kalga Kafe food
We started with a couple of young coconuts. I buy them to open at home, which is quite an undertaking. Getting the coconut water out is easy (hammer and screwdriver) but getting at the meat is harder, especially if you don’t empty the water first. Kalga’s were very fresh and filled to the brim with water. I remarked to the server that these must have been topped off but she said no. She just whacks off the top and sticks a straw in (use a spoon for the meat). I was impressed.
Our friend had a gluten-free vegetable-based dish (if I have any hopes of being a good restaurant reviewer, I’m going to have to bring home menus or at least take pictures of it; I couldn’t find one online) and Michael had a curry.
Our friend’s son and I both had Pad Thai with tofu, which is one of the restaurant’s most popular dishes, and for good reason. It was fresh and tasty and a large serving. The noodles are rice but there is wheat in the soy sauce. They can make the dish gluten-free but, for some reason, don’t have a gluten-free sauce to use. The dish was already vegan so no worries about egg.
Miriam had some brown rice and tastes of other dishes.
The atmosphere was calming and peaceful. Pleasant decor and no annoying new age touches. The bathrooms were unscented. All one level with easy wheelchair access (can not recall about the bathrooms).
Links:
Categories: Food · Oregon Restaurant · Restaurant Reviews
Tags: · asian food, dairy-free, egg-free, gluten-free, oregon, photos-food, photos-places, vegan, vegetarian
September 28th, 2008 · by Cyndi · 2 Comments
I’ve lived in cities with large central libraries before (like Boston) but the locations I’ve lived recently tend to have smaller ones (with access to more books via inter-library loan). Portland has one of those old-fashioned but refreshing monuments to reading. A library where you actually want to spend time, not just kill it.
Multnomah County Central Library
801 S.W. 10th Avenue
Portland, OR 97205
(503) 988-5123
Three floors of book collections. Grand old staircases (and an elevator). And a children’s room to die for. This place is bigger than some local branch libraries I’ve been in.

Children's room at the Portland OR Central Library
The bronze tree marks the front desk and it’s a beautiful sculpture (more pictures). The wood wall to the left leads to a playarea/mini theater. The tables have puzzles on them. And the rear room stretches back further than the picture.
As you can probably guess, I spent most of my time in the children’s section, but the rest of the library was just as spacious. The bathrooms had some light scent but were quite usable.
Right in front of the library, on SW 10th Ave, there is the Portland Streetcar that runs often and is free in the immediate downtown area.
Categories: Libraries · Places to Go
Tags: · oregon, photos-family, photos-places
September 28th, 2008 · by Cyndi · 1 Comment
Our first day of travel from Petaluma, CA to Vancouver, BC was our worst. We took I-5 and, despite keeping the A/C on recirculate and me being on oxygen, I got pretty sick from the pesticide exposures driving past all the agriculture. Miriam was in even worse shape. Screaming, tantrums, and two episodes of extreme potty messiness.
So we were really looking forward to our planned lunch time stop. Mt Shasta, just east of Mt Shasta City, which is past all the bad I-5 air. A couple people recommended stopping at the health food store there, Berryvale, but we never saw it. The town has several blocks of stores (and looked pretty interesting).
Once on the road, I realized I’d forgotten to put directions to the mountain on my palm. Fortunately, it was on my map. We took the first exit into town (should have taken the second, more northern, exit) and followed the signs to the visitor center. The folks there were nice and the building was tolerable and reasonably scent-free. The restrooms had a slight scent but I did not need my mask for the short time inside. We got a street map of the town with directions to Panther Meadows.
A friend told us “Panther Meadows in August is something not to be missed. The flowers, the fresh air, the streams, etc. are pretty spectacular…it is only a few hundred feet from the parking lot, so even kids can do the walk.”
I definitely feel like we missed something. The drive to Panther Meadows was easy enough, and we had no problem finding it, but we saw nothing special.
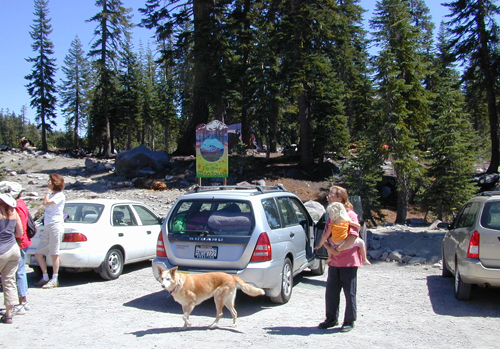
Panther Meadows
This was it. A small dirt parking lot, with some campsites a few feet away up the hill, lots of rocks, and a few trees.
We were all tired and cranky and starving and I had a splitting headache. But there was no place to sit down, let alone eat. The picnic tables were for the campsites, and they were all full. We were told there was a one mile loop trail through the meadow; we saw what might have been a trail head, but nothing was marked. We asked, but no one seemed to know where the trail or the meadow was. I asked about the wildflowers and people just shrugged.
One arriving camper came over and said we were in the wrong parking lot. That if we went a bit further, we’d get to the Panther Meadows day use lot and that it had picnic tables. And that there were other areas with tables too.
There was no other Panther Meadows area. We passed what must have been the meadow (with no way to drive in) but no there were no wildflowers. It was hot and dry and most of the non-tree plants were dormant. It was a lot cooler on the mountain than in the valley. Along I-5 our outdoor temp gauge read 103. But it quickly dropped to 80 as we climbed.
We passed a lone picnic table or two. In the sun with nothing around. We went to the end of the road and found several tables. Still in full sun with rocks and the occasional tiny shrub hanging on for dear life. But there was a nice breeze.
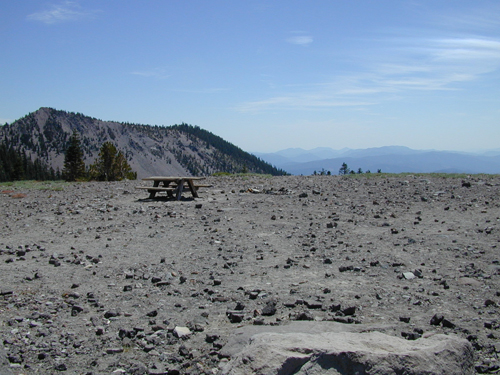
Picnic table on the top of Mt. Shasta
We were nowhere near the top of the 14,162 mountain, but we were well above the 7450 feet of Panther Meadows.
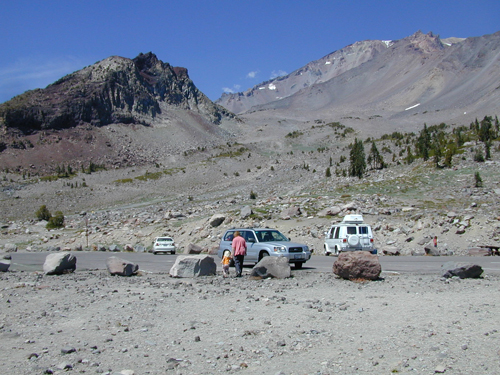
Looking at the top of Mt. Shasta from uppermost parking area
The road up was a very easy drive, despite the elevation change.
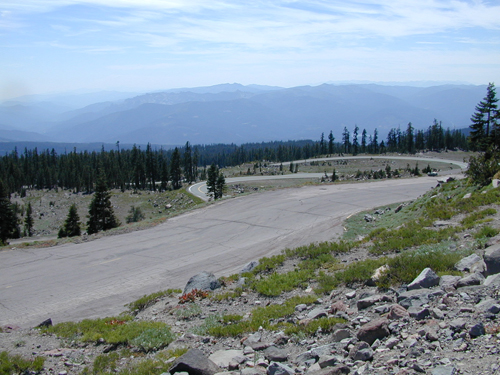
Road leading up Mt. Shasta
We had a lovely picnic, though my headache deepened, along with weak muscles that came out of nowhere, and I realized I was suffering from altitude sickness. It stayed with me until we’d been off the mountain for a few minutes (the base headache was freeway exposures and lasted all day). Mt. Shasta City is at 3500 feet, which is low enough to avoid discomfort.
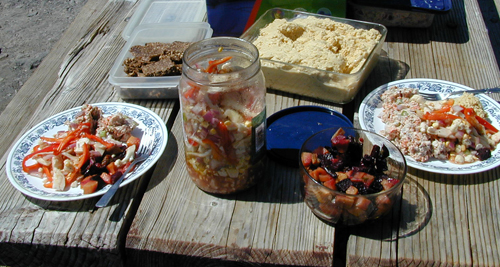
Picnic lunch: raw vegetable salad, banana nut bars, hummus, fish salad, and roasted vegetables
As we left to continue our trip, we passed Panther Meadows and stopped at the Bunny Flat (6900′) trail head to use the bathrooms (adequate, no water).
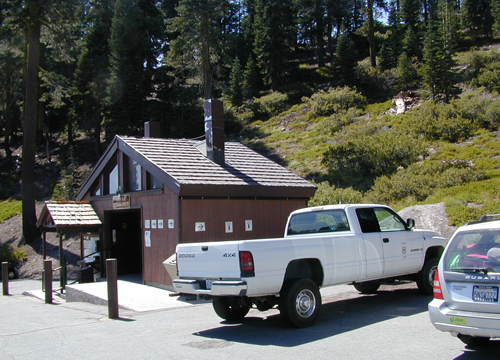
Bunny Flat Restrooms
We made our way back to the freeway and headed north to Oregon for the night.
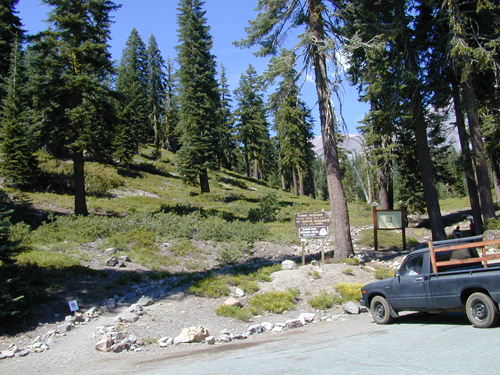
Bunny Flat Trail Head
After this visit, I just assumed my friend was mistaken about August being wet enough for flowers. Reading the various web accounts about Panther Meadows though, it seems it’s a special spot. I’m not sure if the flowers persist through the summer, but many people mention the streams.
Had I known more about it, I would have found an easy access picnic spot (perhaps in town) then gone to Panther Meadows for an after-lunch hike. Though there wasn’t much I could have done about the altitude sickness, being fed and rested would have given us the wherewithal to explore the area and find its treasures.
Links:
Categories: Campgrounds · Parks · Picnics · Places to Go · Travel
Tags: · northern california, photos-family, photos-food, photos-places
September 24th, 2008 · by Cyndi · 1 Comment
Unlike our misadventure of the night before, our two night stay at Champoeg State Park, just south of Portland and north of Salem, was peaceful, quiet, and medically uneventful. We arrived with concerns. Since it was a weekend, and we were only booking a few days in advance, there were just two campsites left. I chose the less crowded one, near a large field. I didn’t know what, if anything, was grown in that field. And Google Maps satellite pictures shed no light. They did, however, reveal the presence of several farms in the area. And that the campsites were fairly spread out.
As we drove up, we found clean air, large campsites where no one seemed to be a smoker (I saw one cigar many sites away and that was it), and a huge empty field flanked by, what else?, blackberry bushes.
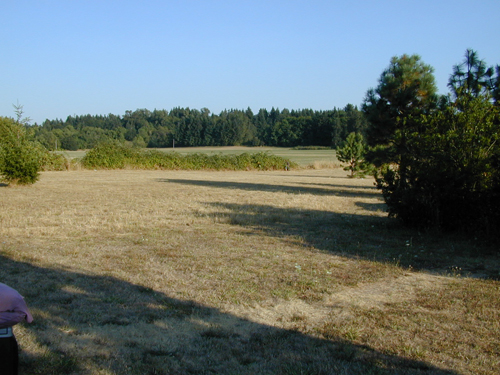
The view from our tent
Champoeg State Heritage Area
Champoeg Rd NE
http://www.oregonstateparks.org/park_113.php
503-678-1251 Ext. 225
Reservations: 800-452-5687
From Southern Oregon (a few minutes from Grant’s Pass), the trip is 230 miles, 3:45 hours. From Petaluma, CA, it would be 10 hours, not counting stops. It’s about 35 minutes south of Portland.
Directions: From I-5, take Exit 278 and head west. Follow the signs.
Check in time 4pm; check out time 1pm.
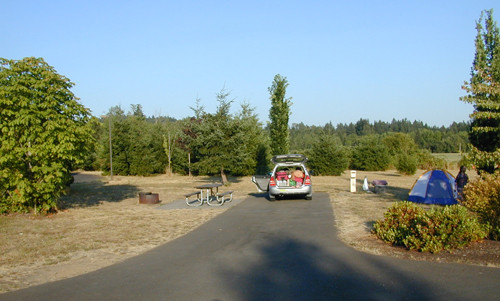
Our campsite from the access road
We spoke to the folks in the one site fairly close to us (on the right) and they were nonsmokers but also locals who decided they would rather come back when it wasn’t the middle of a heat wave. So we ended up with no neighbors.
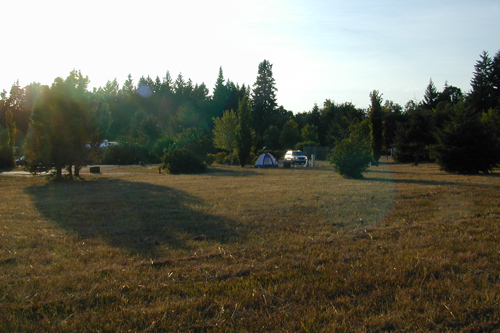
View from blackberries next to the field, back to our site
Experiences turn on a dime…had our neighbors been heavy smokers or pesticide users, my stay there would have been hell, like it was the night before at Indian Mary. For whatever reason though, the campers at Champoeg (inexplicably pronounced sham-poo-ey) were quiet and fairly fume-free (not counting bbq and wood smoke, which fortunately doesn’t bother me, and is pretty impossible to avoid in a campground).
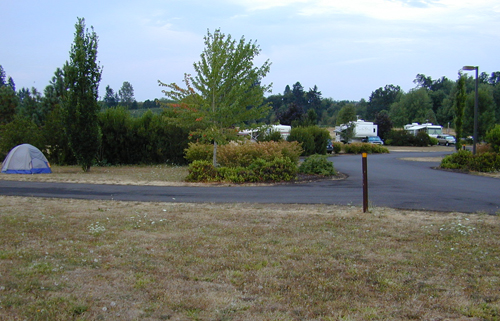
View to the right of our site
First order of business was getting our tent up. Which took half the time it had the night before. We didn’t bother with the rain flap this time, since it was still quite hot. The night breezes were cooler than at Indian Mary though, and we were able to sleep. Our second night, the heat wave finally broke with a thunderstorm. Michael and I woke up in the middle of the night, put up the rain flap and got our belongings into the car, and made it back inside the tent just as the first raindrops started to fall. It’s an excellent tent and not a drop made it inside.
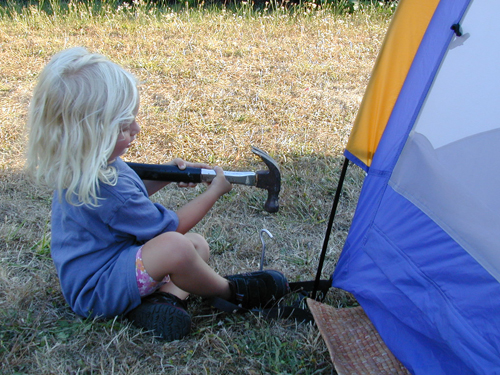
Miriam helps stake the tent
We planned to spend all day Saturday in Portland so Friday night, the night we arrived, we decided to have a campfire. Michael bought some wood but neglected to get kindling. All we had was matches, logs, dried grass, a couple twigs from the ground, and 2 pieces of newspaper.
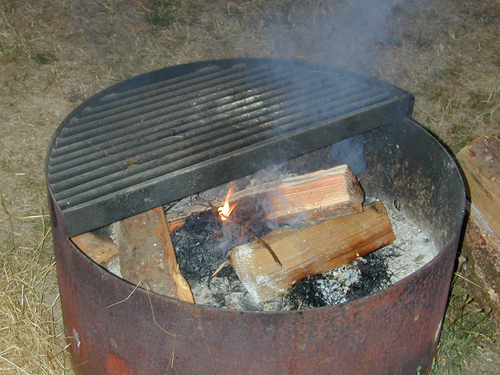
Getting a fire started
Fortunately, all my old Girl Scout training came back to me. I rearranged the logs Michael had laid side by side and, in very little time, we had a fire.
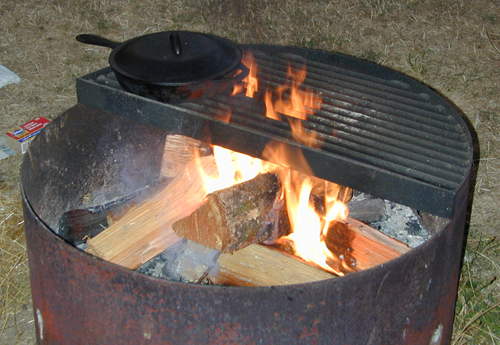
A blazing fire
The food we cooked (in a cast iron pan) was pupusas that I’d made before our trip, and Amy’s gluten-free, vegan pizza. Both were frozen when we left Petaluma but defrosted in our cooler. The pupusas didn’t quite work out. They were very dry. I’m not sure if that was because they were frozen first. On the way back, I had some fresh pupusas I made in Vancouver (didn’t freeze them and didn’t put them in the cooler) and they were very dry eaten at room temperature but fabulous when heated well in a toaster oven (even though those were chilled first). No amount of cooking saved the ones we had at Champoeg though. They were edible, but needed moist sides.
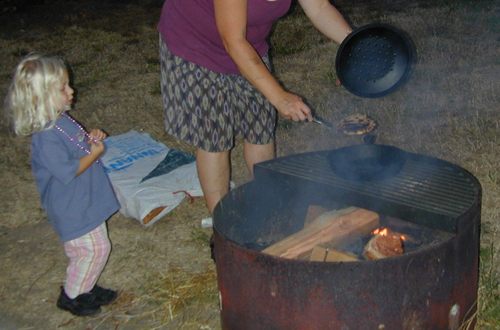
Cyndi & Miriam cooking on a (semi) open fire
The pizza though, was another story. Who knew? pizza heated in cast iron over flames is delicious.
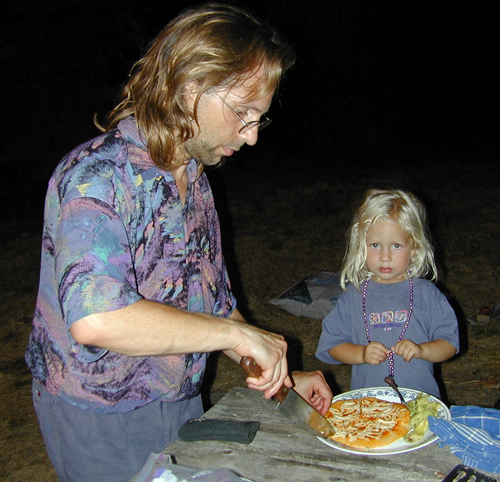
Michael & Miriam preparing fire roasted pizza
It was Shabbus, so we lit beeswax candles and put them in a fire-safe place near the picnic table.
Shabbus candles
We ended the meal with the top item that Miriam had deemed essential for camping (getting all her camping knowledge from watching Curious George): marshmallows. I found kosher ones (egg, dairy, and gluten-free) at Trader Joe’s.
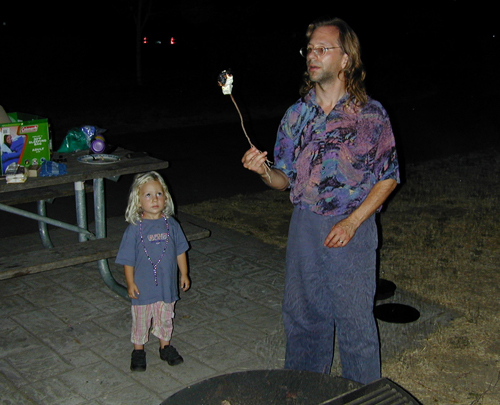
Michael & Miriam roasting marshmallows
Champoeg has a visitor’s center and museums with tours and kids programs, disc (Frisbee) golf, and huge day-use areas, none of which we were able to see. The Willamette River was way back behind the cabins and Miriam and I didn’t manage to see it either (although Michael wandered past what appeared to be a wading section during a late-night stroll). With 615 acres, there is a lot we just didn’t have time for.
History, overview of programs, maps.
http://www.oregonstateparks.org/images/pdf/champoeg_history.pdf
Full park brochure and map
http://www.oregonstateparks.org/images/pdf/champoeg_full.pdf
Campground map
http://www.oregonstateparks.org/images/pdf/champoeg_map.pdf
We were in Campsite B9. The B loop had sites that were much further apart than the A loop. So better for single campers or small groups. If you look on the map, above us and to the right is a large circle labeled club camping. This is the place for groups because there is a shared grassy area in the middle. When we were there, an extended family was having their annual reunion.
We were warned to bring bug spray and, indeed, there were bugs that came out at dusk. They were smaller than mosquitoes and seemed to bite a little, but didn’t give us typical mosquito welts.
The park doesn’t use pesticides or herbicides and the bathrooms have no air freshener and are cleaned with “environmentally safe” cleaners (don’t know what, but they had no smell). Each shower had its own full-enclosed changing room, which was nice. Bathrooms had flush toilets. The park host has wood for sale and a cooler with bags of ice.
Champoeg was an easy commute to Portland, and very livable. If I were in the area, I wouldn’t hesitate to go there again for group camping, single camping, their programs, or a picnic.
Categories: Campgrounds · Museums · Parks · Picnics · Places to Go · Travel
Tags: · oregon, photos-family, photos-food, photos-misc, photos-places
September 23rd, 2008 · by Cyndi · 5 Comments
The first overnight stop on our road trip from Petaluma, California to Vancouver, Canada, was in Southern Oregon at the Indian Mary Campground in Merlin. By Google Maps, it’s 410 miles and a 6:30 hour drive. With extensive stops, it was more like 9 or 10 hours.
Indian Mary Park
Uninc Josephine County, Oregon
7100 Merlin Galice Rd, Merlin OR 97532
(541) 474-5285
Connected to the Oregon State Park system but run separately, through the county.
http://www.co.josephine.or.us/Page.asp?NavID=491
Directions: Take I-5 North or South to Exit 61. Go under the freeway and turn left on Merlin Galice Road, which turns into Merlin Road, for about 3.5 miles. Merlin Road turns slightly left and becomes Galice Road. Continue another 7 miles to the Park entrance on the right.
A friend of ours goes there every year with a large organization that reserves a block of spots near the Rouge River and provides all the meals. And for that sort of trip, this place would be awesome. The river is gorgeous and the park has a communal feel because all the sites are very close together.
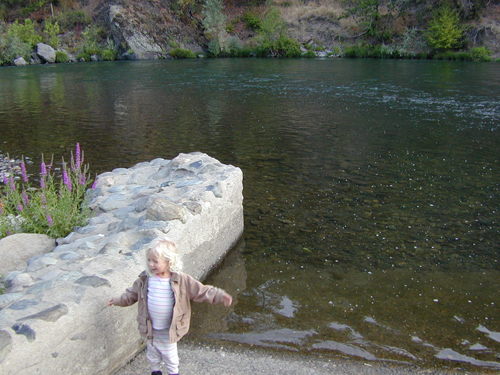
Miriam at the Indian Mary boat launch
Unfortunately, we weren’t with a group and the closeness of the campsites was overwhelming.
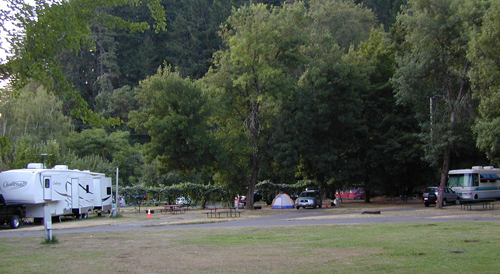
Our tent in the middle of several campsites
That’s us in the middle with an RV to the far left, an empty site to the immediate left, three sites behind us, and one RV to the right.
Between the stifling heat (98 degrees in early evening) and being surrounded by cigarette smokers, I ended up with a fall down asthma attack in the center grassy area at the front of the picture (beyond it is the bathrooms) while trying to escape the smoke. I had my oxygen tank but not my inhaler and Michael was off with Miriam at the playground.
Fortunately, I was able to call for help and, after several tries, some folks (including a paramedic) heard me and got my inhaler and my family. Miriam cared less about the fact that mommy was sick than about the fun of getting to ride in the park’s golf cart. The smokers near to us were very kind and all said they wouldn’t smoke near us anymore. And they didn’t. But the damage was done. I was fragile over the next couple of days and had trouble walking any distance.
Before the attack, we managed to get our borrowed tent up (first time since the dry run at home). This was my first time dealing with a tent, or camping at all, in over 20 years. Michael had never done real camping. It was Miriam’s first time. Not the greatest (re)introduction.
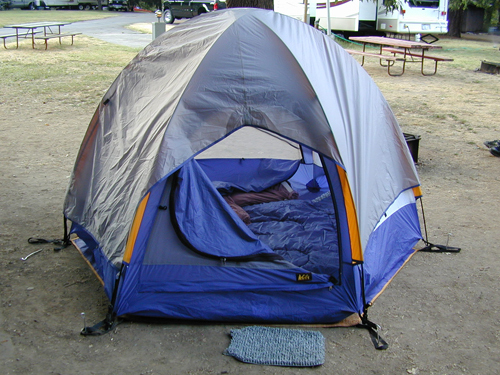
It only took us half an hour to get this baby up
The night went more smoothly. I had chosen an RV site vs a plain tent site because the former had electrical hookups and water and we had an electric cooler. The tent sites weren’t very different or less crowded.
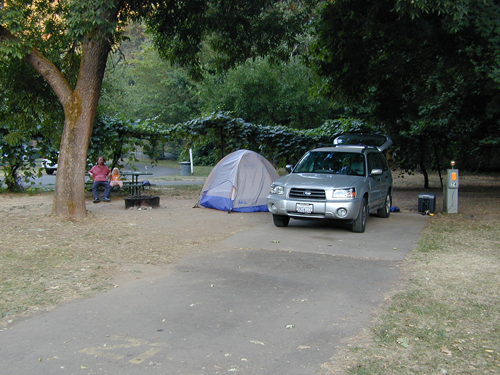
Our campsite
We ate from the cooler, went to bed, roasted, took off the rain flap, roasted slightly less, tried to block out the partying around us, and fell asleep mostly hating the place.
Then it was morning.
Morning at Indian Mary is magical. Everyone else was asleep, the air was cool, and Miriam wanted to see the river.
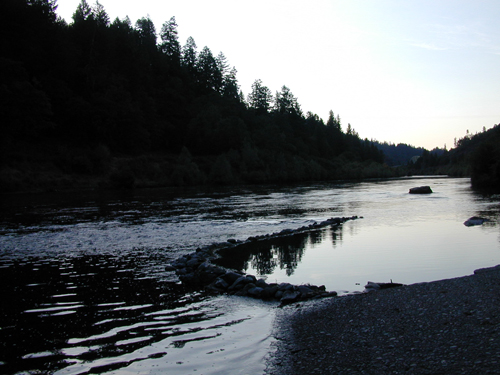
Rouge River in early morning
Once we were away from the campsites, the air at the park was very clean and fresh. They don’t use pesticide at the park and they only use herbicide once in a while at the boat launch (most recently 3 or so months earlier). I walked slowly because my legs were still unsteady and my lungs not at full capacity. We made our way to the top of the riverbank, where Miriam, naturally, had to stop for some blackberries.
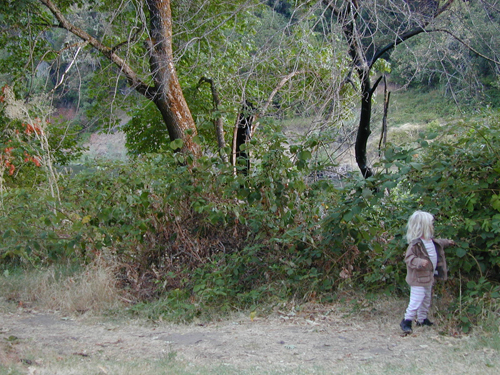
Miriam picking blackberries along the Rouge River
Then to the boat launch where she expressed her deep down desire to go fishing (one she has repeated dozens of times since…some day little one).
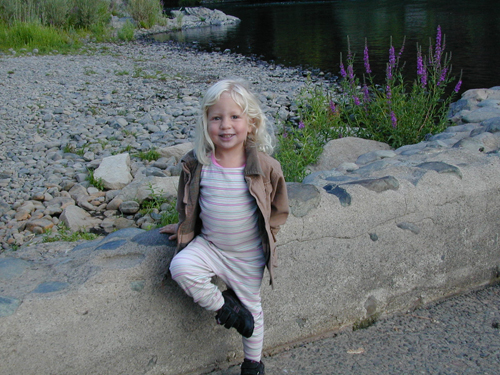
Miriam for a morning walk and yoga pose in her jammies
Then of course we had to make our way to the playground, where her visit the day before had been cut short. We couldn’t stay long because the other campers were waking up and the cigarette smoke began to waft over.
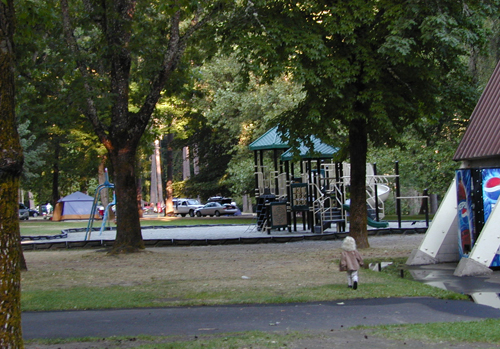
Children's playground at Indian Mary Park
Unless I came with a very large, smoke and bug-spray-free, group, I can’t see myself returning. As solo campers who wanted to sleep early and weren’t interested in socializing (drinking beer around the campfire with strangers), this was completely the wrong spot. For someone with asthma and MCS, it was a nightmare.
Nominally, the park is pretty safe. No pesticides, almost no herbicide, no air freshener in the bathrooms (they told me they use strong smelling cleaning products but we must have been there between cleanings because it wasn’t a problem).
The bathrooms have flush toilets and small shower stalls with tiny changing areas.
There is the playground for the kids plus lots of flat grassy areas, a Frisbee (disc) golf course, volleyball, horseshoes, and a place to boat and fish. We were there on a Thursday night in mid-August so there were plenty of free spaces, though it was mostly full. The better sites were of course taken.
Take a look on the map. We were in site 74. If I went again with a child, I’d want site 46 (preferably the entire surrounding chunk). The map is somewhat misleading because those distances are actually quite close (it’s also not entirely to scale). Many other park maps look similar on paper but they fit half as many campsites in the same space. From us in 74 to the smokers/partiers in 85 was about 20 feet. You can see their white car behind and to the left of us in the two site pictures above.
We packed up and got on the road by mid-morning. On to another two nights of camping.
Categories: Campgrounds · Family Life · Health · Parks · Picnics · Places to Go · Playgrounds · Travel
Tags: · MCS, oregon, photos-family, photos-places
September 17th, 2008 · by Cyndi · 1 Comment
This dish takes a fair bit of time to make, but it’s one of my favorites for a hearty meal to serve to company. I’ve been making it for a while but it wasn’t until recently when I made it for friends in Canada that I took pictures.
I’ve adapted this recipe from:
Chili and Corn-Biscuit Casserole
The Voluptuous Vegan
by Myra Kornfeld and George Minot

Their version was already vegan but not gluten-free. The book has some fabulous recipes but not ones designed for quick meal prep. Their version used a blender, food processor, skillet, pot, and several bowls. I replaced the seitain with tofu to eliminate use of the food processor (and because seitain is wheat gluten). I also made a few other changes here and there to save time and for personal taste or ingredient availability.
I almost always double the recipe, so I provide both sets of measurements here.
The Chili
|
Chili Ingredient
|
Amount for single
|
Amount for double
|
| Beans, soaked (anasazi, adzuki, black, kidney, pinto, etc) |
1 1/2 cup
|
3 cups
|
| Salt |
To taste
|
To taste
|
| Extra virgin olive oil |
1 tablespoon
|
2 tablespoons
|
| Minced vegetables (carrot, celery, onion, radish, etc) |
2 cups
|
4 cups
|
| Ground cumin |
2 teaspoons
|
4 teaspoons
|
| Dried oregano |
1 teaspoon
|
2 teaspoons
|
| Chiles (chipotle, pasilla, ancho, guajillo) |
1-3 dried
|
2-6 dried
|
| Sun-dried tomatoes |
1/2 cup
|
1 cup
|
| Tofu, crumbled (use extra firm) |
6 oz
|
12 oz
|
| Rice wine (or rice vinegar) |
1 tablespoon
|
2 tablespoons
|
| Lemon juice (bottled is fine) |
1 tablespoon
|
2 tablespoons
|
Start soaking the beans the night before or early morning the day you are making this recipe. If you don’t have time, try to soak them for an hour and then pressure cook them. After soaking (6-8 hours or more is best), drain out the water and use fresh water for cooking.
Any combination of beans will do. Kornfeld and Minot like anasazi (picture), but they aren’t exactly supermarket beans. I like adzuki and black beans, but I’ve used a variety of different kinds. If you use canned or pre-cooked, double or triple the amount and measure the beans drained. The amount isn’t critical.
For the veggies, chop them fine and use any combination that you have on hand that you like. The original recipe calls for lots of garlic which I leave out, as I’m not fond of it. But you can include as much as you want. I’ve made this recipe many times with no onion or garlic and it’s delicious. Just be sure to use more than one (3 is good) vegetable. Put them in a large measuring cup as you cut them. If you end up with too many of one, transfer them to a bag or container and refrigerate or freeze for your next saute or soup.
I use fresh oregano since that’s what I have on hand. 1 teaspoon dried is about equivalent to 1 tablespoon fresh. If you prefer different spices, use them instead. Kornfeld and Minot are real big on their chili varieties (it’s actually a complaint about their book) but it’s not necessary to use them all. Just throw in what you have and like. Whole, flakes, powder. I left out the chili in the cornbread.
The original recipe calls for dry sun-dried tomatoes but I use olive oil packed ones instead.
If you don’t want tofu, you can use tempeh, or seitain (wheat gluten), which is what the original recipe called for. Or you could even use browned ground meat. Or leave it out entirely and just make the chili thicker.
Chili Directions:
Cover the beans with 7 cups water and simmer until tender (about an hour, sometimes two). Add salt to taste after they are done.
If you are using whole chilies, remove the stems and seeds and soak them in boiled water for 15 minutes. If you are using dry tomatoes, add them as well.
Saute the vegetables in olive oil on medium-low heat for about 10 minutes, stir often. Add the herbs and cook for another 5 minutes.
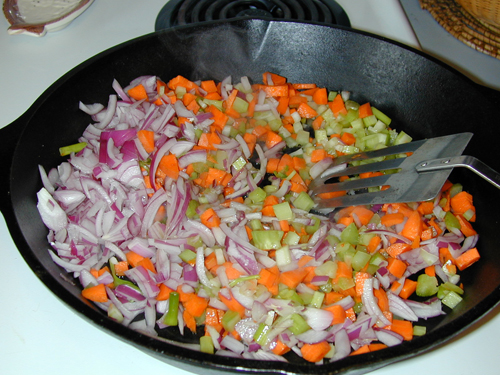
Sauteing red onion, carrot, and celery
Put the chilies and tomatoes, along with the soaking water, into a blender and process until smooth. If you need more liquid, use the rice wine and/or lemon juice.
Crumble the tofu with your hands into small bits. Put the tofu in a pan with the chili-tomato puree and cook for 5 minutes, stirring constantly.
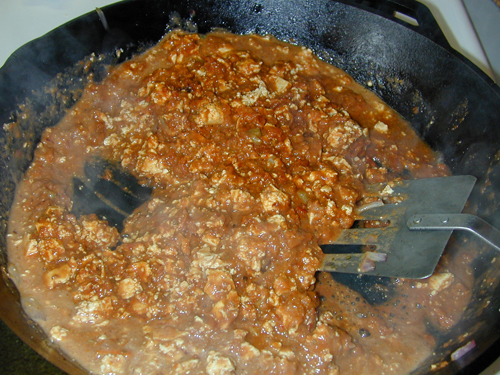
Cooking tofu with tomatoes and chilies
If your beans have excess water, pull it out with a cup. Add the tofu to the beans. Add the rice wine and lemon juice, if you haven’t already.
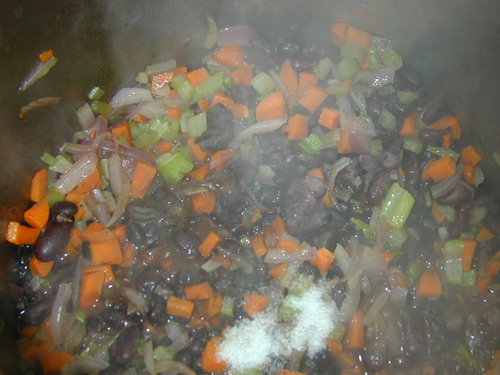
Vegetables and tofu added to the beans with some extra salt
Simmer the beans for 15-20 minutes as needed to thicken. Add back some of the bean water if it gets too thick. You want the beans to be pourable but thick enough to stay on a large spoon.
Taste and add more salt if needed.
The Cornbread
|
Cornbread Ingredient
|
Amount for single
|
Amount for double
|
| Soy flour |
1/2 cup
|
1 cup
|
| Brown rice flour |
1/2 cup
|
1 cup
|
| Xanthan gum |
1/2 tsp
|
1 tsp
|
| Cornmeal (fine) |
1 cup
|
2 cups
|
| Baking soda |
1/2 tsp
|
1 tsp
|
| Baking powder |
1 1/2 tsp
|
1 tablespoon
|
| Salt |
1/2 tsp
|
1 tsp
|
| Apple cider vinegar |
1/4 cup
|
1/2 cup
|
| Soy milk (or other milk of your choice) |
1/2 cup
|
1 cup
|
| Safflower or sunflower oil |
6 tablespoons (3 oz)
|
6 oz
|
| Water |
1/4 cup
|
1/2 cup
|
The original recipe called for wheat flour with the cornmeal but I changed it to be gluten-free. If you don’t want the soy, go ahead and use twice as much brown rice flour (or white) or sub the gluten-free flour of your choice. I use soy to boost the protein content and lower the carbs. The xanthan gum is needed to help the gluten-free flours rise. You can use guar gum instead but I’ve never tried it. If you’re not gluten-free, you can use wheat flour and drop the gum.
Cornbread Directions:
Preheat the oven to 350*F. Lightly oil a deep 7×9″ baking dish (for single recipe).
Get out two bowls. One for dry and one for wet. Use the bigger one for dry and make that mix first. Note that you can make everything for this recipe well ahead of time except for mixing the wet and dry cornbread bowls together. That needs to be done at the last minute.
In the larger bowl, mix the flour, cornmeal, baking soda, baking powder, and salt.
In the other bowl, mix the vinegar, soy milk, oil, and water. Use a whisk to thoroughly blend and emulsify (or use the blender). Add the wet ingredients to the dry ingredients and mix together with a spatula just until the ingredients are fully moist, but do not over-mix.
Spread a thin layer of batter on the bottom of the baking dish. Sometimes it spreads better than other times. You can add a bit of water if you wish, but don’t overdo it and don’t mix too much.
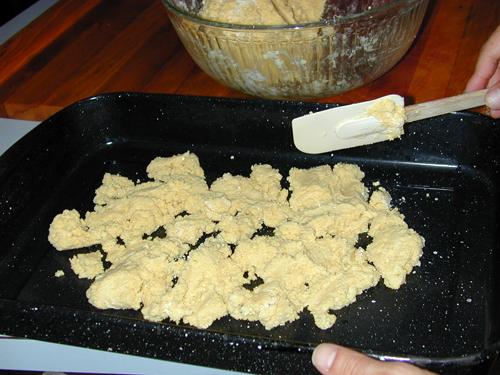
Spreading the cornbread on the bottom of the pan (it needs more water)
Pour the chili on top, even it out, then add the rest of the batter, getting it as even as possible. I was a bit tired and rushed when I made it this time. I really should have added more water to thin out the batter. But the dish was still quite good when it was done.
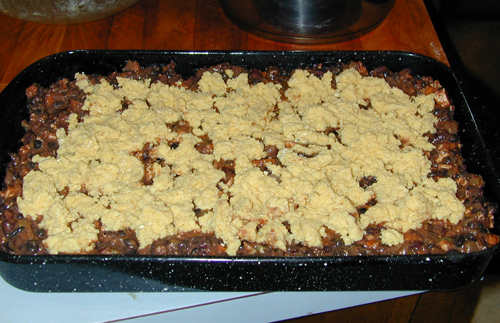
The casserole fresh from the oven
The original recipe calls for 45 minutes of baking. But I never found this to be enough, especially not when I double the recipe. Check it after 45 minutes but pull it out when the cornbread on top is lightly browned and no longer has a raw taste. Give the casserole at least 5 minutes to cool before cutting.
This is delicious served with a chopped/sliced lettuce salad with a tangy vinaigrette. Or with any other raw salad of your choice. Also with salsa or guacamole.
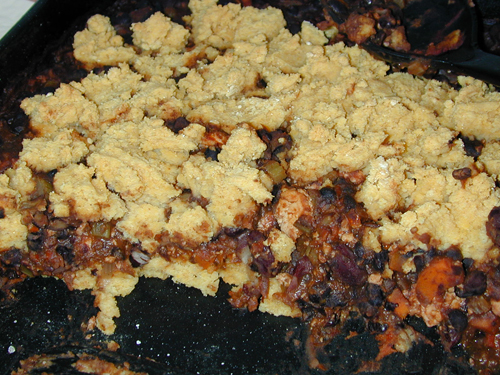
Finished casserole ready to eat
Categories: Book Reviews · Cookbooks · Food · Food Books · Main Dishes · Recipes
Tags: · dairy-free, egg-free, gluten-free, photos-food, vegan, vegetarian
September 16th, 2008 · by Cyndi · 2 Comments
While visiting the Vancouver area last month, we stayed with friends in Burnaby, a suburb to the east of the city. Some other friends from New Brunswick overlapped their stay with ours then went to a hotel in downtown Vancouver for a convention. On their last night, we met up with them for dinner.
Finding a restaurant was no easy feat. Mine and Miriam’s allergies were the least of it (all British Columbia restaurant are nonsmoking (indoors anyway) so that wasn’t a problem for any place without a patio). Our Burnaby host has celiac and can’t have dairy or eggs and our New Brunswick friend can’t have a long list of items, the worst of which is peanuts (any trace of which could kill her). Cooking for all of us was fairly easy (well, I like a challenge) but restaurants are a different matter.
Fortunately, I found Food Vancouver, a great listing of area restaurants, including checkboxes for different dietary restrictions, which you can add to a search by location or cuisine. Unfortunately, it’s clear that some of the restaurants who added themselves (or patrons who added them) didn’t understand the meaning of the checkboxes. We had a long back and forth with a supposedly gluten-free-friendly Chinese restaurant and decided not to bother.
So we went to an Indian place that sounded promising and was an easy walk from the hotel.
India Bistro
1157 Davie Street, Vancouver, BC
604-684-INDIA (6342)
http://www.indiabistro.ca/
http://www.foodvancouver.com/restaurant.php?restaurant=137
Davie Street is filled with restaurants and people but India Bistro was calm and quiet once we passed through the doors. No patio, no incense, no peanut oil, no problem getting a table.
Our server Steve was so knowledgeable we assumed he must be an owner, and perhaps he is. He was amazing and really got our needs (aside from one common blip of saying a dish didn’t have any gluten because it was made with white flour). Four out of the six of us had strict dietary restrictions that only partially overlapped, yet he managed to keep it all in his head and warn us whenever one of us expressed interest in a dish that contained a potentially forbidden ingredient.
Unfortunately, our New Brunswick friend did have an allergic reaction, but it was to some obscure spice she didn’t know she reacted to and it was not the restaurant’s fault in the slightest. But even she says, if she were local, she’d “go back there in a heartbeat,” with some precautions about which dishes she ordered of course.
They don’t use eggs at all (the cheesecake, which is made off site, is the only dish with eggs). All of their breading is vegan chickpea flour and the fryers aren’t used for anything containing gluten, dairy, or eggs.
But this wasn’t just a safe meal, it was delicious. Some of the best Indian food I’ve had in a long time. We started off with two chickpea-battered appetizers, both gluten-free by default: fried calamari ($6.95) and chicken pakoras ($5.95).
I don’t eat meat (I do eat seafood) and have been raising Miriam the same. Michael eats meat (no pork and very little red meat) and we agreed Miriam could have turkey this Thanksgiving with the condition that she understand where the meat comes from. At the tender age of three, she has demonstrated that she understands death and that animals used for meat need to be killed.
Recently, she has been asking “am I allergic to chicken?” I had to tell her no. At the restaurant, she asked again, and Michael and I decided she could have her first taste of it. She was so excited she told the server and everyone else within earshot, multiple times, “I’m having chicken! I’m not allergic to chicken!” Well, she loved it. She ate about half the pakoras by herself. The rest of us devoured what was left. I only had the calamari and it was tender and delicious.
We ate so quickly I didn’t get a picture until the very end.
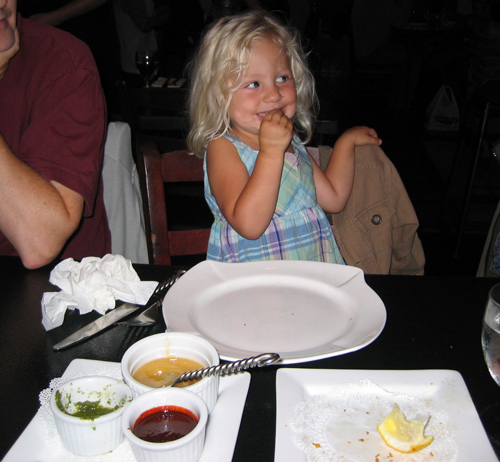
Miriam after her first taste of chicken
For my entree, I chose the Tandoori Trout (trout marinated in fresh ginger, garlic and spices & char-broiled. $13.95). Although the websites say it’s marinated in youghart, if memory serves me, it was actually nondairy (I can cheat with dairy and gluten once in a while). Cooked perfectly with a crispy skin and tender meat. Although the accompanying mint sauce was wonderful, the fish didn’t need anything.
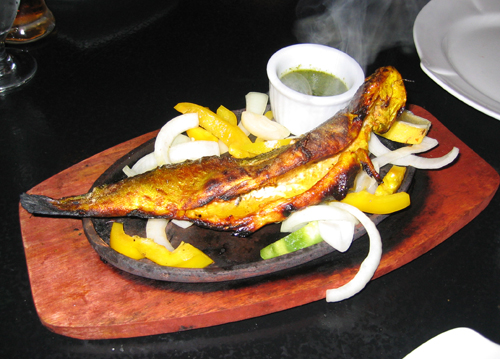
Tandoori Trout
The table shared papadum (lentil crackers, $1.50 times 3), which were the only bread not made with wheat, rice Pulao (basmati rice cooked with cumin, onions & aromatic spices. $3.95 times 2. Vegan and delicate and great for soaking up those marvelous sauces), and cucumber salad ($3.95).
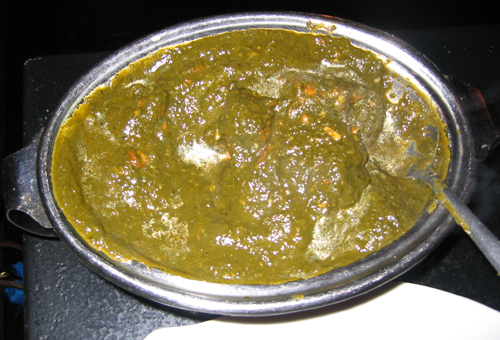
Lamb Palak
The other adults ordered Chicken Jalfrazi (chicken cooked with onion, bell peppers, tomato in a light curry sauce. $10.95), Lamb Palak (lamb cooked with spinach & Indian spices. $10.95), Murgh Coconut (boneless chicken cooked in a unique combination of coriander & coconut curry. $10.95, and Lamb Rogan Josh (lamb cooked with onions, garlic, ginger and traditional Indian herbs & spices. $10.95). I tasted some of the chicken sauces and they plus some rice would have made a meal by themselves.
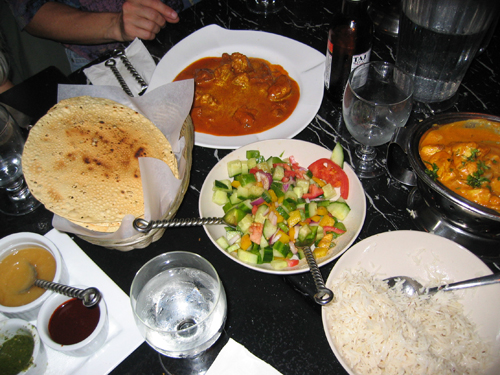
- India Bistro Dinner for six. Clockwise from bottom left: various chutneys & dipping sauces (all vegan and gluten-free), papadum, lamb Rogan Josh, Chicken Jalfrazi, rice, cucumber salad.
We were in the process of ordering dessert when our friend (who left early to get some air) became ill and we had to rush out (her husband went on ahead so the rest of us could deal with the bill). Our server was preparing some samples so we could decide what to order and he sweetly packed them up with our leftovers as we paid.
We ate the desserts the next day. The rice pudding (kheer) was good but the Gulabjamun (dark brown round shaped cheese balls in a honey syrup) were my favorite.
The prices were excellent. Our meal for 6 people (5 adults) had two beers, 2 appetizers, 5 entrees, rice, and salad and came to $100 including tax (but not tip). Parking is a nightmare; take the Skytrain if you can.
If I were local, India Bistro would be one of my regular haunts.
Categories: Canadian Restaurant · Food · Restaurant Reviews
Tags: · asian food, canada, dairy-free, egg-free, gluten-free, lowcarb, photos-family, photos-food, seafood
September 14th, 2008 · by Cyndi · No Comments
Michael and I celebrated our third wedding anniversary on August 21st (and 12 years of being together). I was ill for our first wedding anniversary, and our second was a so-so dinner with Miriam after a doctor’s appointment, so we were determined to have a romantic dinner alone this year. We were in British Columbia and our host offered to babysit. We had plans for a lovely seafood meal in downtown Vancouver but fate intervened again and Miriam was ill the night before.
A few days later, all was calm and we opted for something closer to where we were staying. The place we chose turned out to be perfect.
The Xiang Cuisine
aka Alvin Garden
4850 Imperial Street, Burnaby, BC Canada
604-437-0828
Credit and debit cards accepted but only if your bill is over a certain amount ($30?).
Reviews at Chowhound, DineHere, EatVancouver (with photos of the menu (old version)), and some lovely pictures (pre and post-renovation but with the newer menu).
Xiang is this hole in the wall just east of Vancouver. They renovated a few months ago (based on the pictures I’ve seen, it’s looking much better) and changed their name to Alvin Garden, though they seem to use both names. We walked in to find a pleasant interior with two rooms of tables and no white faces (a good sign). There were some larger groups as well as couples there, and both fit in well.
I wouldn’t call it particularly romantic, but it had the right feel to it for an anniversary (or even a date) and you could easily carry on a conversation.
Our waitress was nice and knowledgeable about the food. Despite warnings from other reviewers about poor English skills, we had no trouble communicating. She seemed perplexed though when we asked for no meat (in particular, no pork). Other reviewers report similar experiences: they ask for no meat and are told it won’t be as good, but it turns out to be excellent. We had no trouble finding several dishes to try and going egg-free was easy too (she just steered us away from a couple of dishes). Dairy-free is pretty much a given in Chinese restaurants (authentic ones anyway). Forget about gluten-free; we didn’t even try. I can eat gluten once in a while, so I didn’t worry about it (but I avoided the leftovers so I wouldn’t have gluten two days in a row).
Not being familiar with Hunan cuisine, aside from knowing it’s the hottest food in China, we didn’t order correctly. We should have had a raw (or at least cold) salad to balance out the heat. And we got way too much food. Our dishes could have easily fed four. Nor did we eat it right. You’re supposed to put some rice in the little bowl they give you and then put food on top, eating the rice as it gets soaked with sauce. Since our bowls still had soup, we used the plates. If anyone laughed at us, they were discrete.
We started with soup, broiled fish with chili.
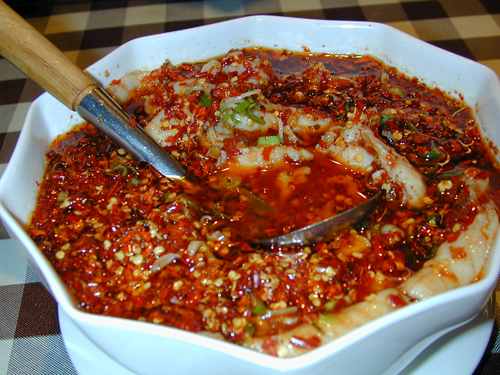
Broiled fish with chili soup
At $18.98, this seemed like quite an extravagance, until we saw the pot. We could have served 8, as part of a larger meal, and it had a fair bit of firm white fish. Our waitress warned us this one would be hot, and it was blistering. I had trouble eating it, though I kept doing it since it was so good. Michael wasn’t fond of the style of putting dried chilies on top as he prefers his heat more integrated.
Our other dishes were fried eggplant with black bean sauce (top left of picture, $8.90); Hunan style shrimp (bottom right of picture, $14.90); steamed dried tofu with special chili (bottom left of picture, $9.90); and a pot of rice. We both prefer our food lowcarb, which everything was, but wanted the rice to soak up the amazing sauces and, in my case, reduce the heat level. I can’t recall which of the dishes normally have pork in them, but ours came meat-free.
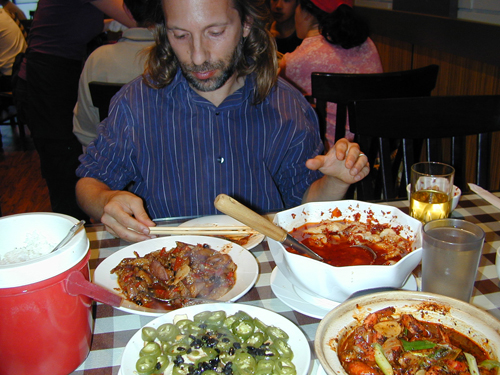
Michael enjoying Xiang's offerings
The eggplant was like silk and melted in our mouths. It was the only dish we managed to finish. It and the shrimp were our favorites. The chili sauce on the shrimp was similar to the soup’s but the heat was more a part of the dish and wasn’t as intense. We loved the crispy edible shells. I ate the tofu without the sliced jalapenos and found it to be a nice contrast to the tomato/chili based dishes. It had some heat but was fairly mild. The chewiness of the tofu was also a good counter to the softness of most of the ingredients in the other dishes.
Xiang passed the girlfriend-cry-test, which is now the wife-cry-test. That’s where if I take a single bite of something and tears start rolling down my face, then it’s hot enough for Michael. Part of my anniversary gift to him was choosing a restaurant where I knew he’d have the heat he craved, and the joy of watching me suffer with delight.
Michael had a Chinese beer ($4.50) and I had a glass of sweetened and chalky soymilk ($1.50), mostly because I needed something to dial down the heat. Dessert was pumpkin cake (egg-free) which turned out to be 4 large glutenous pies, filled with a bit of pumpkin and fried. They had a mild flavor, not as sweet as most Westerners would expect of a dessert, but complemented the meal and had a definite addictive property.
So this turned out to be a fairly pricey meal for us, but worth it due to the special occasion and the massive amount of leftovers we carted home. Although any size group (or solo diner) can get a great meal, Xiang seems best geared for large groups who will share the oversized plates and get the opportunity to enjoy a wide variety of dishes.
Categories: Canadian Restaurant · Food · Restaurant Reviews
Tags: · asian food, canada, dairy-free, egg-free, lowcarb, photos-family, photos-food, seafood
September 13th, 2008 · by Cyndi · 1 Comment
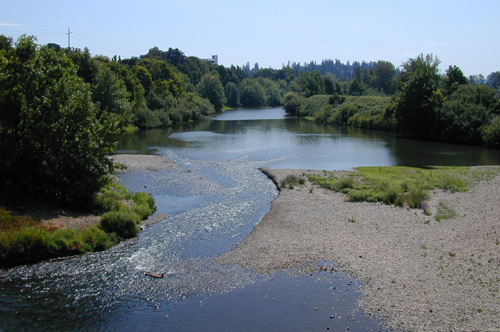
Williamette River at the south end of Riverfront Park
This huge and beautiful park is worth the couple mile detour for anyone travelling along I-5 in Oregon. Our first stop was the picnic area. They have a large covered section of tables, which was taken when we were there so we ate at a table in the sun (during a heat wave unfortunately).
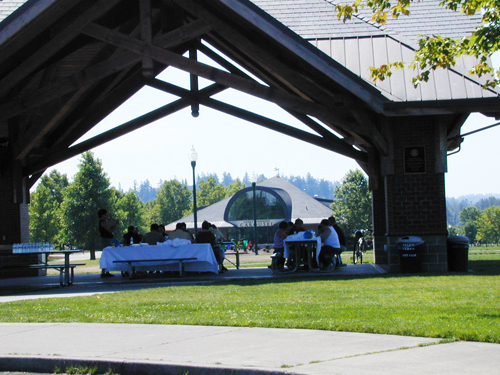
Covered picnic area at Riverfront Park
The building in the background houses a gift shop and an old-time carousel. With fairly safe bathrooms and air conditioning. $1.50 per ride for both adults and children. Children must be 42″ to go alone. They would not allow me to ride on the same horse as Miriam or to ride on a horse next to her. I had to stand. But Miriam chose the sleigh instead.
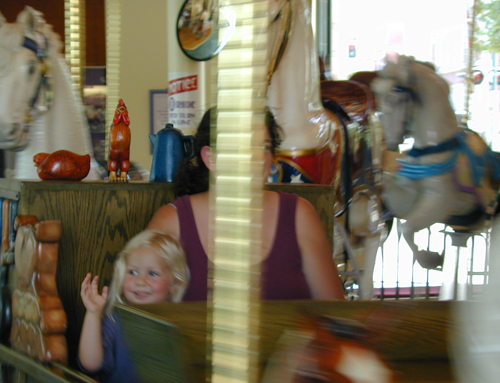
Miriam & Cyndi on the Riverfront Park Carousel
Next we walked down to the far south end of the park to see the handmade tiled Eco Globe.
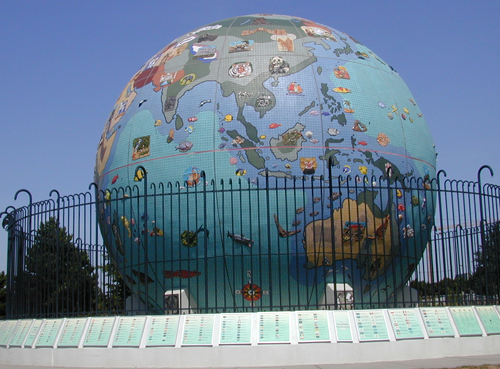
Eco Earth Globe Eastern Hemisphere

Eco Earth Globe Western Hemisphere
This 23 acre park has plenty of room to spread out.
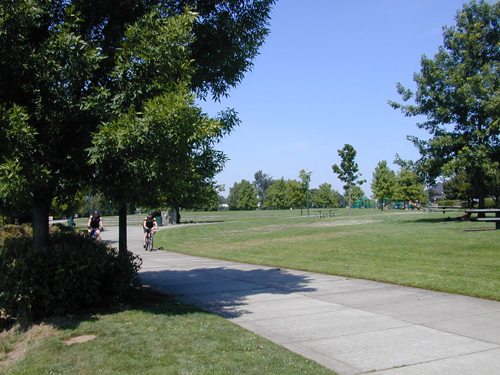
Grassy expanse at Riverfront Park
We walked back past the playground but, despite asking for it, Miriam was too hot to play.

A very hot and tired Miriam & Michael heading away from the Riverfront Park playground
The Williamette River runs along the entire west side of the park.
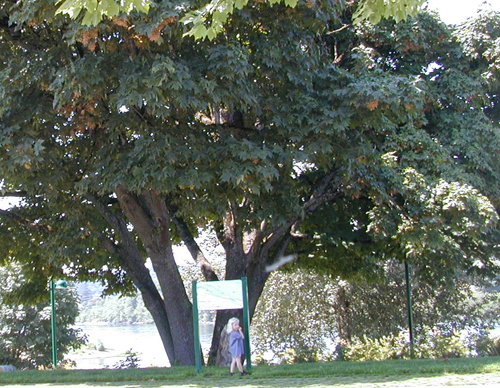
Miriam reading the river map
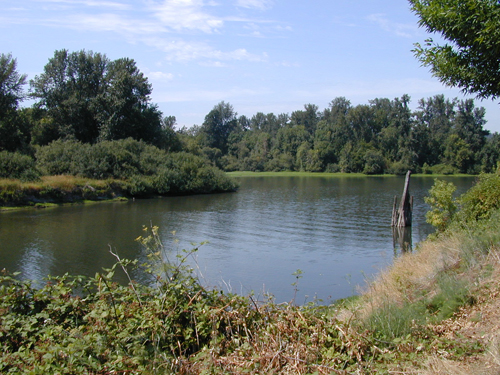
Williamette River at the north end of Riverfront Park
After our long walk, we were ready to get indoors. Our next stop: the A.C. Gilbert Discovery Village down the block.
Disability access: Nice flat sidewalks making a loop around the park. Plenty of places to sit down and rest. The bathrooms inside the carousel building were decent (no strong scents) and the building itself seemed okay. I didn’t test the bathrooms by the playground. I don’t know what their pest and weed control is there but I didn’t notice any chemicals.
Riverfront Park
116 Marion St. NE, Salem, OR
http://www.cityofsalem.net/departments/parks/river_front.htm
Categories: Carousels · Parks · Picnics · Places to Go · Playgrounds
Tags: · oregon, photos-family, photos-places
September 12th, 2008 · by Cyndi · 2 Comments
While driving north on I-5 through Oregon, I paged through an Oregon tourist guide looking for a good place to stop for lunch. We decided on Salem, with the fabulous Riverfront Park next to a children’s museum.
A.C. Gilbert’s Discovery Village
http://www.acgilbert.org/
116 Marion St. NE, Salem, Oregon 97301
503-371-3631 or 1-800-208-9514
Admission is $5.50 for adults and children 3 and up. Discounts f or younger children, seniors, and those on public assistance.
I should preface the rest of this post by saying that a heatwave struck Northern California and Oregon the day we left home. Driving wasn’t a problem, because we had A/C, but we spent a miserable night camping in Southern Oregon and all of our stops were unpleasant at best. The Discovery Village had an A/C system that probably works fine 99% of the time, but wasn’t quite up to killer hot days like we had and was uneven. Also, it’s not a building, it’s a complex. Many of the exhibits are outside and you have to go outdoors to get from one building to another. It was not family fun at its best.
Miriam had a wonderful time though. The first room had many devices to make bubbles, including this one as big as a picture window.
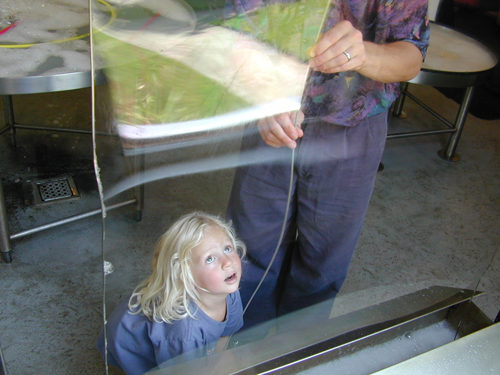
Miriam makes a giant bubble
Miriam then crawled through a giant mouth in the human body exhibit, insisted on a prolonged stop in the toddler room, and made her way upstairs, where she found the castle room, with dress-up clothes and a stage.
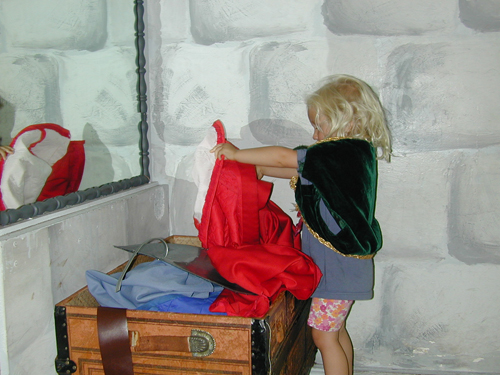
Miriam plays dress-up in the castle room
It took some doing to pry her away.
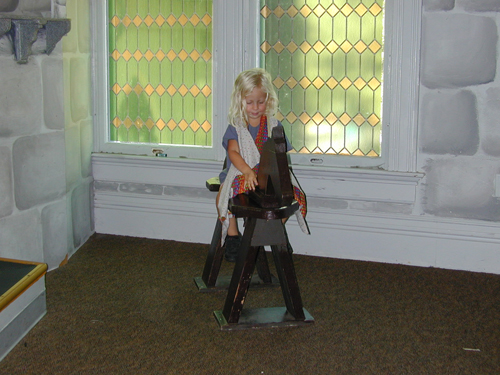
Our fair princess gallops away on her steed
Alas, the heat kept me from taking more pictures but Miriam enjoyed the China room (where older girls visiting the museum insisted on sitting us all down at the table and serving us a pretend lunch), a play grocery store, and a giant train set. There were also swings and a huge (and impressive) climbing structure outdoors (Miriam needed supervision in it but, fortunately, adults fit fine).
Disabled accessibility: limited. There are ramps leading to each building but only stairs going to the upper stories, where large numbers of exhibits are. The exhibits themselves are not geared for use from a chair. I couldn’t use the bathrooms there because there was a strong air freshener or cleaner scent that came from them each time we passed by. The air quality inside the buildings was fair. Aside from the bathrooms, there wasn’t anything terrible that I noticed. I got a headache while I was there but it’s unclear how much was from the heat.
Most of the exhibits are older and don’t have the technology that more modern museums have. Some of the exhibits (or components of them) aren’t functioning properly. Yet Miriam talked about this place for days. She really enjoyed herself. I’d say that anyone 2-6 years old would have a blast. Younger kids still have a few things to do and older kids would have fun if engaged in specific activities.
Categories: Indoor Playspaces · Museums · Places to Go · Playgrounds
Tags: · oregon, photos-family
September 10th, 2008 · by Cyndi · No Comments
On a recent trip to Vancouver, Canada, I admired my hosts’ towering apple tree, as well as the superior taste of the apples. When I found out they simply composted them, I vowed to turn them into something useful.
First, I collected 24 hours worth of fallen apples.
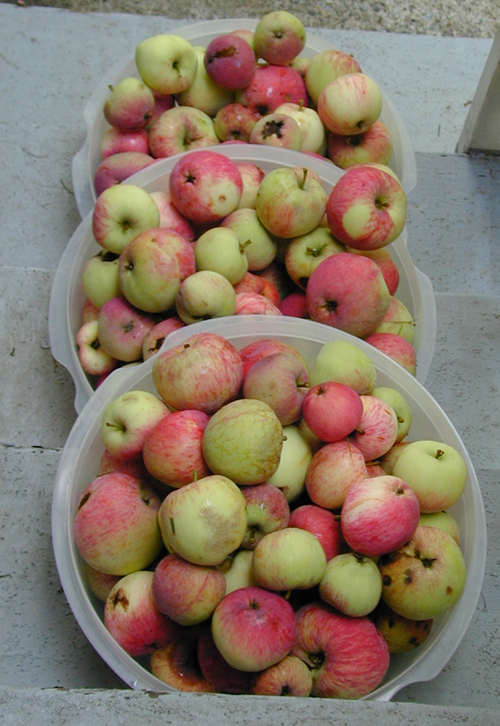
Apples in bowls waiting for processing
Next, I cut away the bad parts (nice organic, untreated, apples with some worms, impact bruising, and other spots) and cut the apples into quarters.
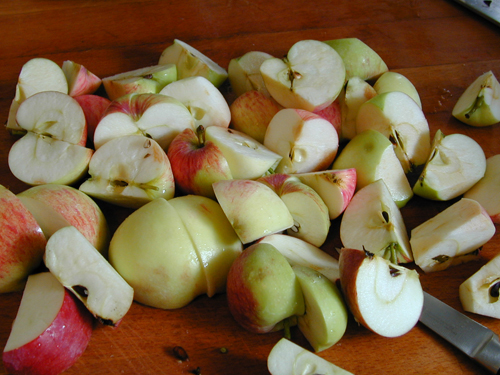
Cut apples
Then I trimmed out all the cores and any bad spots I missed. I like my sauce with skins left on. They add more depth of flavor, nutrition, and don’t change the texture much. Plus it saves a ton of time.
Toss some fresh lemon juice in the bowl to reduce browning.
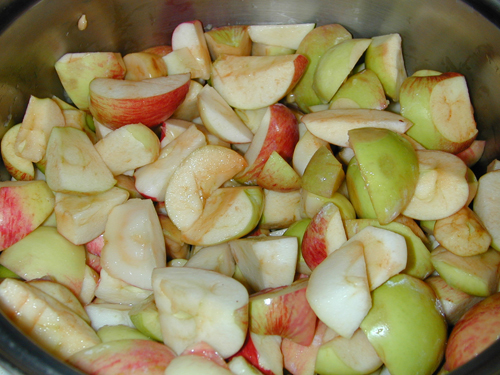
Apples ready for the cook pot
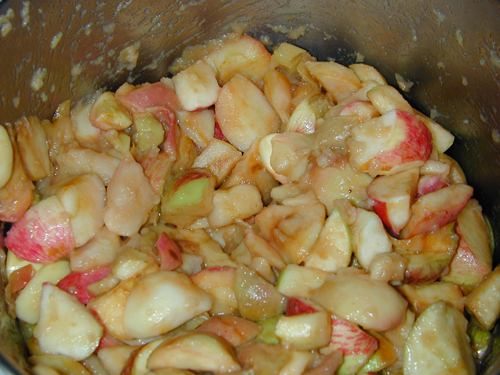
Cook on low heat and stir every few minutes. After a few minutes, they look like this. Add a touch of salt to help them fall apart. If you’re adding sweetener or spices, this is a good time.
A few more minutes and they’ll look like this. If you want apple butter, cook them even longer.
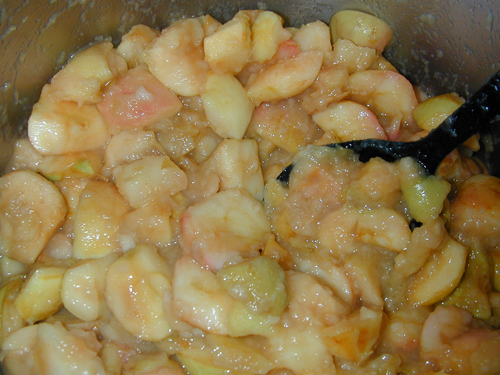
Apples ready to be made into sauce
Now you can turn them into sauce.
First though, here’s how not to sauce them.
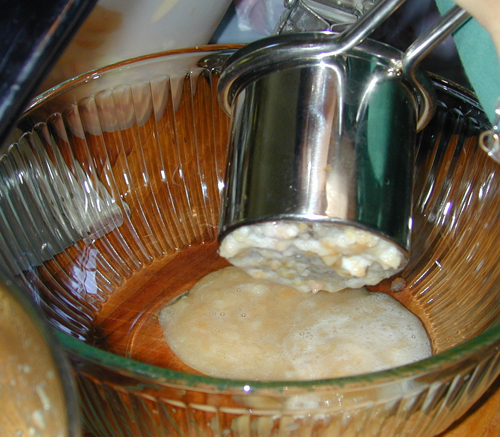
A ricer doesn't work on applesauce
The ricer seemed like a good idea at the time. But it took a whole lot of pressure just to come up with mostly liquid. It helped to swap the end-piece for one with bigger holes, but only marginally. So, off to the food processor we went!
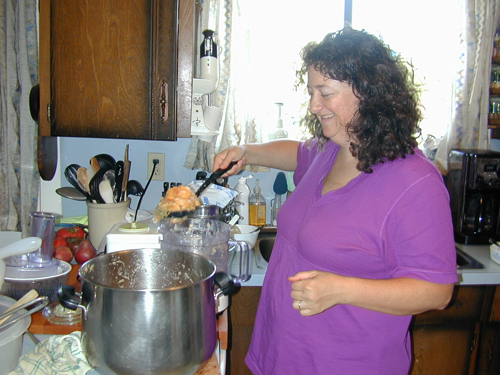
Cyndi putting the cooked apples into the food processor
Don’t overload the food processor. And just pulse the apples a few times so you don’t over process them. I like my applesauce chunky but you can go further and make them smoother.
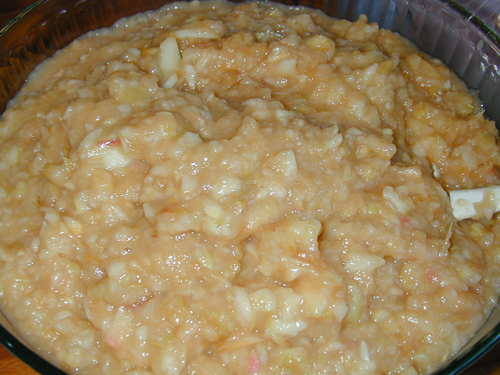
Perfect applesauce
At this point, it’s ready to eat. I love it chilled. Our host was planning on using it warmed on pork chops and putting it into recipes. Because of the latter possibility, we measured it into bags two cups at a time. Then we labelled and froze them. I’ve tasted some of the thawed sauce and it’s fabulous. The taste and texture don’t suffer a bit for being frozen.
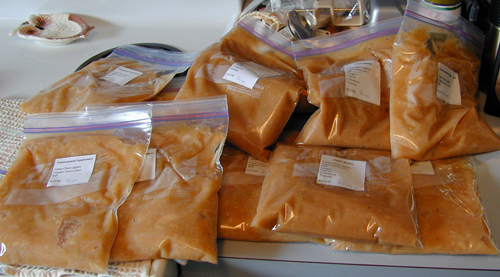
Applesauce ready for the freezer
We made two recipes:
Unsweetened Applesauce
Apples
Lemon juice
Salt
Apple Butter
Apples
Lemon juice
Salt
Ginger
Cloves
Cinnamon
Nutmeg
Categories: Desserts · Food · Recipes · Snacks · Spreads & Dips
Tags: · dairy-free, egg-free, gluten-free, photos-family, photos-food, vegan, vegetarian
August 29th, 2008 · by Cyndi · 3 Comments
I’m visiting friends in Vancouver, British Columbia (Canada) and they introduced me to a local treat.
Chi Cake
http://www.chicake.com/
Vegan, gluten-free, organic cheesecake
Vegan Choice Foods, Inc., Contact: Alan Munro
Unit 14 – 7621 Vantage Way
Delta, BC V4G 1A6 Canada
Phone: 778-88VEGAN (778-888-3426)
E-Mail: questions@chicake.com
The good news is, it’s delicious. The bad news…it’s only available in the Vancouver area. It’s also pricey: $20 for a 19 oz (540g) cake.
Varieties
6″ retail box (frozen) in New York Lemon
8″ wholesale cakes (fresh or frozen):
New York Lemon
Chocolate-Hazelnut
Pumpkin Spice (seasonal)
We had the New York Style lemon. It wasn’t really New York style, which is dense and rich. This was light and melted in your mouth. So doesn’t quite hit all my cheesecake satisfaction buttons (I’m a NY style girl) but it was really quite good.
Given that I can’t get this at home, I wonder if I can duplicate it. It seems fairly simple. The filling is a soy-based cream cheese (the Follow Your Heart brand is very good and may be similar to what they use, if not the same) with tofu (I assume silken) and then they add sugar, lemon juice, salt, and an egg replacer (theirs is various starches).
The crust is cornmeal, puffed millet, sugar, grape juice, coconut flour, Earth Balance margarine, and ginger.
Maybe when I return home…
Categories: Food · Food Product Reviews · Sweets
Tags: · canada, dairy-free, egg-free, gluten-free, vegan, vegetarian


