December 3rd, 2008 · by Cyndi · 1 Comment
“Goodbye old car! Thanks for taking good care of us all these years! We’re going to miss you!”
Miriam repeated words like this many times today. I don’t know why I get sad when getting rid of a car. Am I doing the right thing?? How can we just leave it here to be scrapped after it did so much for us? Fortunately, I get over it pretty quickly. Miriam on the other hand is maybe scarred for life.
This old car means more to Michael than it does to me. It was a gift from his grandparents back in 1989. Six months later, he moved to London for grad school and had to sell it. The friend who bought it never kept up with her payments to Michael so, when they reconnected about 10 years ago, she just gave him back the car. We were glad to have it. My car was a stick shift (which Michael can’t drive) and his van was giving out.
Two years ago, the car failed its smog test. We spent $700 getting it fixed. It passed the smog test and, a few weeks later, one of the 4 cylinders died. It wasn’t worth fixing at this point and we bought a used car as a replacement.
We found out about a program California has to take older cars off the road. If you fail a smog test, you can turn in the car and get $1000, which is about what this car was worth running decently. Unfortunately, you only qualify at the time of registration. We spent two years kicking ourselves for not doing this then. All the while we kept the car registered and insured and Michael drove it every month or so to keep the battery charged (he still had to jump it a few times). Although you register a car yearly, you only do the smog test every two years, so we had to wait.
Our chance came a couple of weeks ago. Michael took the car in and it failed massively, as we expected, and was labeled a gross polluter. That’s about when we learned that the state doesn’t buy cars just for failing smog, they have to be gross polluters, and this car was not one two years ago.
Last night we stripped the car of anything loose and Michael removed the radio this morning. Then he went to the DMV, turned in the plates, and filled out forms. Miriam loves to ride in the car so Michael transferred her car seat and gave her one last slow ride up to Windsor, about 30 minutes away, while I followed behind them. After endless paperwork, we got our check.
As we drove away, Miriam called out her final goodbye and insisted we each do the same. Goodbye old car and thanks.

1989 Honda Civic Sedan
Categories: Family Life · House & Home
Tags: · photos-family, photos-household
December 1st, 2008 · by Cyndi · 2 Comments
Shhh…don’t tell anyone it’s vegan: they’ll never guess. The first time we made this was Thanksgiving 2007 and it (along with all the cashew cream) was devoured. Someone else’s pumpkin pie (homemade with traditional ingredients) still had half left. In 2008, this Thanksgiving treat was one of 3 pumpkin pies (all gluten-free as it happens) and got the nod as first or second from everyone who tried the selection.
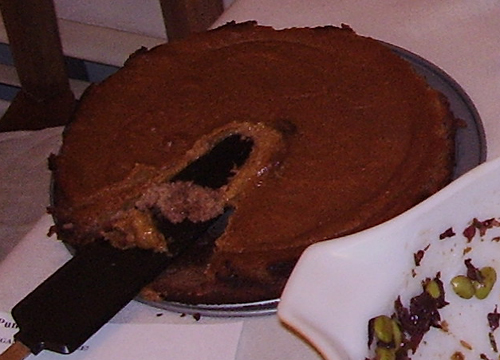
Pumpkin pie from Thanksgiving 2007
Because I couldn’t find one perfect recipe, I used the crust from one and the filling from another. Actually, Michael did the work.
Lowcarb notes: we’ve made this pie (filling and crust) with xylitol instead of sugar and it works fine. Leave out the molasses.
We decided to triple the recipe this year but somehow ended up with 4 pies (and 6 crustless cupcakes we made for a nut-allergic friend). We used small/medium springform pans.
The crust:
From:
http://www.somethinginseason.com/2007/10/pumpkin-pie-from-scratch-part-1.html
(note: this lovely site has been shut down)
Basic recipe:
2 cups whole pecans (you can substitute walnuts if you like)
1/4 cup brown sugar
1 egg
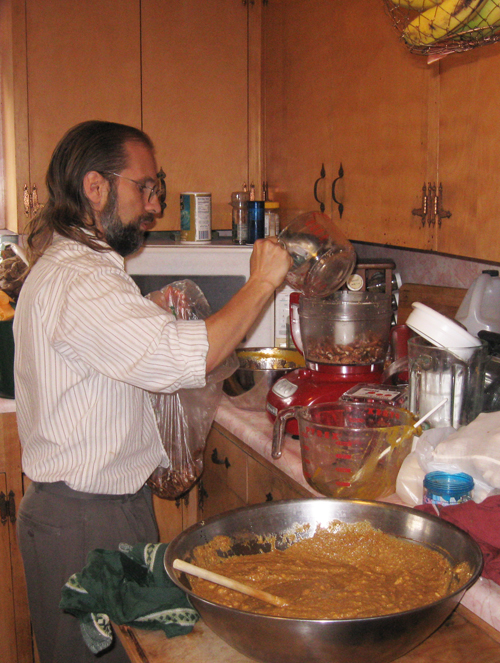
Michael processing pecans
I used pecans and organic cane sugar and flaxseed goo for the egg (1 tablespoon fine flax meal in 1/4 cup water, nuked for a minute then left to cool). You simply grind it all in the food processor and then press it into the pan. Cover the bottom and an inch or more along the sides with a good thick crust (1/4″ or so).
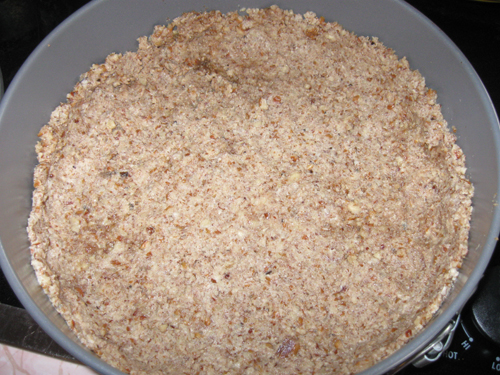
Crusts ready for filling
The filling:
From: http://www.tazarat.com/results.asp?id=33
Basic recipe:
3/4 lb firm tofu
1 (16 oz) can pumpkin puree or 2 cups fresh-cooked pumpkin
1 cup Sucanat (organic evaporated cane juice/cane sugar) or brown sugar
2 TB oil
2 TB molasses
1 1/2 tsp cinnamon
1 tsp salt
3/4 tsp ginger powder or 1.5 tsp fresh grated ginger
1/2 tsp nutmeg
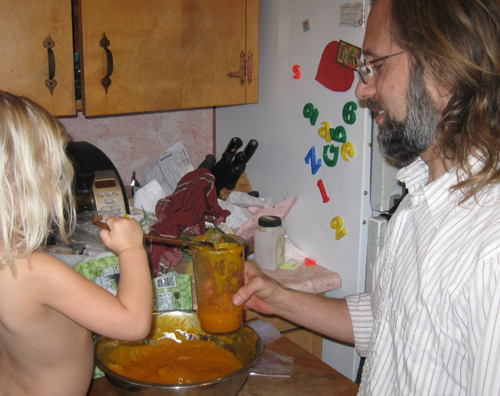
Michael & Miriam measuring pumpkin puree
We used homemade pumpkin puree (from Peterson pumpkins) which I measured into 2 cup bags and froze. For the sugar, we used organic cane sugar. Michael used 4/5 of a cup instead of a full one in 2007 but we forgot in 2008 and used the full amount. The pies tasted great and weren’t too sweet. The oil was sunflower (also oiled the pan with it). Instead of ginger powder, we used twice as much grated (both fresh and frozen work well) ginger. In 2008, we couldn’t find nutmeg in the pantry so substituted cardamon (yum…I think we’ll have to do both next year).
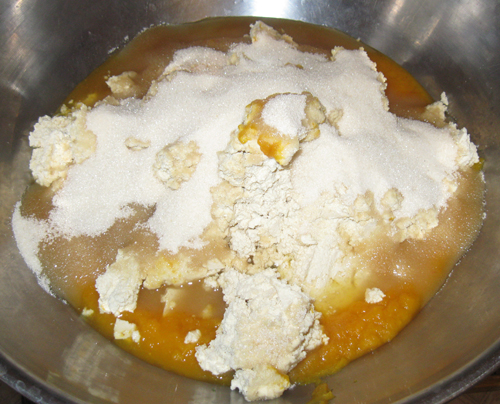
Pumpkin pie filling
You just food process and/or mix everything and pour it on the crust. Spread out evenly.
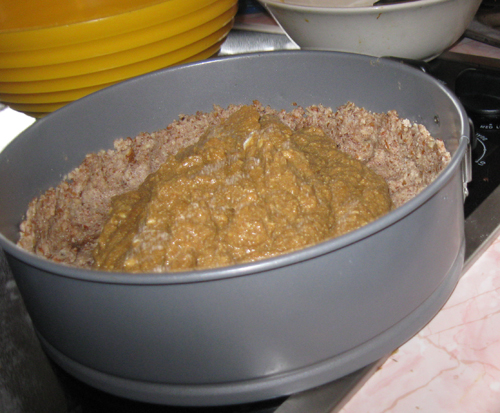
Filling the crusts (picture by Miriam Norwitz)
The directions say to cook for 1 hour at 350*F, until cracks appear. But this isn’t nearly long enough. The filling takes 1.5 to 2 hours; unfortunately, the crust starts to burn after you pass 1 to 1.5 hours. The secret is to turn off the oven after an hour or so, before you get that burnt smell, but leave the pies inside where it is warm. The filling will continue to set. If your oven doesn’t hold heat well, leave it on a low temperature (like 200 or 250).
The good news is that overcooking the crust actually tastes good. People liked it even when it was burnt, though it was better when it was just caramelized. Just keep an eye on it and you’ll be fine.
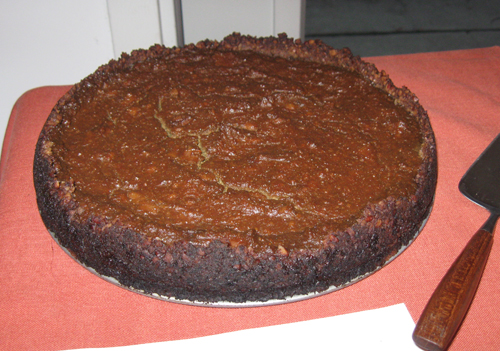
Pumpkin pie display
This is a rich pie with plenty of spice, but still a good pumpkin flavor. It is softer than your usual pumpkin pie but part of that is regular pies have a very firm crust that holds the filling (this crust doesn’t do that at all). The texture is good. All in all, it was a success.
I made a cashew cream to go with it. The cream was also a huge hit. It was great on it’s own but even better with the pie. They went together superbly.
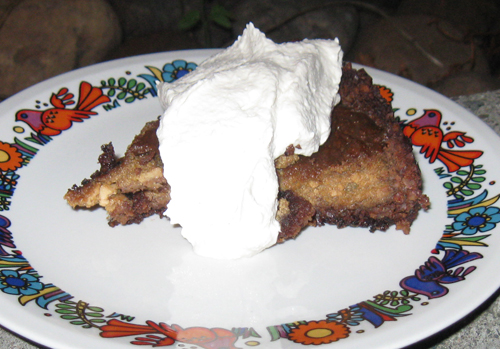
Pumpkin pie with cashew cream
Note: Recipe rewritten with new pictures 11/08.
Categories: Desserts · Food · Places to Go · Recipes · Religion & Holidays · Snacks · Thanksgiving
Tags: · dairy-free, egg-free, gluten-free, lowcarb, photos-family, photos-food, vegan, vegetarian
December 1st, 2008 · by Cyndi · 3 Comments
So what’s wrong with cranberry sauce made with oranges, you ask? Nothing. It’s delicious. But the slightest trace of oranges makes my daughter sick for hours. So I developed a version with lemons instead. I think it works better than oranges for cutting fatty foods and providing a clean crisp taste. You will need to add slightly more sugar/sweetener to this recipe to make up for the lack of sugar from the citrus.
Cranberry sauce is one of those dishes that is so easy to make I can’t understand why everyone doesn’t do it. Especially given that the canned stuff is so bland and without texture. You do want to use organic cranberries here, as chemically-grown berries tend to be high in pesticides. 2008 was not a good year for cranberries and they were horribly expensive. Fortunately, you don’t need a lot of them (1 lb served over a dozen people).
This recipe freezes extremely well. It also lasts in the fridge for a long time. I froze a batch leftover from Thanksgiving 2006 and served it for Thanksgiving 2007 with very little reduction in taste or texture. I used the recipe again for Thanksgiving 2008.
Ingredients:
Fresh cranberries, 1 bag (about 16 oz)
Fresh lemon zest from 2 small lemons (organic only)
Fresh lemon juice from 1 lemon (2 if not juicy)
Fresh ginger root, grated, 1-3 teaspoons
Salt, pinch
Stevia, pinch or two (optional)
Organic cane sugar, as desired
Water as needed
In 2008 I used 3 TB sugar and no stevia and ended up with perfect sauce that was not very sweet (which is how we like it). In 2006/7 I used a bit less sugar and some stevia. In 2008 I also used 3 TB water to thin out the sauce a bit. How much water you need (if any) will vary a lot based on how juicy the berries are, how much you cook it, how much sugar you use, etc.
Rinse the cranberries in water and drain.
Put into an empty pot on the stove and heat gently while stirring until the cranberries start to soften.
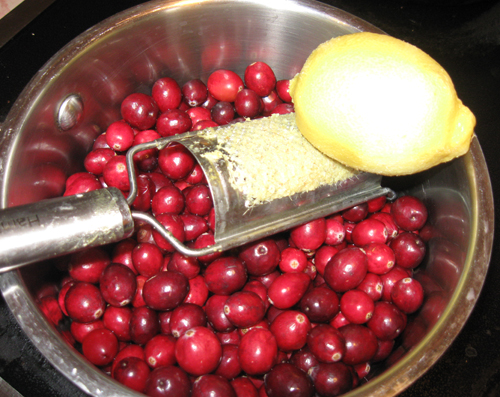
Zesting a lemon over cranberries
Add stevia and sugar to desired sweetness. The stevia is optional but will help reduce the overall sugar level. I end up using about half of what is called for in a traditional cranberry sauce that also has a sugar boost from orange juice. Don’t use all or mostly stevia as the dish will be too bitter (I love stevia but it doesn’t mesh well with lemons).
Add salt, lemon, and ginger.
Stir and cook until the cranberries start to pop open and the texture is to your liking. Mash a bit if you wish or leave mostly whole. Adjust sweeteners/seasoning if needed. If the flavors aren’t coming together, you probably need a touch of salt.
This cranberry sauce makes a great traditional accompaniment to turkey or other Thanksgiving fixings. It’s also good as leftovers with a variety of foods as a condiment. Miriam enjoyed dipping carrots in it. And for Thanksgiving 2007, some people ate it straight as a dessert.
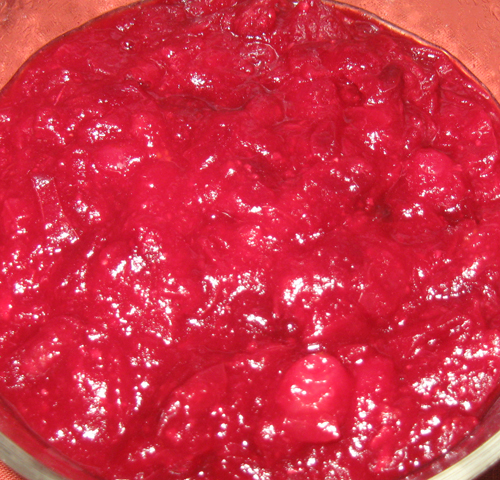
Finished cranberry sauce
Note: Recipe rewritten with new pictures 11/08.
Categories: Desserts · Food · Places to Go · Recipes · Religion & Holidays · Spreads & Dips · Thanksgiving
Tags: · dairy-free, egg-free, gluten-free, photos-food, vegan, vegetarian
November 30th, 2008 · by Cyndi · 7 Comments
This is a simple recipe but difficult to get just right. You need a good blender and some finesse.
I made the cashew cream to go with a vegan pumpkin pie I took to a Thanksgiving Potluck in 2007 and again in 2008, though it’s delicious on anything sweet.
Recipe:
2 cups raw cashew pieces (I keep them in the freezer)
Juice of one small lemon
2 teaspoons vanilla extract
Pinch of salt
Dash or two of white stevia powder (or use a another sweetener if you prefer)
Soak the cashews overnight (anything between 4 and 24 hours is fine).
Drain and rinse the nuts and blend them with as much water as they need. You may need to do this in several batches.
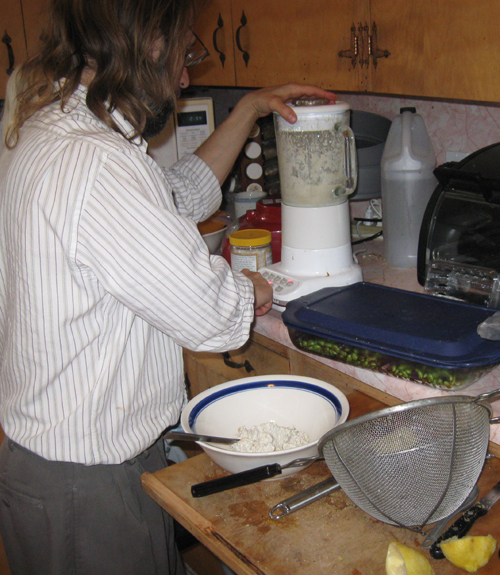
Michael & Miriam blend the cashews
Add the rest of the ingredients.
Keep blending, then stop and use a spatula regularly to get it all. Make sure it is very smooth. Don’t be afraid to add water, but taste the cream frequently to make sure you aren’t over doing it. If the blender is strong, the nuts will cream up and absorb the extra liquid. If not, you’ll have a somewhat gritty cream (which won’t take too much liquid, so be aware) but it will still taste good.
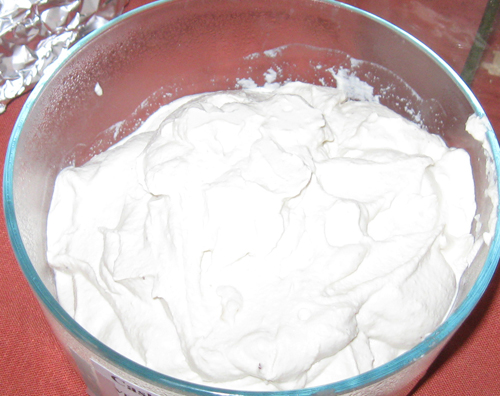
Finished cashew cream
Serve as you would whipped cream. It will keep in the refrigerator for several days.
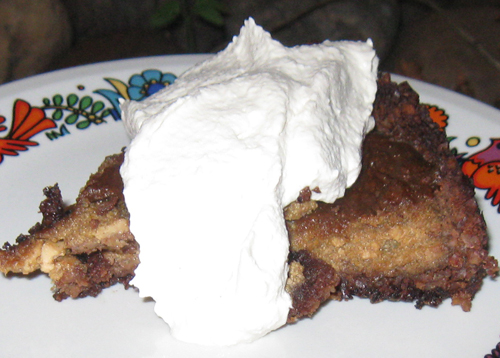
Cashew cream over pumpkin pie
Note: Recipe rewritten with new pictures 11/08.
Categories: Desserts · Food · Places to Go · Recipes · Religion & Holidays · Snacks · Thanksgiving
Tags: · dairy-free, egg-free, gluten-free, lowcarb, photos-family, photos-food, raw food, vegan, vegetarian
November 24th, 2008 · by Cyndi · 2 Comments
It’s fall! It’s pumpkin time! So what do you do with those seeds? Well don’t waste them, turn them into a healthy nosh.
Start with any winter squash: pumpkin, acorn, red kuri, whatever you like. In these pictures, I used butternut squash.
Cut the raw squash in half lengthwise. Use a fork to pull out the seeds. See the gooey stuff in the seed section of the squash? It’s delicious when cooked so you can just leave it there (except for pumpkins; remove and discard pumpkin goo).
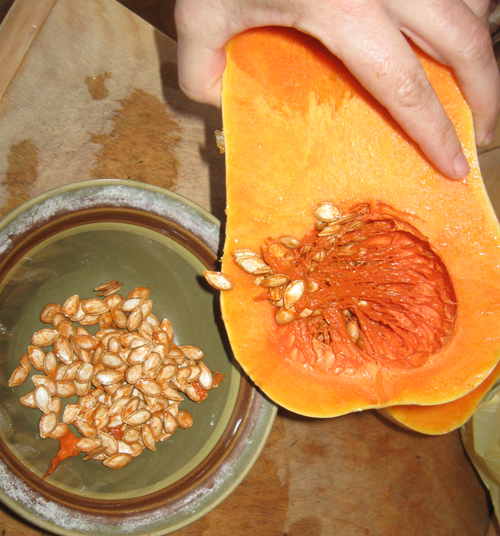
Removing butternut squash seeds
If you want, you can wash the seeds in some fresh water (I rarely bother). This will give them a cleaner appearance and flavor after being cooked, and will reduce burning. Be sure to lay them on a clean towel after washing to dry them.
Mix in some oil (I use olive, just enough to coat), something salty (I used tamari), and some flavor (I used cumin, other times I use curry powder or hot pepper). Stir with the fork.
Spread them out on a cookie sheet (no need to grease it since you put oil with the seeds) and bake until crispy and golden brown. I put them in with the squash (the temperature can vary between 300 and 450 degrees) but watch them carefully because they’ll be done in 5-20 minutes, depending on the temperature. They do burn easily. Be sure they aren’t too soft either; you want them to crunch in your mouth once they’ve cooled down.
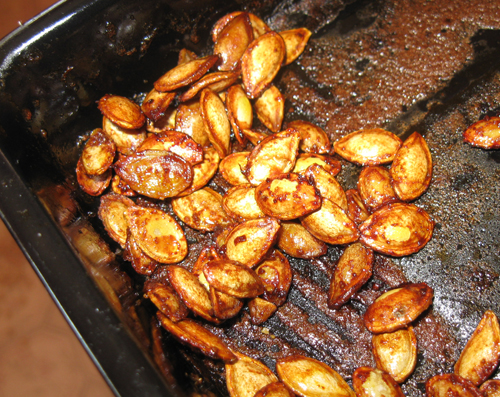
Roasted butternut squash seeds
If there are any leftover, store them in a glass jar with a lid on the counter. They will last for a few days to a couple of weeks. If they get soft in the jar, just crisp them up in the toaster oven.
Categories: Food · Recipes · Snacks
Tags: · dairy-free, egg-free, gluten-free, lowcarb, photos-food, vegan, vegetarian
November 22nd, 2008 · by Cyndi · No Comments
Some comfort foods come from childhood (the one that fills my soul is very soft, very slow cooked scrambled eggs over buttered whole-grain toast, something I can no longer have) and others are with you all along but hidden until you happen upon that food. My adult-found comfort food is Ethiopian. The sour spongy bread wrapped around legumes cooked long and creamy in unfamiliar spices.
So when I heard an Ethiopian/Eritrean restaurant was finally opening in Sonoma County, I had to go. It took a while–it actually opened in early 2008, and another I never made it to was open briefly before it–because eating out regularly was the first thing we cut from our budget as money got tight. But after a bad day Thursday, when I had an appointment near Michael’s office, I emailed him and said that after the appointment I was picking him up at work and we were going to lunch.
Abyssinia Restaurant
913 4th Street, Santa Rosa, CA
(707) 568-6455
Hours: M-F 11am – 3pm; 4:30pm – 9pm (closed Tuesday)
Sat 9:30am – 10pm; Sun 9:30am – 9pm
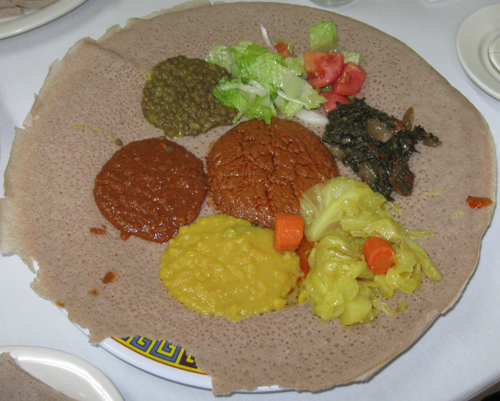
Vegetarian Combo
I’ve eaten in perhaps a dozen different Ethiopian restaurants in my time and they’ve ranged from barely passable to excellent. My current favorite is Café Eritrea D’Afrique in Oakland, CA. For the most part, they all have very similar dishes: Injera (the bread) served with we’t (meat or legume/vegetable spiced stews, also spelled wat or wet or wot).
Before I knew I was gluten-intolerant, I took a friend with celiac to Cafe Eritrea and she made sure that their injera was made from teff (a non-gluten African grain) only. When they said it was, she tasted a bit and waited 20 minutes. She is so gluten sensitive that she would have known by then. She then ate a full meal (and many others on different occasions) and never had any symptoms.
I’d encountered wheat flour in some injera recipes (and even some restaurants) but assumed it was a Westernization of traditional cuisine. Turns out it’s a valid variation, along with the use of barley flour. I thought perhaps it was a regional difference, maybe Eritrea vs Ethiopia, but my readings tell me it’s more of a family or personal difference.
In one Vancouver restaurant that used barley flour with the teff, they said the bread was less sour than the 100% teff versions (the woman made a face as she thought about sour injera) and I’ve found this to be true. Cafe Eritrea’s injera is thick and soft (but with body) and very sour; I love it. Abyssinia’s injera is made with teff, wheat, and barley and is thin, dense, and with very little sour taste at all. Both versions are good, it’s a matter of personal preference and of course of food tolerance. If you can not have barley or wheat, check ahead of time what the injera you’re thinking of getting is made from.
I was disappointed: Miriam and I can eat gluten once in a while without any problems, but I prefer not to and this means we can’t bring gluten or wheat intolerant friends there. And I really miss the sour stuff; it doesn’t hit my comfort food buttons without it.
Abyssinia is a nice place and it has received a boatload of good reviews. It’s very clean and white with touches of native art and eating baskets (which I didn’t see in use). Aside from the staff, I didn’t see anyone in the restaurant who looked like they came from Ethiopia, though I’m not sure how large the community is in Sonoma County so that may not be a true sign.
Our server (who may have been the owner’s son) was accommodating and quick. We asked for water as we perused the menus. I wanted hot water with lemon. Michael asked for regular water. And Miriam said “warm water.” Our server obliged with a tray of drinks fit for the three bears.

Miriam's water is just right
Miriam had expressed an interest in chicken and that’s what Michael wanted too, but the sole chicken dish on the menu (Doro We’t $13.95) came with a hard-boiled egg. The server said the eggs are already in the sauce but he’d check to see what he could do. The kitchen was about to start a new sauce and they had no problem doing one egg-free (he seemed to understand that sauce that had touched egg was not safe).
Unfortunately, he mentioned that the chicken was spicy so Miriam refused to even try it, but Michael enjoyed it (and was glad not to have to worry about cross contamination). He said it was “sufficiently spicy” but not so much that I wouldn’t have been okay with it (I’m a former spice wimp who is fine with medium hot).
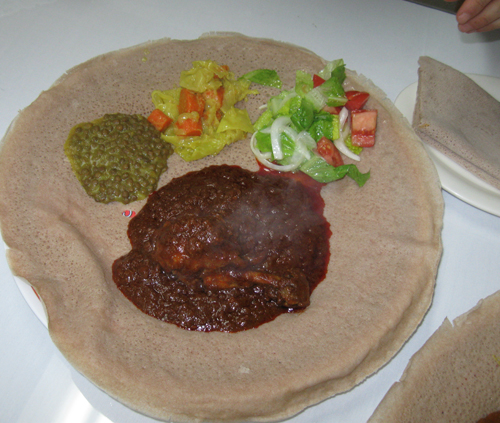
Doro We't
I had the vegetarian combo ($18.95 for two, $10.95 for one), which they say is vegan (some of the meat dishes use a spiced butter). It has a bit of every one of their six vegetarian dishes: garbanzo beans, split yellow peas, two lentil dishes, collard greens, and cabbage/carrot/potato. Plus some green salad. Only one was spicy (the lentils (miser) or garbanzos (shiro) on the far left of the plate, see top of page). The collards had a deep green leafy flavor which was quite good. Some reviews praise them for not being bitter, but I like that depth in collards.
The we’ts had a flat taste to them, like they lacked salt, though adding salt didn’t help much. The food was also quite oily. I’m someone who tends to cook with a fair bit of oil but this put me off. I’ve had Ethiopian food before that had no oil and it is flavorless. The excess here might have accounted for the dampening of the spice flavors. Part of the fun with this cuisine is eating the plate, the injera on the bottom that has soaked up the sauces. But in this case, the injera had little sauce but lots of grease.
Considering Abyssina is only 20 minutes from my home, and 5 minutes from Michael’s work, it made a nice meal and I may go back again. I can’t say it is as good as the Oakland ones (though those vary a lot as well), but they’re a good hour away.
Parking is difficult but we found a place around the corner. It’s a few blocks from the center of downtown so there is street parking here and there. The restaurant is wheelchair accessible and there is no incense or other strong smell. But the bathrooms had so much air freshener that Michael and Miriam turned away at the door (when a 3 year old is willing to hold it, you know it’s bad).
To see the menu, click on the picture below and use your browser’s zoom function if needed.

Abyssinia Menu
Other reviews:
The Press Democrat (May 2008)
Chowhound (March 2008)
Yelp
Categories: Food · Restaurant Reviews · SF Bay Area Restaurant
Tags: · african food, dairy-free, egg-free, photos-family, photos-food, santa rosa, sonoma county, vegan, vegetarian
November 17th, 2008 · by Cyndi · 1 Comment
With all the various fermented vegetables I’ve made, somehow I never got around to making cucumber pickles. But that changed this summer when I tasted a friend’s potluck offering and realized how much I missed them. The vinegared pasteurized version from the store just doesn’t taste the same.
My friend used slicing cucs (the kind you put in salad), cut into chunks. They were delicious but a bit mushy with a thick skin. I knew I’d want to use pickling cucs, which are thin-skinned, solid, and just the right size for pickles. I found some at an organic farm stand I passed on my way to an appointment in Santa Rosa. The farmer insisted I take some heads of dill as well.
I used the making sour pickles recipe from fellow tribe member Sandor Katz, author of Wild Fermentation. With other veggie ferments, you add salt, massage it in, and let the vegetable juices come out and cover the veggies (adding some salt water if necessary). But, with whole pickles, you need to make a brine. With cucumber pickles especially, the salt to water ratio matters. I used 3 tablespoons salt in 2 quarts/liters of water.
I also added a large head of dill flower, a small handful of peppercorns, and some grape leaves. Katz (and other sources) say the grape leaves help make the pickles crunchier. I figured it couldn’t hurt, and I do have a nice grape vine in the back of my property. Next time though I’ll make extra grape leaves and then use them for stuffed grape leaves since all the commercial ones have preservatives. If you want garlic, toss in a few peeled cloves.
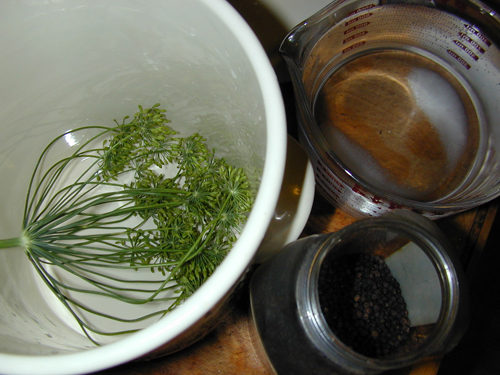
Seasoning for pickles
Put your dry seasonings in the bottom of the container (use glass or ceramic; plastic works but I can’t recommend it). You don’t have to sterilize it first but do make sure it’s clean. Wash the cucumbers, cut out any bad spots, and remove any remaining blossom ends with your fingernail or a knife. You can keep the stems. Pack tightly into the container.
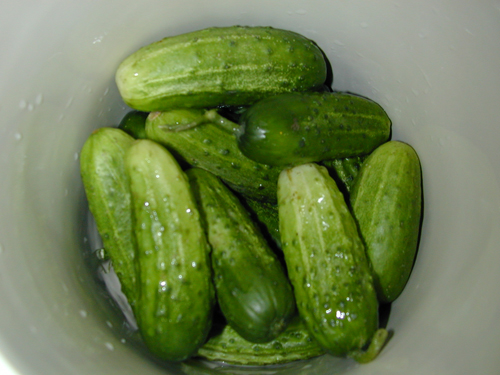
Packing pickles
Now, pour in the salt solution, making sure all the cucumbers are covered. Put a plate or jar or other weight into the container to keep the pickles submerged. I used a plate with a water-filled jar on top. Cover the container with a loose fitting lid or towel to keep it clean.
Put the container on your kitchen counter or some other place that’s not too hot or too cold. Don’t put into your fridge; it won’t ferment.
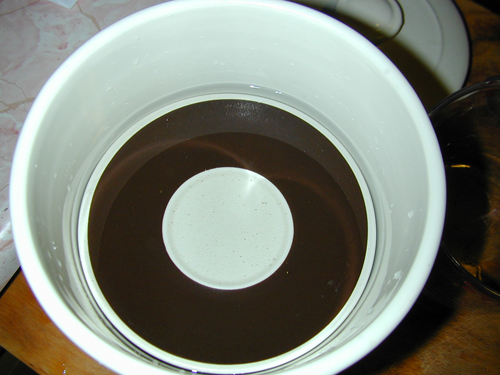
A plate as a jar weight
Check the pickles every day. There will be a lot more mold growth than with sauerkraut and other vegetables. Carefully wipe it away, cleaning the plate/weight as well. You can dip a cup or ladle into the brine to pull off mold from the top. The mold is white and isn’t overtly harmful but it will make your pickles mushy and bad tasting. Don’t worry about traces but try to get most of it.
After 5 days, my pickles were crunchy with a slight tang but were more cucumber than pickle. At two weeks they were just right. You should taste now and then to see how you like them. Some people go a month or more. It’s not only a matter of taste (do you want sour, half sour, dill, etc?) but the salt concentration and temperature will make a big difference in the fermentation rate. When they’re done, clean things up one last time and stick the container in the fridge.
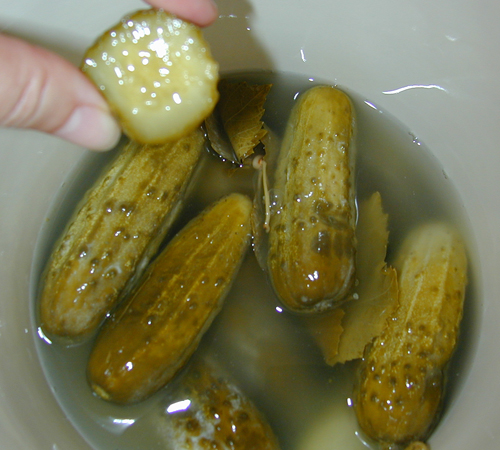
Pickles ready for eating
This batch came out pickle perfect. But my second batch, not so much. That time I bought organic pickling cucs from the farmer’s market and they had air spaces in the middle. You just can’t predict this. The pickles took less time to cure and still tasted fine (though not as flavorful since I didn’t have any dill) and the texture wasn’t bad, but I didn’t get that solid pickle crunch when I bit into them. I also had a lot more trouble with mold the second time, even after refrigerating. They’re still edible but I’m not sure what went wrong. Guess I’ll have to practice some more…next cucumber season.
Categories: Food · Recipes · Snacks · Vegetable Dishes
Tags: · dairy-free, egg-free, fermented foods, gluten-free, jewish food, lowcarb, photos-food, raw food, vegan, vegetarian
November 14th, 2008 · by Cyndi · 1 Comment
In my ongoing quest to discover 1001 things to do with masa, I came up with this little gem. Guaranteed to please three year olds everywhere.
Start with fresh masa if you can get it. Reconstituted masa harina if you can’t.
Grab a chunk, roll it into a ball, then flatten by hand into a thick oval tortilla. Place your hot dog on top, making sure the tortilla is large enough to cover the dog on all sides.
We used a LightLife Tofu Pup. Not because it’s the best vegetarian hot dog out there (trust me, it’s not) but because it’s the only one I know of that is even halfway like a hotdog but is vegan and gluten-free. Miriam had been asking for hot dogs and this package was a treat for her. Feel free to substitute any hot dog or sausage of your choice.
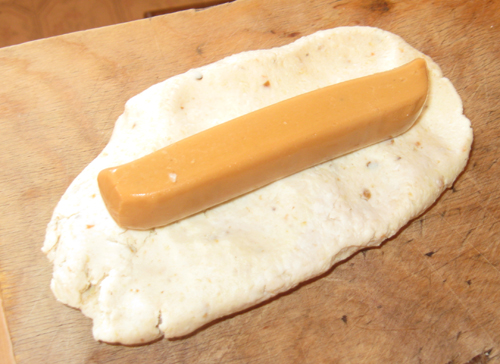
Hot dog placed on top of masa
Now, roll the masa around the dog, seal the edges and crimp the ends. Pull off any excess masa.
Note: I haven’t tried this on a stick but the time to do it is before you put the hot dog on the masa. Wrap the masa around the hotdog end of the stick.
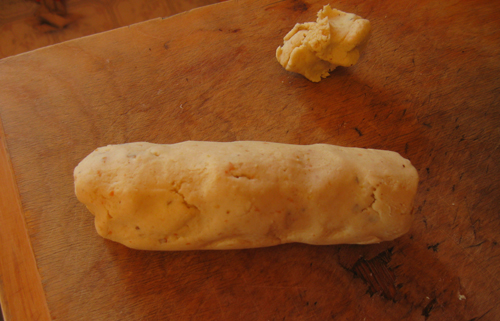
Corndog ready for frying
Fry in a hot cast iron pan (or anything else that won’t stick) without any oil. With tortillas, the pan should be hot enough to sizzle water, but here you want it on the low end of that because the masa is thicker and you want it to cook through without burning the outside.
Cook until browned on all sides. That means about 6 turns (it’s round, not a square) and don’t forget a few seconds on each of the ends.

Corndog with Catsup
Serve with the condiments of your choice. For Miriam, that’s catsup.
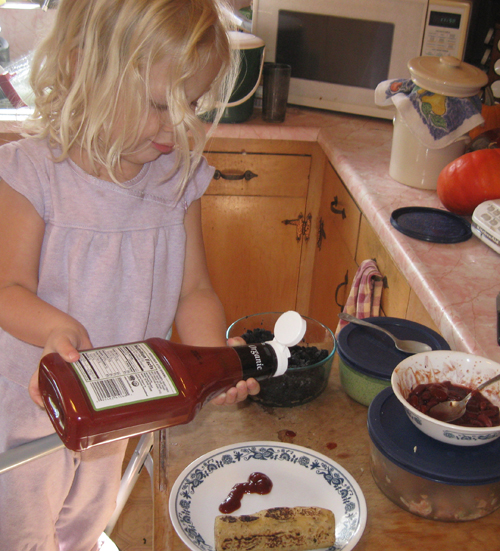
Miriam adds catsup to her dog
Three years olds often take some time to warm up to new foods, even ones that become their favorites later on. Not in her case… “I LOOOVE this!!”
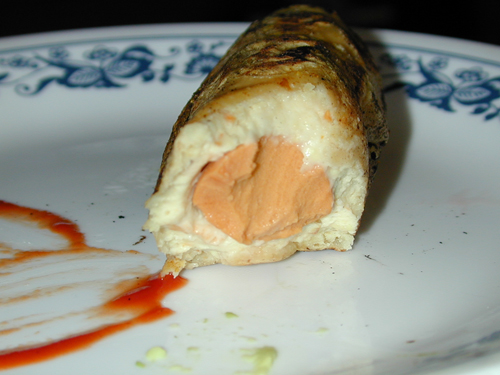
Half eaten corndog
Categories: Food · Main Dishes · Recipes · Snacks
Tags: · dairy-free, egg-free, gluten-free, photos-family, photos-food, vegan, vegetarian
November 7th, 2008 · by Cyndi · 1 Comment
At the Petaluma farmer’s market in September, I found a stand with a big box of organic paste tomatoes (romas) which was on sale because they were overripe. I picked out some good ones then thought, wait a minute, and turned to the farmer and asked to buy the whole box. “I was hoping some one would ask me that!” he said. I ended up with 20 lbs of luscious organic paste tomatoes for $12. Only a few ounces of them were too far gone to use and I lost less than a pound total to stems and bad bits.
Yes, you do want paste tomatoes for this. Roma is the most available variety but there are others, including many heirlooms. Paste tomatoes are drier than slicing or cherry tomatoes so there is less liquid to cook down. They also stand up better to long cooking times. If you eat a paste tomato raw, it won’t have much flavor. But trust me, once you’ve simmered or roasted it will be intense.
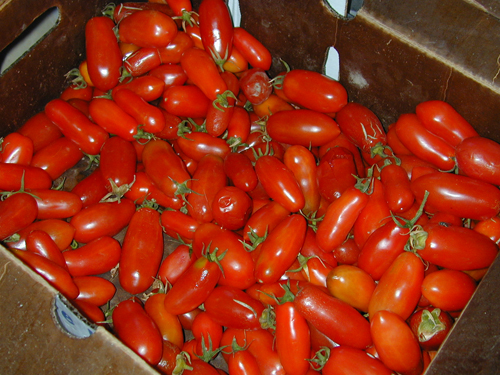
The bottom of a big box of roma tomatoes
I washed the tomatoes by immersing in a bowl of water and lifting them out, minus their stems. Then I cut out any bad parts and then sliced into quarters (or so). I think I am not going to bother to cut them up next time. They really fall apart easily in the pot and you puree them later anyway. But I will inspect each and every one for scars or bad spots (cut out the stem ends if they are large or woody). And of course to make sure no stems or leaves are there.
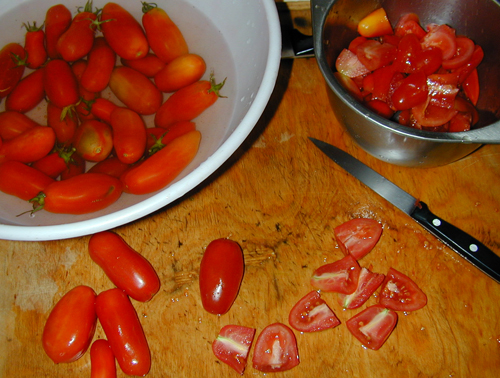
Quartering tomatoes
Simmer on low heat in big pot for several hours, let it sit overnight with the heat off, then cook some more. Note how the picture shows some bubbles on the edges but no bubbles from boiling. That’s what you want. Boiling is much too hot. Check and stir often.
When a few hours from the end, add a bit of salt and 2 bay leaves.
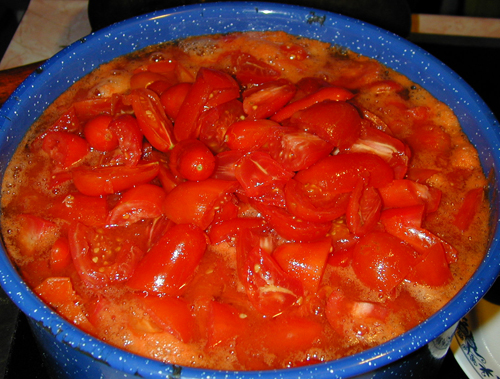
Simmering tomatoes
If you’re not careful about the heat or stirring frequently, you will end up with some burnt parts on the bottom. In fact, a lot of sauce recipes just assume you will have some “crust” at the bottom and tell you not to stir too deep. But you can prevent all or most of it if you’re watchful. Don’t worry about some browned stuff at the bottom though.
And, by all means, do not–I repeat, do not–let your spouse put a lid on the simmering pot in order to do something else on the stove and accidentally knock the dial of the electric stove from “single burner low” to “double burner high” and then ignore it because it’s not his sauce. When I went to check on it 20 minutes later, it was bad. Smokey smell and a burnt taste in the sauce. I was not a happy chef.
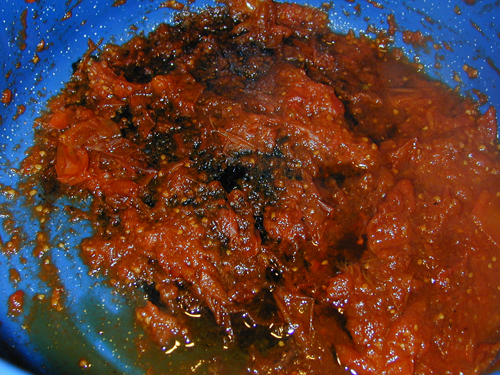
Burnt sauce on the bottom of the pot
Here’s how I fixed it:
- Carefully move the sauce to another pot (do not pour; scoop and avoid touching the bottom).
- Put in some sugar to counter the burnt flavor (I used 2 tablespoons).
- Add a raw peeled potato to the sauce and simmer it in there for a while. It soaks up the bad flavor.
It did work. The sauce has a definite smokey undertone but it’s still very good and usable.
When the sauce is done, it will be much reduced from where it started and the tomatoes will have completely fallen apart. It should look like this.
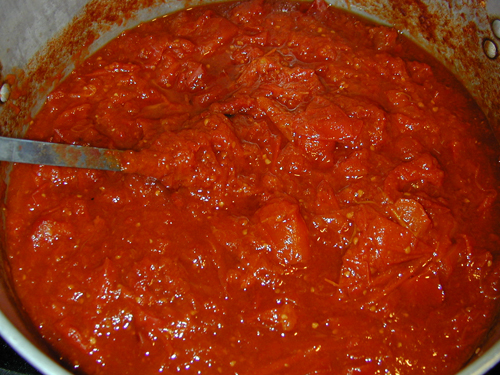
Tomato sauce ready for pureeing
I then sauteed 2 medium onions, diced, in olive oil. For some (okay, most) applications I brown the onions but you don’t want to do that here. The flavors will be off. Make them translucent but stop before you get more than a hint of browning.
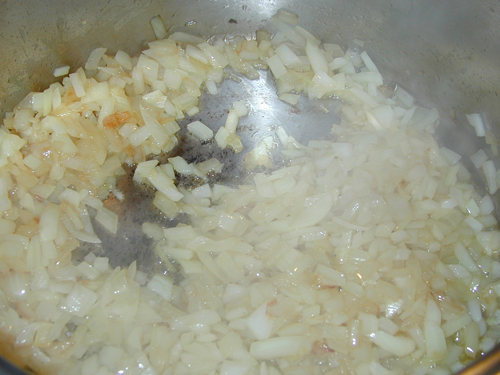
Sauteed onions
You can add most anything you like to your sauce. If you like garlic, put it in with the onions. If you want vegetables, dice them and either saute with the onions or add to the simmering sauce a couple hours before it is done (since it’s at low heat, it cooks things very slowly).
I decided I wanted a plainer sauce, so I could change it up as I liked later. So I only added the onions (with olive oil), salt, and some fresh rosemary, oregano, and basil (very near the end).
Now it’s time to puree the sauce. You can do this before or after you add the onions or anything else, depending on what you want. I pureed after adding everything. Be absolutely sure you remove all the bay leaves first though (and the potato if you burned your sauce).
I used my trusty Braun stick blender, which is perfect for this application. I wanted the sauce to have texture but be reasonably smooth.
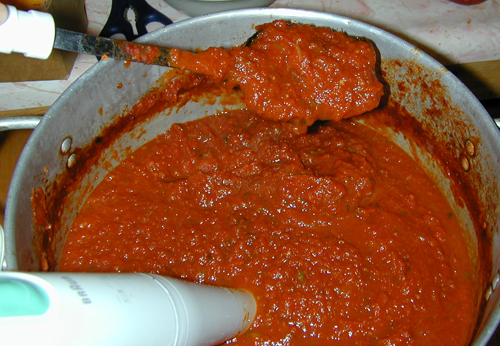
Pureed sauce ready to eat
This batch gave me 22 cups for freezing and 25 oz for the fridge. Pyrex makes some 2 cup round glass storage containers with tight fitting plastic lids which are great in the freezer. You can defrost the sauce the day before in the fridge or just slide it out of the Pyrex into your pot or nuke the glass (remove the lid first).
This sauce is of course great on pasta. We also like it on sauteed tofu.
Categories: Dressings & Sauces · Food · Recipes · Vegetable Dishes
Tags: · dairy-free, egg-free, gluten-free, lowcarb, photos-food, vegan, vegetarian
November 3rd, 2008 · by Cyndi · 1 Comment
This year, Miriam (age 3.5 years) wanted to be a superhero for Halloween. Her first choice was Superman, and she was quite clear that she meant Superman, not Supergirl. Being 3 though, she had a lot of back and forth. At times Supergirl was okay and so were Spiderman, Batman, or anyone from the Justice League (her favorite is Hawkgirl). In the end, she decided on being Superman (though she used both titles while trick-or-treating).
Being a green mom I’m opposed to 1) spending lots of money on something meant to be used once and 2) buying new plastic/vinyl. Being someone with multiple chemical sensitivities though, I’m not able to just pop into Goodwill and look for used costumes. I didn’t want to take the time to make something either.
I found a used Superman costume on Craigslist from someone who said there was no fabric softener. I didn’t notice a scent on it when I bought it (but then I didn’t notice the rip in the seam either) but it came out after being washed. Miriam said it itched and I wasn’t sure what I was going to do. But it turns out she was okay if she wore clothes underneath it (which was a good idea anyway because it was cold out). I just washed my hands after every time I touched it and had her change immediately upon coming home.

Miriam & Michael fly off to Halloween storytime at the library
Last year, her first time trick-or-treating, we found exactly one item in her bag that she wasn’t overtly allergic to and let her eat it. She bounced off the walls for a while then gladly agreed to trade in the rest for daddy to take to work and she got to pick out a toy from a local store.
This year they went trick or treating in a more popular area so the treats were smaller. This meant far less chocolate, her biggest allergen. About 2/3 of the candy was chocolate, orange, or something else she reacted to (like the treat from last year, which has dairy) and it went into daddy’s bag (traces of dairy or gluten aren’t problems for her and she can eat each of those as treats once in a while, but egg, chocolate, and orange are not okay ever).
I snagged the one good thing in what was left for myself (peanut butter taffy, yum!) and she had a taste of it. Then she got to pick one candy for herself with the caveat that we didn’t know what might have orange so she was taking a risk that she might pee her pants. She had a sour cherry lollipop (the round junky kind with a chewy center, which made for some amusing expressions as she’s had almost no candy in her life…she now says she wants to give away all the chewy candy). She did some bouncing around and we explained that it was the sugar (actually, it was probably mostly the artificial crap).
She is keeping crayons and a tiny joke/coloring book she received. We did take away a smartie necklace she was wearing because it was orange colored and smelled like orange. She willingly gave it up when I told her that. We went and washed hands and neck but she’d been wearing it for a while and did end up having to pee in the middle of the night, though no accidents.
The deal is, and she’s totally cool with it, is that she will get a toy (she was okay with my picking one out and not telling her in advance…anyone know a cheap source of a real working stethoscope? I’ve been wanting an excuse to get her one for ages) in exchange for the candy in daddy’s bag. As for the rest of the candy, she can keep it or exchange it for the Yummy Earth lollipops I bought her (two flavors I know are orange/grapefruit/tangerine-free…I can’t buy from the bulk bin, only separately wrapped bags of single flavors) or for another toy. So far, she’s opted to have a Yummy Earth treat each night.
I am really happy that we could encourage her to trick-or-treat with abandon and not worry about what she was getting. That would ruin the fun. She still gets her treats (edible and otherwise) and she had a blast Halloween night despite the drizzle.
I stayed home…I can’t risk the cigarettes and pesticides I’m sure to encounter. And I already had a headache. Maybe next year I’ll go with my gas mask on and let people decide if it’s a costume. I hate missing so much of the fun stuff in her life, but I’m grateful that, so far, she’s able to participate in them herself.
Halloween day, Michael’s office had a Survivor (TV show) dress-up theme, complete with an eat-gross-things contest. His special treat was deep-fried crickets (“but, Cyndi, they’re not traife”). Oh, and a big bag of chocolate.

Miriam & Michael prepare to go trick-or-treating
Categories: Family Life · Halloween · Health · Miriam Updates · Religion & Holidays
Tags: · MCS, photos-family
October 28th, 2008 · by Cyndi · 1 Comment
Chimichurri is a popular sauce from Argentina made with fresh green herbs (usually parsley, cilantro, and/or mint), garlic, acid (red wine vinegar, lemon, etc), and olive oil. Some recipes have other ingredients. It’s usually served on meat but I love it on fish, tofu, beans, salad, and all sorts of things. Since I’m not a garlic fan, I leave it out. It’s still amazing. My acid of choice is fresh squeezed lime juice. Not only is the flavor just right, but limes generally have no seeds, so it’s not too hard to make.
Chimichurri Sauce Recipe
2 bunches fresh herbs (any combo of parsley, cilantro, or mint)
Juice of 3 limes
Salt
Seasonings as desired (hot pepper, garlic, etc)
1/4 cup extra virgin olive oil
Take any parsley or cilantro bunches you’re using, twist off the bottom half of the stems and discard into the compost. Then wash the remainder very well (cilantro in particular tends to hold dirt) by swishing and lifting out of a bowl of clean water, three times. Pull mint leaves off and discard stems.
Shake or spin dry the herbs and put most of them (maybe 3/4) into the food processor.
Add the lime juice and some salt. Note that the amounts given here are approximations. Bunches vary in size and so do limes. Each of them vary by water vs flavor. There is just no way to know exactly how much lime juice or seasoning you’ll need. So start with 3 limes and add 1 or 2 more if needed after you taste. Start your salt amounts on the low side too.
I like a teaspoon or so of cumin (the seeds are best but powder is good too) and some mild heat. Sometimes I use chipotle powder, other times I use chili flakes. All depends what I’m in the mood for and what’s on hand. If you want garlic, use fresh peeled cloves. Rough chopping will help your processor out but is optional if you have a good one. I’d use 2-6 cloves in this recipe, depending on how much you like garlic.
Process until smooth and taste. Adjust lime juice, salt, and seasonings. Repeat until it’s perfect.
Now, drizzle in the olive oil and process lightly. Use more or less if you wish.
Finally, add the leftover herbs and pulse the processor so they are well chopped but still have texture. If you’re using a processor that can’t do this well, or you are using a blender, then do the chopping by hand and add the minced herbs at the end.
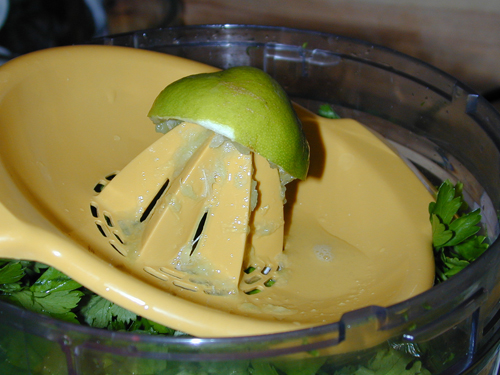
Squeezing limes for chimichurri sauce
This sauce lasts several days in the fridge and you can use it to punch up just about anything. It’s great with mashed avocados, browned extra firm tofu slices, firm white fish, or on crackers. But one of my favorite ways to use it is in a bean salad. Here are two different recipes.
Black Bean & Lentil Salad with Chimichurri Sauce
I used black beans and lentils in this dish, but you can substitute any legumes you wish. Be sure to cook them so they are done but still firm. If they are mushy, you’ll end up with bean dip, not bean salad.
2 cups dry black beans, soaked overnight and drained
2 cups french green lentils, rinsed in water
4-5 small bell peppers
I cooked the beans and lentils separately (though in the same pot) so I wouldn’t risk having to overcook one. Feel free to cook them together if you’re better with timing than I am. Cook until done but firm, drain well (liquid is great for soup stock (freeze it) or put on plants outside).
Cut peppers in half, remove cap and seeds and slice into thin strips (cut in half if more than 3″ or so). Put on baking dish with a touch of olive oil and bake until soft. I did 25 mins at 350*F in a convention oven. If you use a regular oven, stir them every 5-10 mins.
Add peppers to beans, stir lightly, and add the chimichurri sauce.
In a blender, put the following (these are approximate amounts):
Mix in sauce. Serve warm, at room temperature, or chilled.
Variation: for a bit of spice, make some of the peppers medium heat ones and cut fine (leave some peppers large and mild) or add hot pepper to the sauce.
Black Bean, Cucumber, & Tomato Salad with Chimichurri Sauce
Black beans (measure as 2 cups dried or 3-4 cups cooked, drain before using)
1 medium cucumber
2 large tomatoes, preferably heirloom
Dice the cucumbers and tomatoes and add to the beans. Add the chimichurri sauce. Mix and serve at room temperature or slightly chilled.
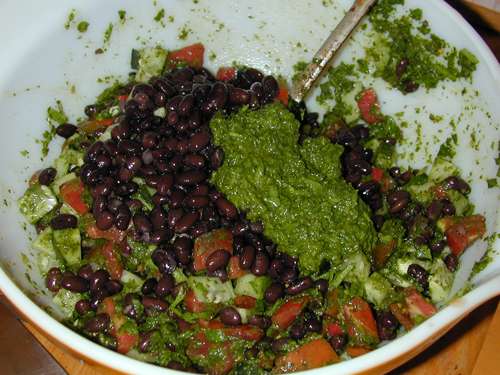
Black bean salad with chimichurri sauce
Categories: Dressings & Sauces · Food · Main Dishes · Recipes
Tags: · dairy-free, egg-free, gluten-free, latin food, lowcarb, photos-food, raw food, vegan, vegetarian
October 27th, 2008 · by Cyndi · 4 Comments
After all our travel posts, I thought it was time to share some places close to home. Really close to home in this case.
Peterson’s Farm
636 Gossage Ave, Petaluma, CA 94952
ettamarie@petersonsfarm.com
http://www.petersonsfarm.com/

The Peterson Farm as viewed from our driveway
Yes, we are lucky enough to live across the street from a small, working, chemical-free farm. In a mere 6 acres, Ettamarie and Ray Peterson manage to raise hundreds of pumpkins (including several delicious varieties, not just ornamental ones), fresh eggs, glorious raw honey, and a few miscellaneous things depending on the season.
Naturally, we always get our Halloween pumpkins here. This year they graced our Sukkah too. They make good pie when they’re done being pretty.
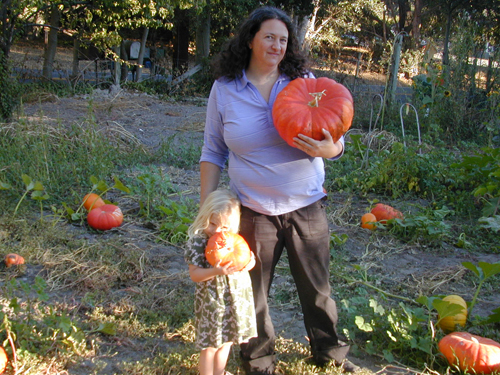
Cyndi & Miriam pick out pumpkins
Neighbors wander in as needed for a carton of eggs or a jar of honey but this isn’t an attraction you can just drive over to: make an appointment first. Mostly, they host school groups. The joyous noise of children discovering their perfect pumpkin floats through our windows all October.
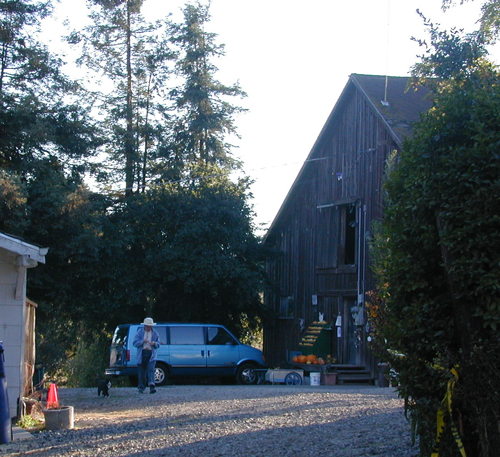
Peterson's Farm barn
There is a picnic area.

Peterson's Farm picnic area
And a large barn for workshops and classes.
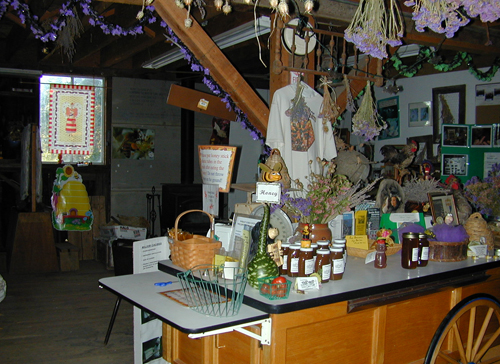
Peterson's Farm Barn Interior
But what Peterson’s Farm is famous for is Ettamarie and her bees. Here she is showing off a real hive inside a glass display case (there is a hose off to the right, through the window, that lets the bees go outside as desired).
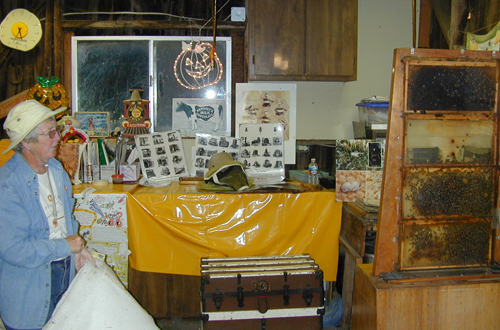
Ettamarie Peterson & her bees
Categories: Farms · Food · Food Markets · Picnics · Places to Go
Tags: · petaluma, photos-family, photos-friends, photos-places, sonoma county
October 23rd, 2008 · by Cyndi · 2 Comments
This year the spirit possessed us and we decided to build a sukkah for the holiday of Sukkot. We’d done a poor attempt a few years ago but this was the first real one for all of us.
Sukkot occurs 5 days after Yom Kippur, in late September or October. It reminds us of the time when the Jews wandered in the desert in the years between leaving slavery in Egypt and entering the land of Israel. The Sukkah (or Succah) is a temporary hut reflective of the ones carried through the desert during the Exodus.
It can be any size: big enough for one person or for a crowd. You spend the 8 days of the holiday taking your meals in it, or sleeping there if you wish. One wall can be a building and another is open (or partially open). The other two are made out of just about any material. Our two side walls weren’t as sturdy as the article linked to above say is required, but they worked.
The roof needs to be of materials grown from the ground. We used mulberry branches from the tree in the pictures. You should be able to see the stars but not have gaps that are too large.
I organized the Sukkah building party (for Sunday, just before the start of the holiday Monday at sundown) before I had a clue what we were going to use as materials. Then our tenant built a raised bed for my garden. I said it was too tall and he said, no problem, I’ll just cut off the top. When I saw the leftover wood, I knew immediately that was the Sukkah roof’s frame. It was small but I figured it was big enough for our family to eat in and we could each spend some time standing in it for the gathering. I also considered the mulberry tree to be an extension of the Sukkah roof.
So, here’s how we started: one wobbly wood frame, an open space in the driveway (dig that new gravel we put down a few weeks ago), an old garage door we’re painting this year (so I don’t care about screw holes), some scrap wood, the chuppah poles from our wedding (6 foot long dowels wrapped in ribbon), and some miscellaneous tools and fasteners.
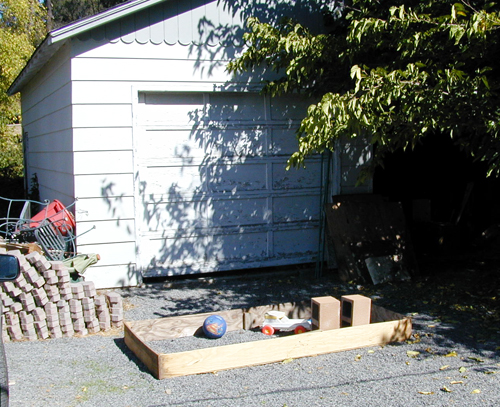
Sukkah Frame
First, we reinforced the frame with some extra nails. Then we cut some scrap wood and nailed a piece across each of the 4 corners. This was to serve as a stop for the poles. Next, we turned the frame over, put the poles so they were on top of the scrap wood corners, and held them to the frame with pipe clamps. Finally, what you see in the picture, is someone pre-drilling the holes in the frame for screwing the frame to the garage.
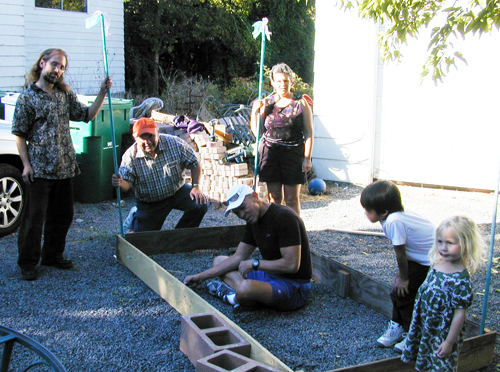
Building the Sukkah
Did I mention that both the batteries for my electric drill and circular saw (interchangeable batteries) were dead? Yes, I’d charged them, but they’re old. Couldn’t find our hand saws either. We borrowed a circular saw for the scrap wood but had to use hammer and nails for the hole pre-drilling and brute strength to screw the frame to the garage door.
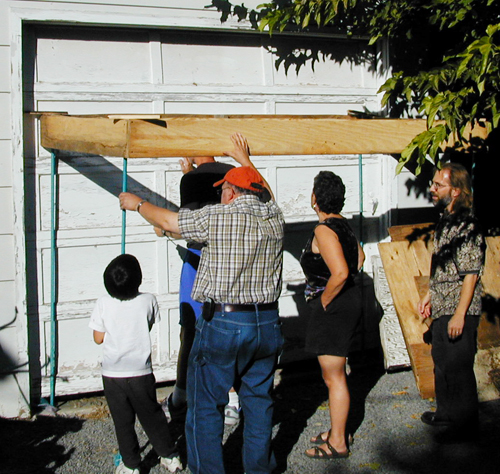
Putting the Sukkah up
We did it! Our Sukkah was a 4’x8′ wooden frame screwed to a garage. With 6′ poles on all corners, helping support the weight and create the structure. A friend loaned us the clothes for the two side walls and I tacked an old sheet up for the back wall. The floor was an old area rug and we covered the roof with freshly cut mulberry branches.
The round glass-top table was inside the Sukkah most of the time but we pulled it out for our celebration potluck Wednesday night. We added some more tables to hold food and other items.
Our Sukkah decorations were minimal but we had some Stars of David Miriam made in Synagogue over the High Holy Days, beeswax candles from Bloomfield Bees, and half a dozen pumpkins from Peterson’s Farm.
Our dinner was the cornbread challah I invented for the occasion, ceviche, a couple of salads, wine and seltzer.
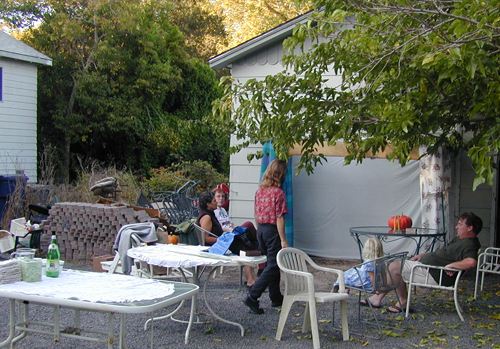
Celebrating Sukkot
All in all, I’m very proud of our Sukkah (and no telling me how pathetic it was…it doesn’t look like the pictures you see in books but it met the religious requirements and was a lot of fun). Maybe soon all those bricks will be my long-dreamed of patio and we’ll eat outside all year round.
Categories: Building · Family Life · House & Home · Judaism · Religion & Holidays · Sukkot
Tags: · photos-family, photos-friends, photos-household, photos-misc
October 18th, 2008 · by Cyndi · 3 Comments
We hosted a potluck for Sukkot this year and told everyone we would provide the challah. The last shabbus potluck we went to had regular challah and Miriam ended up with some symptoms due to cross-contamination from the eggs (part of the ritual is breaking the bread with your hands; while we don’t do that of course, others we ate with did and, despite their trying to avoid it, the crumbs spread).
At our last time hosting a Jewish potluck with these friends, we made a great challah from a Pamela’s bread mix. It came out great and worked well with a braid too. But Miriam had her first life-threatening allergic reaction in August and our top suspect is tapioca (negative in the allergy testing but we’re not letting her have it until we can do it in a controlled manner with medical backup). As anyone gluten-free for a while knows, pretty much every gluten-free bread mix or product on the market contains tapioca. It’s a great flour, but Pamela’s has it too and we just can’t take the chance.
I ordered some more of Primavera’s fabulous organic masa and was going to make tortillas (to go with the ceviche I made for the main dish). Then I thought…what if I braided and baked it instead?
First I took the fresh masa, scooped some chucks out of the bag with a spoon, evened them out, and rolled them into 3 balls.
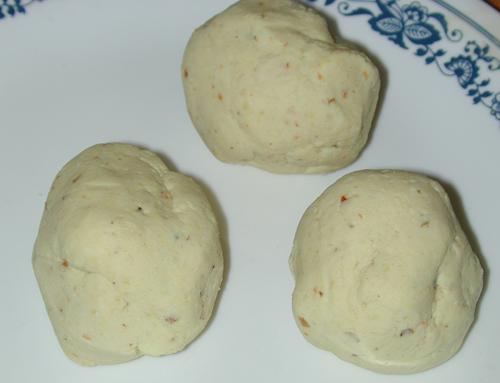
Masa rolled into balls
Then, I rolled each ball into a log.
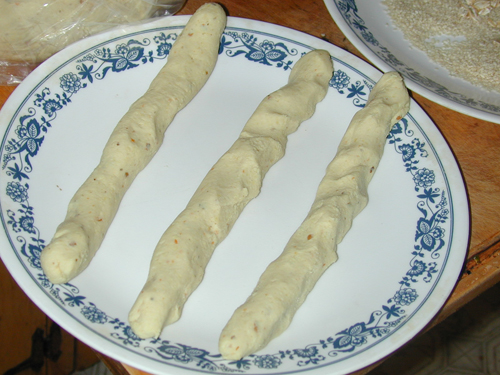
Masa balls rolled into lengths
And braided it, crimping the ends well and pushing down on the dough so it wouldn’t come apart.
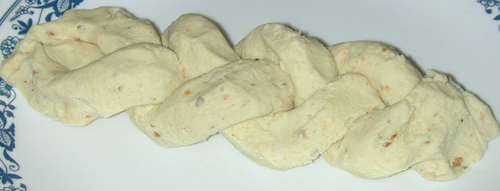
Braided dough
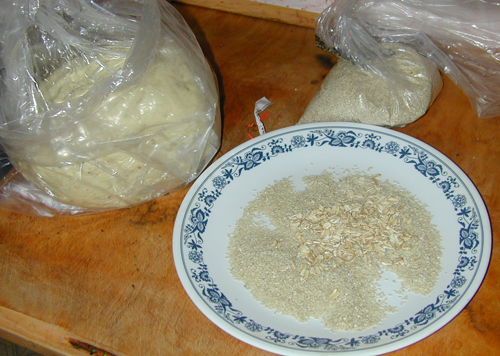
Then it went for a roll (all sides) in a plate of sesame seeds. I added some oatmeal so it would be “bread” we could say Hamotzi over. This is completely optional if you don’t need it for religious purposes. The oats didn’t change the taste or texture at all. If you react to the wheat contamination in most oats, use ones certified gluten-free. The sesame, on the other hand, was delicious and added a nice crunch.
Sesame seeds and oatmeal
I carefully moved each loaf to a baking pan generously coated with olive oil.
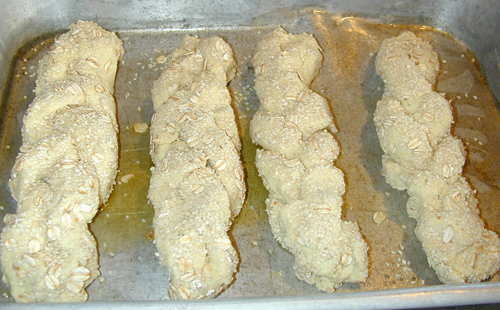
Challah ready for baking
I baked them at 325*F for about 35 minutes, turning once halfway through (use two spatulas so they don’t break apart). I left them in the oven with the heat off for another 10 minutes or so.

Finished challah
Miriam ate about half of what was there and the rest of us made sure the plate was empty. Even the nonallergic folks thought it was fabulous. It came out dense and chewy, almost like a bagel (hmmm…) but still light enough to have the mouthfeel of bread.
I’ll have to experiment a little. The oil kept it from sticking and also made it richer, which was what I was going for. Without the oil, it might taste more like a tortilla. But, overall, I’m very happy with how it came out.
Happiness is a little girl jumping for joy singing “it’s challah that doesn’t make me sick!!!”
Categories: Food · Grains · Judaism · Recipes · Religion & Holidays · Shabbus
Tags: · dairy-free, egg-free, gluten-free, jewish food, latin food, photos-food, vegan, vegetarian
October 12th, 2008 · by Cyndi · No Comments
We only had one day to spend in Portland, Oregon and it was a scorcher. We decided to do our neighborhood roaming in the morning and then find indoor spots for most of the day. We then met friends for dinner.

Portland Travels Overview
We drove up and down Alberta & Killingsworth Streets and walked about in an area with some interesting looking stores. It was mostly too spread out for walking and most places were closed early Saturday morning.

Portland Downtown Area
This was a great spot to kill a few hours. We drove there and managed to find parking. Note for Portland newbies: there is a huge difference between east and west. Many of the numbered streets duplicate. Downtown is west. (more…)
C) Portland Streetcar to the Pearl District. Downtown.
Right in front of the library, on SW 10th Ave, there is the Portland Streetcar that runs often and is free in the immediate downtown area. We took it north to a neighborhood called the Pearl District, which was a fun place to walk around and see the sights. We popped into Whole Foods for a quick bite to eat (including a grilled peach with berry sauce dessert which was a free sample) and a safe bathroom. Then we zigzagged a bit along the main parallel streets until we reached the southern edge of the district where Powell’s was.
This local chain is a Portland institution and this branch is the largest. Several stories on practically a whole city block. We could have spent days there. The bathrooms are scented. The building has elevators and is basically wheelchair accessible, if you don’t have to reach too high. There are plenty of places to sit, especially in the children’s section, which has tables and chairs like a library.
Known in Portland simply as OMSI, this 2 story building filled with exhibits for all ages was a nice way to stay cool. (more…)
F) Kalga Kafe. 4147 SE Division St.
Lovely vegetarian restaurant. Great place to meet friends and end the day. (more…)
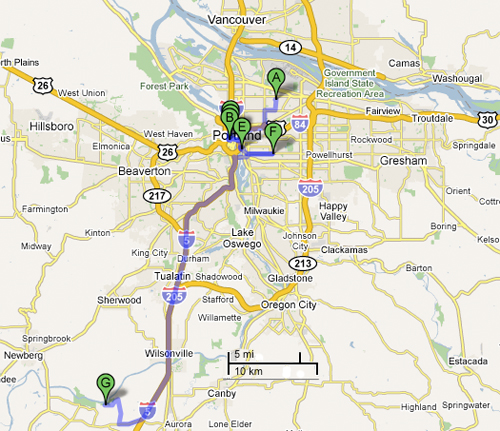
Greater Portland Area
After our day in the city, we went back to Champoeg State Park. A mere half hour drive away, it was an inexpensive way to be close to town.
Categories: Places to Go · Route Planning · Travel
Tags: · oregon, photos-misc


