Drash for Congregation Ner Shalom‘s Shabbat service, October 13, 2023, a few days after the start of the Israel-Gaza war.
by Cyndi Norwitz.
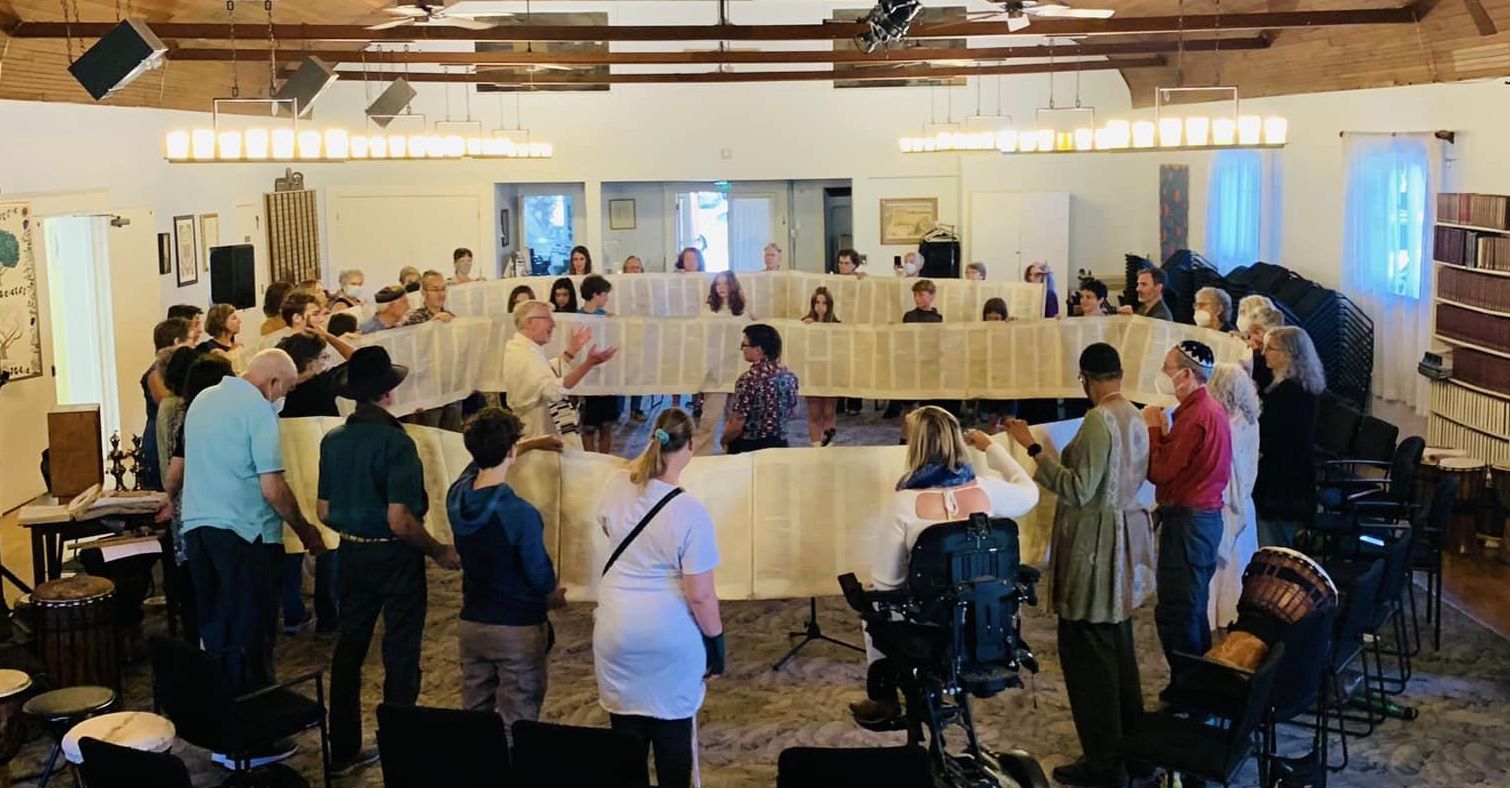
Simchat Torah at Congregation Ner Shalom, October 8, 2023. Photo by Mia Zimman.
A few days ago, we celebrated Simchat Torah, marking the cycle of our sacred book from the end all the way forward to the beginning. We unrolled the Torah scroll, creating a circle of holy words around us. Then we rolled it back up again to start our year afresh.
Tonight, we begin the first Torah portion of the year: Bereshit. It’s a long parashah, running from the creation of the universe all the way through to Noah. Now you might have heard a story about Noah and a boat. But that’s for next week.
This week Noah breaks a curse. Which curse you might ask? There are so many in Bereshit. Eve is cursed. The snake from the Garden of Eden is cursed. But this one is the curse of Adam.
To Adam [God] said, “Because you did as your wife said and ate of the tree about which I commanded you, ‘You shall not eat of it,’ Cursed be the ground because of you; By hard labor shall you eat of it All the days of your life:
Thorns and thistles shall it sprout for you. But your food shall be the grasses of the field;
By the sweat of your brow Shall you get bread to eat, Until you return to the ground— For from it you were taken. For dust you are, And to dust you shall return.”
There’s a bit of history here. When humans became self-aware, they expanded to geographies where nourishment required more than reaching into a tree for fruit and grubs. They invented agriculture and cooking and—in Biblical lands at least—the staple of their diet was bread.
After spending months researching the process for my novel, I can tell you, breadmaking is a task that envelopes a community. Breaking the soil, sowing, tending, reaping the grain. Then threshing, dehulling, and grinding. All that only gives you flour. You then have to build and maintain ovens, find sources of fuel, create your leaven, mix, proof, knead, shape, and bake the loaves. Only in community can we eat bread.
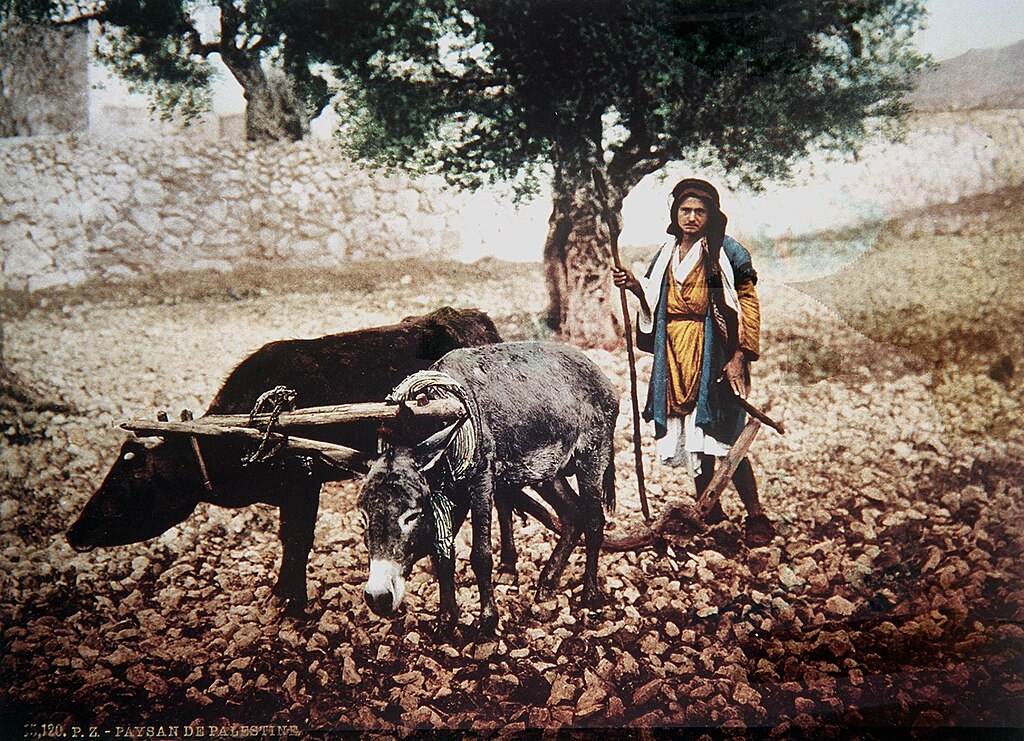
Farm worker in Palestine: Arab woman using donkeys to plow her field. French photographer, Bonfils. 1 January 1890. National Photo Collection of Israel, public domain.
The commentators speak of different elements of the curse. One is about agricultural tools. Some say Noah was the innovator of the plow and other tools and that, before he came, humans got grain from the grasses of the field using their hands.
The second is the thorns and thistles. While Rashi and others interpret this to mean ancient Hebrews were eating artichokes and cardoon, I suspect the line has more to do with the grain itself. Ancient forms of wheat had a sharp and spiky extra covering, one that had to be removed in an extra step of dehulling (whereas modern wheat only needs to be threshed).
Most important though is the line from the curse: All the days of your life. Because this was not a curse for all time, but a curse only for Adam’s lifetime. All humans suffered from his curse, but only for one generation. Granted, the supernatural 930 years of Adam’s life made for a very long generation. But the curse died with him. In Torah, the first person born after Adam’s death is his descendent Noah.
So much can happen in a single generation. At Simchat Torah last Sunday, Rabbi Irwin Keller pointed out a bit of Torah that even the sofers could not help illuminating. In the story of Jacob and his brother Esau, we have twin brothers who hated each other. Jacob tricked Esau out of his birthright and their father’s blessing and Esau nearly murdered Jacob for it. They went their separate ways for 25 years—one normal human generation—before seeing each other again.
What would their reunion bring? Frozen hearts? Pillage? Death? Instead of all that, it brought kisses. They fell upon each other in love. Neither forgot the fear and loss, but their brotherhood was more powerful than their years of wrongdoings.
In Torah, the nations surrounding the Israelites are mostly descended from siblings who went their separate ways: Esau, Cain, Jabal, Ham, Japheth, and of course Ishmael. To live in peace it takes more than getting along. It’s about seeing all others as equals deserving of everything we want for ourselves.
Today, as we end a week of war that follows decades of oppression, let us take the opportunity to start a new cycle. On this Sabbath eve, the first of our Biblical year, may we see our siblings’ pain. May we feel the anguish that leads people to unconscionable choices. May we start the difficult work of sitting down together to break our bread.
Now this is a bit of advanced genealogical sleuthing. How do you find people in a document that don’t seem to be there?
Teasing Out Census Entries
For those of you who have searched for families in the Census records on Ancestry or FamilySearch or elsewhere, you know that often the person you’re looking for pops right up in the search feature and sometimes you have to finagle it a bit.
People use different names at times or different spellings or nicknames. Sometimes the transcription, which is the only thing the search engine can use to search on, is pretty far off. Other times there’s an error right on the document itself.
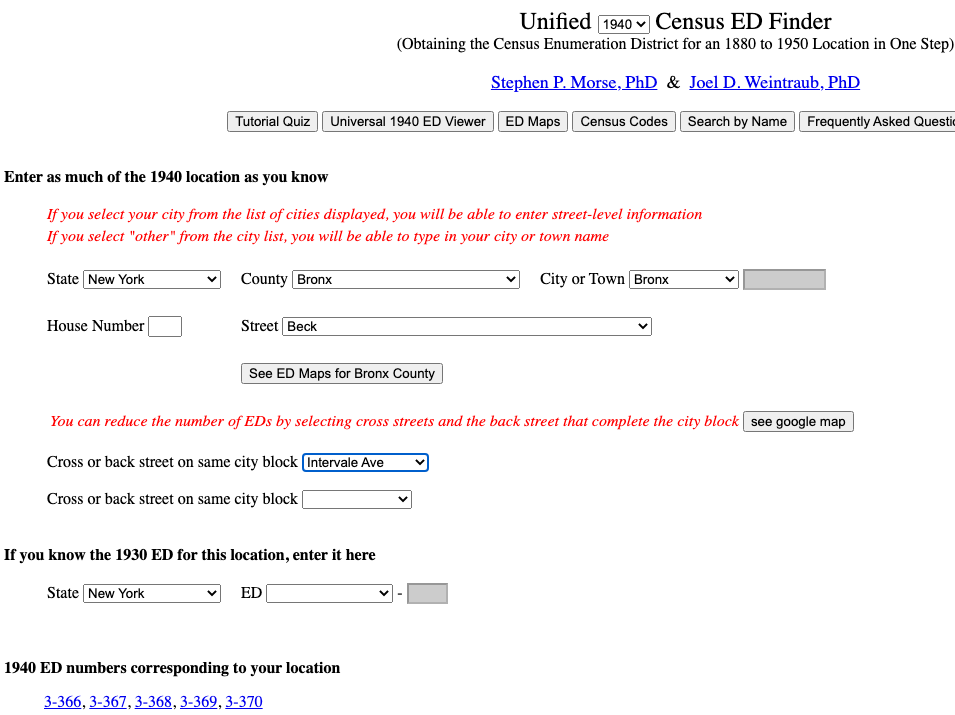
One intermediate level feature is manual searching, and you need an address for that. Head to Steve Morse’s excellent (indispensable) site and choose the Unified Census ED Finder. Pick the year from the dropdown menu, then the state, county, and town. Then put in the street name (the number doesn’t do anything, at least not for the times I’ve tried it). You’ll get one or more ED aka Enumeration District. The census files are by ED and that is the only way to search. Add cross streets (use Google Maps for this) until you narrow it down to one ED (or more if you have no choice) and start going through them page by page.
The results for the 1940 Unified Census ED finder for Beck Street in The Bronx, NY, with one cross street added.
What if you have the right page in the right ED file and you still can’t find the person?
One of my family lines is through Max Hassan, a Polish Jew born with the name Mendel Hasensprung who is almost certainly my great grandmother’s brother (I already know he’s closely related). I’ve been fleshing out him and his wife and kids with as many documents as I can find.
The one document I was missing was the 1940 Census. I just couldn’t find them. Then I got lucky and found Max in the 1950 Census along with two of his three kids, Gerald and Annette. The census had him as widowed so then I was able to find a death index with several choices that could be Bella Hassan, his wife (in New York City between 1930 and 1950). After a few dead ends, I found a likely one from 1943, which is a year you can get full death certificates online for free. Bingo.
The cool part was that the address on the death certificate was 894 Beck Street, The Bronx, NY. The same address where they were in the 1930 census (the 1950 address was different). This meant they were there in 1940. It took me two tries to find the right ED (sometimes the same cross streets are in multiple ones) but I got it.
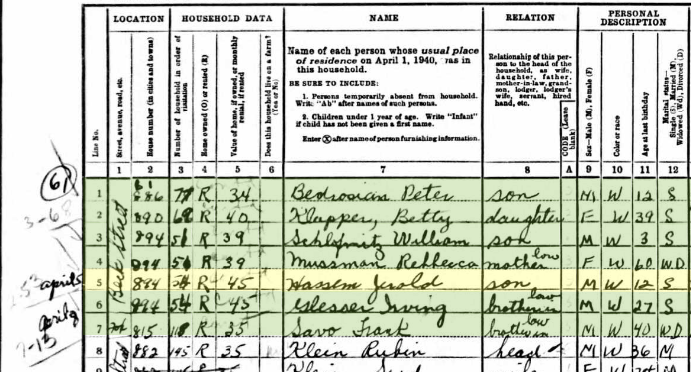
1940 Census entry for 894 Beck Street, The Bronx, NY, for Max, Bella, and Annette Hassem.
Unless you choose “exact,” the genealogy search engines don’t care about vowels or double letters (and they’re pretty good about alternate spellings where the names sound the same). “Hassen” (or “Hasen”) and “Hassan” might as well be the same name. But an “m” instead of an “n”? That’s a problem. No wonder I couldn’t find them with searching. And in this case, the error isn’t the transcriber’s, it’s the enumerator’s.
But wait, Max and Bella had three kids. I already had the 1940 Census for the eldest child, Ysaye, living with his wife elsewhere in New York (at the same address mentioned in his mother’s death certificate since he was the informant). But where is the baby, Gerald? He was only 12 in 1940 so there was no way he was off on his own.
894 Beck Street is a huge apartment building with dozens of families, and I checked those pages to see if he was mistakenly put with another family (maybe a relation). Nope. My searches weren’t bearing fruit. So it was time for another tactic.
Check the End!
One little trick is that sometimes a household gets missed and the enumerator adds them to the end of the ED file. If the family you’re looking for isn’t at the address you expect, check the last couple of pages. Sometimes they’re added to the end of the block, for EDs with multiple blocks (a block being the rectangle (etc) defined by 4 (or so) streets and the houses touching it.
Max, Bella, and Annette are on page 4 of the 28 pages that make up ED 3-367. Page 27 is where the extra people begin. To my surprise, the enumerator didn’t just have extra families, she had extra people within families that were already listed in the correct spots earlier on. And there was Gerald, listed as Jerold Hassem.
Jerold Hassem, age 12, in a list of extra people at 894 Beck Street.
In fact, there are four extra people from 894 Beck Street, none of which are complete families (none of the relations say “head”). For some reason, there are also no apartment numbers. So who goes with which family from pages 1-4 (all the families in the main listing from 894 Beck Street)?
I was pretty sure that Jerold Hassem was the missing son Gerold Hassan, but what about the next one, Irving Glesser, brother-in-law to someone? Glasser is Bella Hassan’s maiden name and this family often had relatives living with them. Is Irving Bella’s brother? Or just a coincidence?
What Are Those Pencil Marks?
Take a look more closely at those notations on the far left of the page. “61” in the circle is the sheet number (a number that is always in the top right corner of the page). The dark dates, April 5 and April 8, are the dates the enumerator added the names. The bulk of the ED was enumerated on April 3rd. But what’s unusual is the light pencil marks you can barely see. “3-68”? why that means sheet 3, line 68. That’s the family that entry goes with.
Jerold’s name has a “2-53” next to it. Sheet 2 covers pages 3 and 4 within the Ancestry document (computer file page numbers aren’t always the same as document page numbers, and besides, the document sheet numbers aren’t in order anyway). Sheet 2 line 53 is, surprise, Max Hassan, the head of the Hassan family. That’s where Jerold/Gerald belongs.
If you look carefully, you’ll see that there is a penciled line from the “2-53” notation that points to Jerold and another one that points to Irving. Hooray! Now I know they both live with Max and Bella.
But wait. Take another look at the main entry for the family. To the left of Max’s name is a notation “61-5.” Sheet 61, line 5 goes straight to Jerold’s entry on page 27 (which is sheet 61). Just another little confirmation.
All this makes me wonder…are there other families in the various censuses who have been broken up over multiple pages within an ED? Do those pencil marks exist on other EDs or is this just one disorganized enumerator? Once you hit the 1950 census you get missing families added the end so often it can be half the families on a page. But before that the enumerators took the time to organize their paperwork before writing up the final census documents and extra families still exist but aren’t as common.
What about you?
Have you seen this before in any Census from 1940 or earlier? Leave a comment with your experience.
How do you know if a person is the one you think they are? Too many people who do genealogy just assume that the same name means the same person. That’s how you end up with family trees where a parent was born 50 years later than their supposed child. Sometimes you’re careful and avoid obvious mistakes like that, but still get caught up because two people might have the same name, even an unusual name, live in the same area, and were born around the same year.
I never assume someone is who I think they are until I’ve absolutely confirmed it through documents or other evidence. One mistake can easily snowball into 50 and ruin an entire branch of your tree.
The Verification Trail
Here’s an example from my husband’s tree that I did today.
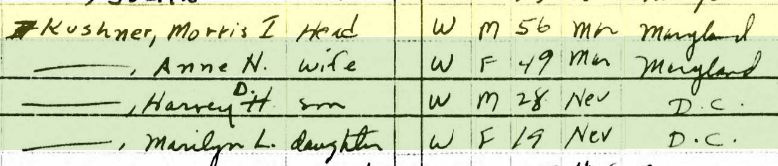
Since the 1950 Census records became publicly available this year, I’ve been going through my tree to add it in. My husband’s father had an aunt named Annie Nitowitz who married Morris Kushner. They had three children, all of whom were my father-in-law’s first cousins. I found the couple and their two youngest children in Washington DC in the 1950 census. Easy peasy.
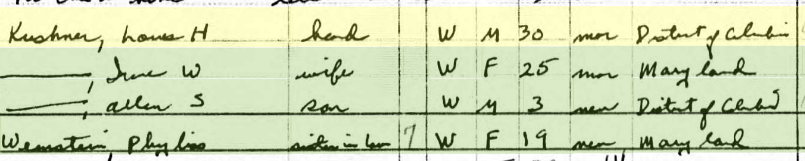
But where is their eldest, Louis Herbert Kushner who appears in earlier census records? He’s 30 years old in 1950 so chances are good he’s married, but I have no record of his wife or any children. There is one person with that name in DC in 1950, so maybe it’s him, but I don’t really know.
If this is him, then his wife is Irene (we even get the bonus of her maiden name, Weinstein, since her never married sister lives with them) and his eldest child is Allen.
I need more information than this. Yes, Louis’s age and location match (and even the middle initial) but his occupation is different from what it was in 1940 (not a big deal, but not a clue either) and there are no other pieces of evidence I can use from the census document to match them up. Under normal circumstances I might ask family members, but everyone I know from the relevant generations is gone.
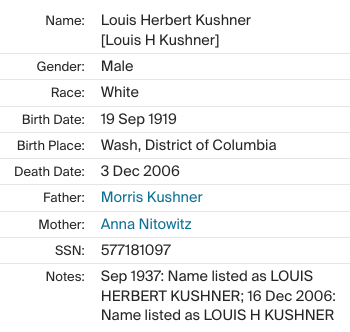
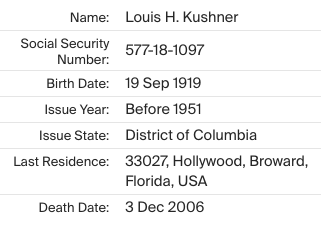
So what do I know about Louis? Well, he was born in DC on 19 Sep 1919 and he died on 03 Dec 2006. I know this for sure because of the Social Security Applications and Claims Index which gives not only the dates but his parents’ names. It’s definitely the right Louis Kushner. (Note that I always use scans of original documents when available, but a lot of records online don’t have images, just transcriptions, which can be wrong or incomplete, but they’re the best we’ve got.)
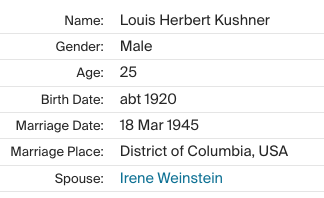
Next, I found the DC marriage index. Louis Herbert Kushner to Irene Weinstein. This is the couple from the 1950 Census. Louis’ middle name also matches the Social Security Applications and Claims Index one. But it’s still not a slam dunk. The full certificate isn’t available so I can’t see Louis’ parents’ names. I’m reasonably sure it’s him at this point, but I still can’t be 100% sure. And I need to be 100% sure; I’ve seen too many mistakes at this level of certainty.
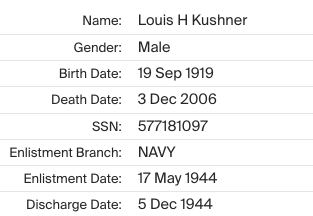
Next, I found the U.S. Department of Veterans Affairs BIRLS Death File. At first glance it looks like there’s nothing extra that’s useful. It just confirms Louis’ birth and death dates and tells us he served in the Navy during World War II. But hey, there’s a social security number.
The Social Security Death Index matches the social security number and other info and tells us he lived in Florida before his death. But it doesn’t help us figure out if Irene is his wife.
Bingo!
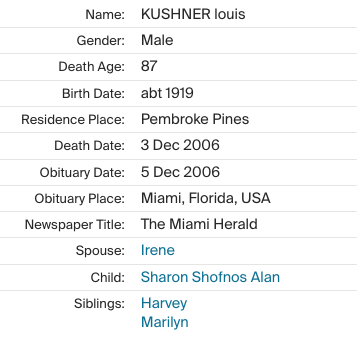
I found a few other docs that confirmed things we already knew but didn’t bring us any closer to figuring this out. But wait, what’s this? A transcription of his obituary. This comes from Newspapers.com, an expensive online newspaper clipping service that doesn’t have library editions (they have free days a couple times a year, very worth doing).
Without all the previous work I did, I might guess this was the same Louis and Irene (especially with the same child’s name, Alan) from the 1950 census, but I wouldn’t know if it was my Louis. But look, his date of death matches. We already established he’d moved to Florida. And here’s the bonus: his two siblings, Harvey and Marilyn, match up too.
Don’t assume, verify
And that’s how you work a verification trail. And how you add a new branch (and a new set of second cousins for my husband) to the family tree.
I have lots of memories of food my mother cooked when I was a child, but her strudel is one of my very favorites. She made it sometimes with poppyseed filling (from a can) and apple filling (from scratch). I made it many times with her and a bunch of times without her.
Just like she did, I used store bought phyllo dough. Because my God who on earth would make it by hand? My grandmother Manci, that’s who. I never did eat her version because she lived across the country and passed away when I was nine. So I’ll name this recipe after my mother, Marty.
I discovered I was allergic to dairy several decades ago and this butter-filled strudel fell by the wayside. I made it a couple times with margarine but it didn’t come out quite right, even when I reduced the amount to tone down the extra greasy taste.
This Thanksgiving I chose to cook the meal for my extended family. My 16 year old asked for apple pie, made with spiced apples. That jogged my memory and I realized my daughter (born long after my mother was gone) had never tasted strudel. It was time to make it again.
Ingredients
Filling (make ahead of time)
Apples, 4 lbs of something with good texture and tartness (I used Gala)
Sugar, 1 cup
Walnuts (raw), 2 cups chopped
Raisins (golden preferred), 1 cup
Cinnamon, 2 tablespoons
Cardamon, 2 tablespoons
Nutmeg, 1/4 teaspoon
Clove powder, 1/8 teaspoon
Salt, 1/2 teaspoon
Strudel
Phyllo dough. 1 package. I used Phyllo Factory organic with 18+ sheets (ideally you want 21 sheets but some packages have more than stated).
Butter. I used Miyoko’s vegan butter. Amount is a guess, about 1 stick. Unsalted is best but I accidentally used salted and it still came out fine.
Tools
Pot for making filling
Baking sheets to fit 3 large rolls
Parchment paper
Small pan to melt butter
Pastry brush (this is a must)
Set your oven to 350F
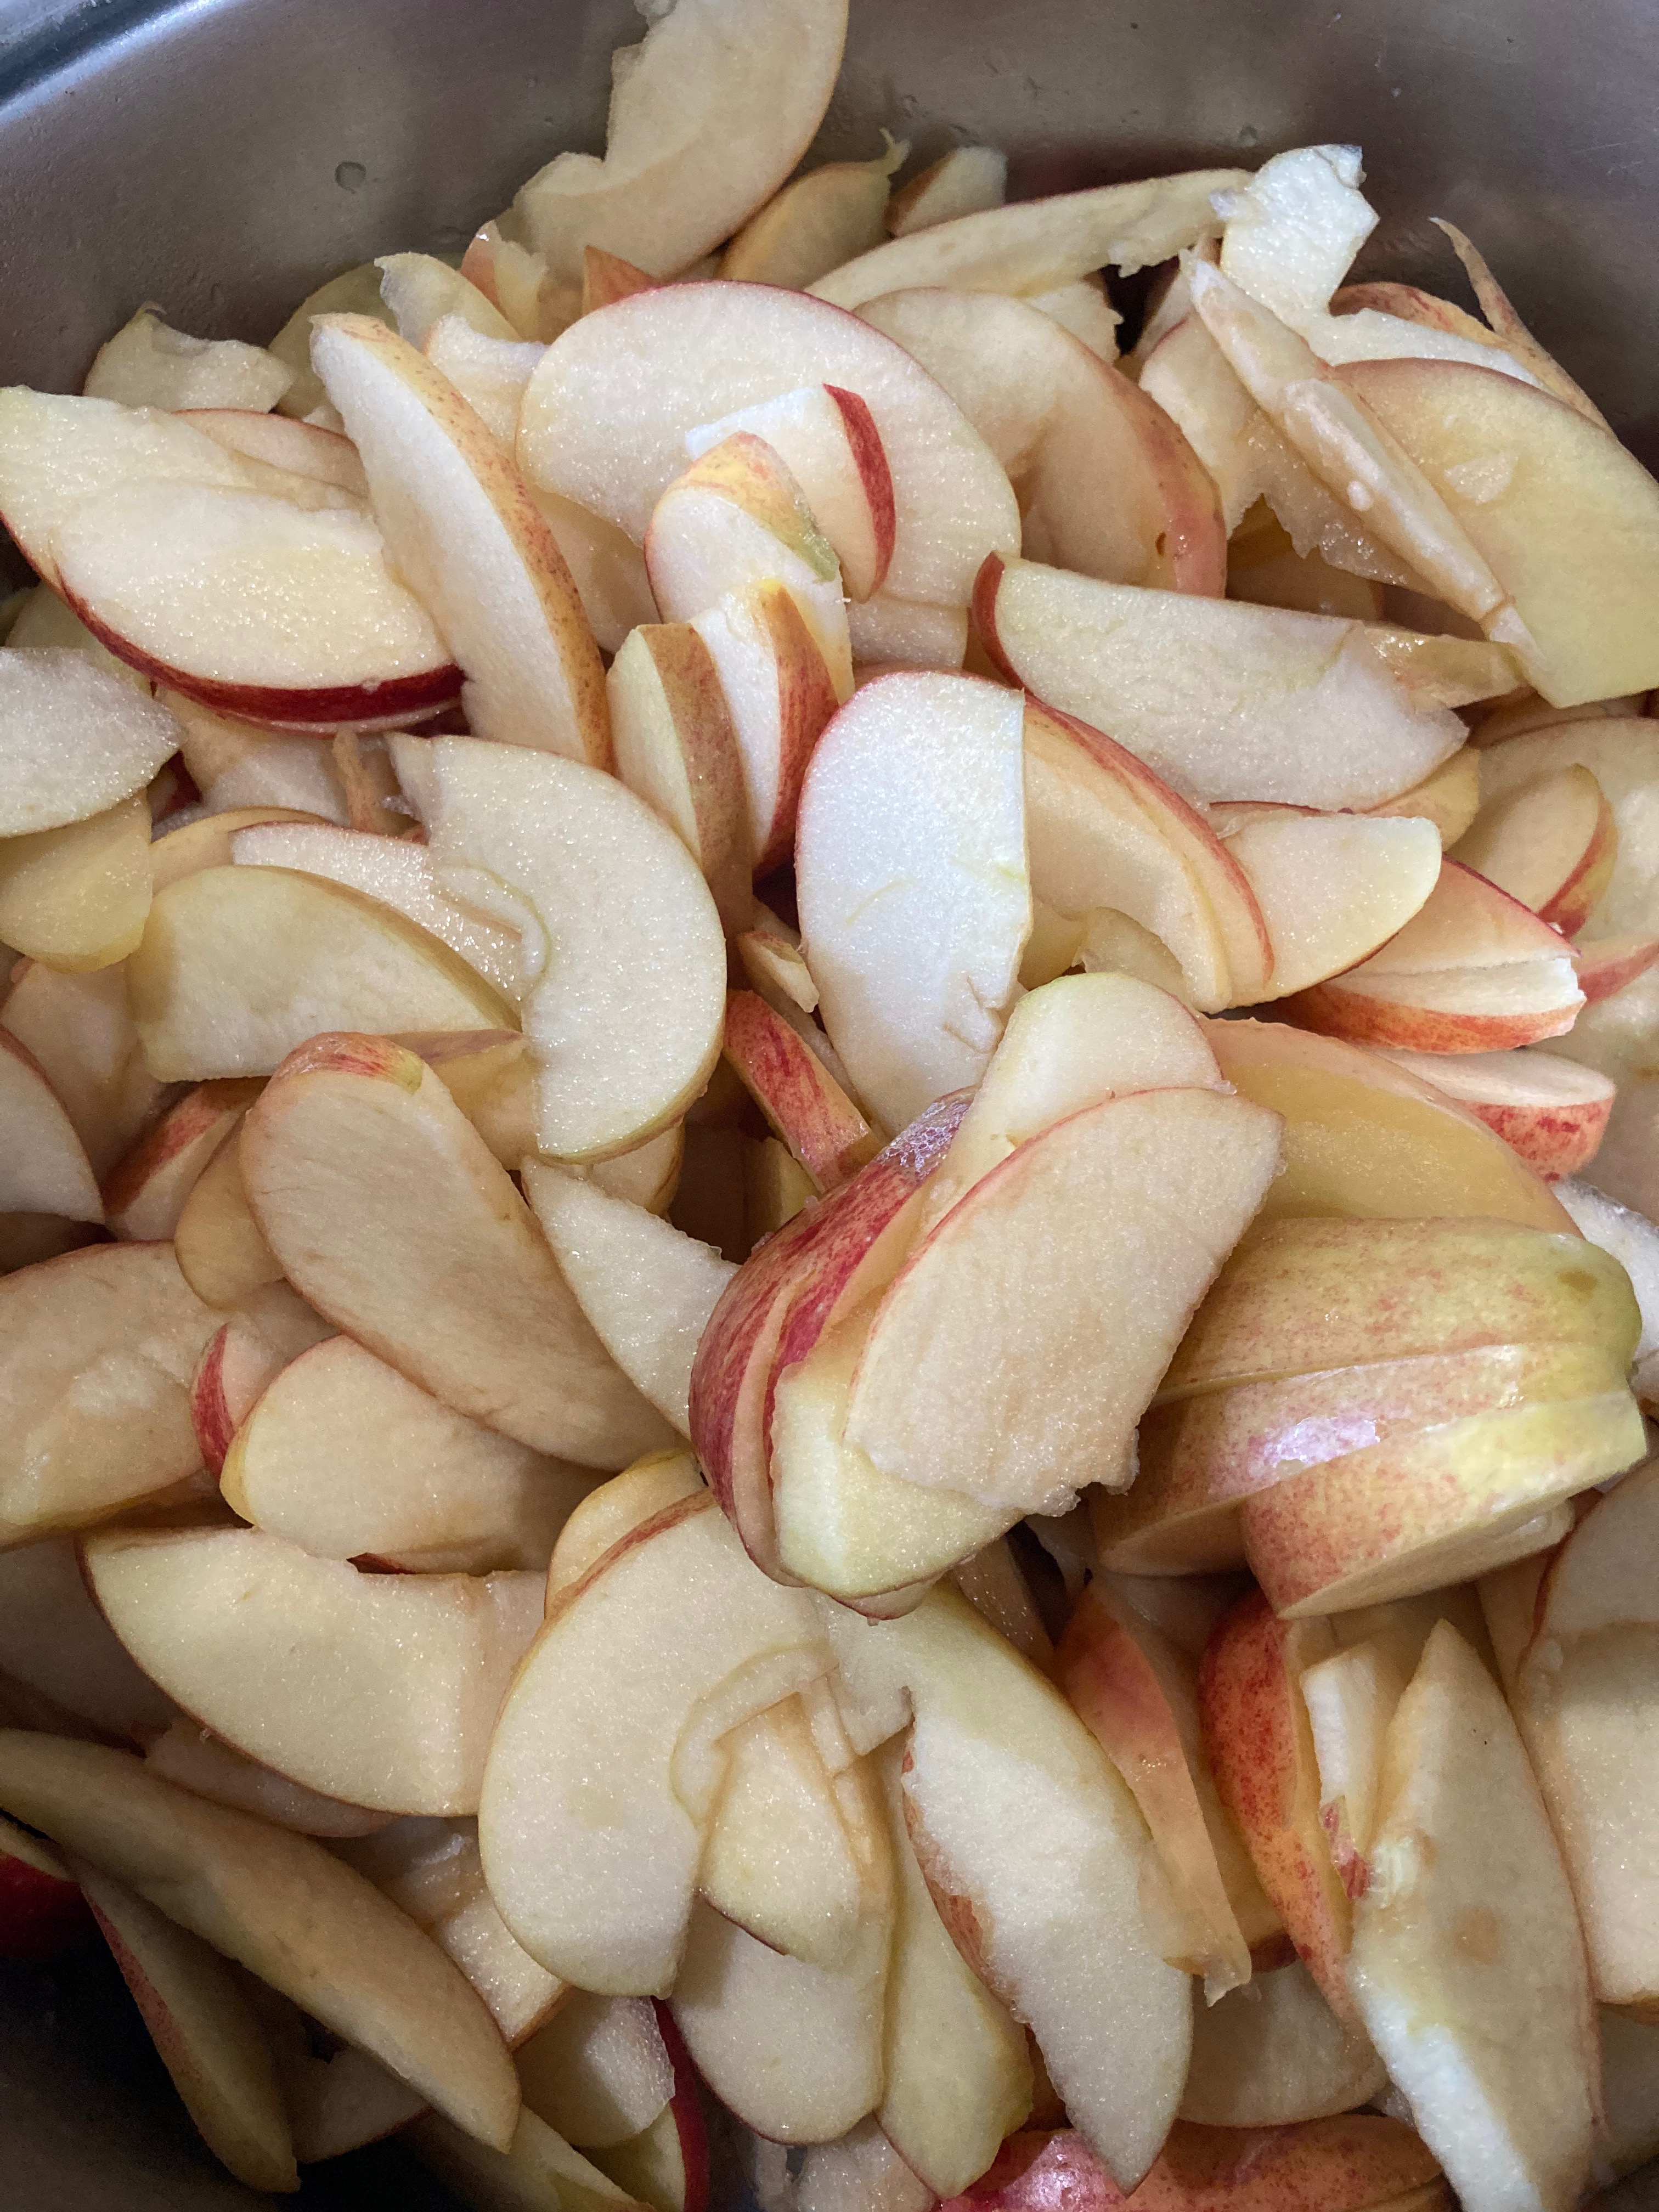
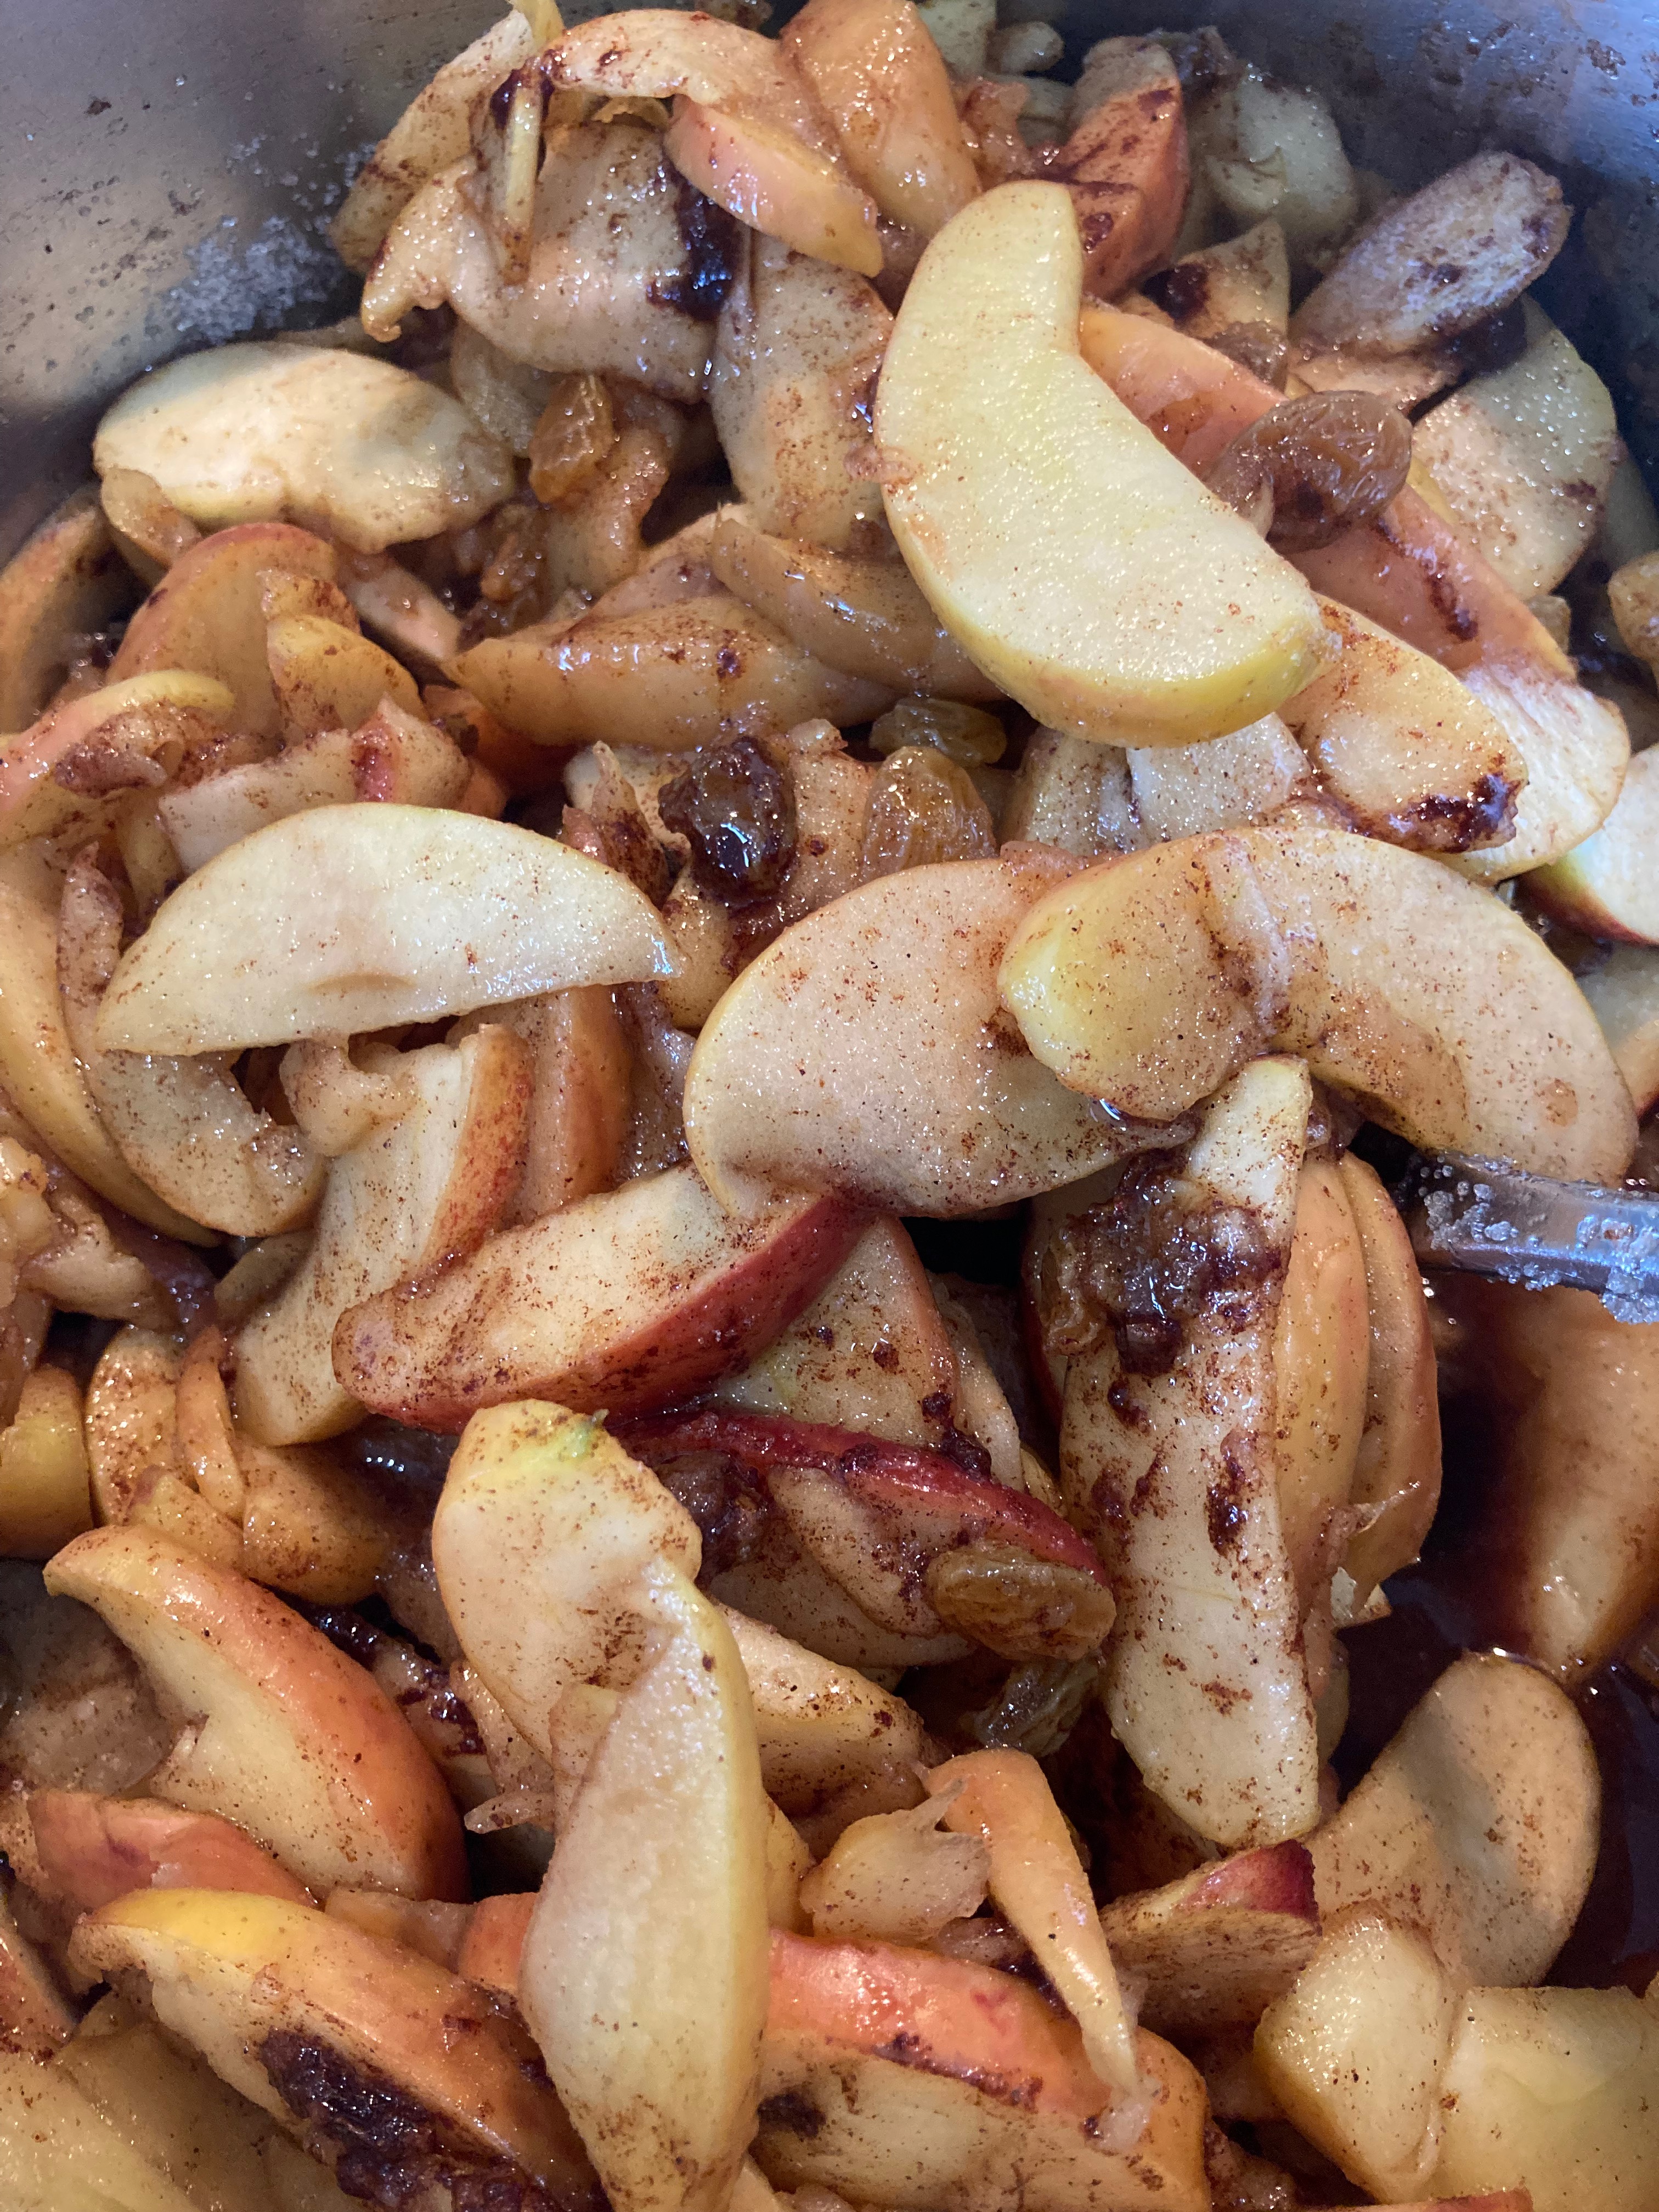
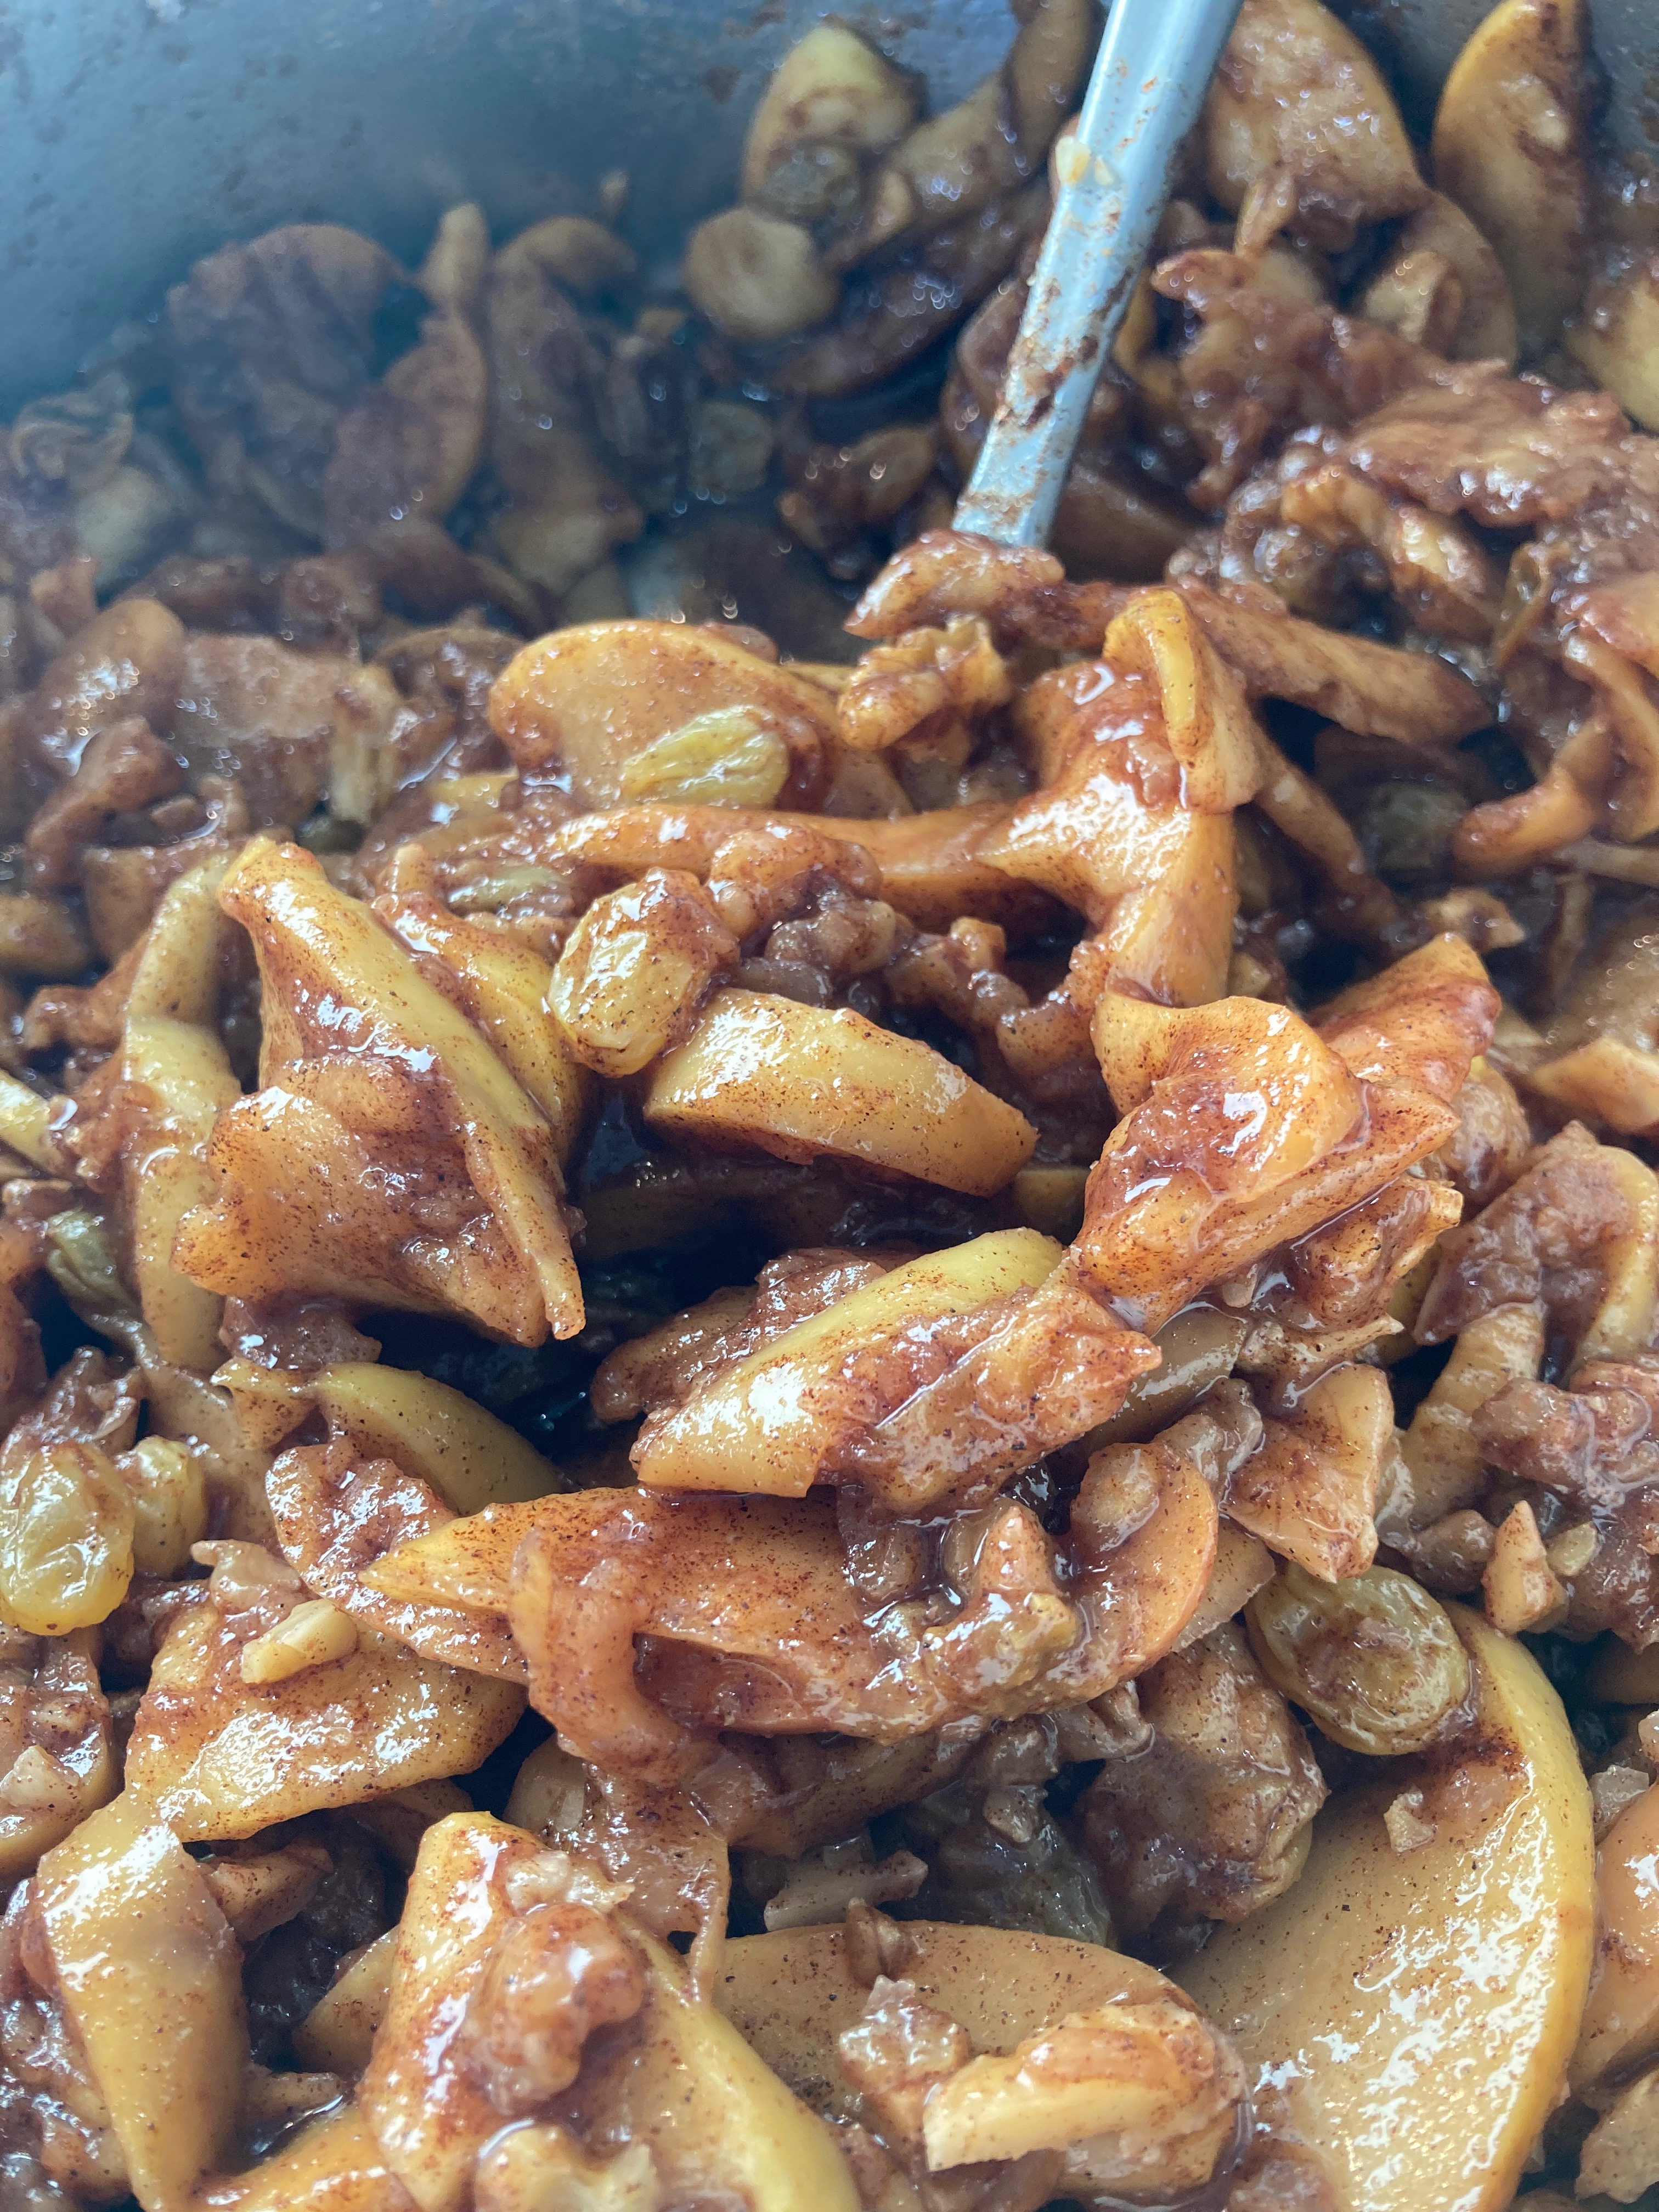
Apple strudel filling. From raw apple slices to softened apples with other ingredients to finished filling.
Recipe
Filling
Wash apples, cut into quarters, remove core. Do not peel.
Slice each apple piece into thin pieces. There’s a range of thickness that works but I like them maybe 1/4″ thick.
Put a little bit of water into your pot and turn up the heat to medium (the water is there to keep the apples from burning before they start releasing their own water).
Cook the apples, stirring gently every couple of minutes, until they start to soften.
Add the sugar, stir well and continue to cook.
Add the walnuts, raisins, salt, and spices. Stir them in, taking care not to break up the apples too much.
The mixture is done when the apples are soft and translucent but not mush.
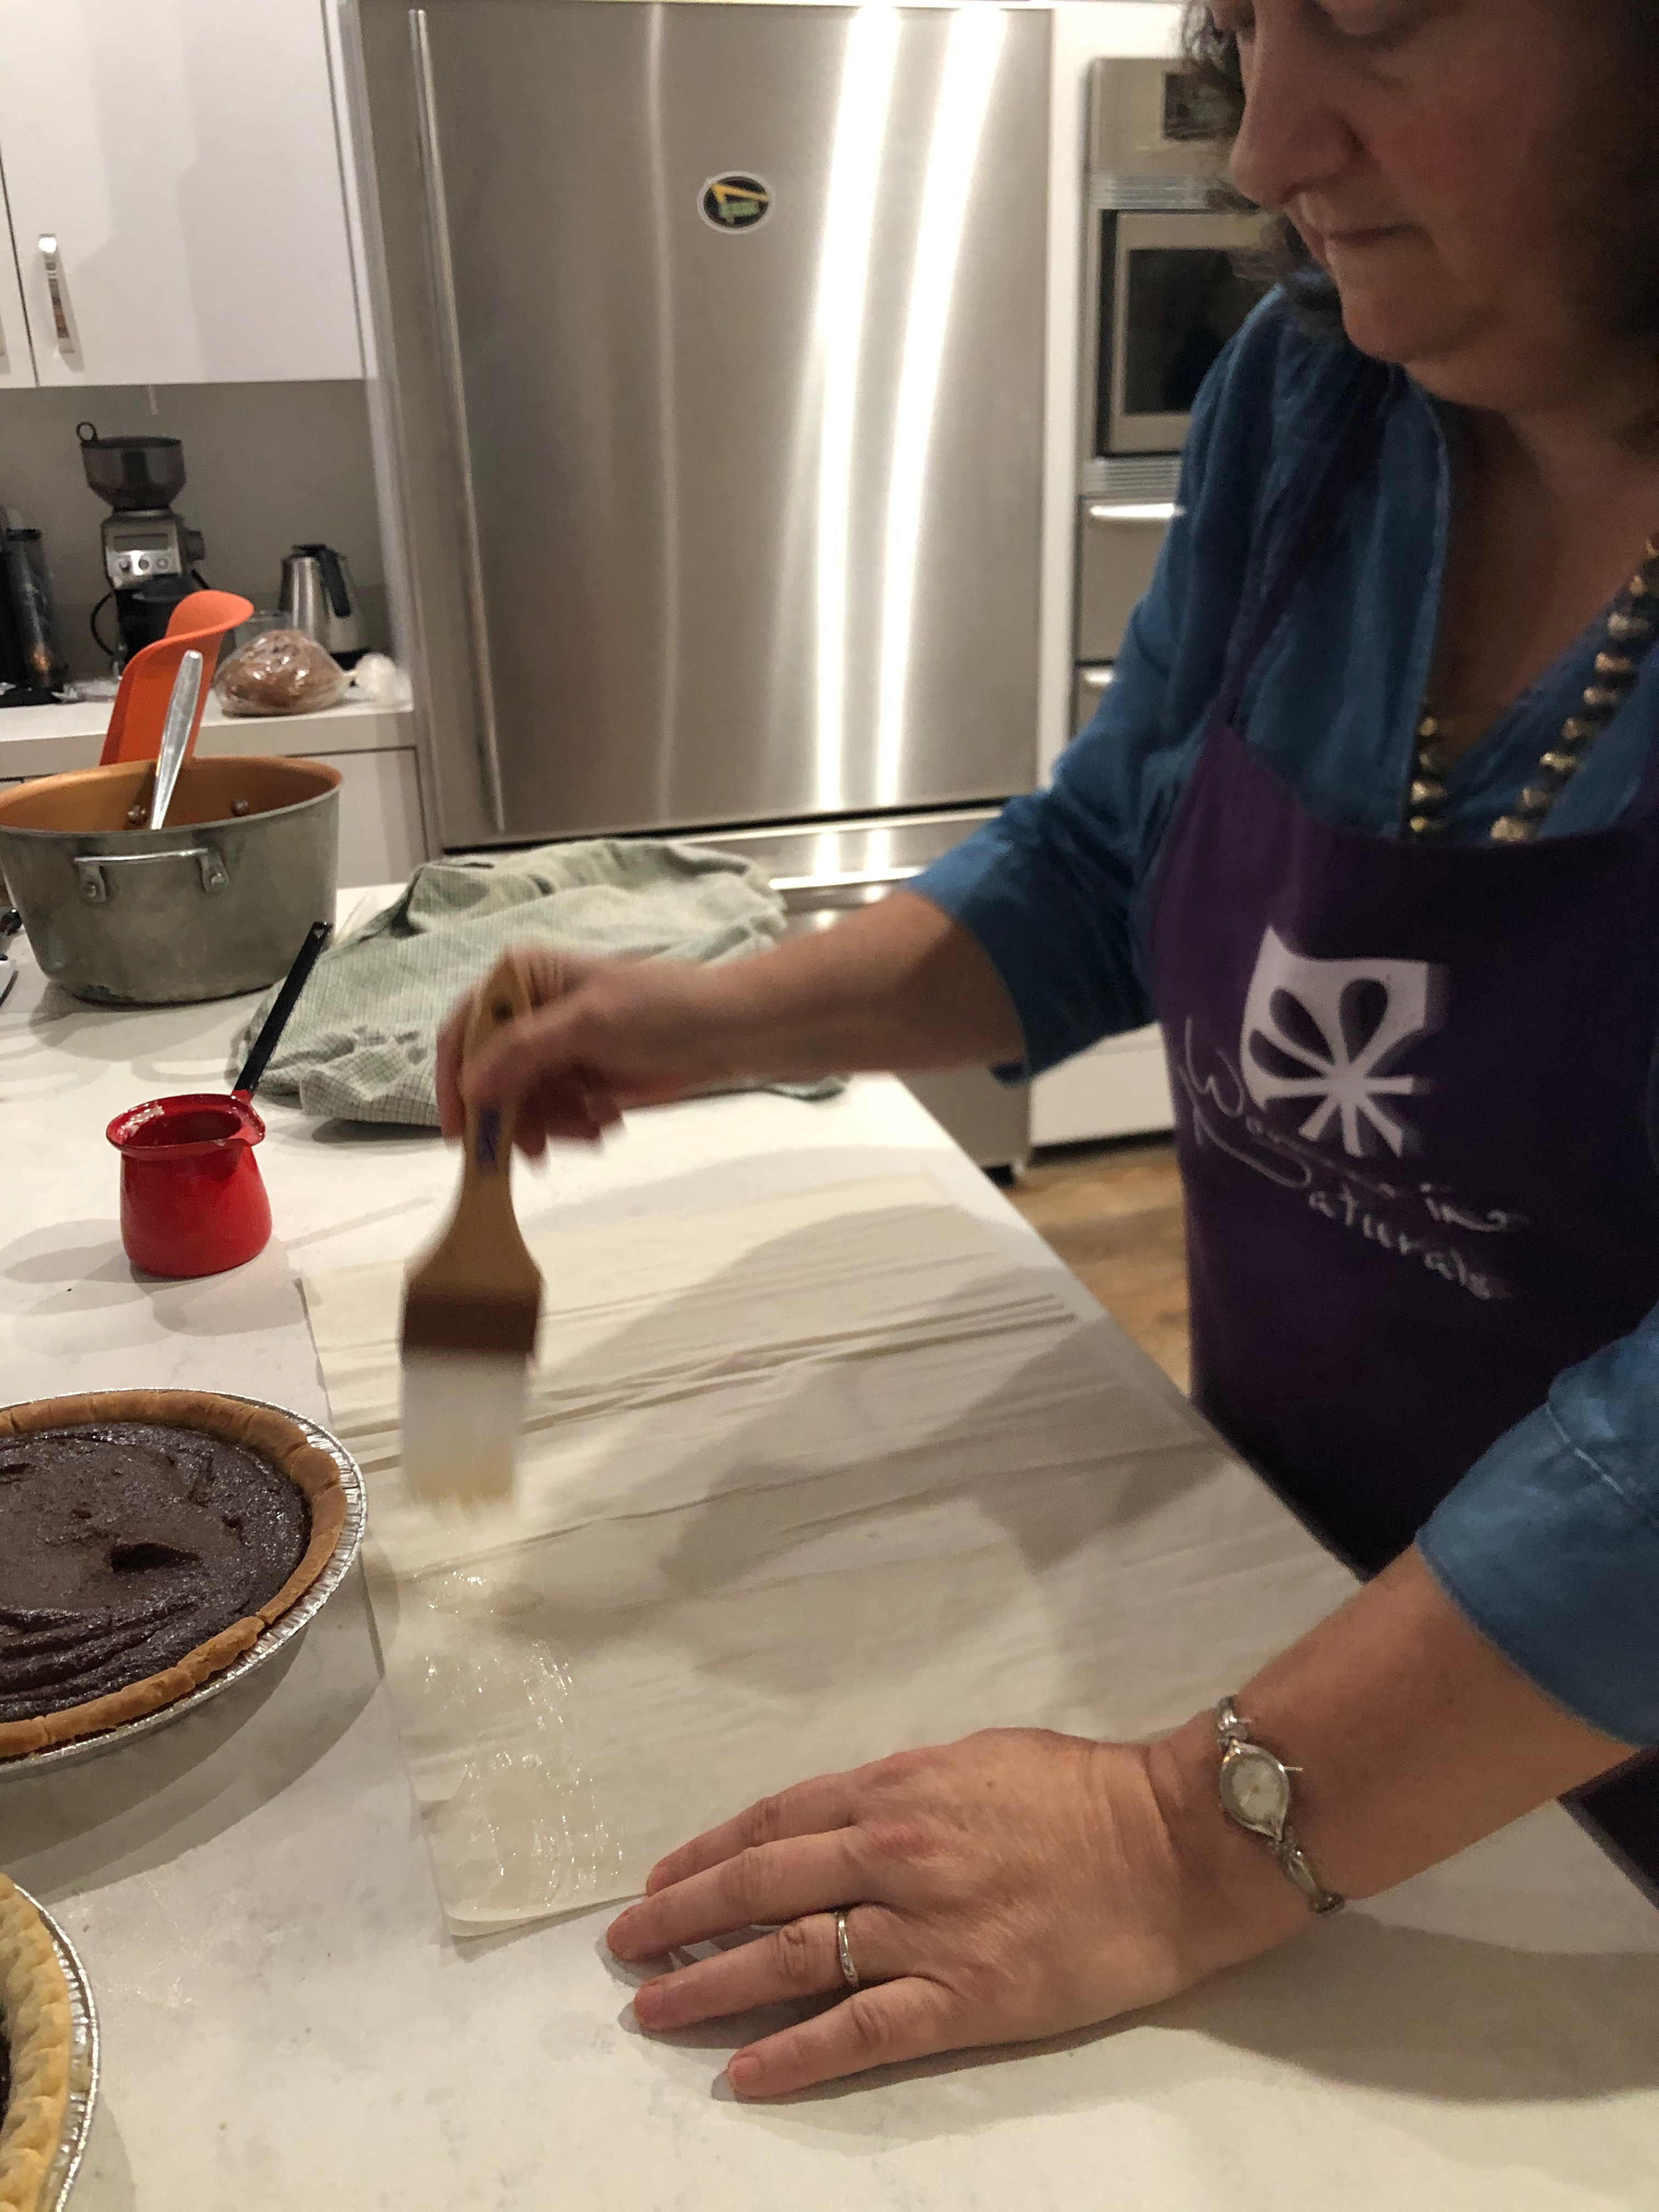
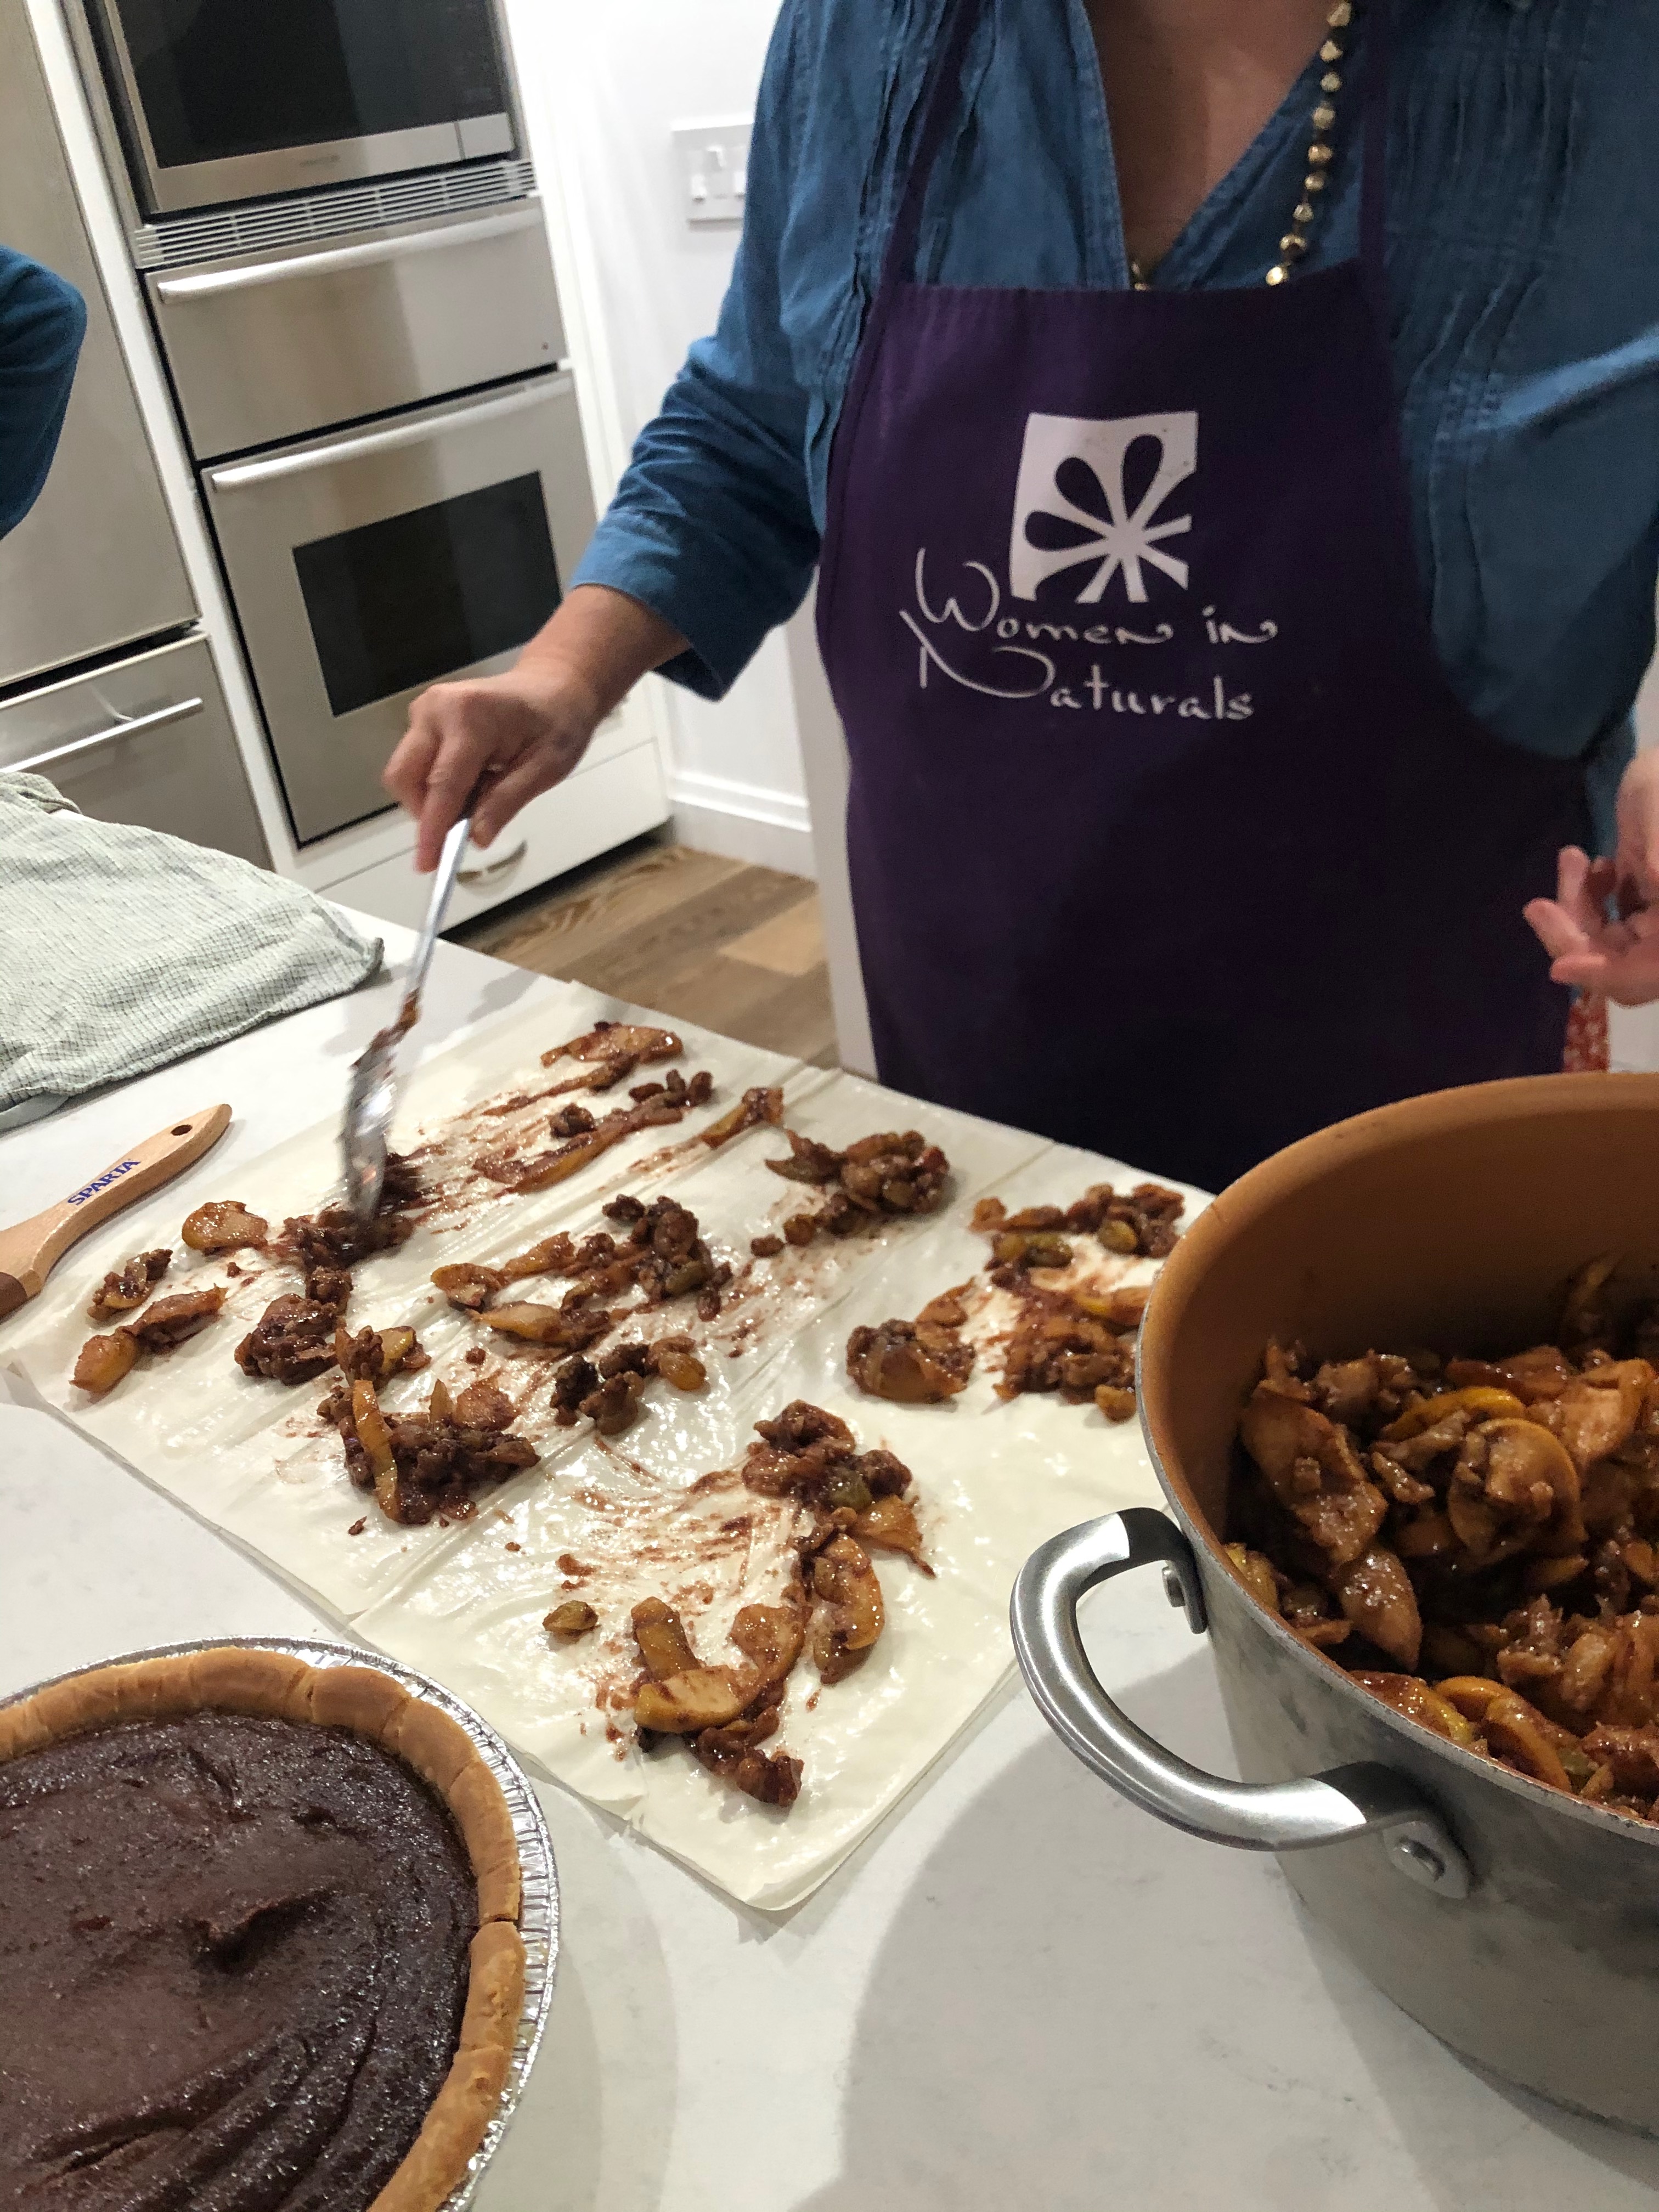
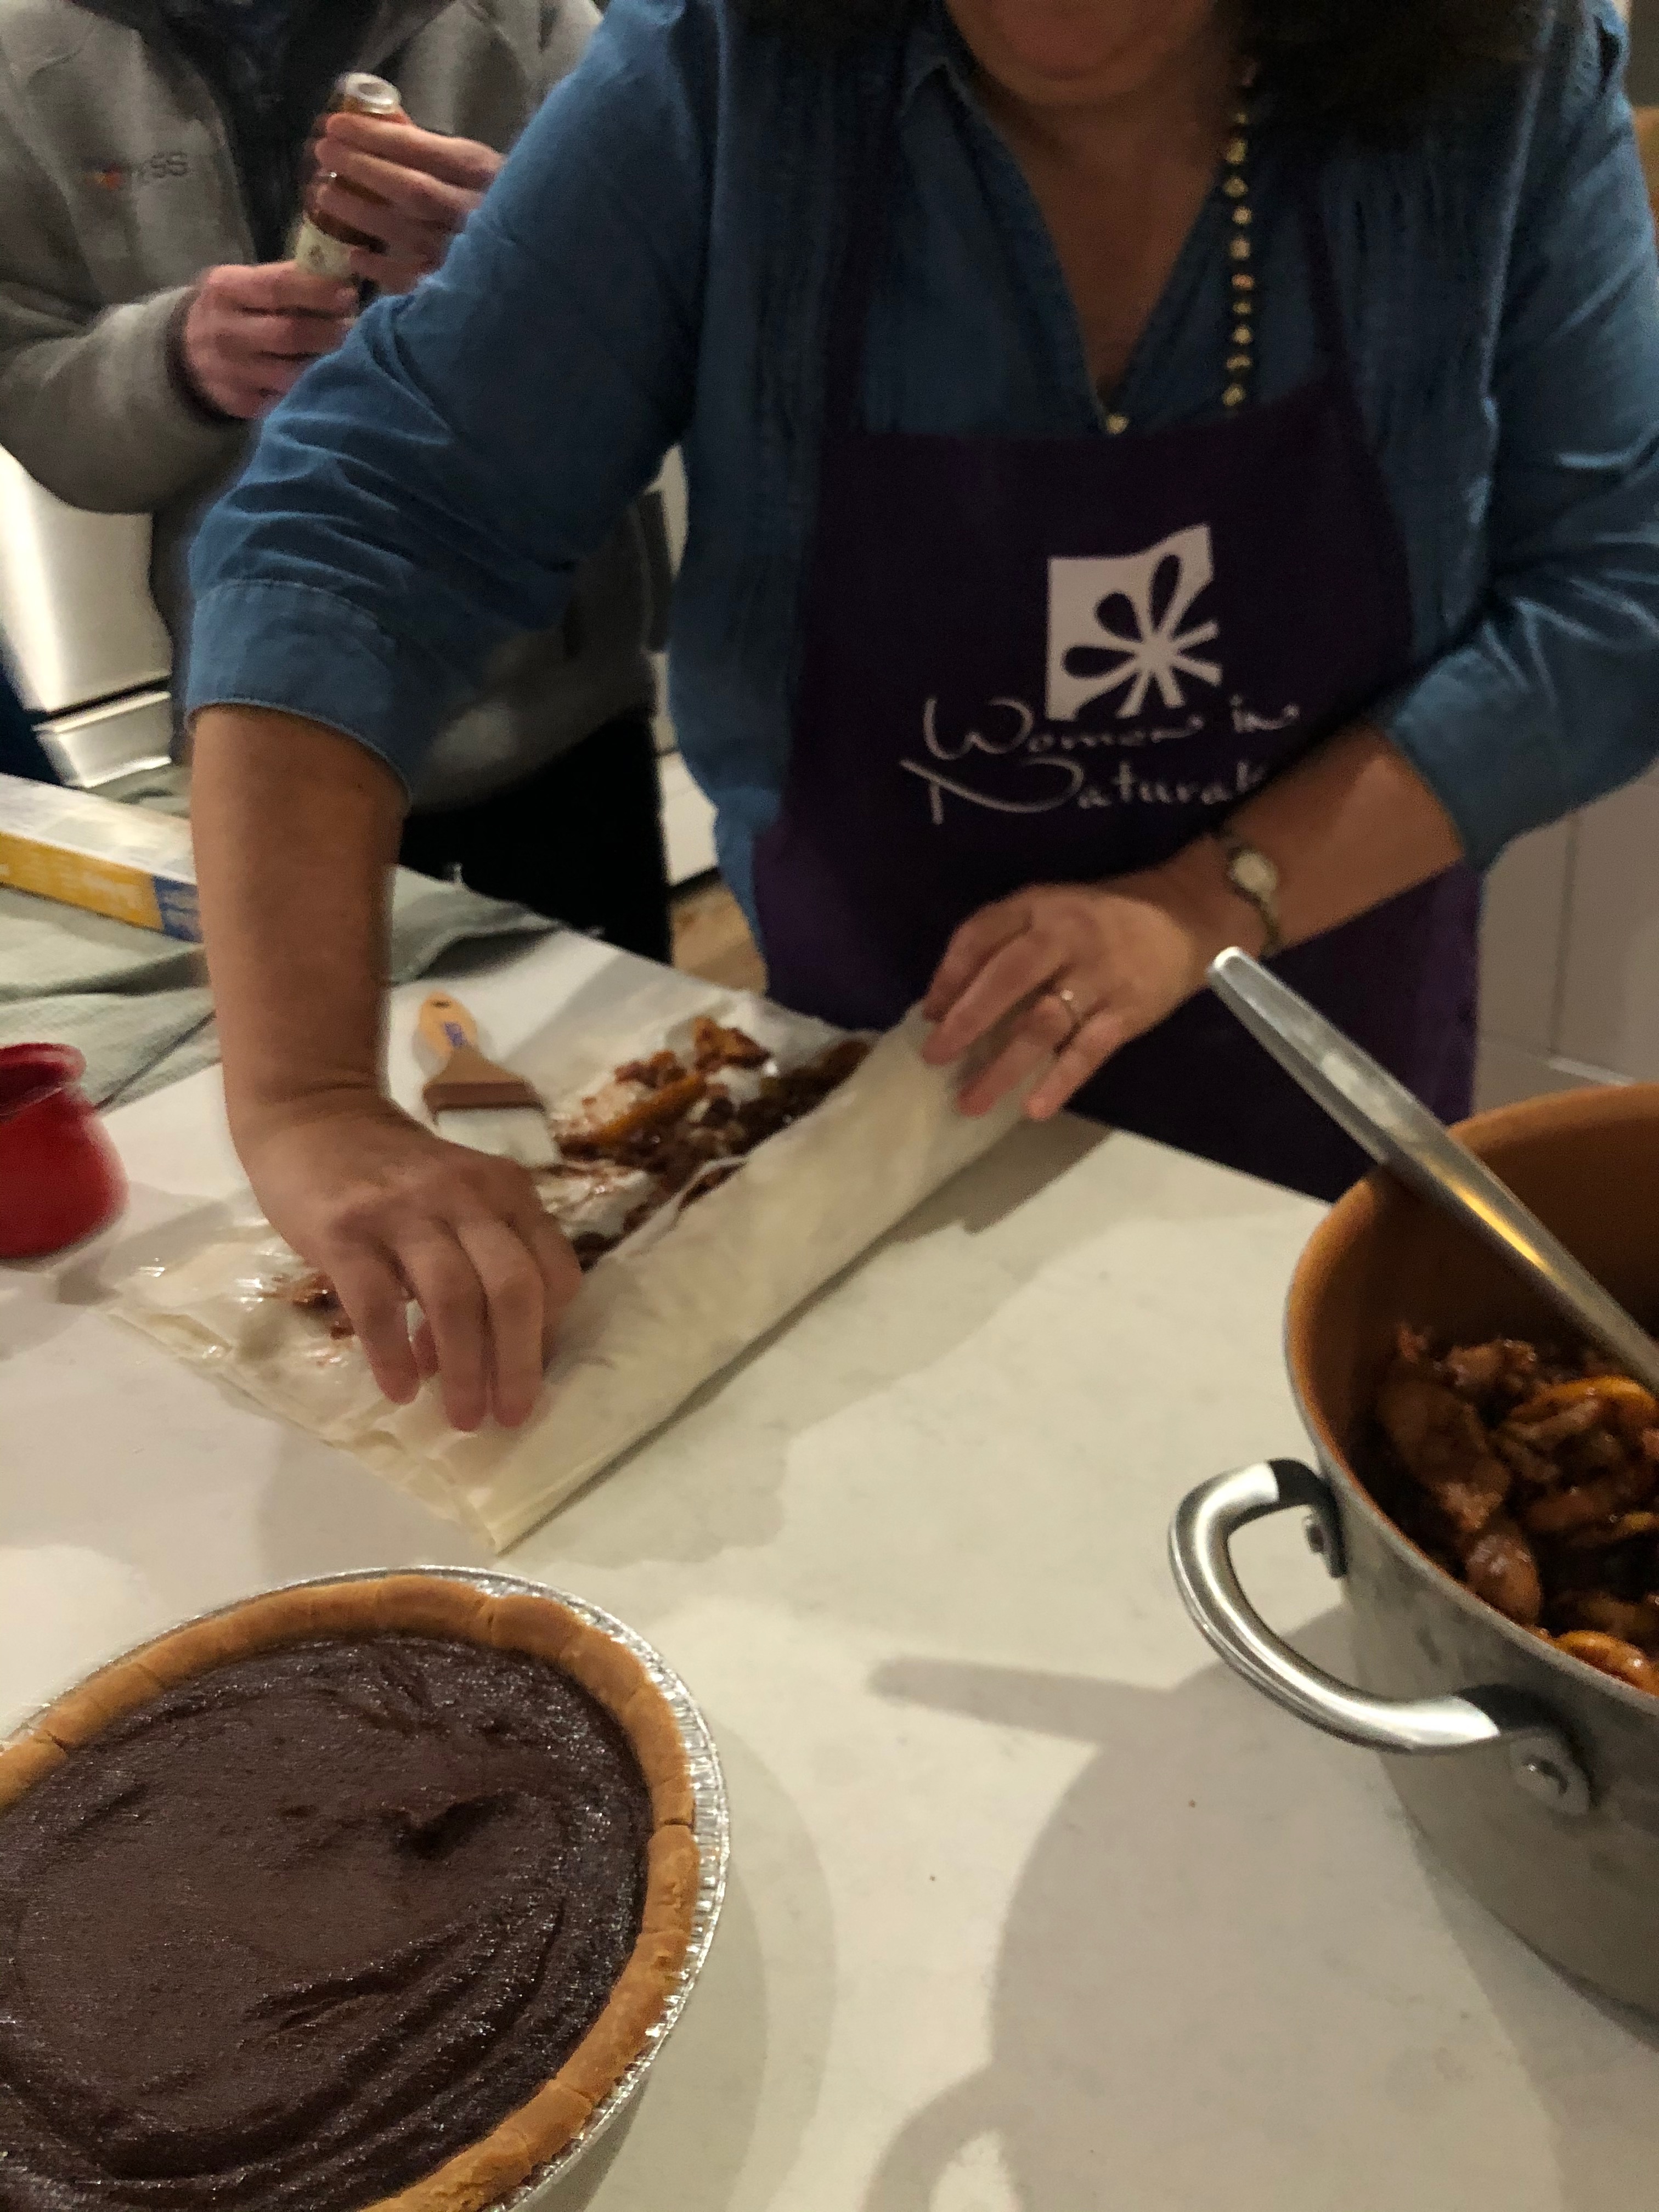
Lay down phyllo sheets, brush with melted butter, add filling, repeat and roll.
Putting it all together
Defrost your phyllo according to the package directions. This may include an additional stretch at room temperature. Make sure you plan for this. You can not use phyllo that is the wrong temperature, it will break.
Get out your filling. It can be anything from room temperature to warm. You want it to be easy to spread around without damaging the dough. Divide into 3 even parts.
Melt your butter but don’t boil it.
Now you can unwrap the phyllo dough. But keep a damp tea towel over it whenever you’re not taking some out. It will dry up fast and then it crumbles.
Put 3 sheets of phyllo on a completely flat surface.
Brush lightly with melted butter, making sure to get the edges. This should be very quick, maybe 5 seconds.
Take 1/3 of the filling from one of your 3 divisions (that means 1/9 of the total filling) and spread on the dough. You will not get even coverage and that’s fine.
Put 2 sheets of phyllo on top and brush with butter.
Use another 1/3 of the filling on top. Aim to even out the strudel so that this bit of filling goes in the holes left by the last layer.
Now put another 2 sheets over this and brush with butter then add the rest of the filling, taking care to make the entire product as even as possible.
Start to roll up your strudel the short way (the final product will be shorter and thicker than if you rolled it the other way).
As you roll it, brush with more butter. Put extra butter on the end so it will seal.
Put the roll seam-side down on to parchment paper on the baking sheet.
Add more butter on top and on the ends.
Use your second division of filling to make your second strudel. Then do the third.
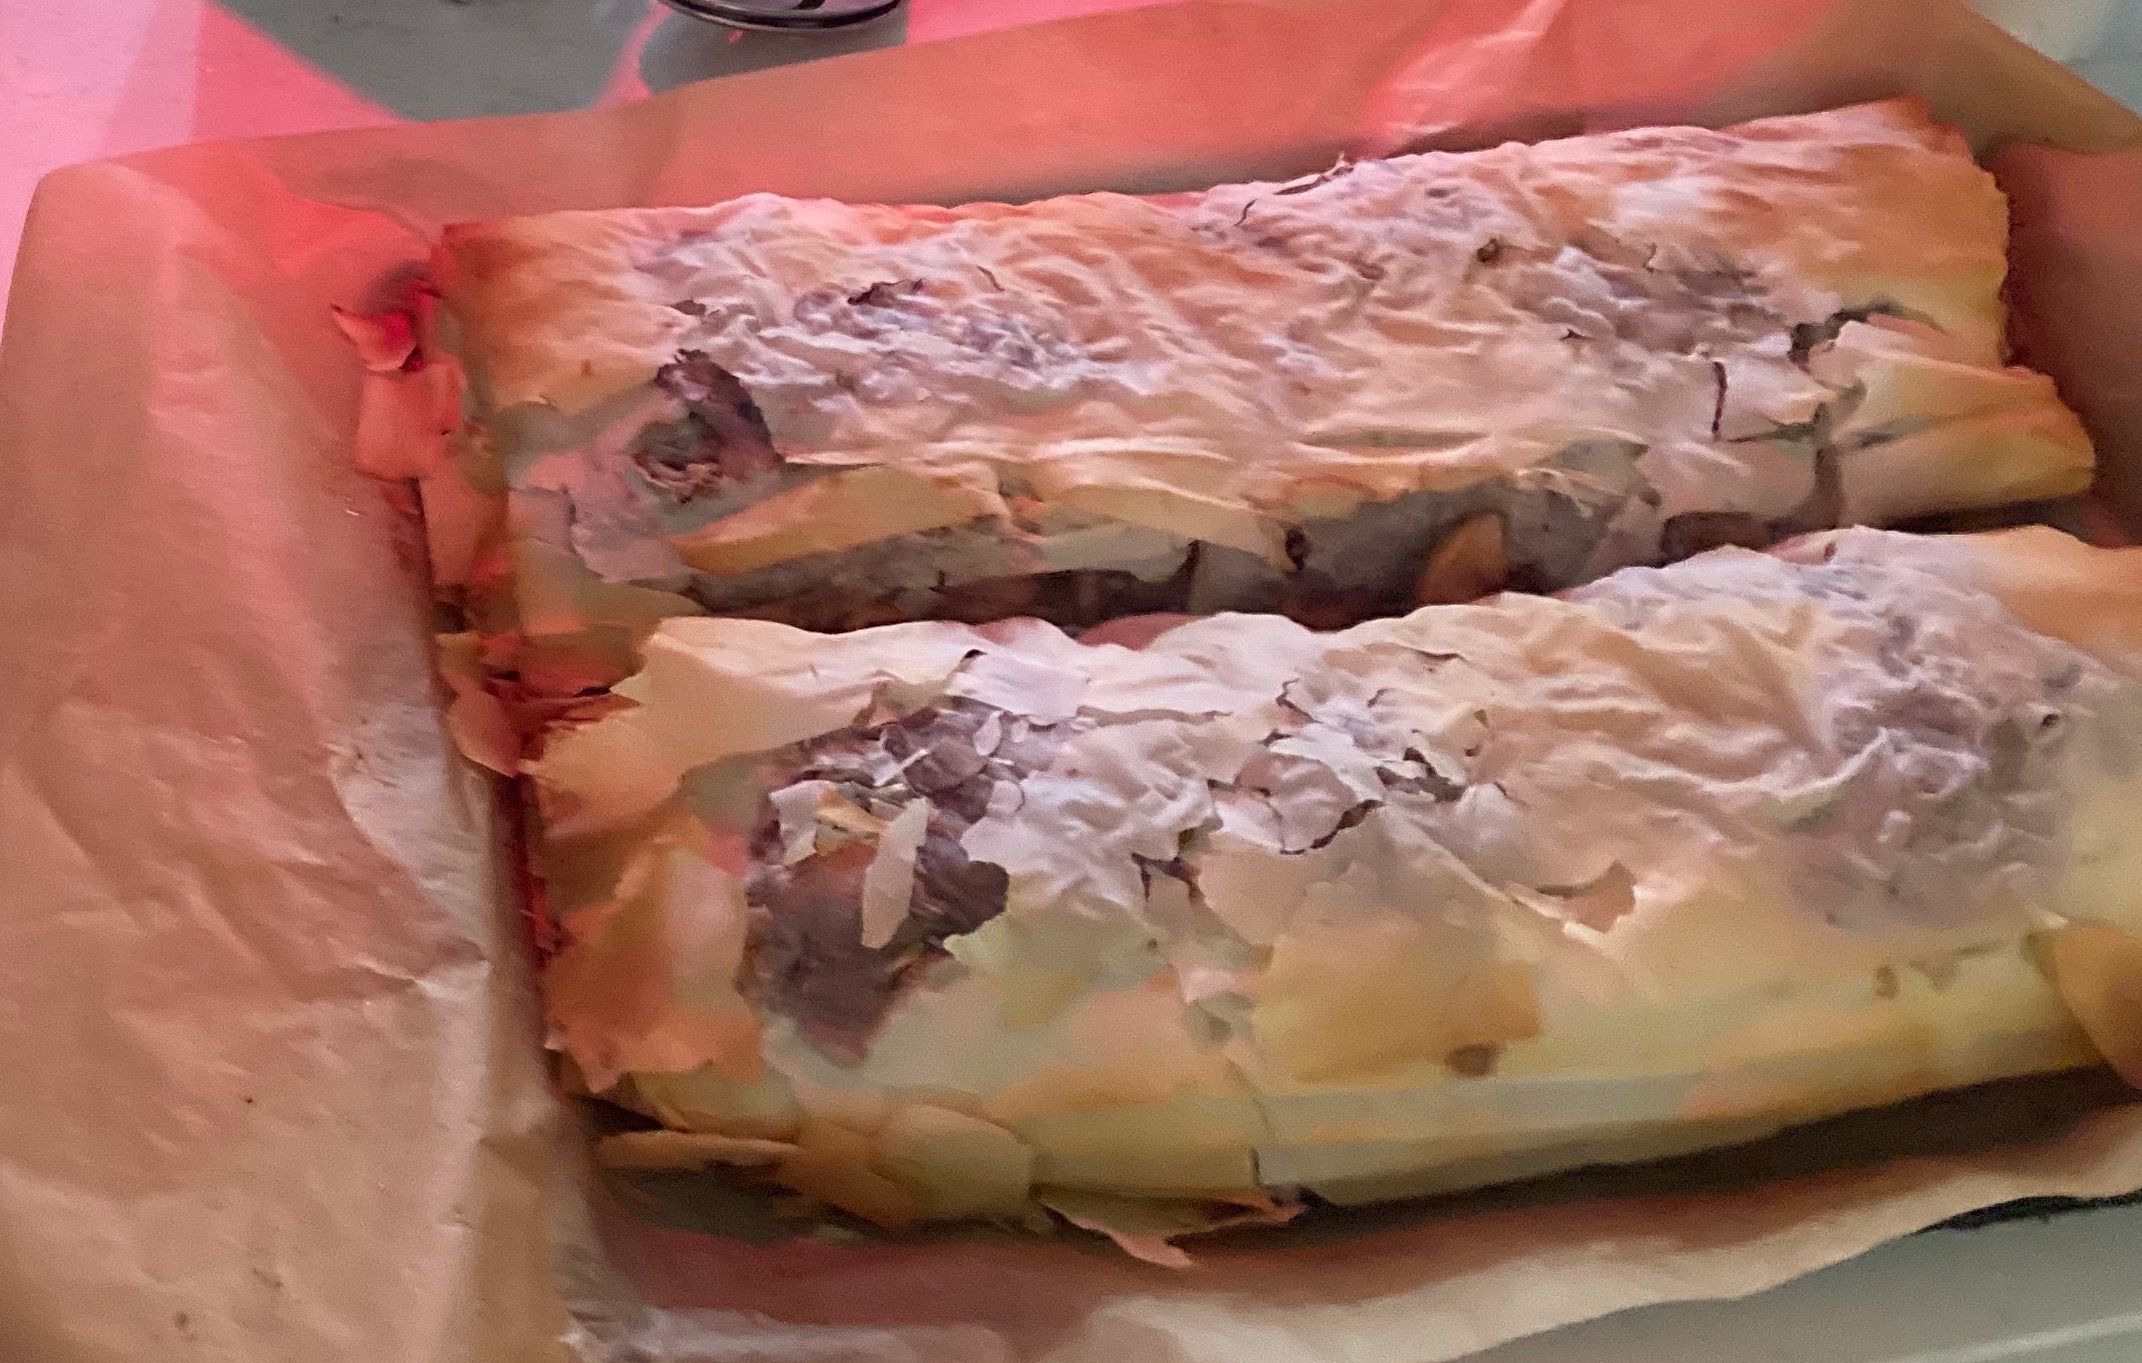
Bake at 350°F until the outer layers are brown and crispy. The inside should be fully cooked but can be chewy.
Notes:
Strudel does not keep well. Eat it fresh from the oven. If you plan on needing to reheat it, don’t cook it all the way before storing.
The phyllo dough packages from 30 years ago had 21 sheets, which was perfect. The one I got this time around said it had 18 sheets. I put 2 sheets as the bottom layer and that was a mistake. For one, the box actually had 20 sheets. Two, the outer layer cracked. It would be better to put 3 sheets on the bottom and take away sheets if needed from other layers.
You can see that the outer layer needed another sheet of phyllo (I only used 2). This is also parbaked. The ends were terrific but the middle needed more time in the oven.
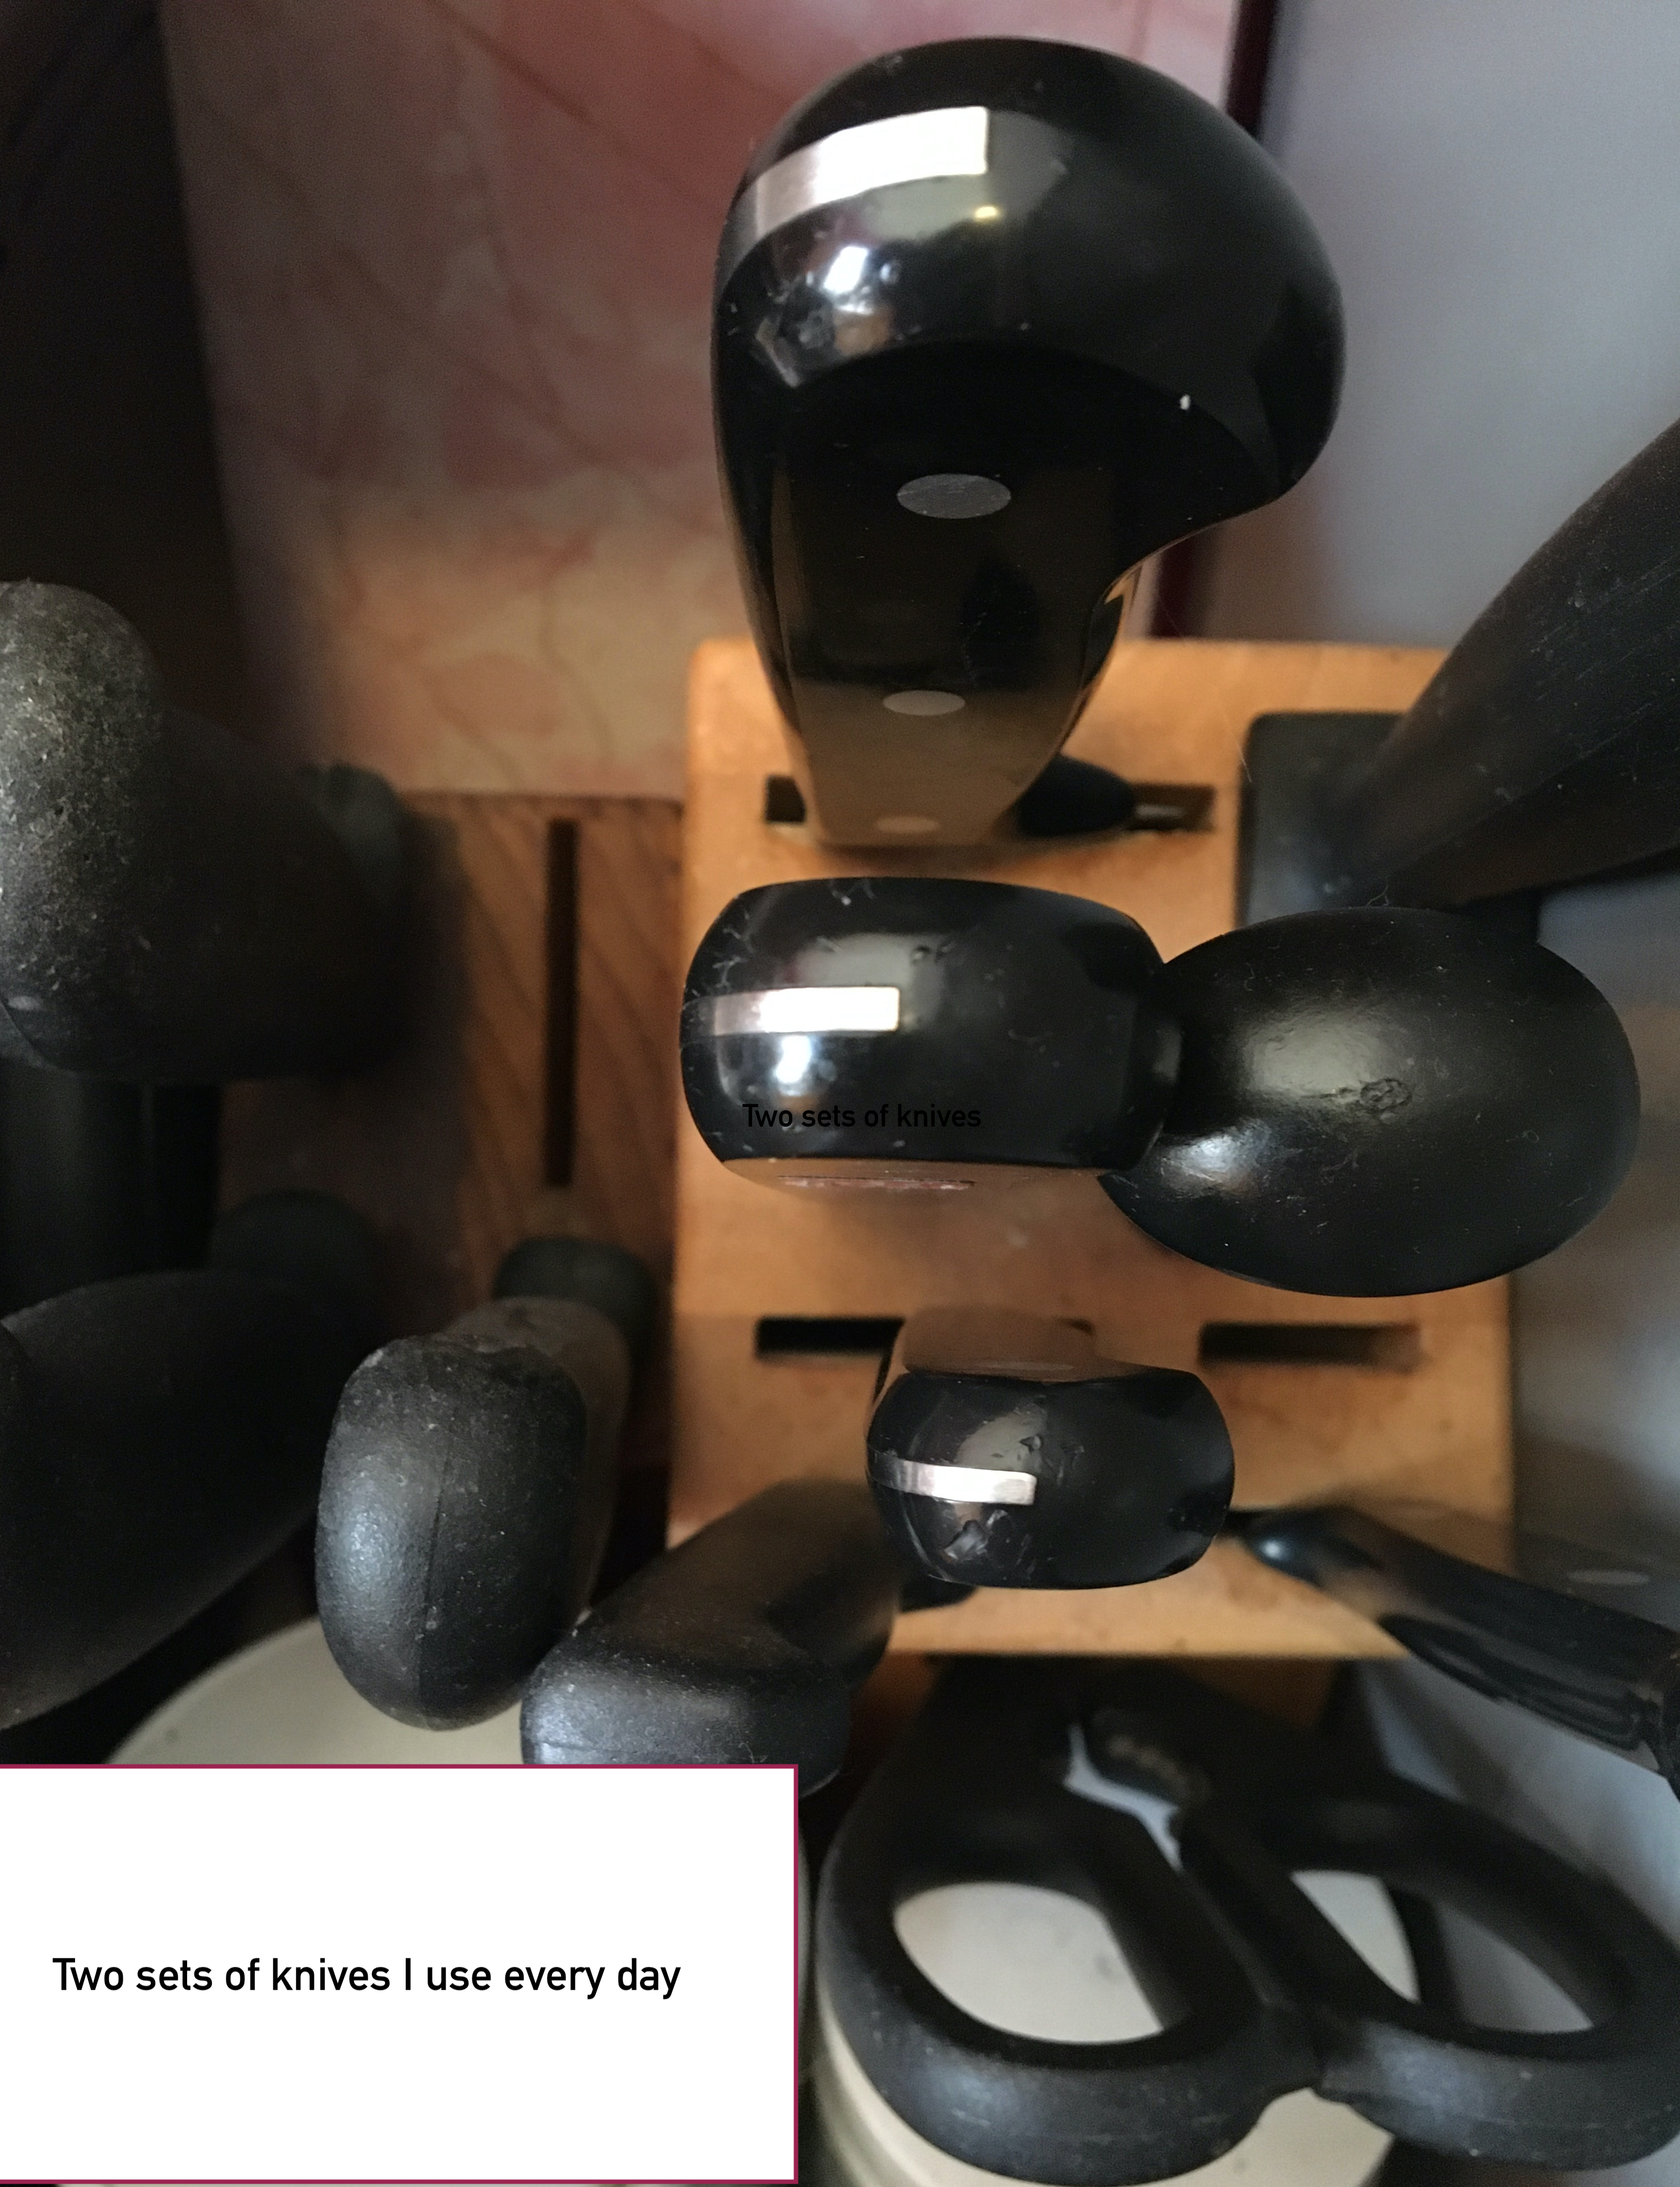
I have two sets of really good knives (wedding presents from 2005) I keep on my counter. I added a couple parers and a fish knife. It has basic knives of different sizes, a bread knife, a honer, and scissors.
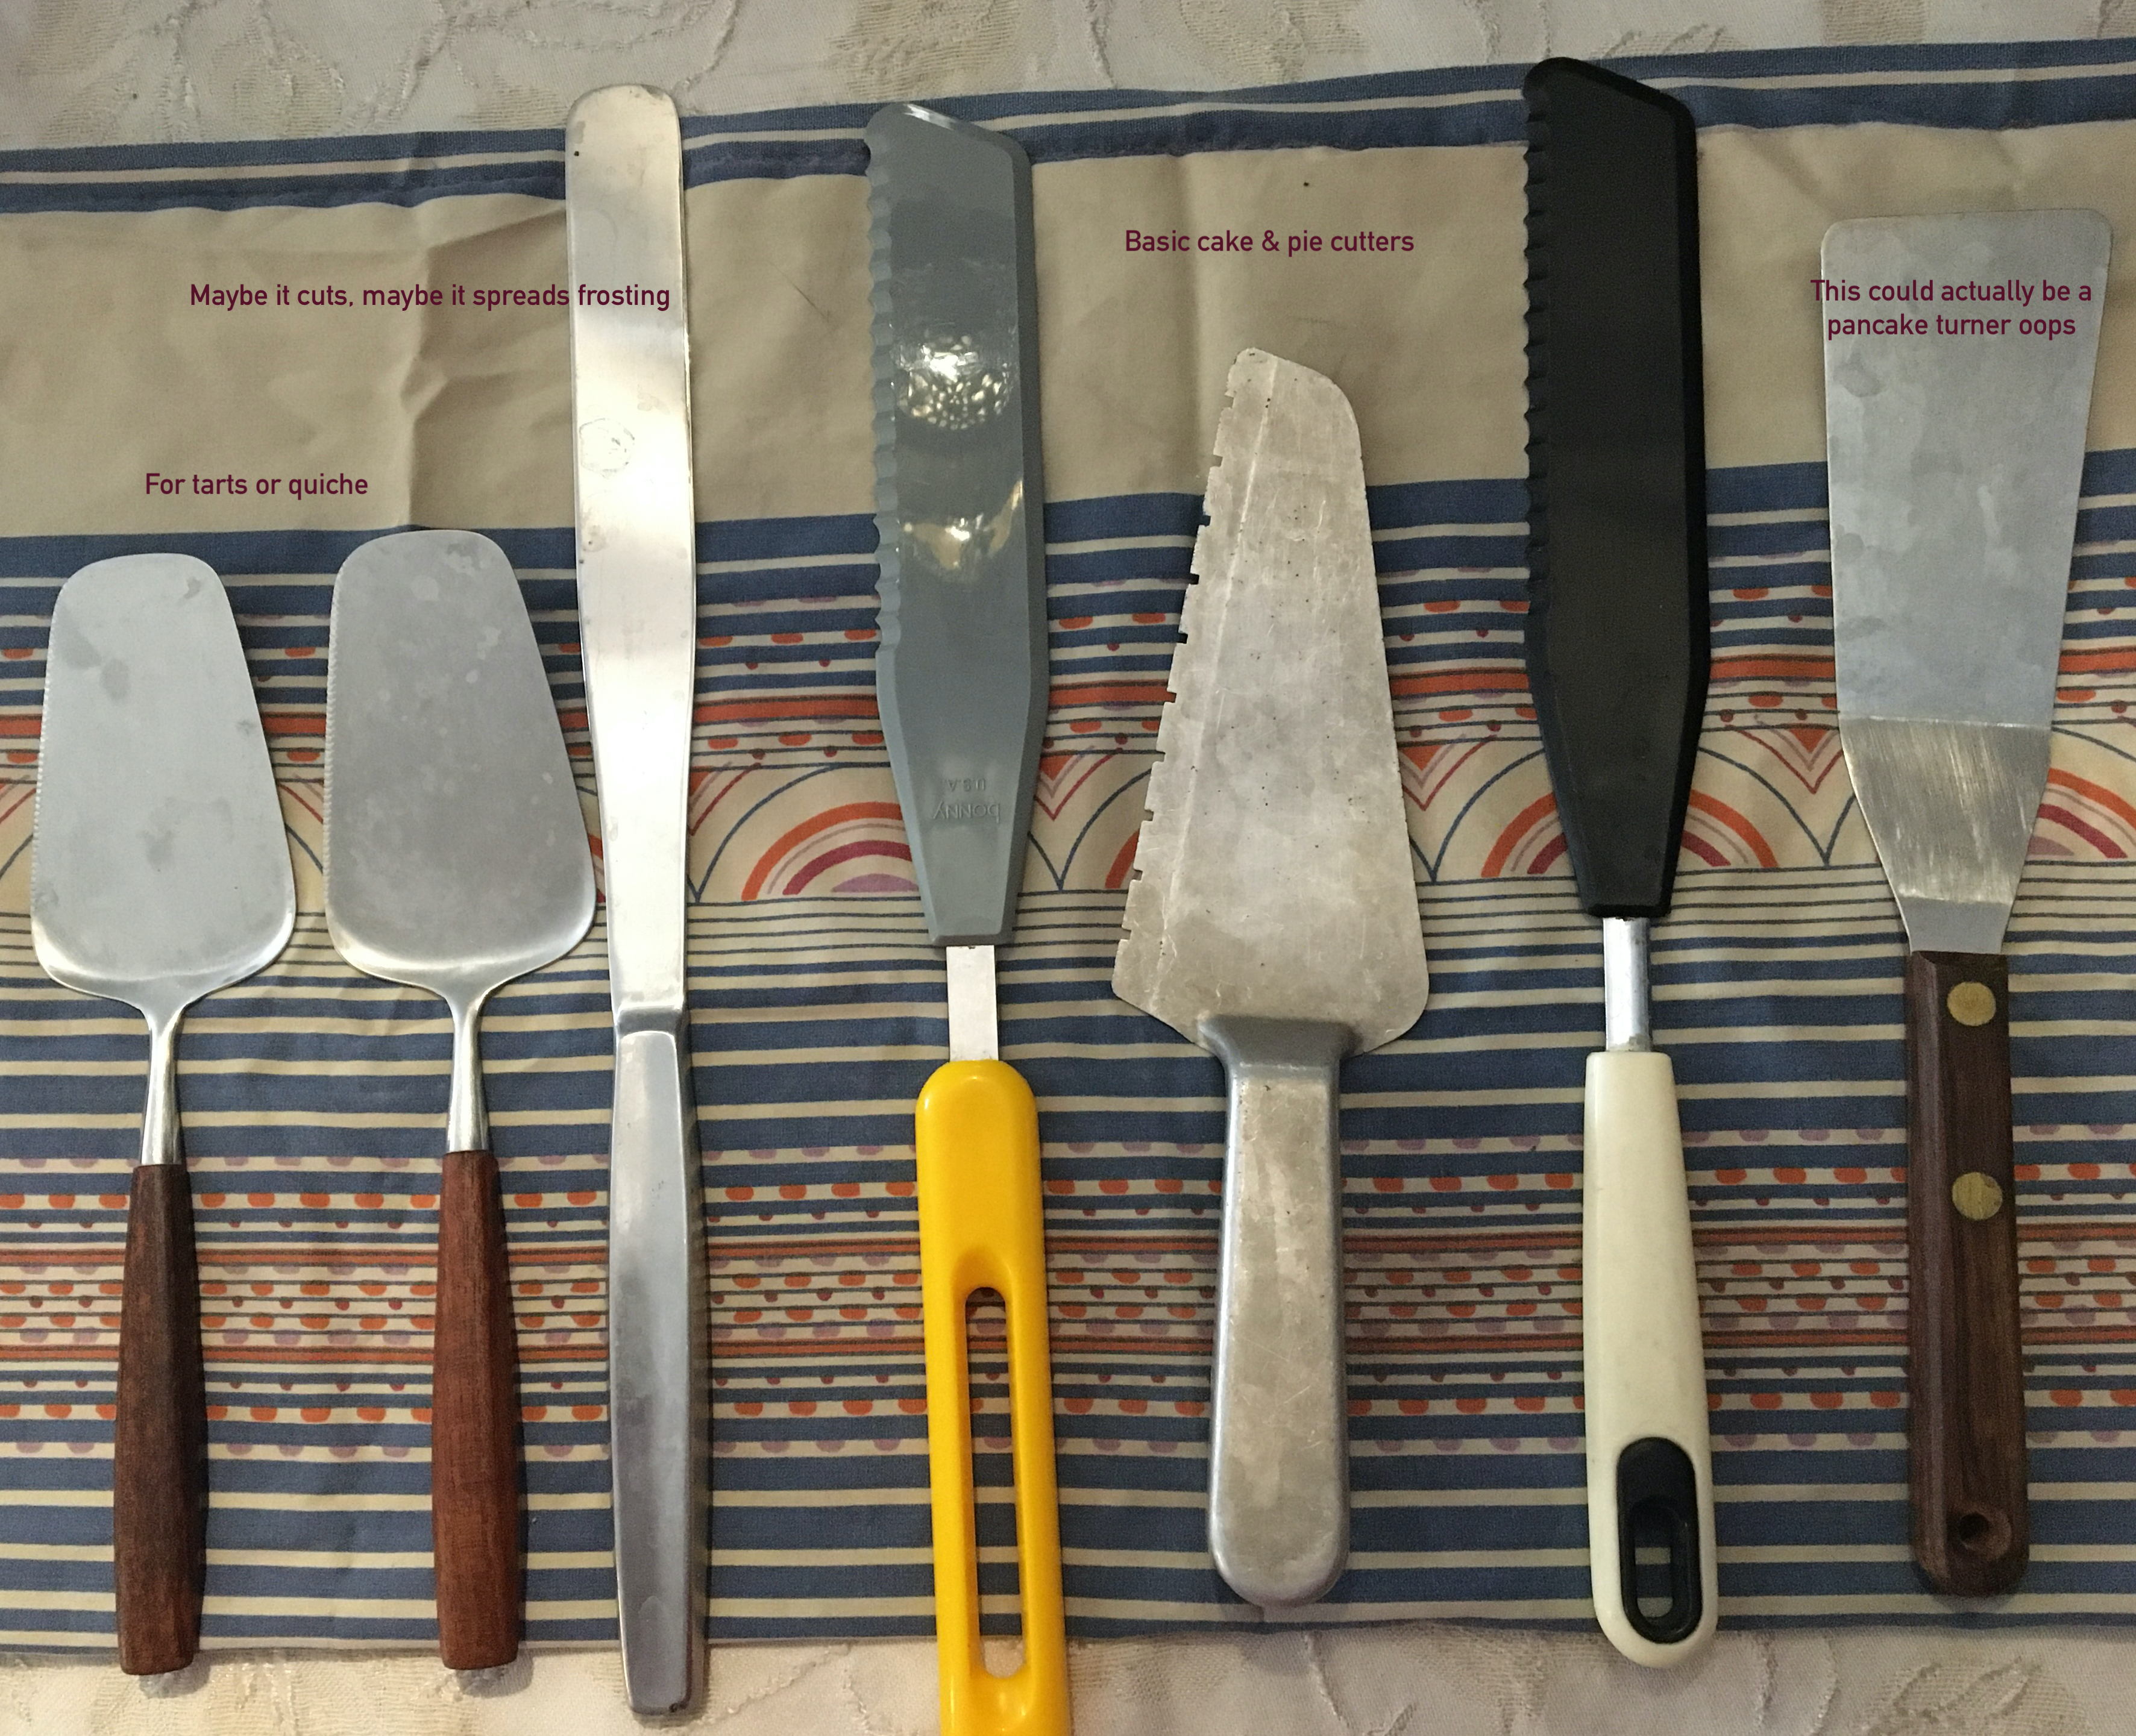
I also have a knife drawer and various other drawers I recently cleaned out and sorted. Now all “things that cut” are together. More or less. While some are ones I bought, most are things I inherited from my mother.
Some of the knives I use regularly or at least once in a while. Some are duplicates of ones I use (and I’ll get rid of them). Some I know what they are but don’t need them. Others are a mystery. Then there are the ones that scare me.
Let’s start easy.
Butter knifes. Fancier than the basic flatware ones I have. Designed for spreading things on to bread or crackers. Nothing weird.
This one’s a little weird. It cuts and it spreads. But I can deal.
These are butter knives/spreaders with pointy tips. Why? I guess to cut a piece of cheese and pick it up?
I use the pizza cutter. I used to use the cheese cutters when I ate cheese. The cake cutter I bought but it didn’t cut my cake at all. Must be for some type of cake I don’t eat. [Edit: the “cake cutter” is actually a cake leveler; the one my friend showed me has two parallel wires not the one mine does.]
These cut cake. And pie. And tarts and quiche and so forth. Nice normal stuff, most of which I actually use.
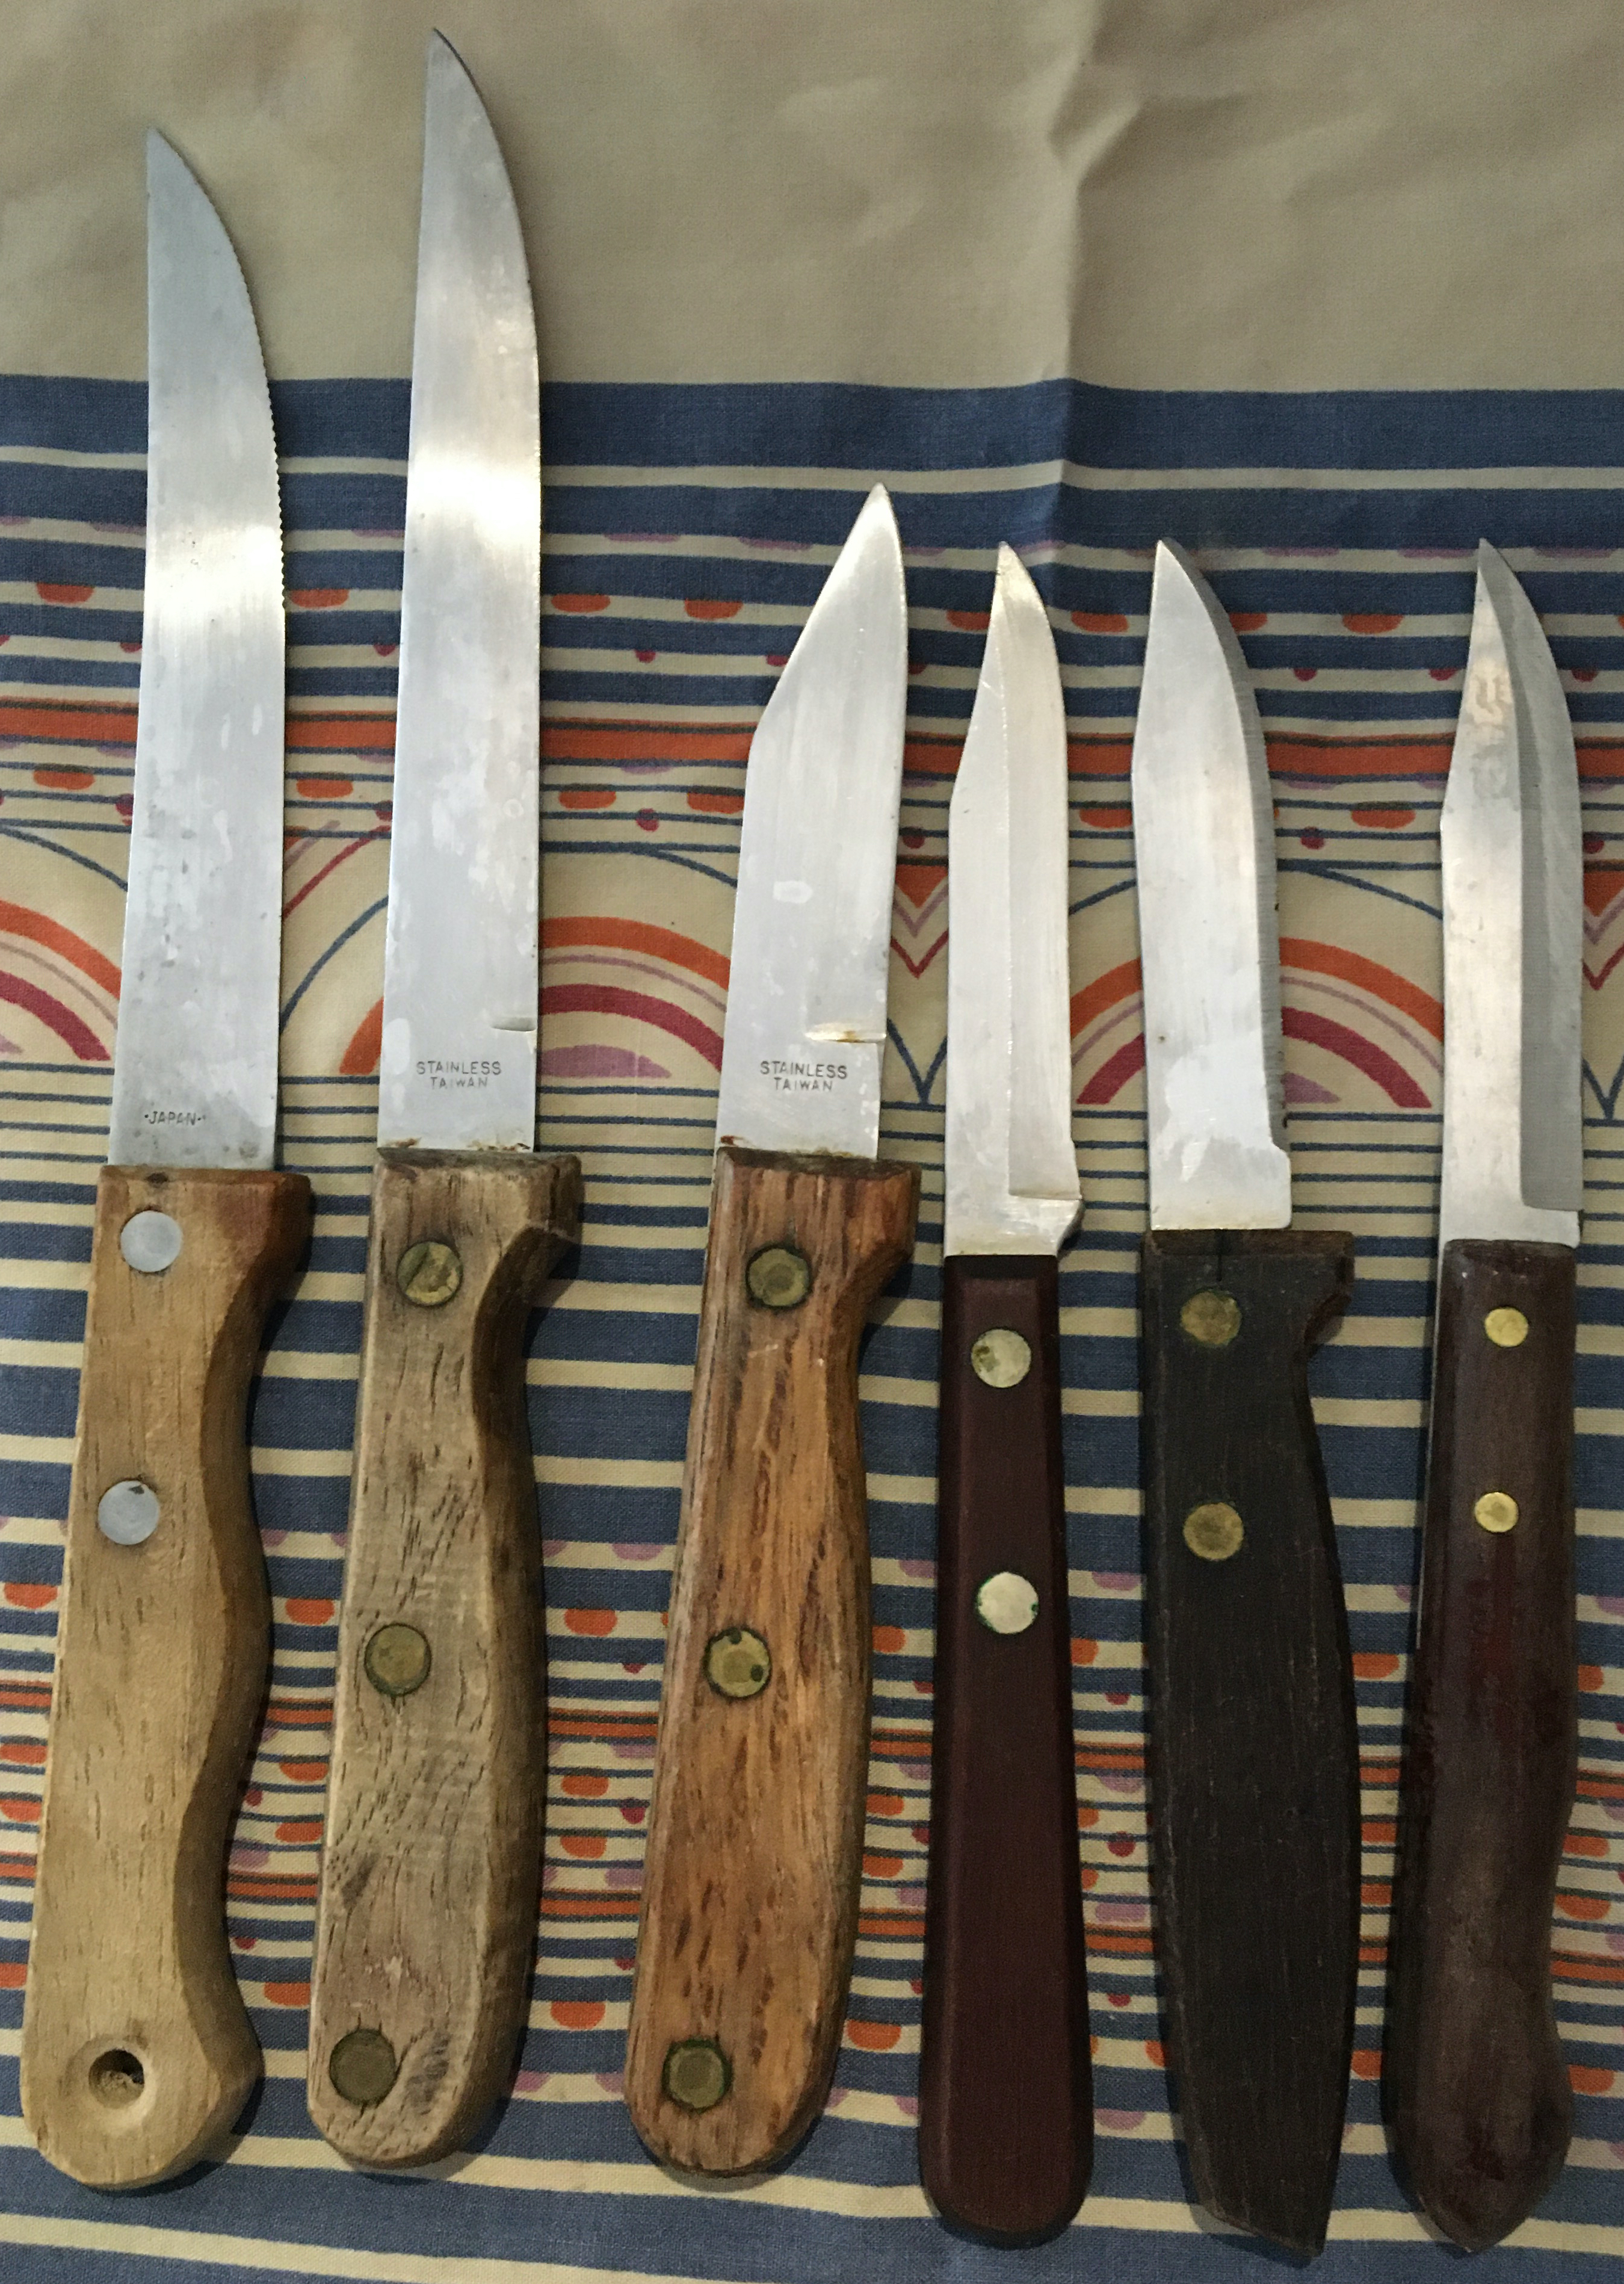
Steak knives. I grew up with the set on the left and they’re still usable. I mean I don’t eat steak but they’re great for slicing tomatoes and for teaching children how to cut.
Paring knives. Nice and easy. I just have better ones now. Sorry knives. [Edit: The longer ones on the left are called utility knives.]
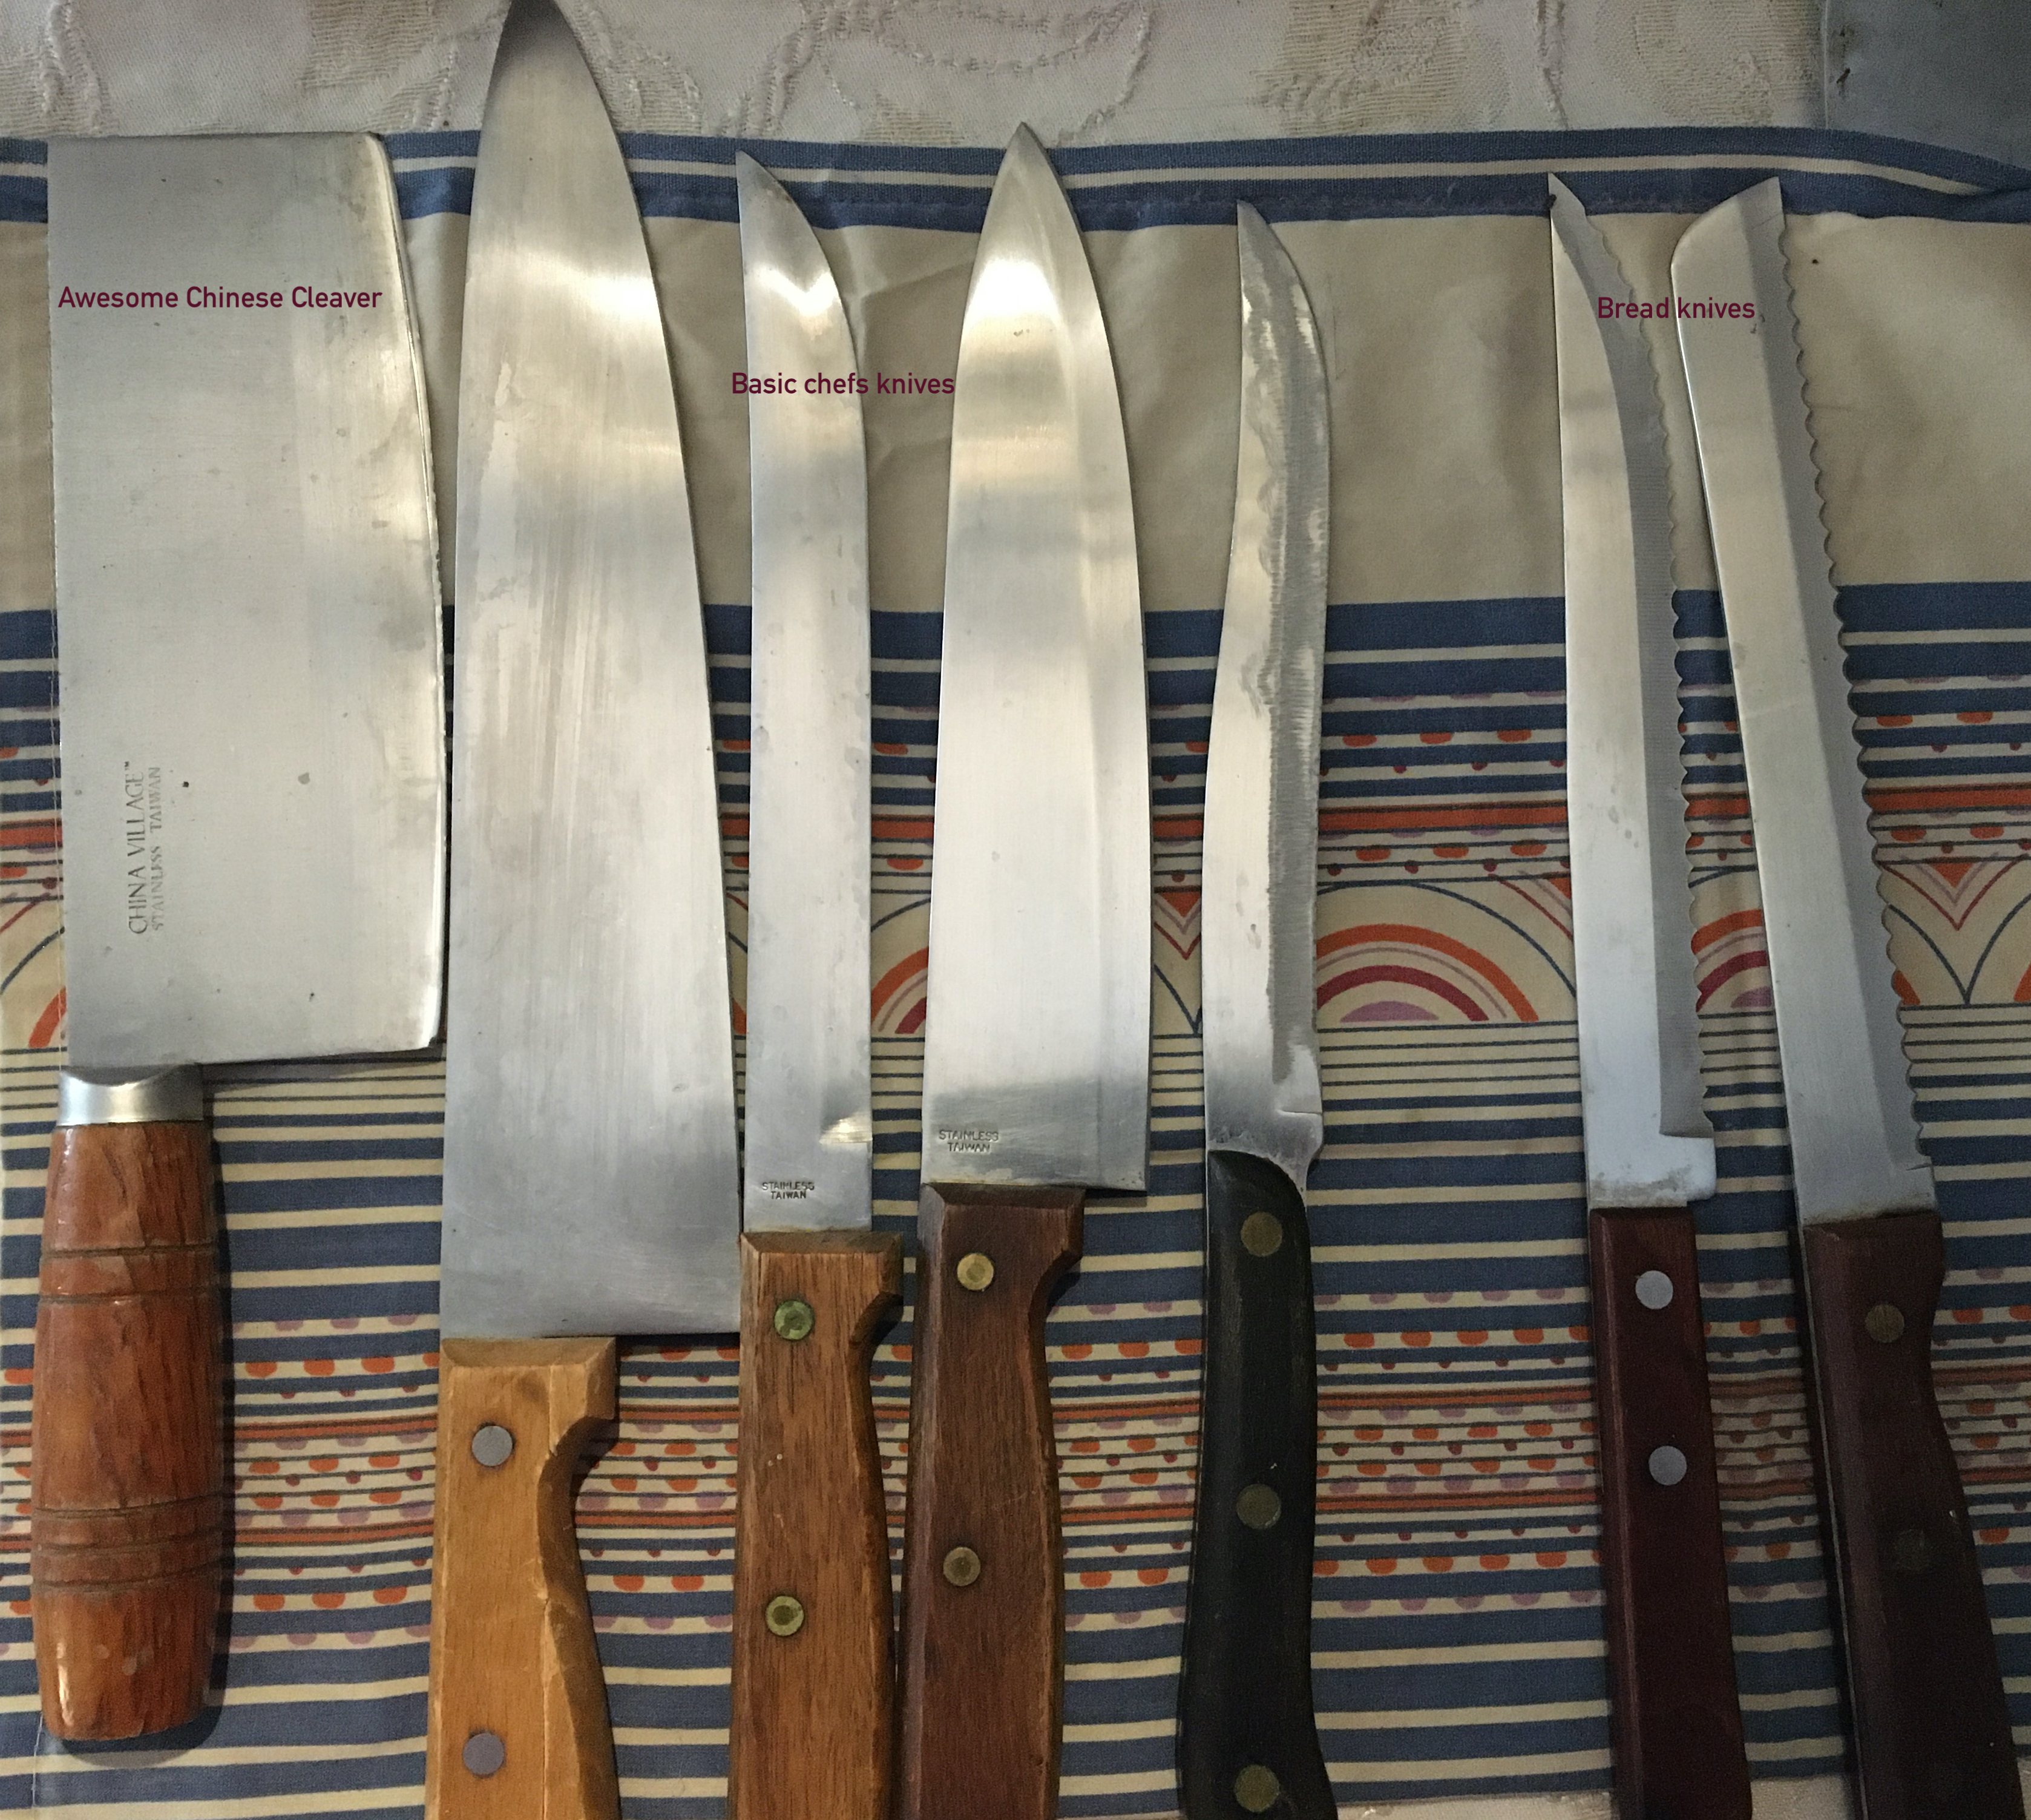
I love my cleaver. I got it decades ago when I took a Chinese cooking class. The 3 chefs knives I used before I got married. I don’t understand what the one with the dark handle is for with that funny shape. Raw meat maybe? [Edit: Yes.] I used to have 3 extra bread knives but I gave one to my synagogue’s kitchen after I hosted a meal with 4 dozen bagels that all had to be cut without a bread knife.
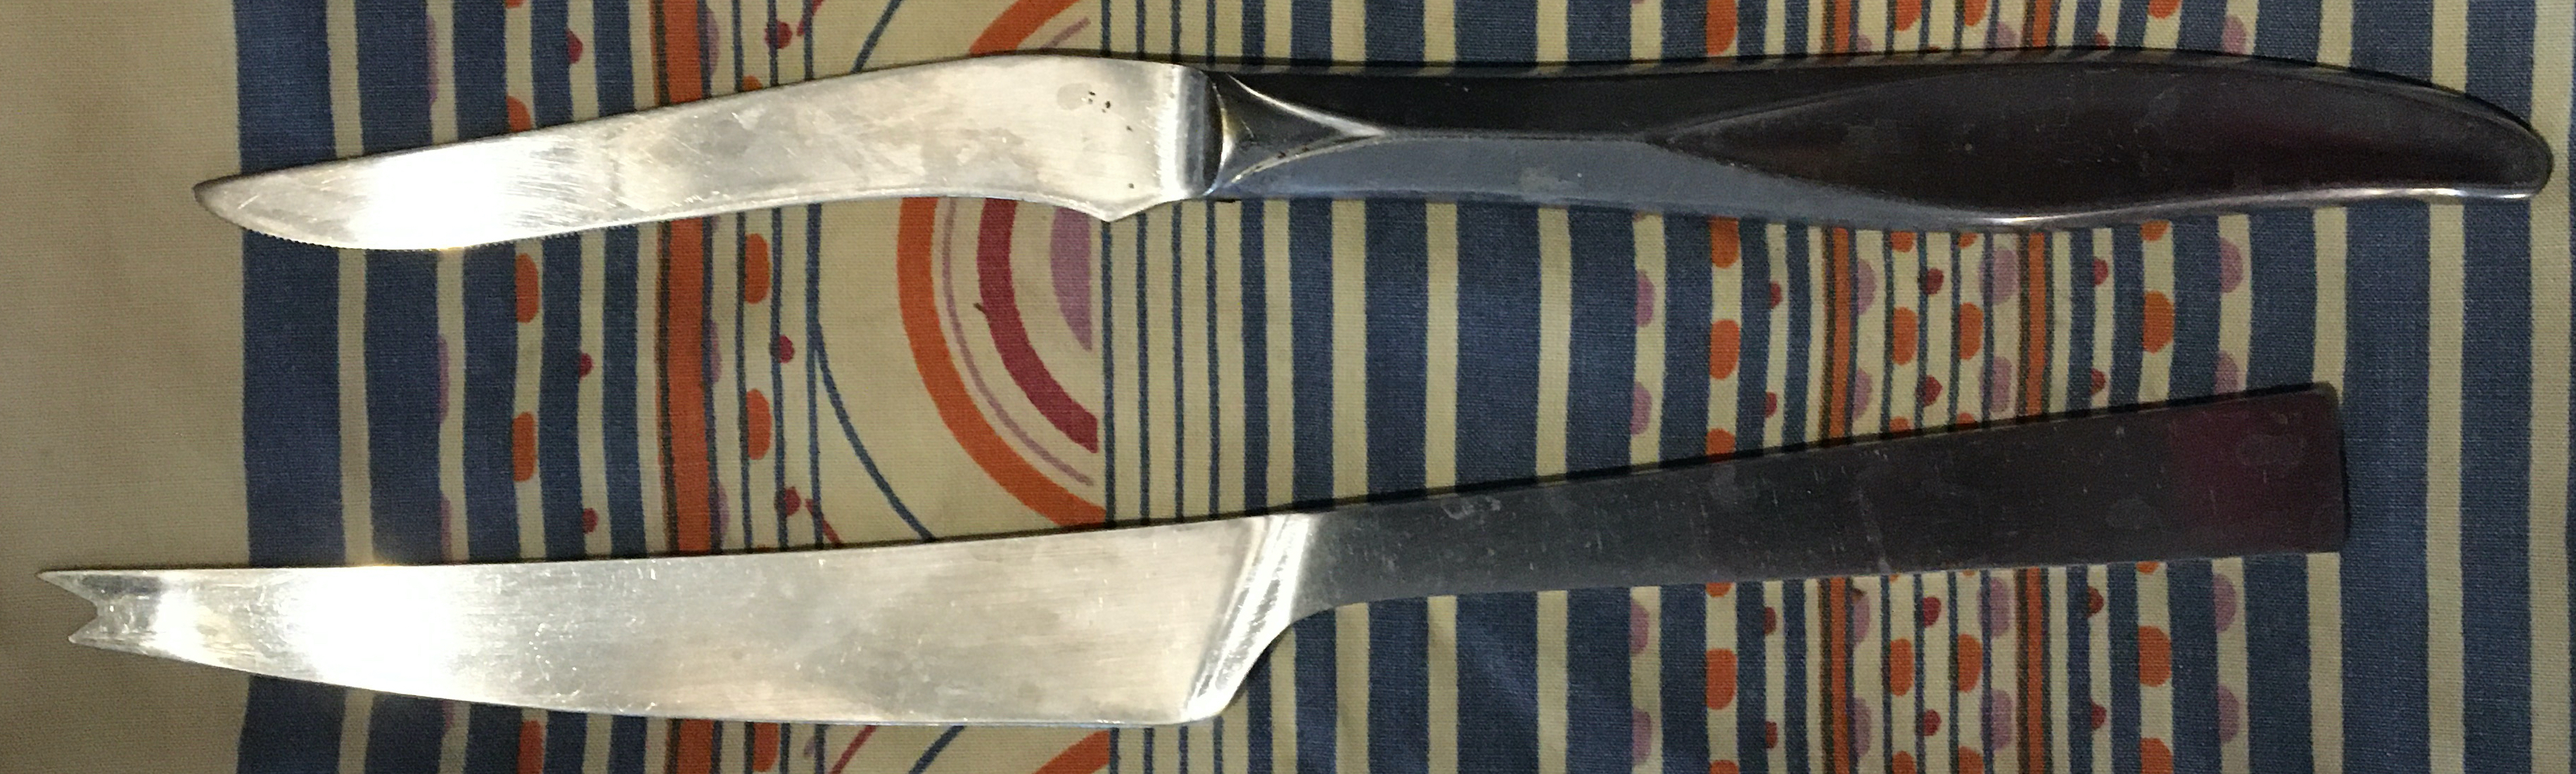
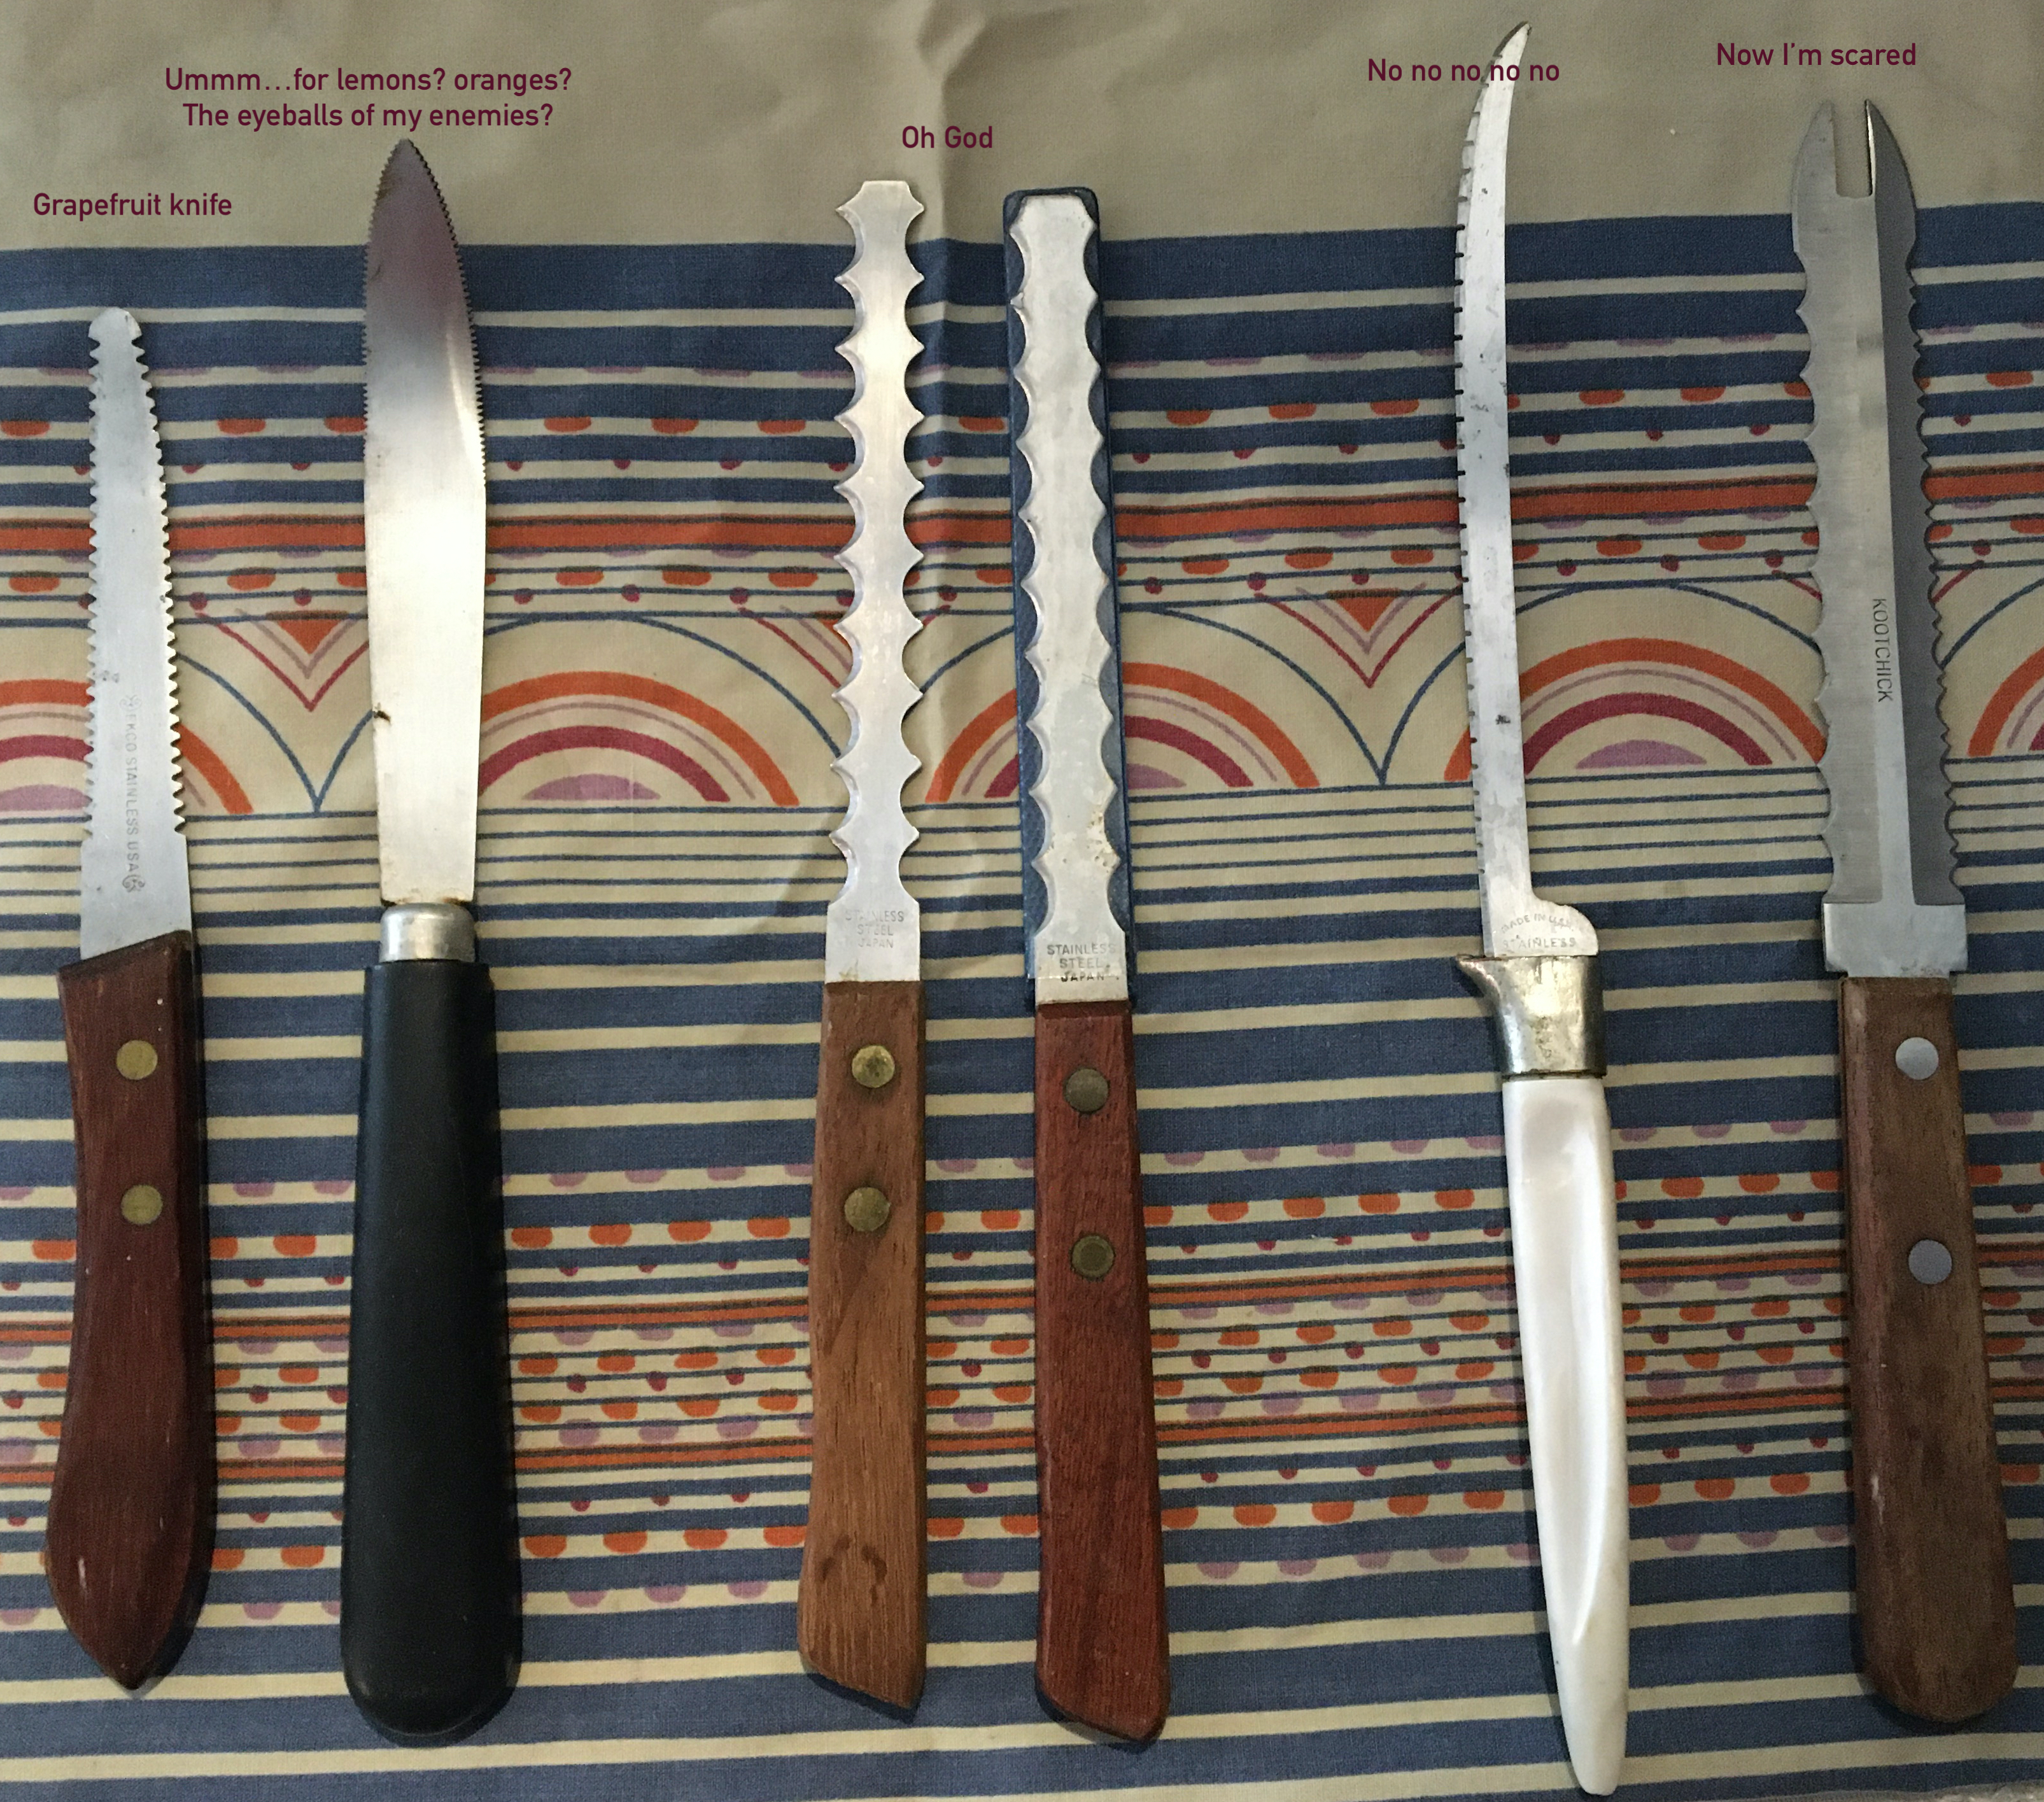
Now we’re getting into the weird territory. We start with a grapefruit knife. I doubt my kid has a clue what it is, but I recognize it, even if I never use it. Next could be another grapefruit knife, or for segmenting oranges or lemons or I don’t know.
The next ones just scare me. I mean I guess they’re for preparing or carving meat…but why do we have all this three-sided pointiness? Why is there a knife too flimsy to cut anything but long and curved and sharp?
[Edit: the sharp forked tips are for picking stuff up (cheese, meat, tomato slices). The knife on the far right is a saw and raker blade, a heavy-duty knife used for cutting frozen foods. I have no idea why it has a fork on the end.]
I saved the best for last. Okay, it starts normal. A nice honer and a useless manual sharpener. A tiny paring knife. Two cheese knives. Or at least I assume that’s what that elegant pokey thing is with the double spikes. [Edit the one with a fork at the tip is indeed a cheese knife. But the one just to its left, with the flange to protect your hands, appears to be an oyster knife.]
Then we have the large version of the 3-sided knife. A chopper that rocks as you use it but looks like something from Star Trek.
And then there is the cleaver. Not a lovely balanced rectangular cleaver like the one I use all the time. Nope. This one looks like a mini throwing axe. And then it has the cutouts on the other side. Is that for bonking? It’s not a tenderizer or a serrated blade or even useful for cutting twine. What is it?
If you can tell me more about any of these knives and similar tools, please leave a comment. I love funny kitchen tools. Even when they scare me.
I’ve seen some oddnesses in my time exploring cemeteries, but this one is new to me.
This is the cemetery walking distance from my house and its hilly paths and century and a half of burials make it an enjoyable walk when parks are closed or crowded.
Cypress Hill Memorial Park Cemetery, Petaluma, California.
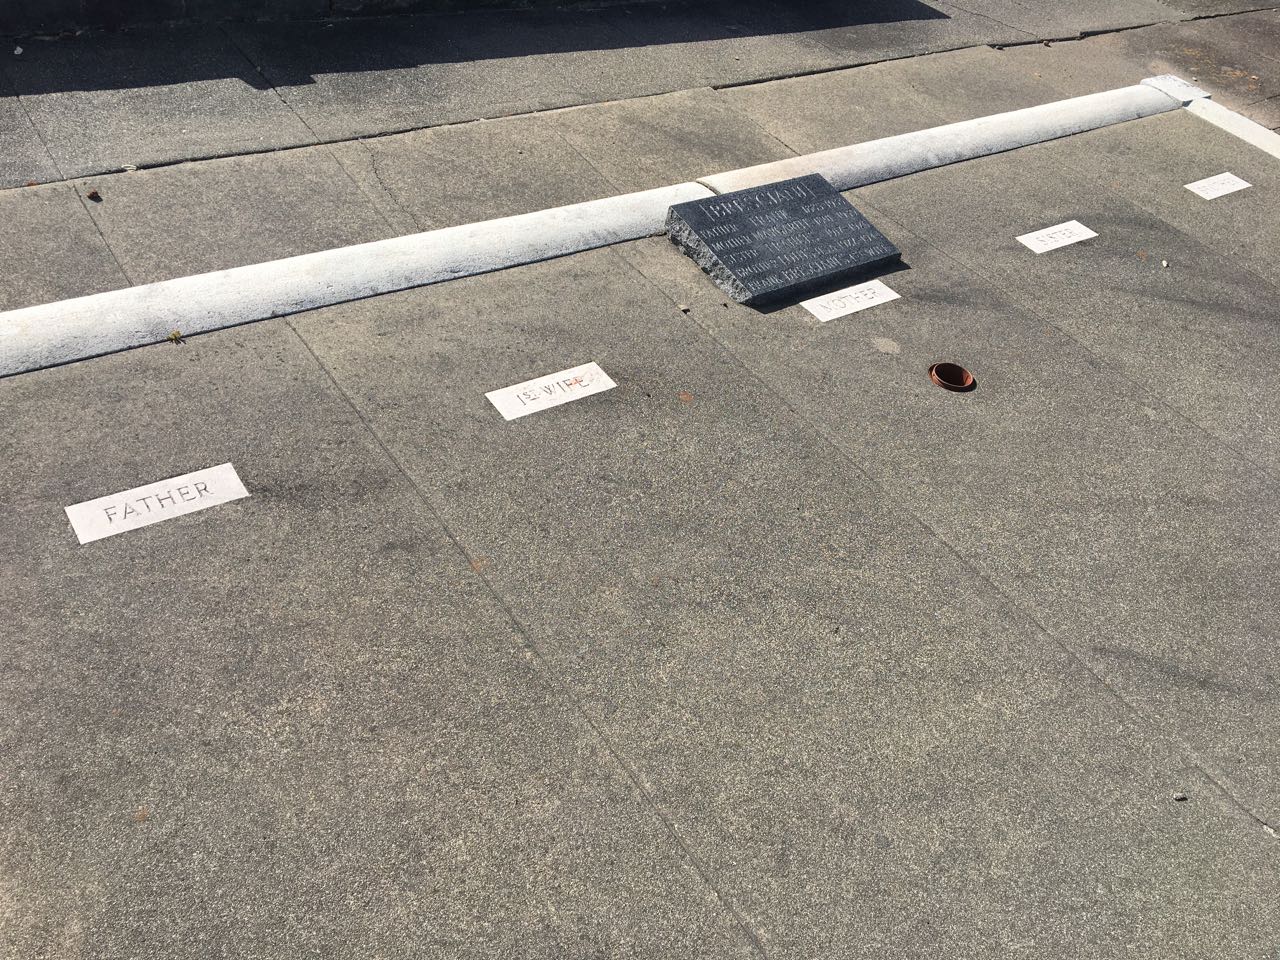
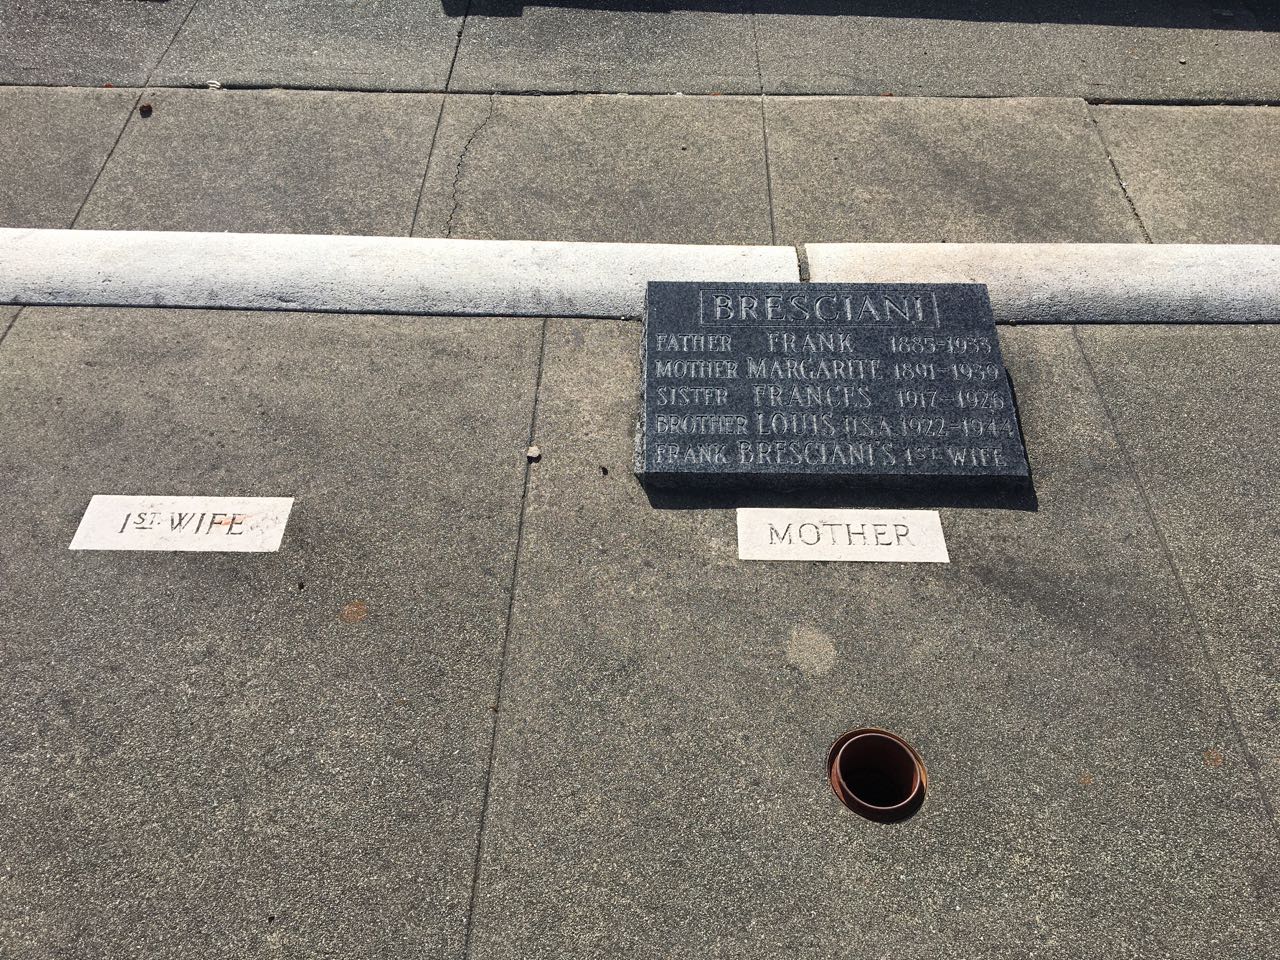
We have a family plot, something common in this cemetery and elsewhere. Each grave is labeled only with a family moniker and then there is a single plaque to list names and dates.
The graves are (from left to right): Father, 1st Wife, Mother, Sister, Brother.
The plaque reads:
BRESCIANI
Father Frank 1885-1933 Mother Margarite 1891-1939 Sister Frances 1917-1926 Brother Louis U.S.A. 1922-1944 Frank Bresciani’s 1st Wife
So many questions!
Did they really expect anyone would believe that the family would bury a woman but not know her name or the year she died (which is presumably the same year they buried her)?
If the family hated her this much, why not buy her a separate plot?
When did she die? Were she and Frank divorced then she died after his death, so he could not be the one to bury her properly? Or did she die young then the family carried out Frank’s deathbed command to re-inter her in the family plot, but did so in the meanest way possible?
Was the social cut by Margarite? Or by her son Louis? Or was it some other family member (they had other sons)? The graves are not in order by year of death and the plaque would have been made after they all passed away (since the brother died as a young man, presumably a soldier in World War II based on his age, the year, and the “USA” note).
If she was re-interred, her old grave would have had her name and dates of death and probably birth. If there was no stone or the stone was faded, the cemetery records would have had these things (how could they have found her grave without her name?).
Frank Bresciani, well known Chileno Valley rancher, who had been ill for less than a week, passed away Sunday morning at the Petaluma General Hospital. Death was caused from a throat infection.
Friends learned with regret of the sudden death of the well known rancher who was apparently recovering when he took a change for the worse.
The late Mr. Bresciani, because of his genuine worth and affable nature won a high place in the regard of his friends. He worked hard in operation of his ranch. In Chileno Valley where he had resided for many years, his death bringing sorrow to his friends on the neighboring ranches.
Born in Italy, he was only 48 years of age when he died. He was the beloved husband of Mrs. Margaret Bresciani and loving father of James, Frank Jr., Louis and William Bresciani, and devoted brother of Peter Bresciani. He leaves a mother, brother and sister, residing in Italy.
Since his arrival in the state 31 years ago, he had been engaged in the dairy business in Sonoma and Marin counties.
The funeral will take place from the Blackburn & Sorensen funeral chapel Tuesday morning at 9:30 o’clock, thence to St. Vincent’s church where a requiem mass will be celebrated for the repose of his soul commencing at 9:45 o’clock. The interment will be in Calvary cemetery.
In the 1910 Census, Frank was a hired man working on a dairy ranch in the town of Sonoma (same county as Petaluma). He was 24 and single and had immigrated from Italy in 1903 (it’s common for dates to be off in the census so don’t rely on them to be exact).
In the 1920 Census, Frank and Margaret were living in San Antonio, in Marin County just south of Petaluma, where he owned a dairy ranch. With their children Frances and James and Frank’s brother Pete. Frank was 36, and was in the process of establishing citizenship after immigrating from Italy in 1902. Margaret was 24 and had immigrated from Switzerland in 1913 (both her parents were also Swiss but they all spoke Italian as their native tongue).
In the 1930 Census, Frank and Margaret were still in San Antonio on Chilano Valley Road, on the border of Petaluma, so it may be where they lived when he died, as he still owned his dairy farm. They had been married for 13 years at that point (so 1917). He was 44 and a US citizen, having immigrated from Italy in 1905. Margaret was 33 and an naturalized, Italian-speaking, 1913 immigrant from Switzerland. They lived with their children James, Frank Jr., Louis, and William, plus Frank’s brother Petro and a boarder.
I couldn’t find marriage records for Frank and Margaret and there is no mention of the elusive first wife, nor of any children that might have come from her.
Perhaps someone with more knowledge will share the background for this mystery but, at this point, I can only speculate.
A social cut so deep that it’s literally etched in stone for all to see.
Making your own soup stock is easy peasy, costs practically nothing, and tastes so much better than anything you can buy (unless you get it from a restaurant). Now that I have an Instant Pot, making stock is even easier.
Instructions
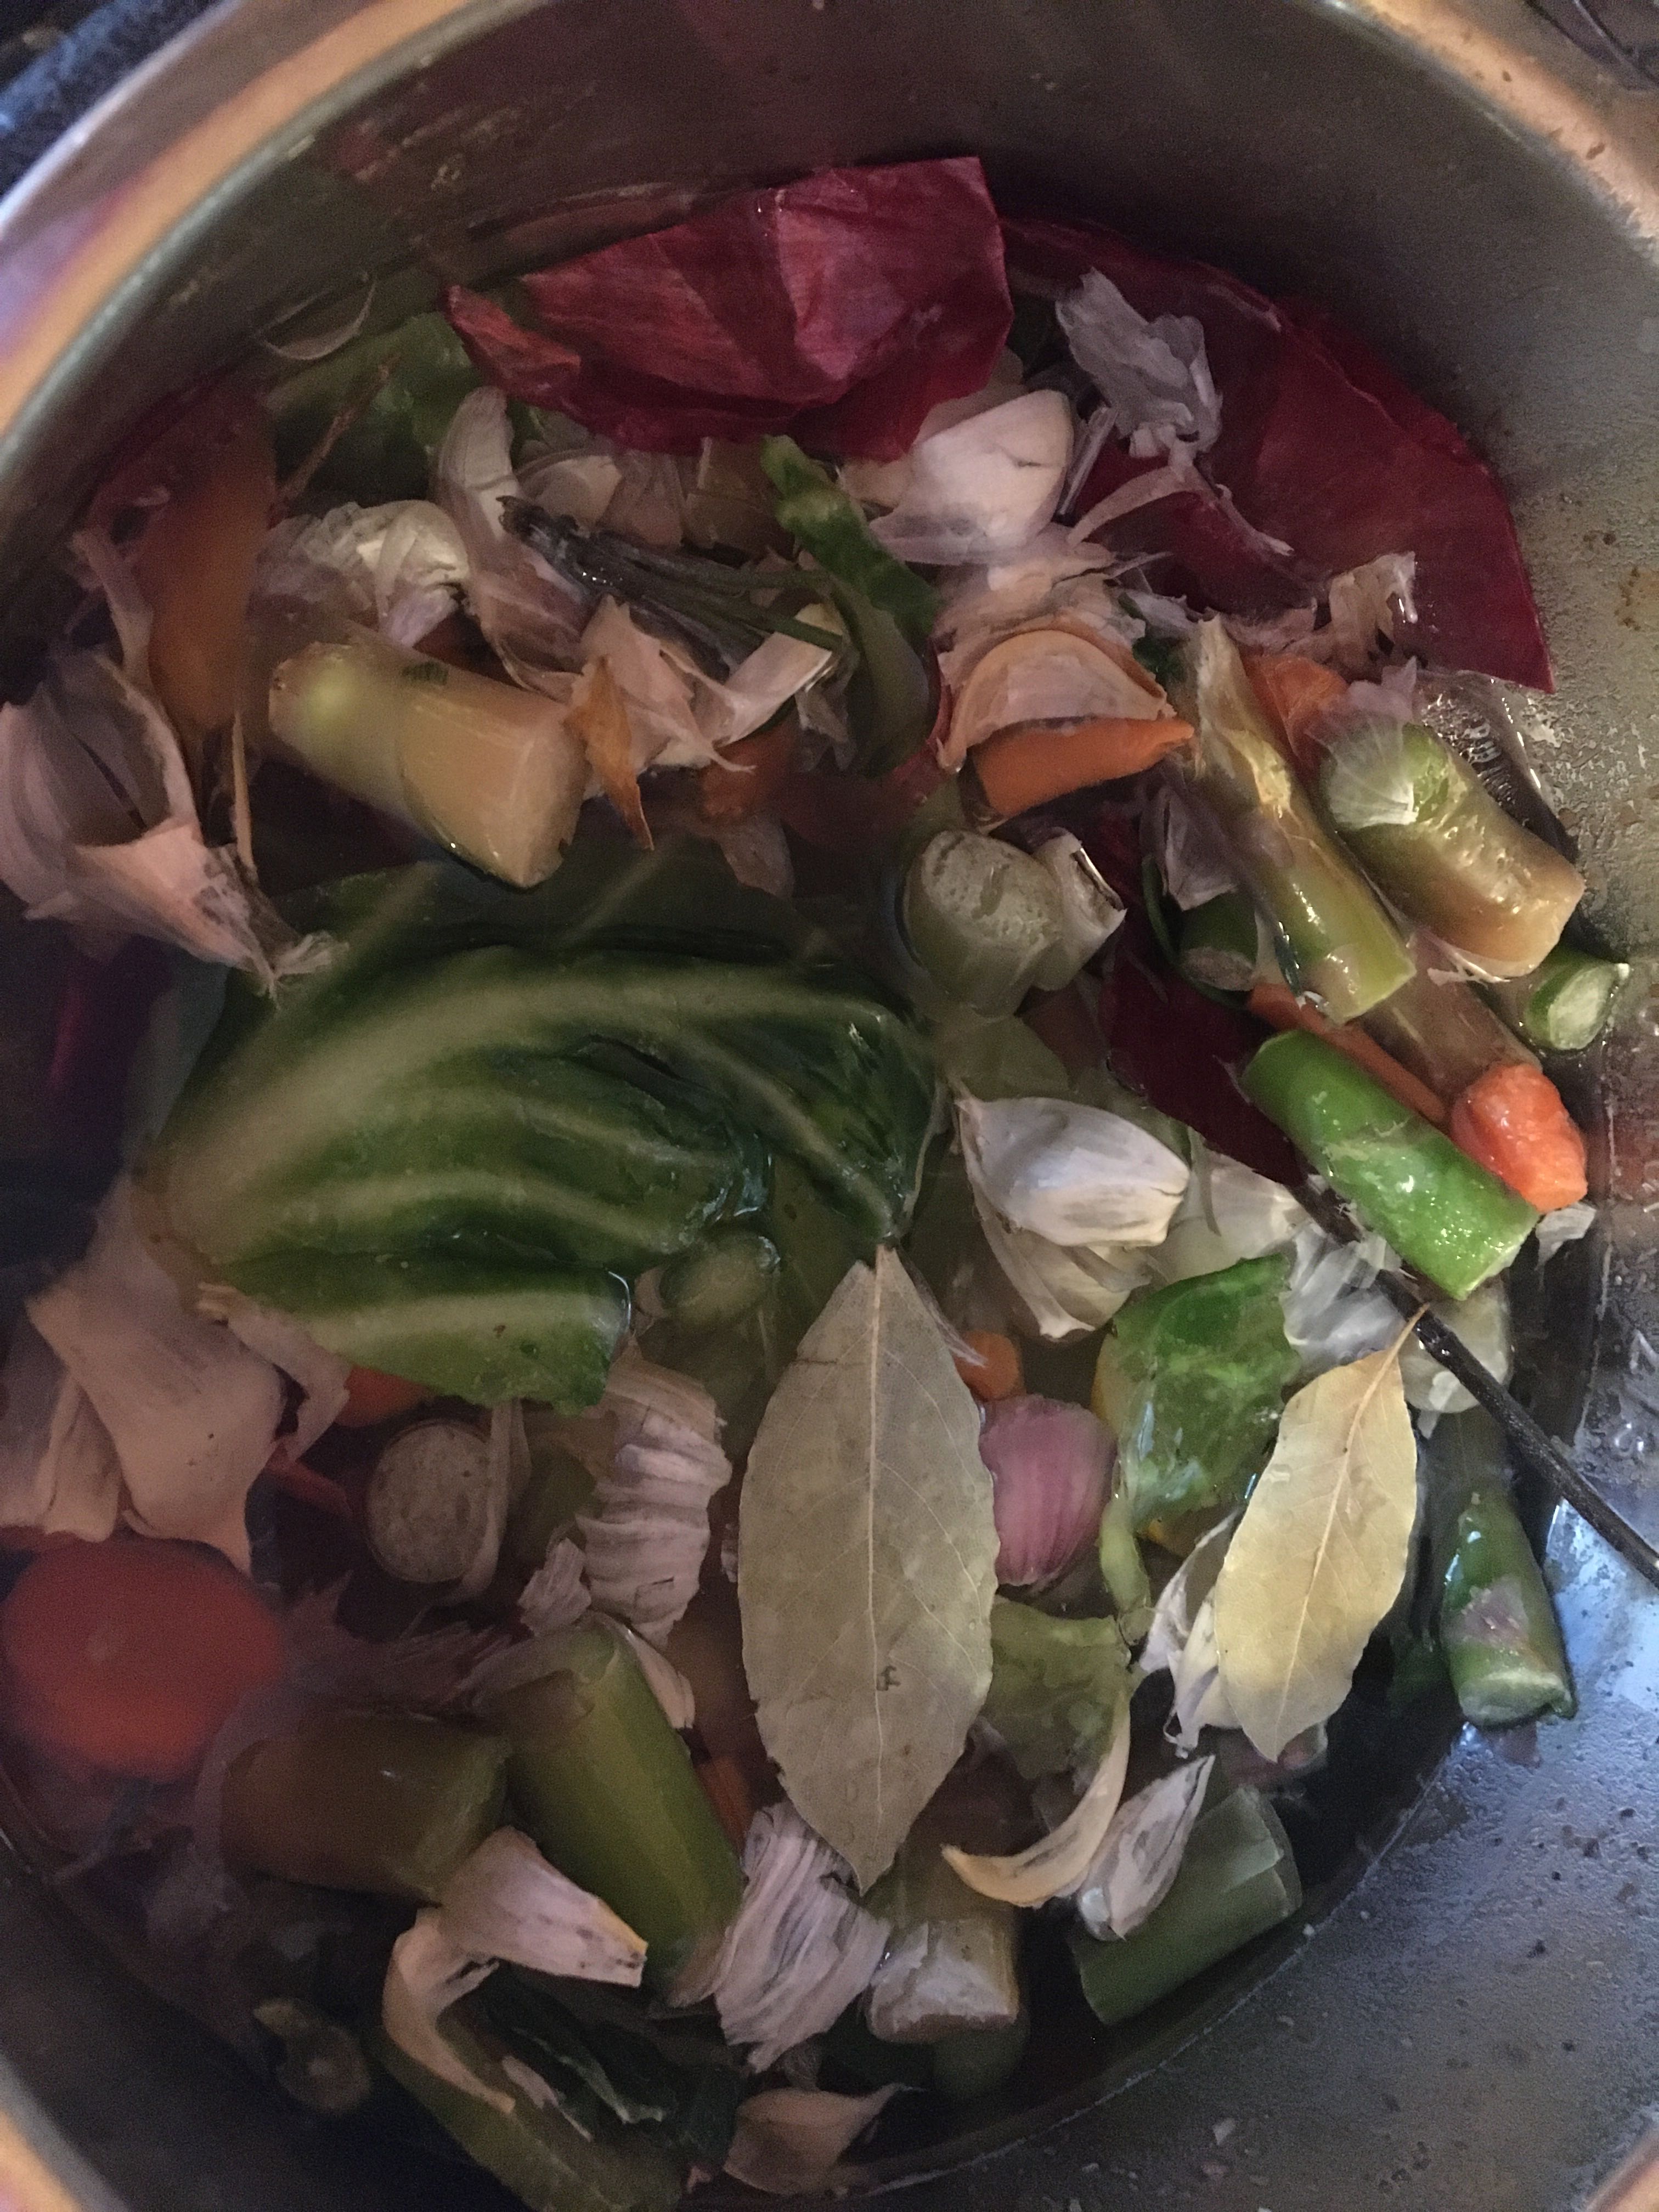
Save trimmings for the stock pot in freezer
Dump trimmings in Instant Pot (or stovetop pot)
Add seasoning or extra veggies
Cover with drinking water
Pressure cook for 40 minutes with natural release (or simmer on stove for a couple hours)
Strain and squeeze out veggies
Pour into storage containers and freeze
Ingredients to Freeze
I keep a couple zipper bags in my freezer so, when I’m prepping veggies for meals, I can just toss in the trimmings. While there are animal products you can use for stock, I’m only going to cover the vegan choices here.
DO USE: Onion/garlic skins, tough ends of leeks, carrot and other veggie ends that are dried or misshapen, cores and outer leaves of cabbage, mushroom stems that are too tough to eat, carrot tops, peels that are edible but you’ve chosen to remove them (carrot, beet, potato), root veggies that are still edible but got woody or tough.
Extra fresh herbs (I toss in herb stems as well, like basil or rosemary or sage). Ginger pieces I discarded because they were all skin or dried out. Asparagus ends. Broccoli stems and cauliflower cores.
DO NOT USE: Anything that is dirty or moldy, parts you’ve removed because they’re not healthy (potato eyes), peels from waxed produce (cucumber). Most hard peels (winter squash is okay). Previously cooked foods or grains.
Fruit. There are exceptions (I like an occasional unwaxed lemon peel) but, in general, stock doesn’t really benefit from banana peels or apple cores.
BALANCE YOUR FLAVORS: When I got some carrot tops I washed and rough chopped them and put them into their own freezer bag so I could dole them out over several stockmaking sessions. Otherwise it would be too much. Some people warn about too much onion/etc, but I haven’t found that to be a problem. I do find that too much cabbage family items throws the flavor off.
Ingredients to Add
Bay leaf (I use 3 leaves per batch)
Lemongrass (fresh sliced in half or rough cut dried)
Dried peppers (just one or two)
Whole spices (but go easy on things like peppercorn)
Ginger root (if not already in the frozen pile)
Any fresh vegetables you want to balance what you have frozen (carrot, celery, onion, garlic, cabbage, etc). This is a good time to cull old produce from your fridge, as long as it’s not moldy
Salt is optional! I was salting my stock but then I stopped so I could have more control over the salt levels in the finished soup.
Cooking the Stock
In a 6 quart Instant Pot, I loosely added frozen vegetables to the max line (I’d do less if I packed stuff in) and added 3 quarts of filtered water.
Use the pressure cooker setting on high for 40 minutes and let the pressure release naturally. Cool to a safe temp before straining.
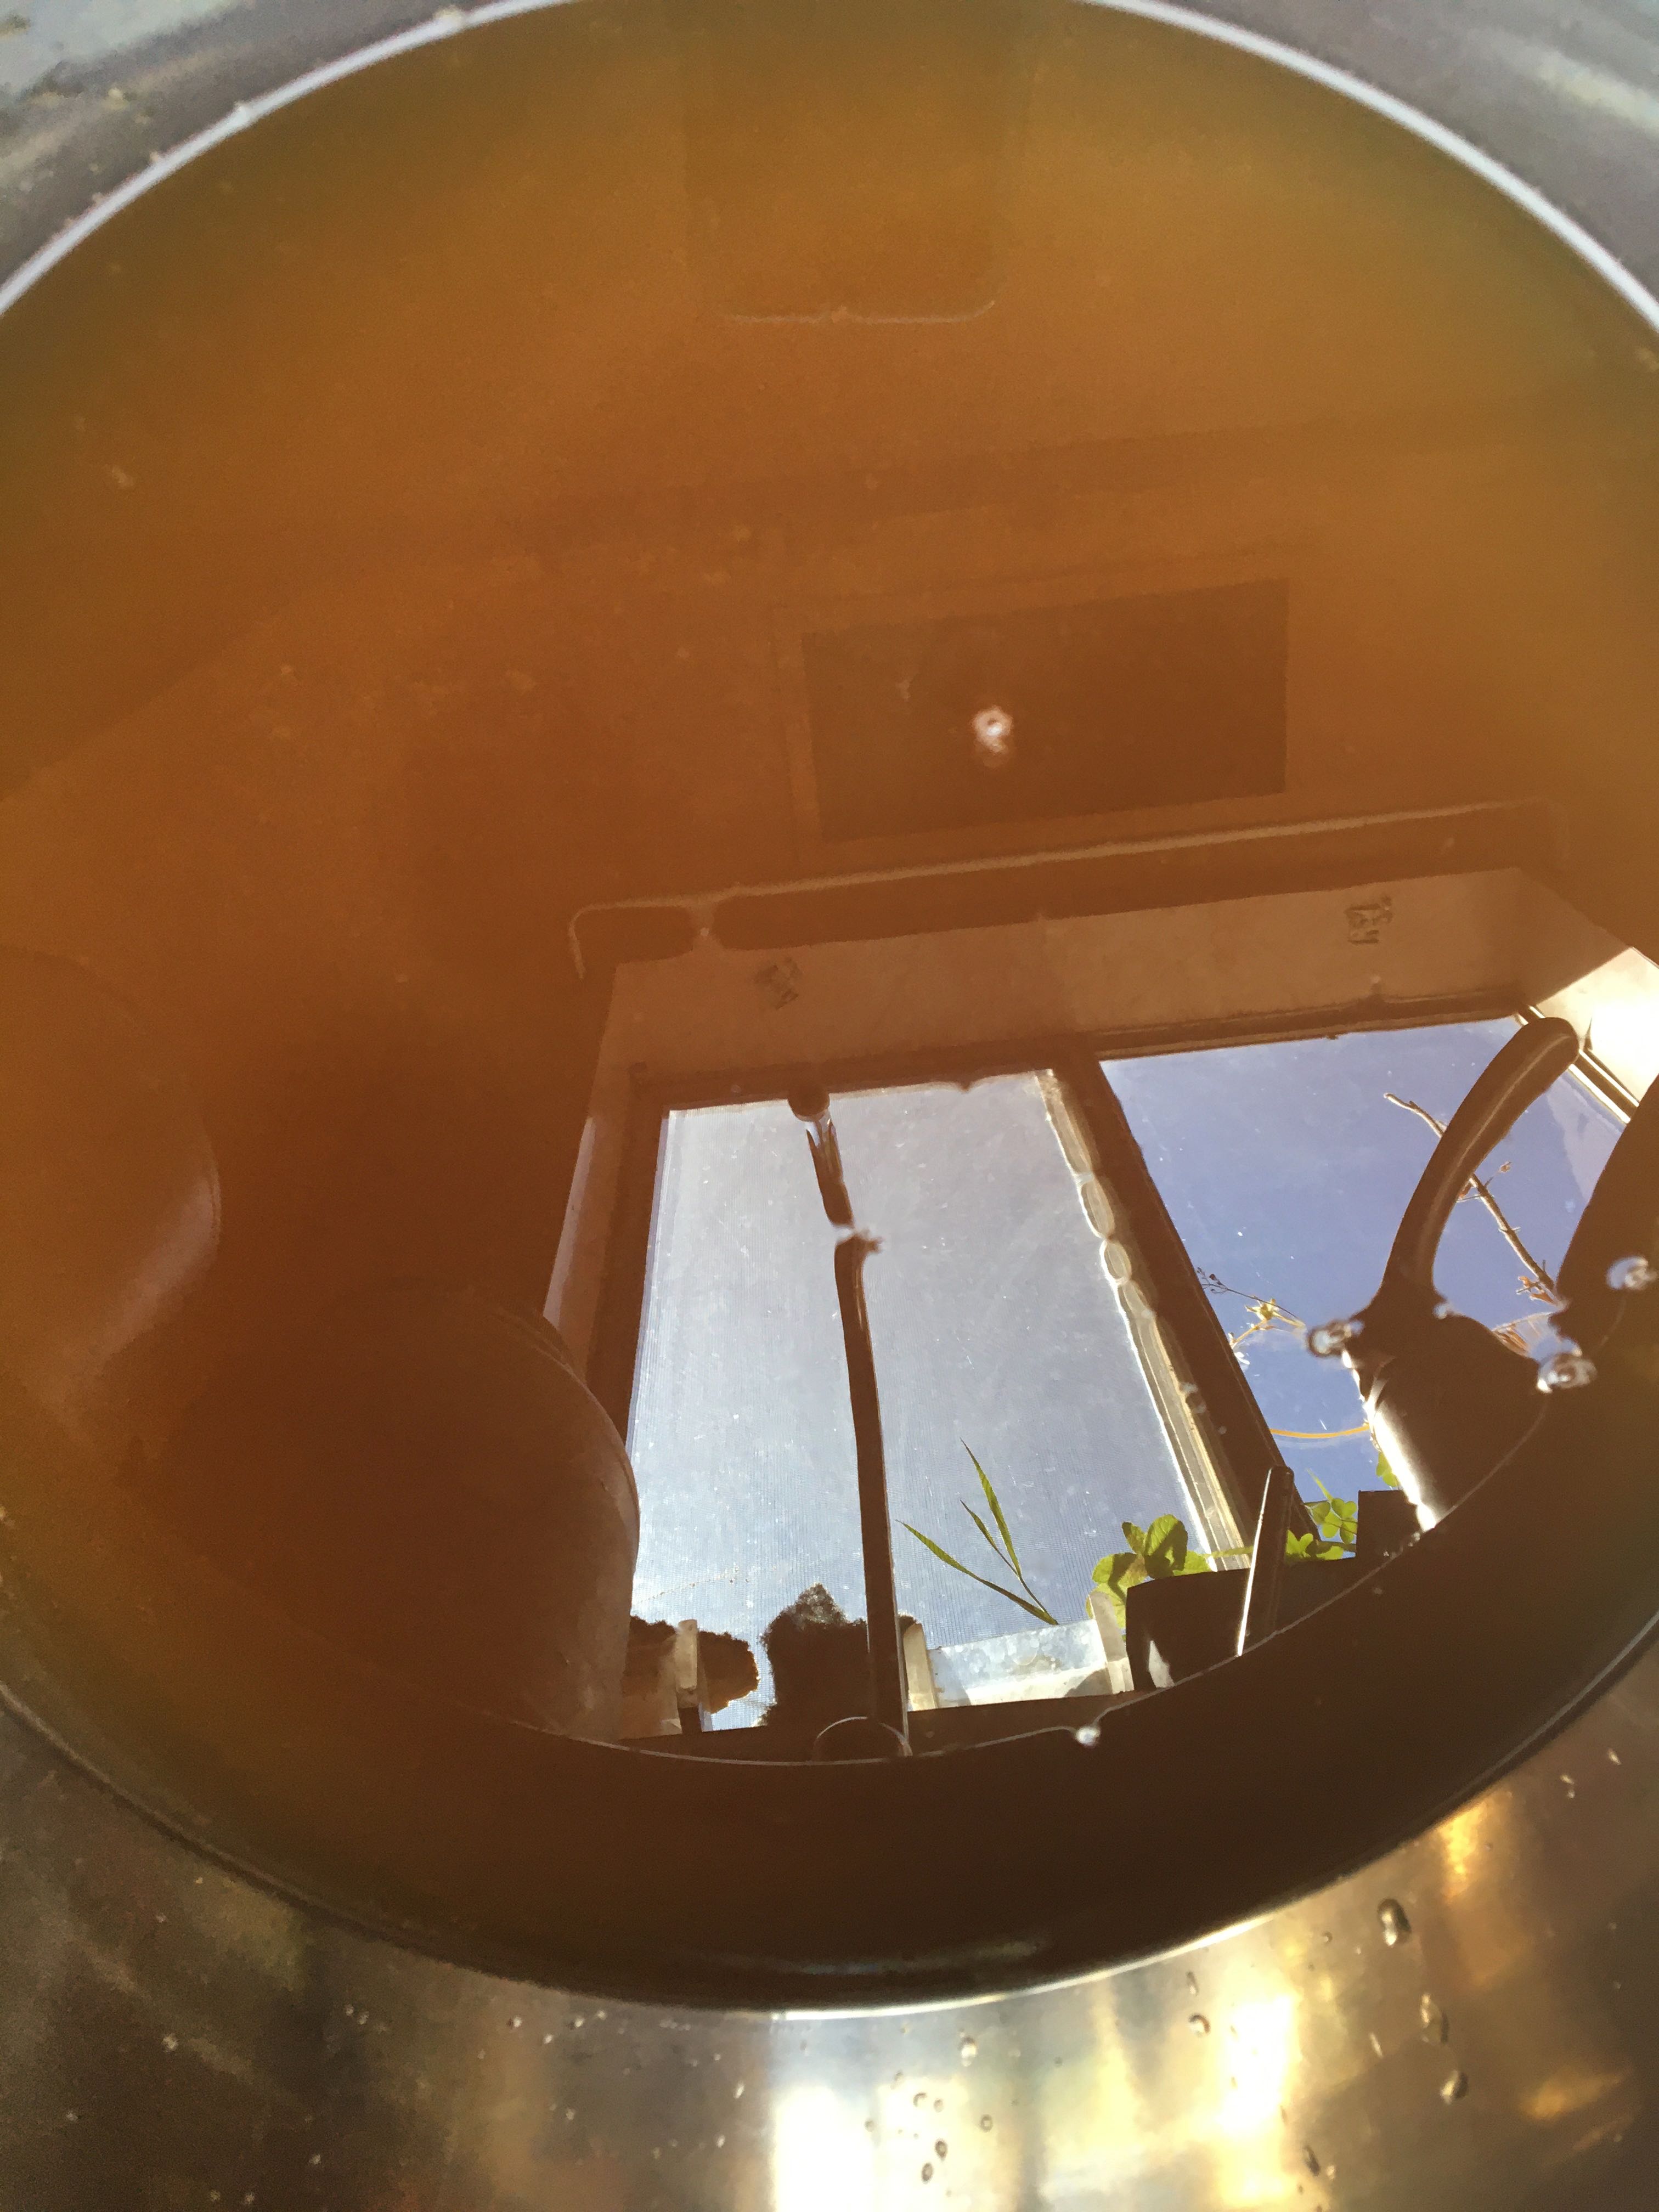
Straining the Stock
When cool enough to handle, pour the stock into a collander that is inside a large bowl.
Squeeze the liquid out of one handful of vegetables at a time and discard (compost loves it).
Storing the Stock
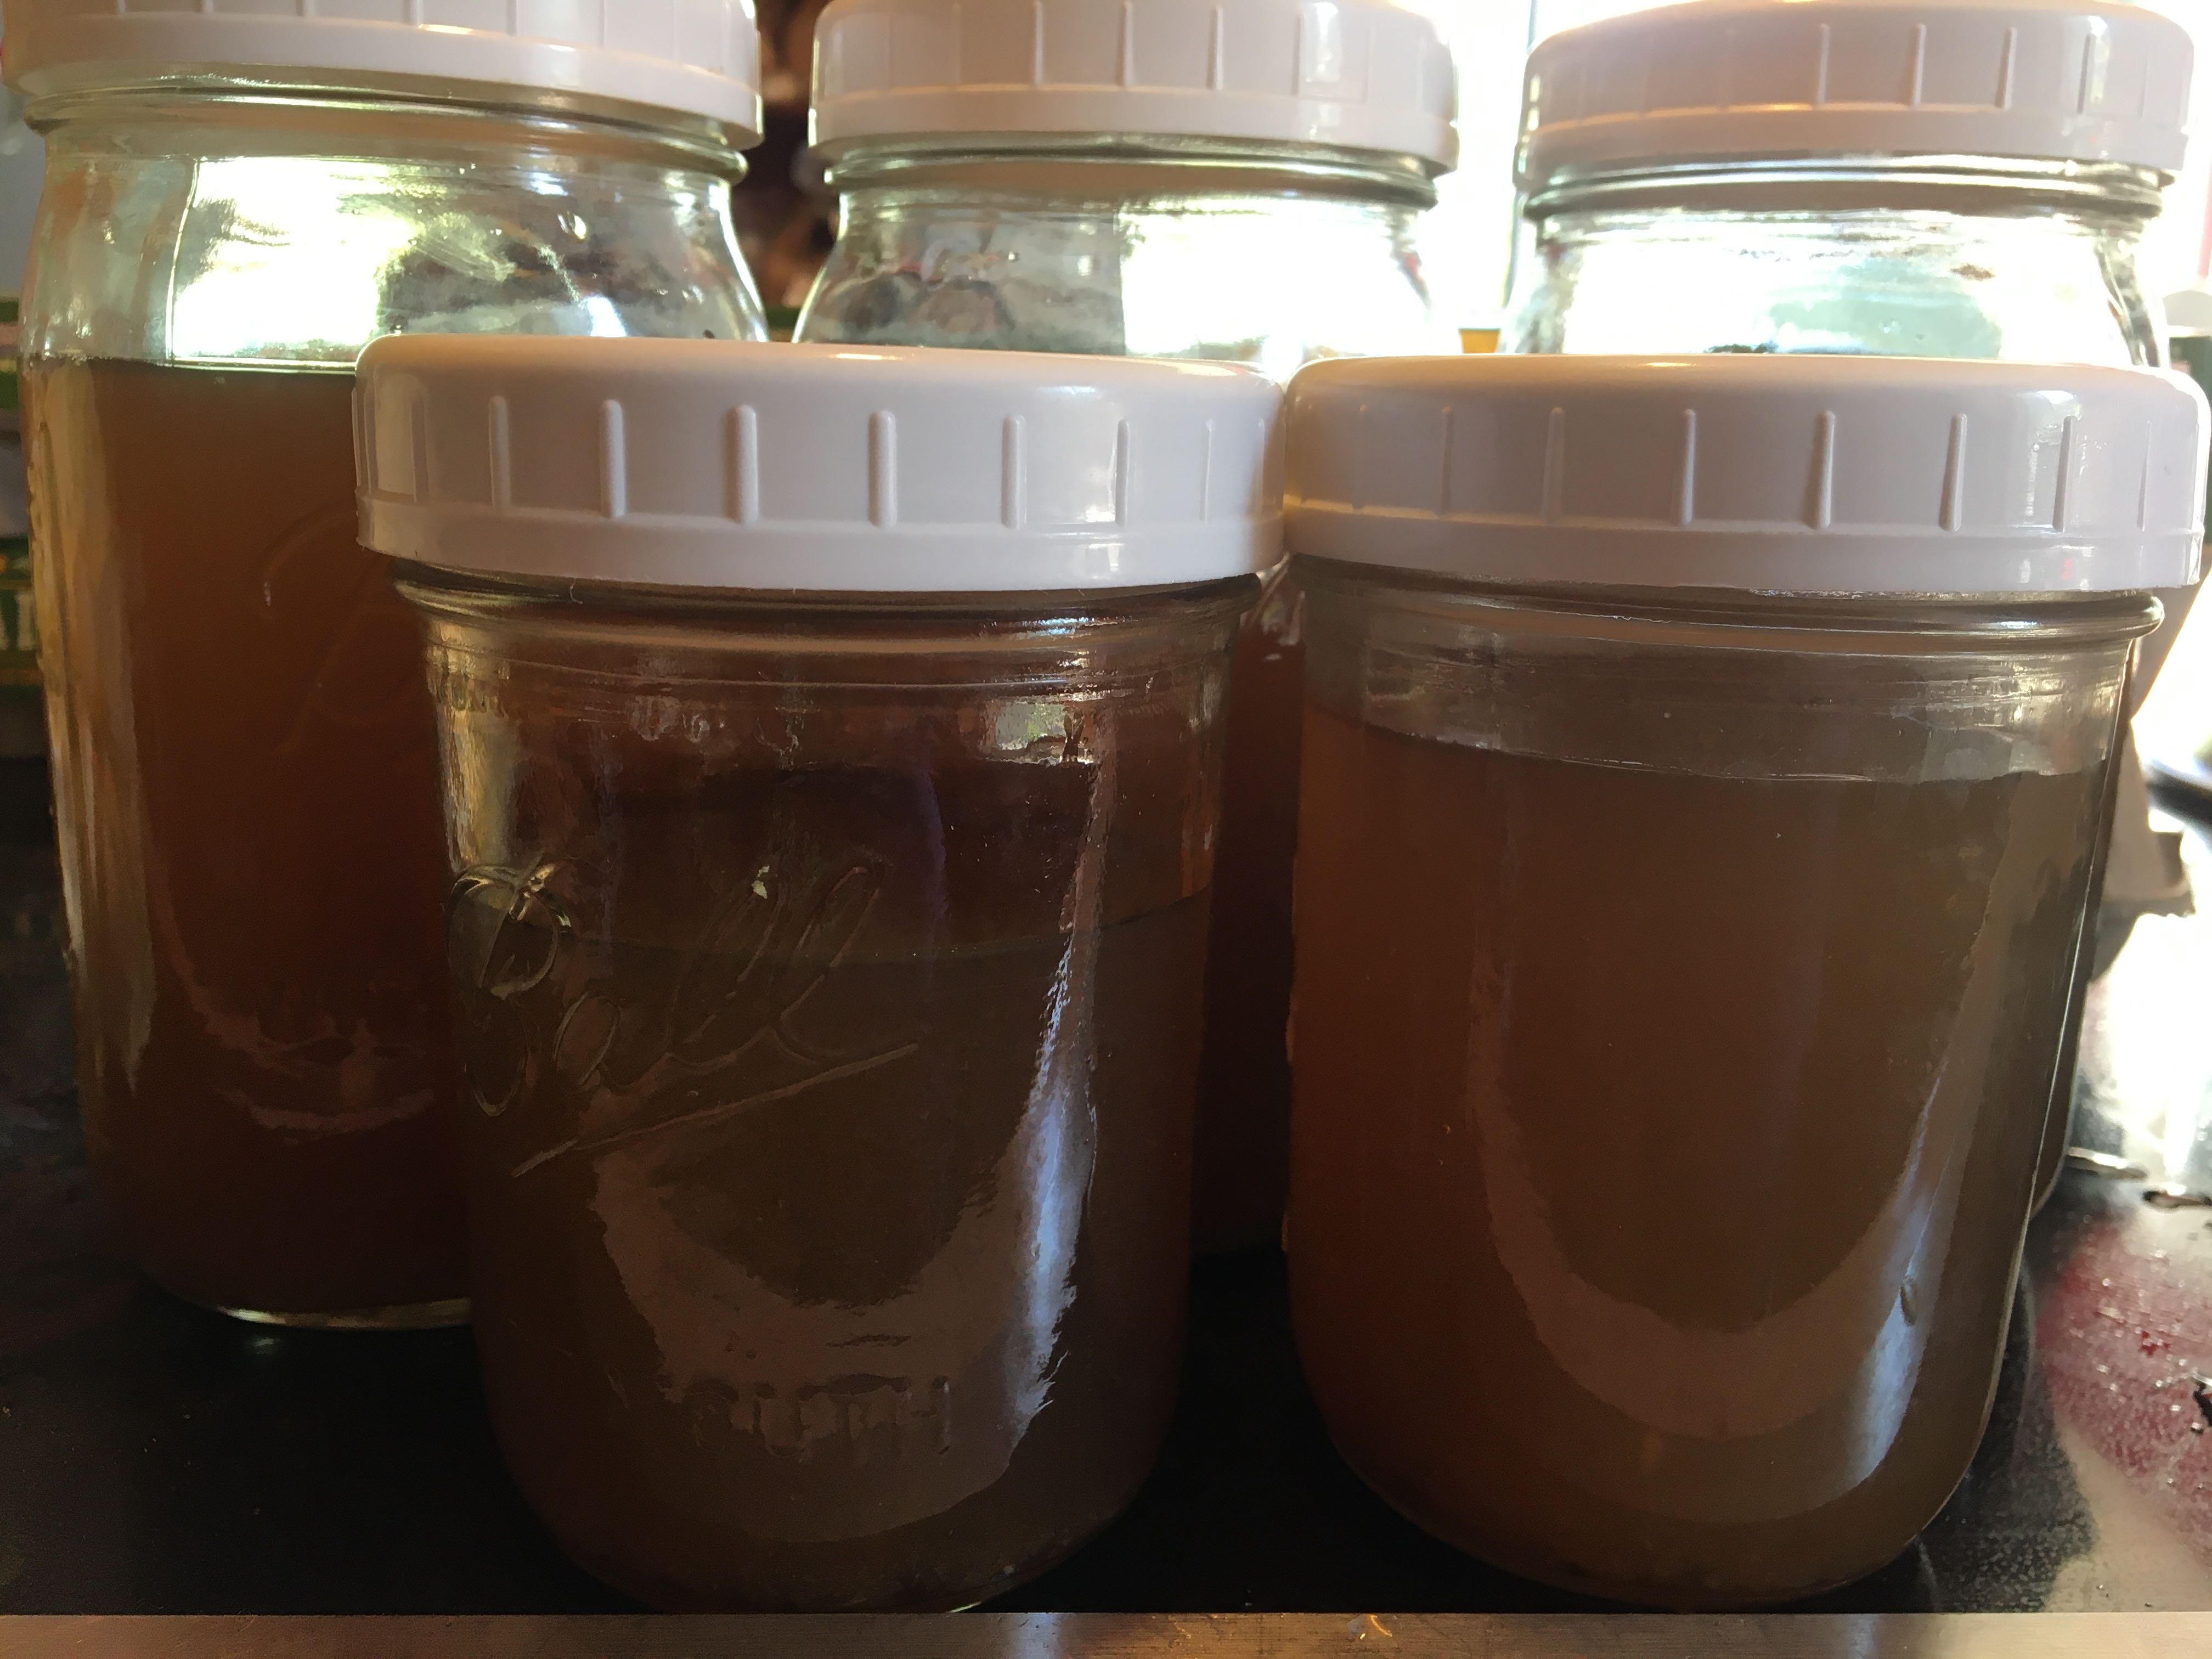
I use 3 quarts of water in my stock because that gives me “4 quarts” of stock. In quotes because it’s really 3 quarts but I use mason jars and you need to under-fill quart ones or they can break as they freeze. If you use plastic or metal containers, then the amount you end up with doesn’t matter. Though I’ve found that 3 quarts is about the right amount to get the pot to just under the max line, since the vegetables will take up the rest of the space.
Using Stock
I generally use 2 quarts (remember, they’re under-filled) of stock for a pot of soup that ends up being 4-6 quarts. If my soup is going to be mostly broth, I may throw in another pint or quart.
Defrost in the fridge the day before you need it. Or remove the lids and defrost in the microwave. The stock can go into the soup pot frozen. You just need to defrost it enough to get it out of the jars.
These days we’re deep into the shelter-in-place order for the Covid-19 pandemic and we’re trying to use up items from the pantry and freezer. We still shop, but a lot less often, so we don’t always make it to the store as we’re planning upcoming meals.
I’ve been making soup stock and a variety of vegan soups with my Instant Pot for a while now. Some have come out better than others, but mostly it’s been a great experience. Because me and carbs are often not on speaking terms, I don’t make bean soups very often, which is a shame, because I love them. Here is a bean soup that helped clear my pantry and came out exceptionally well.
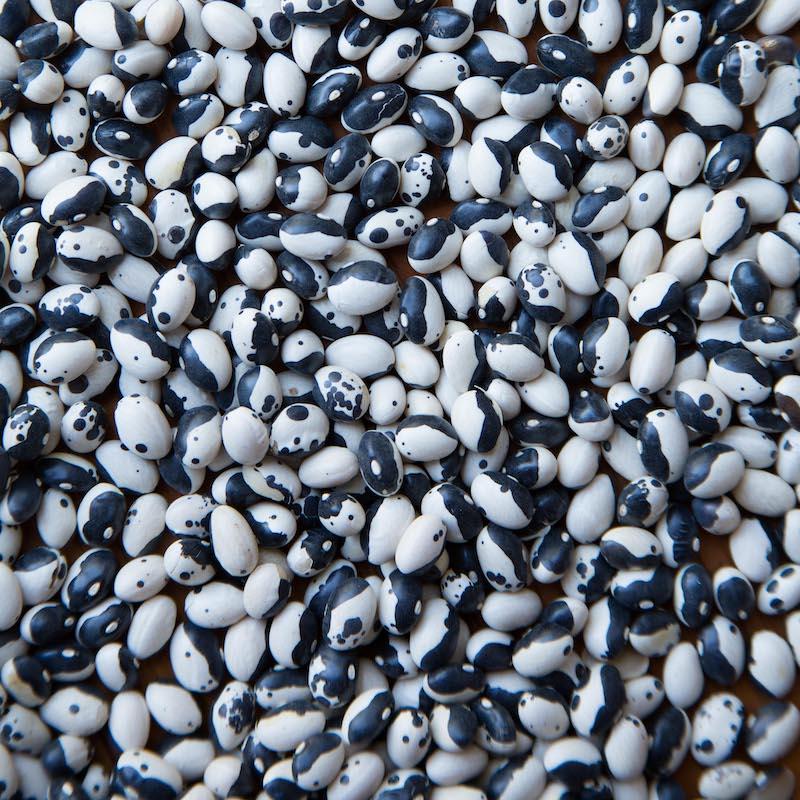
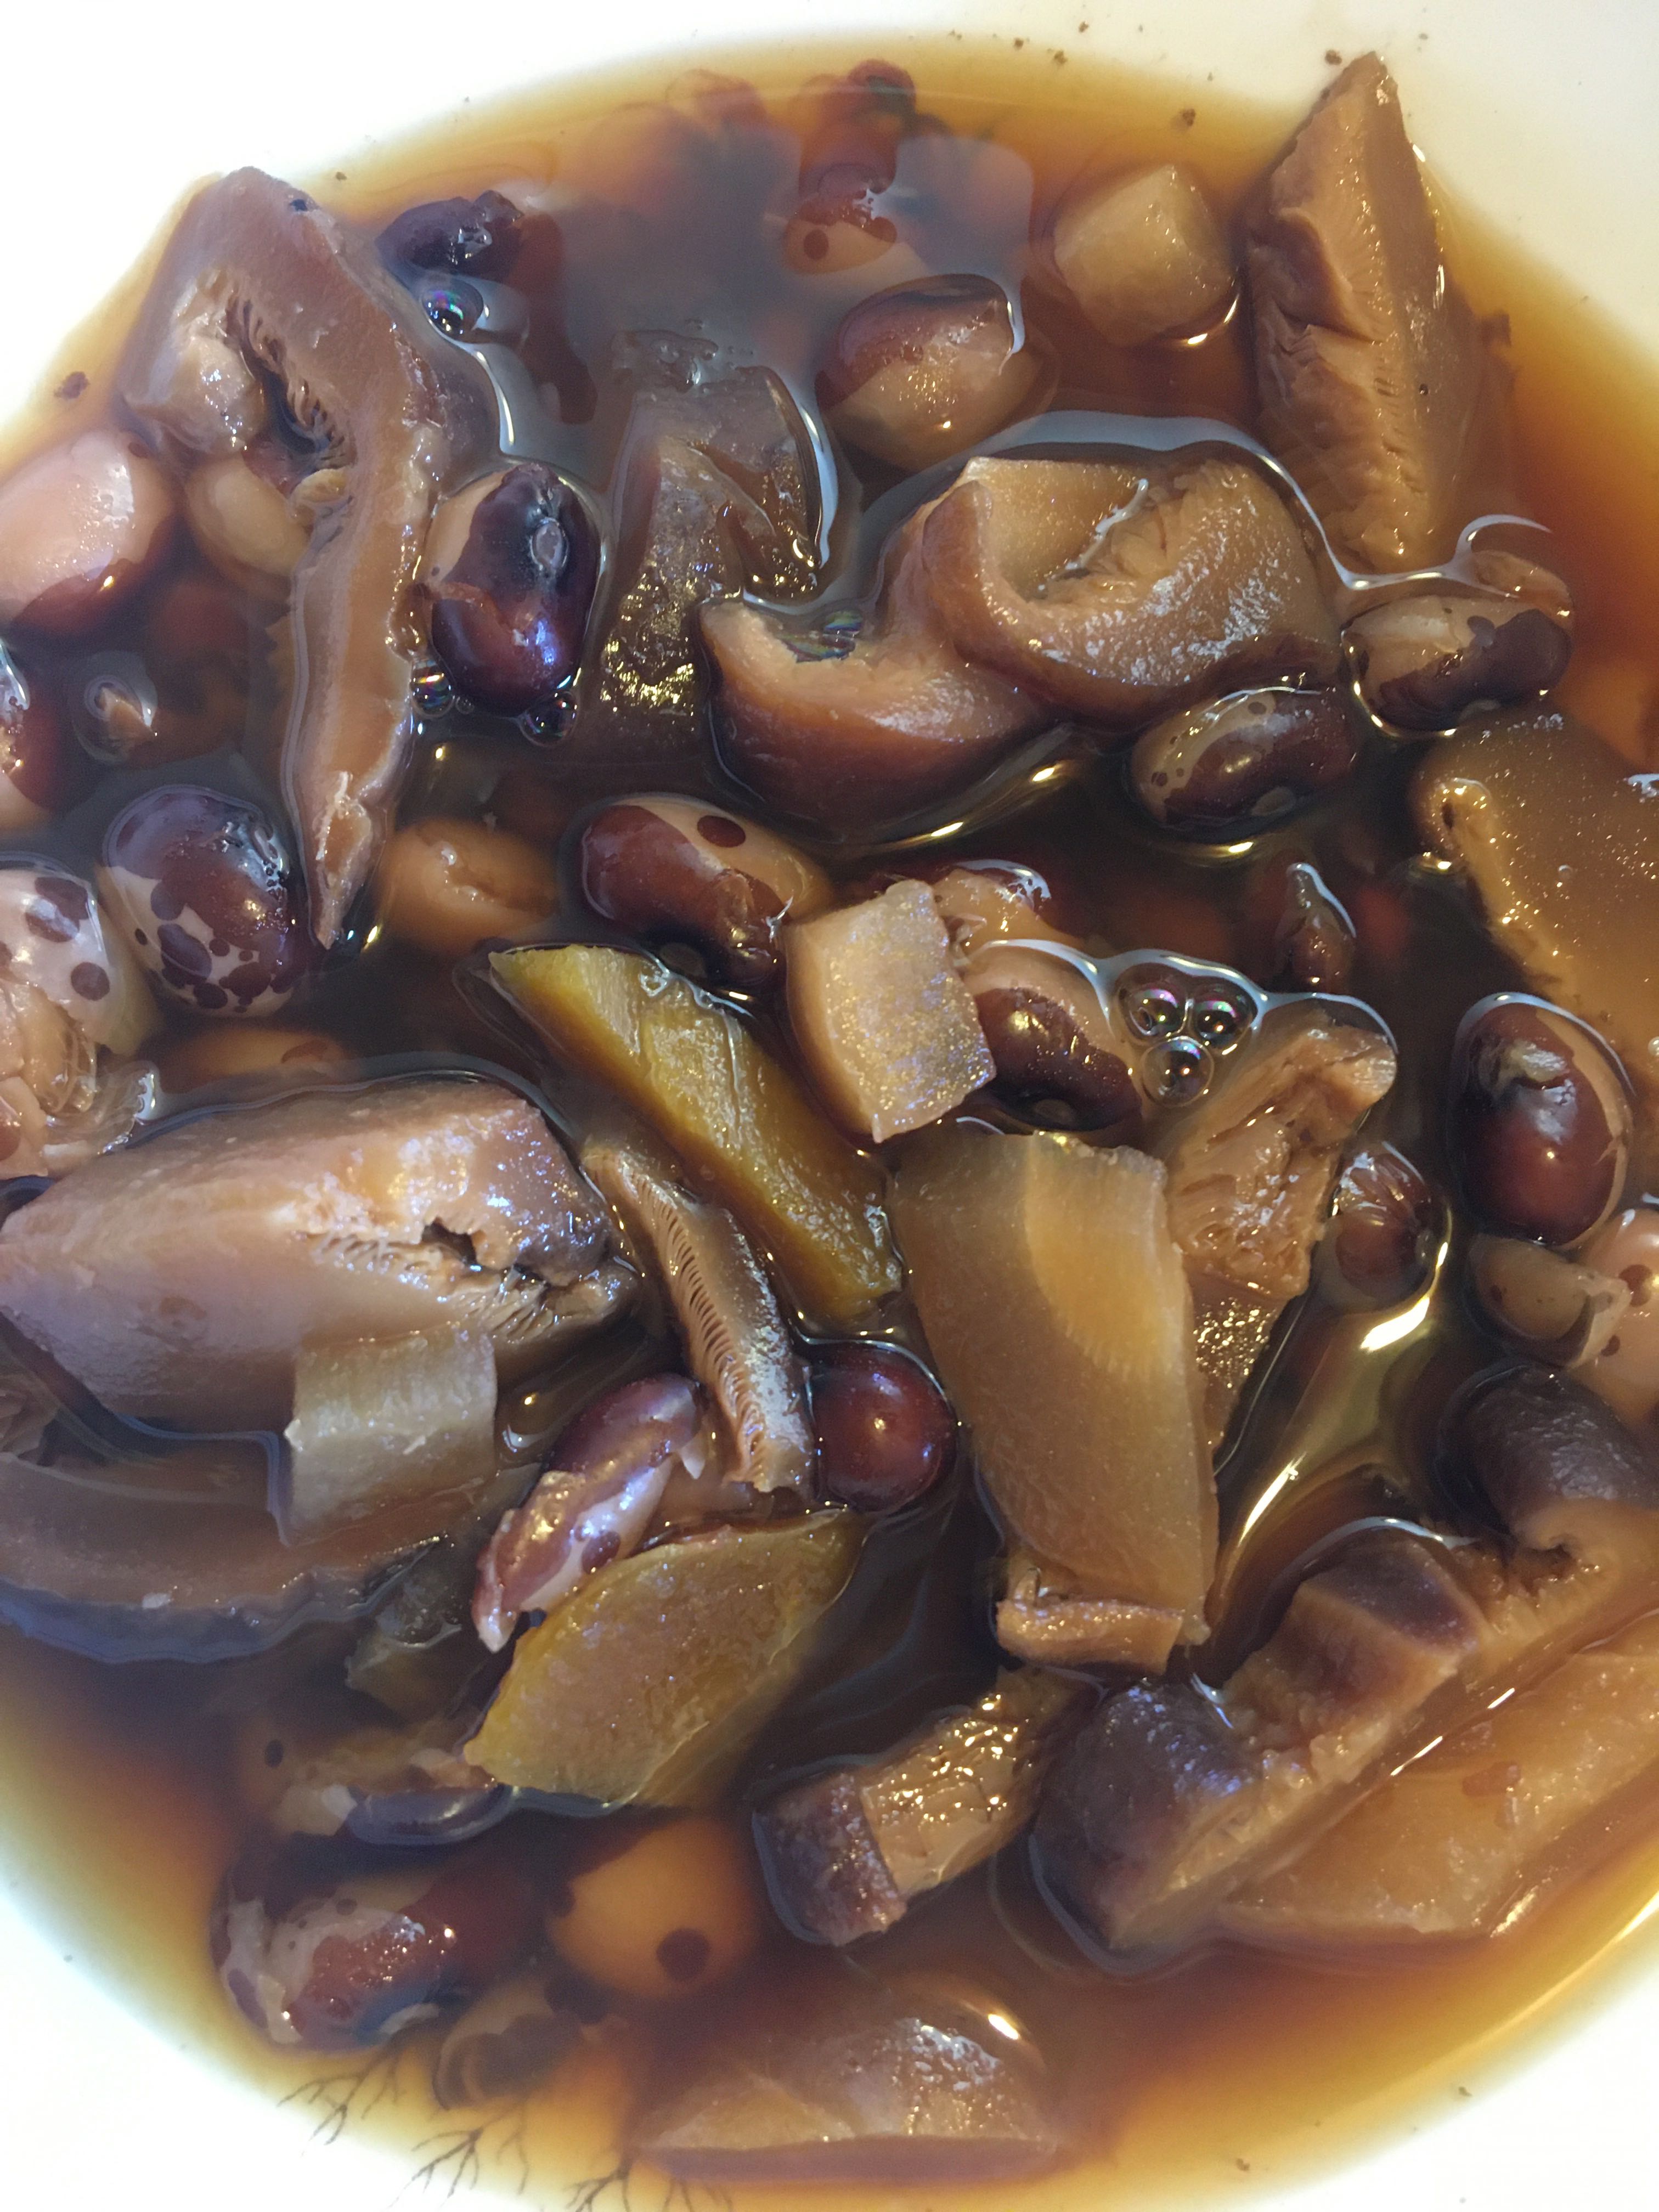
I used Black Calypso heirloom beans because I bought two bags of them last year at the Heirloom festival from Community Grains. Turns out, they’re amazing in soup. They cook down to a rich thick broth while at the same time maintaining their shape and some of their color.
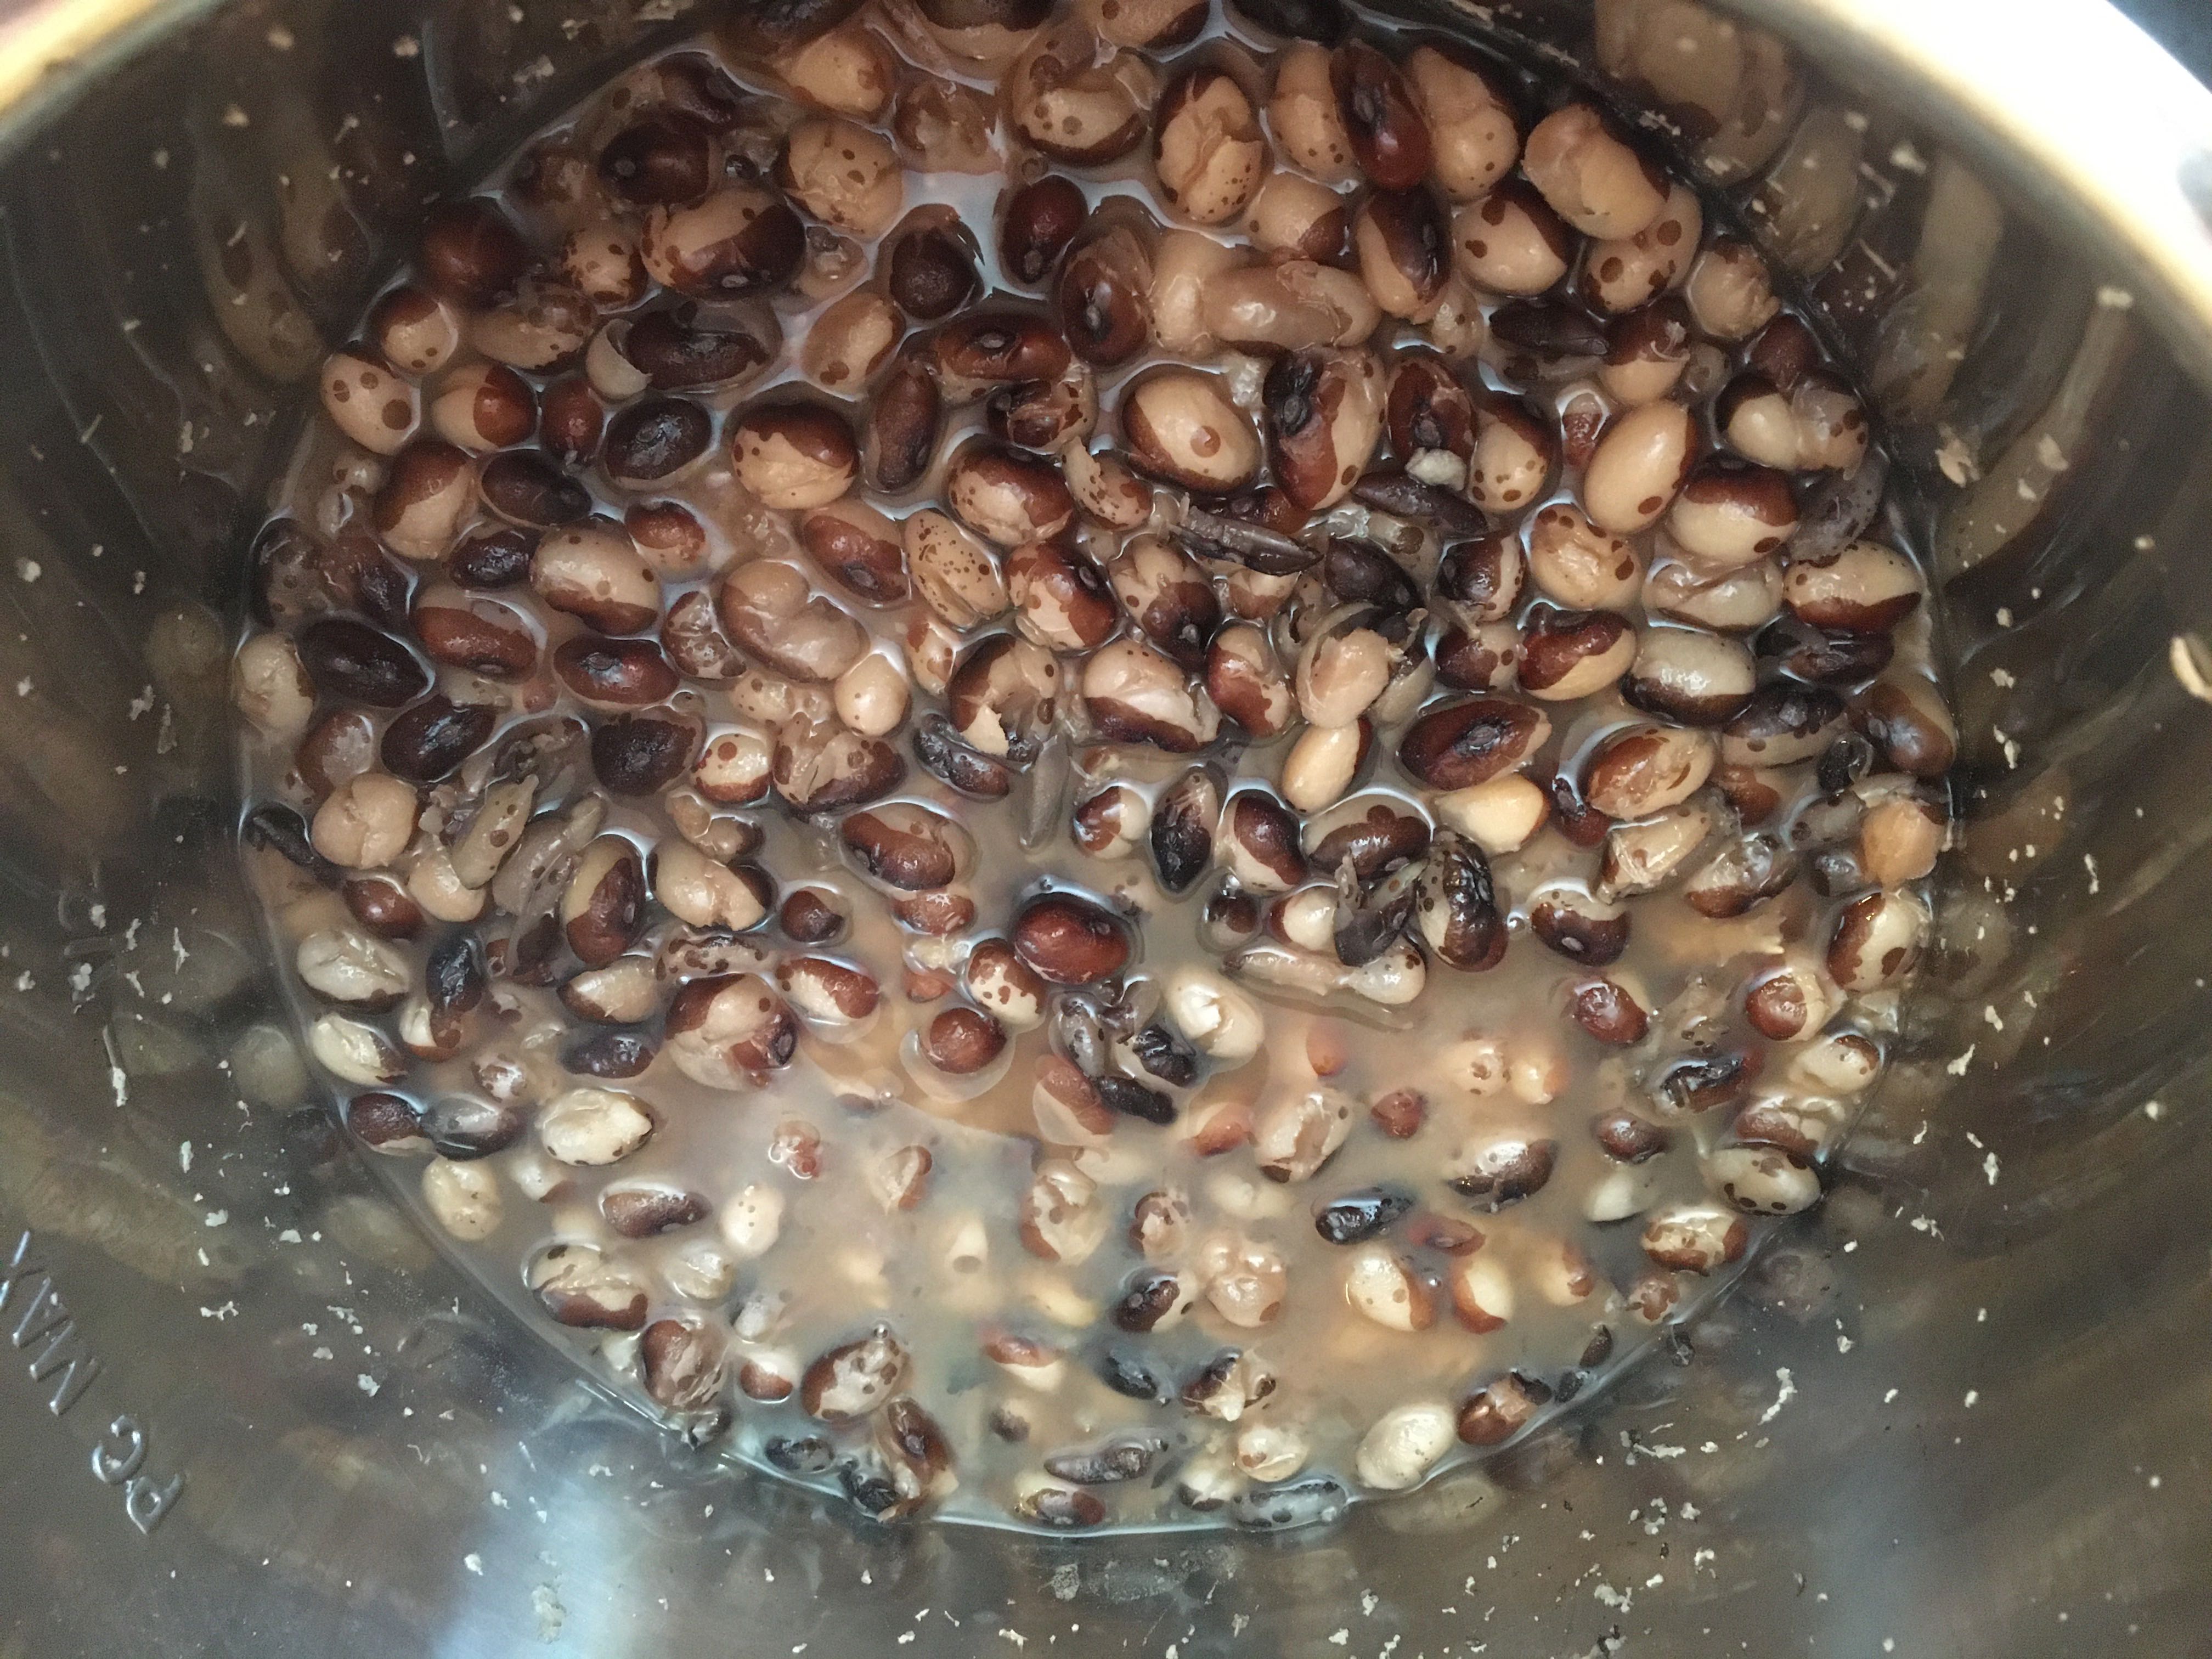
This is a post though about using what’s in your pantry and fridge so any dried bean that works in soup will work here. The size of the bean matters, because you may need to adjust your cooking. The first time I made this soup, I soaked the beans a couple hours then put everything in at once and pressure cooked for 40 minutes with natural release. The beans were ever so slightly undercooked. A couple hours on the slow cook setting took care of that, but then the vegetables were a bit overcooked.
This time I soaked the beans overnight (you can skip this step with a pressure cooker but it may change your cook time and there are some other reasons to soak), drained the beans and pressure cooked them with fresh water for 20 minutes on manual release. Then I added the other ingredients and pressure cooked on natural release for 40 minutes.
Smaller beans (like turtle aka black beans) won’t need the extra cook. Very large beans might need more. Also, you can cook the beans in water or in stock. I used water because I didn’t want to lose all the stock flavors with that extra cook, but I ended up with more ingredients than would fit in the pot under the max line and the flavor of the finished product wasn’t as intense. I removed 2 cups of liquid to add back after the cook.
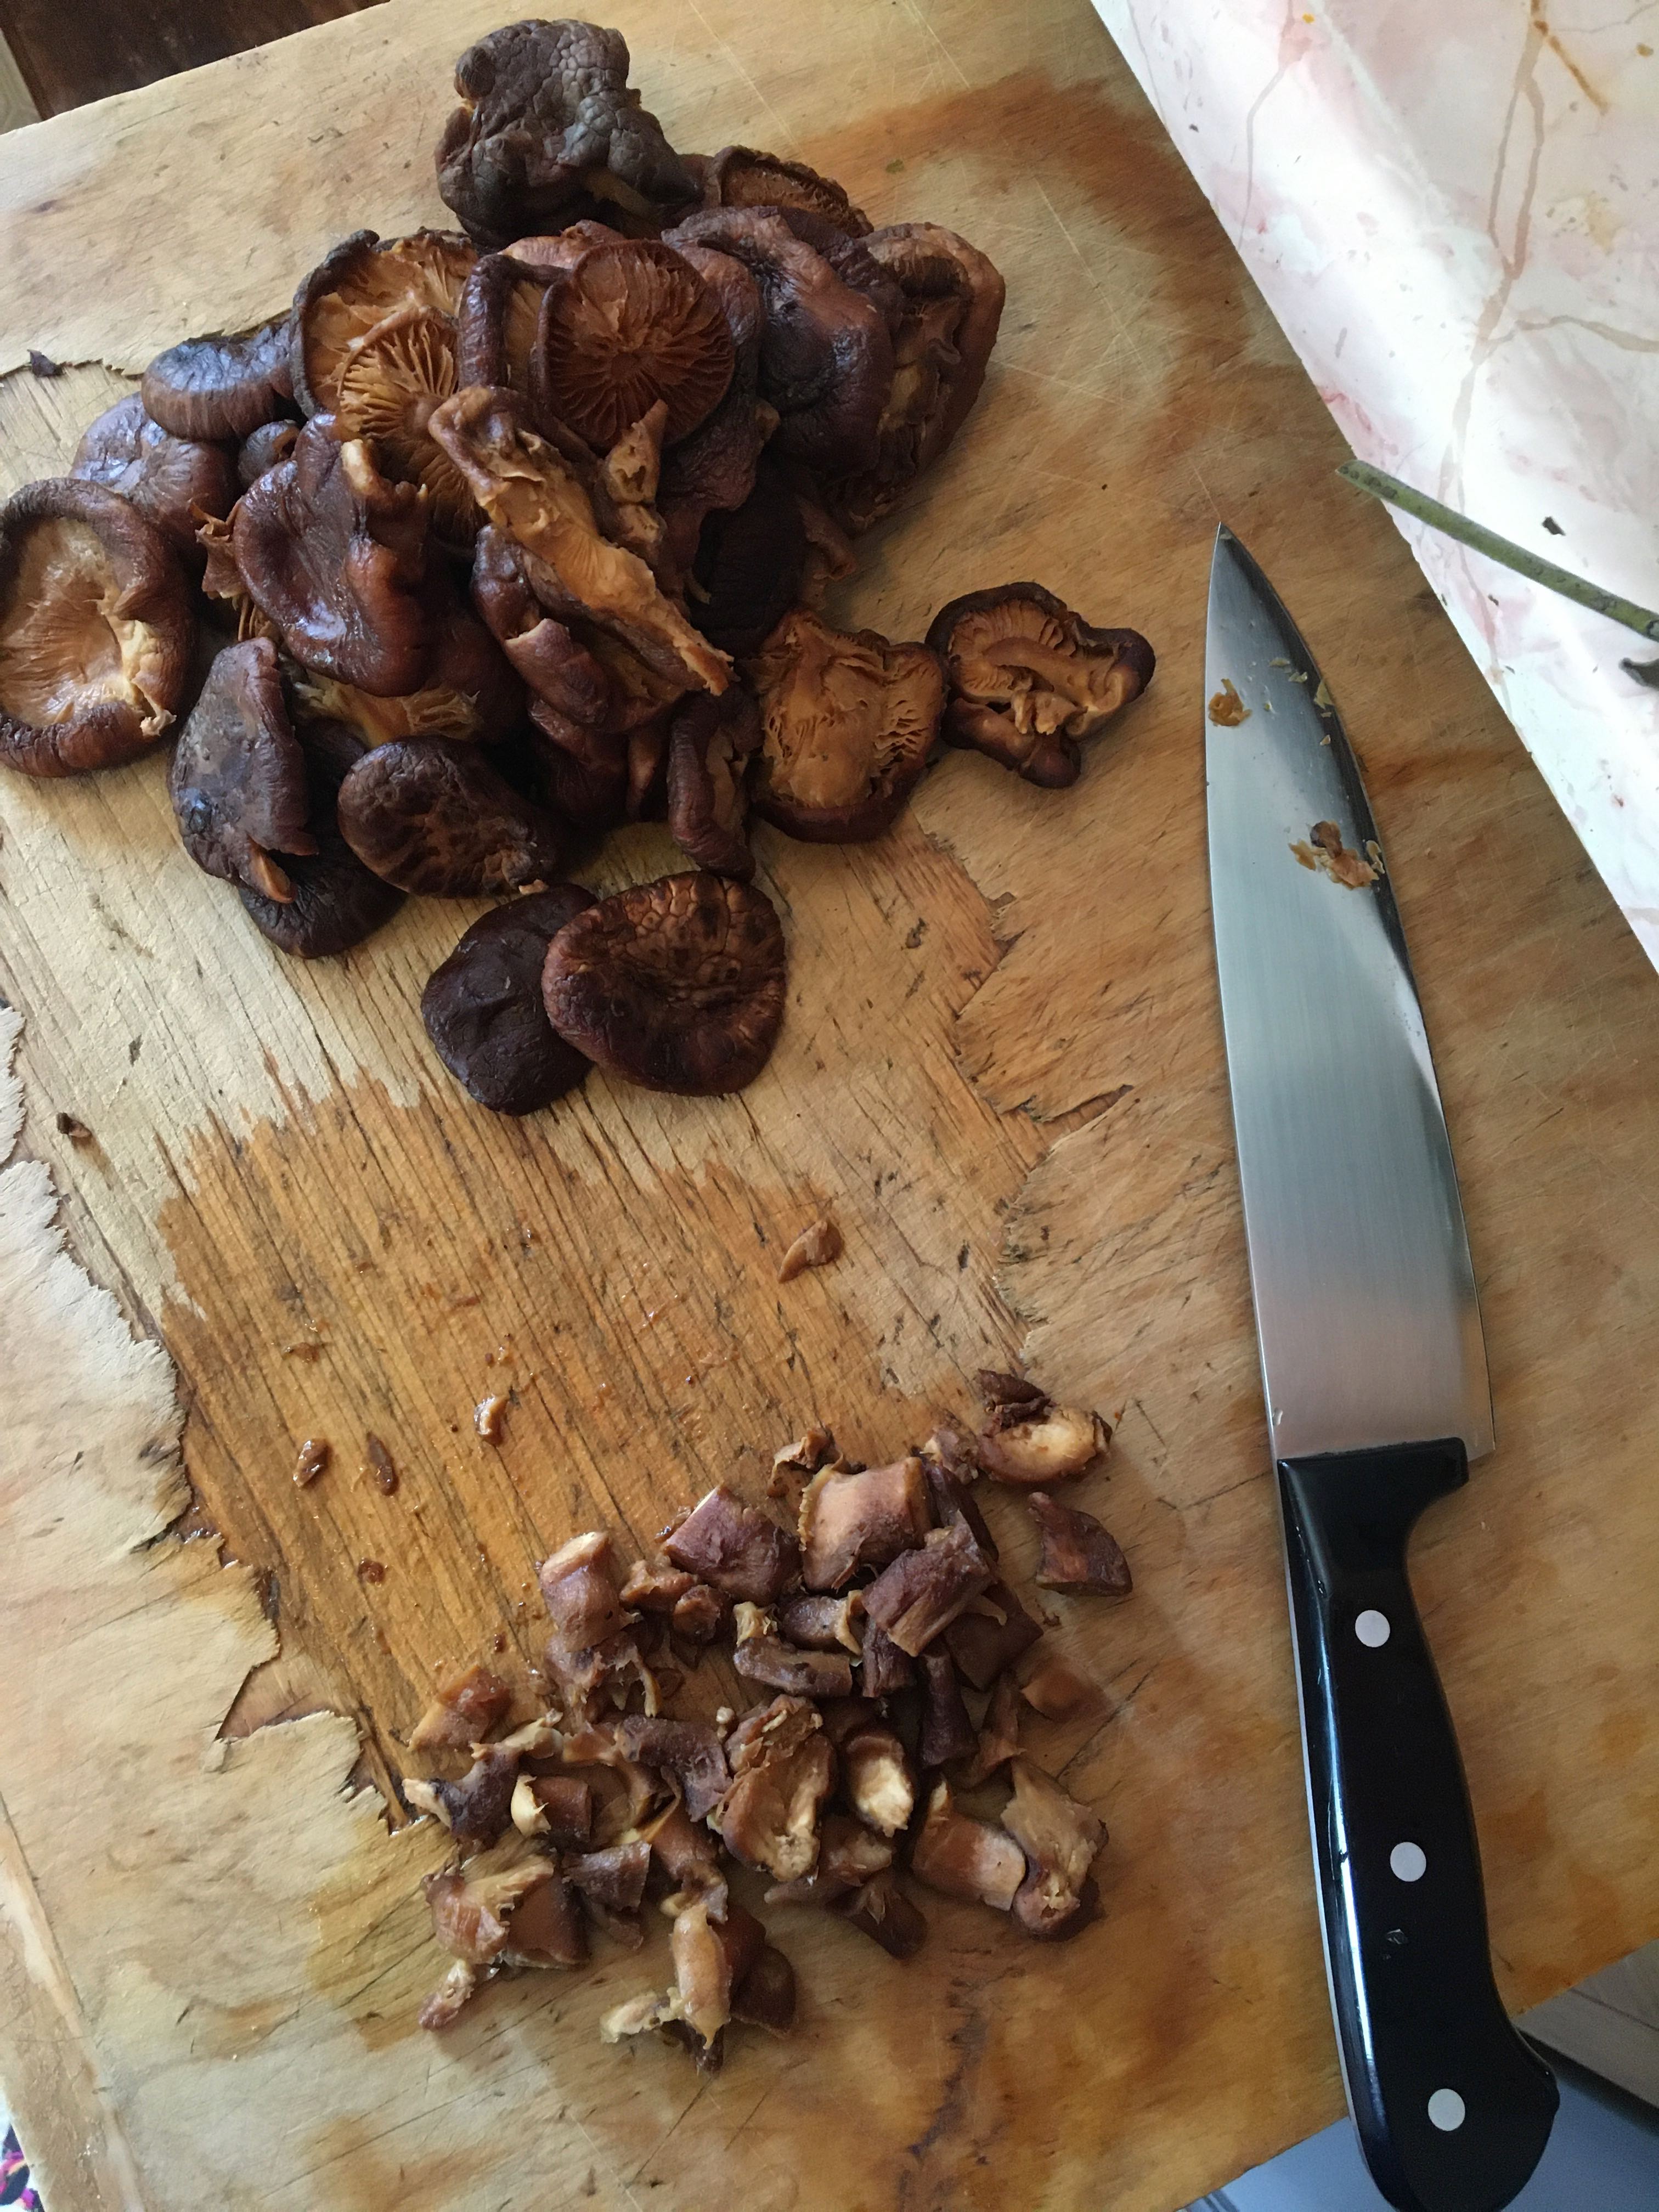
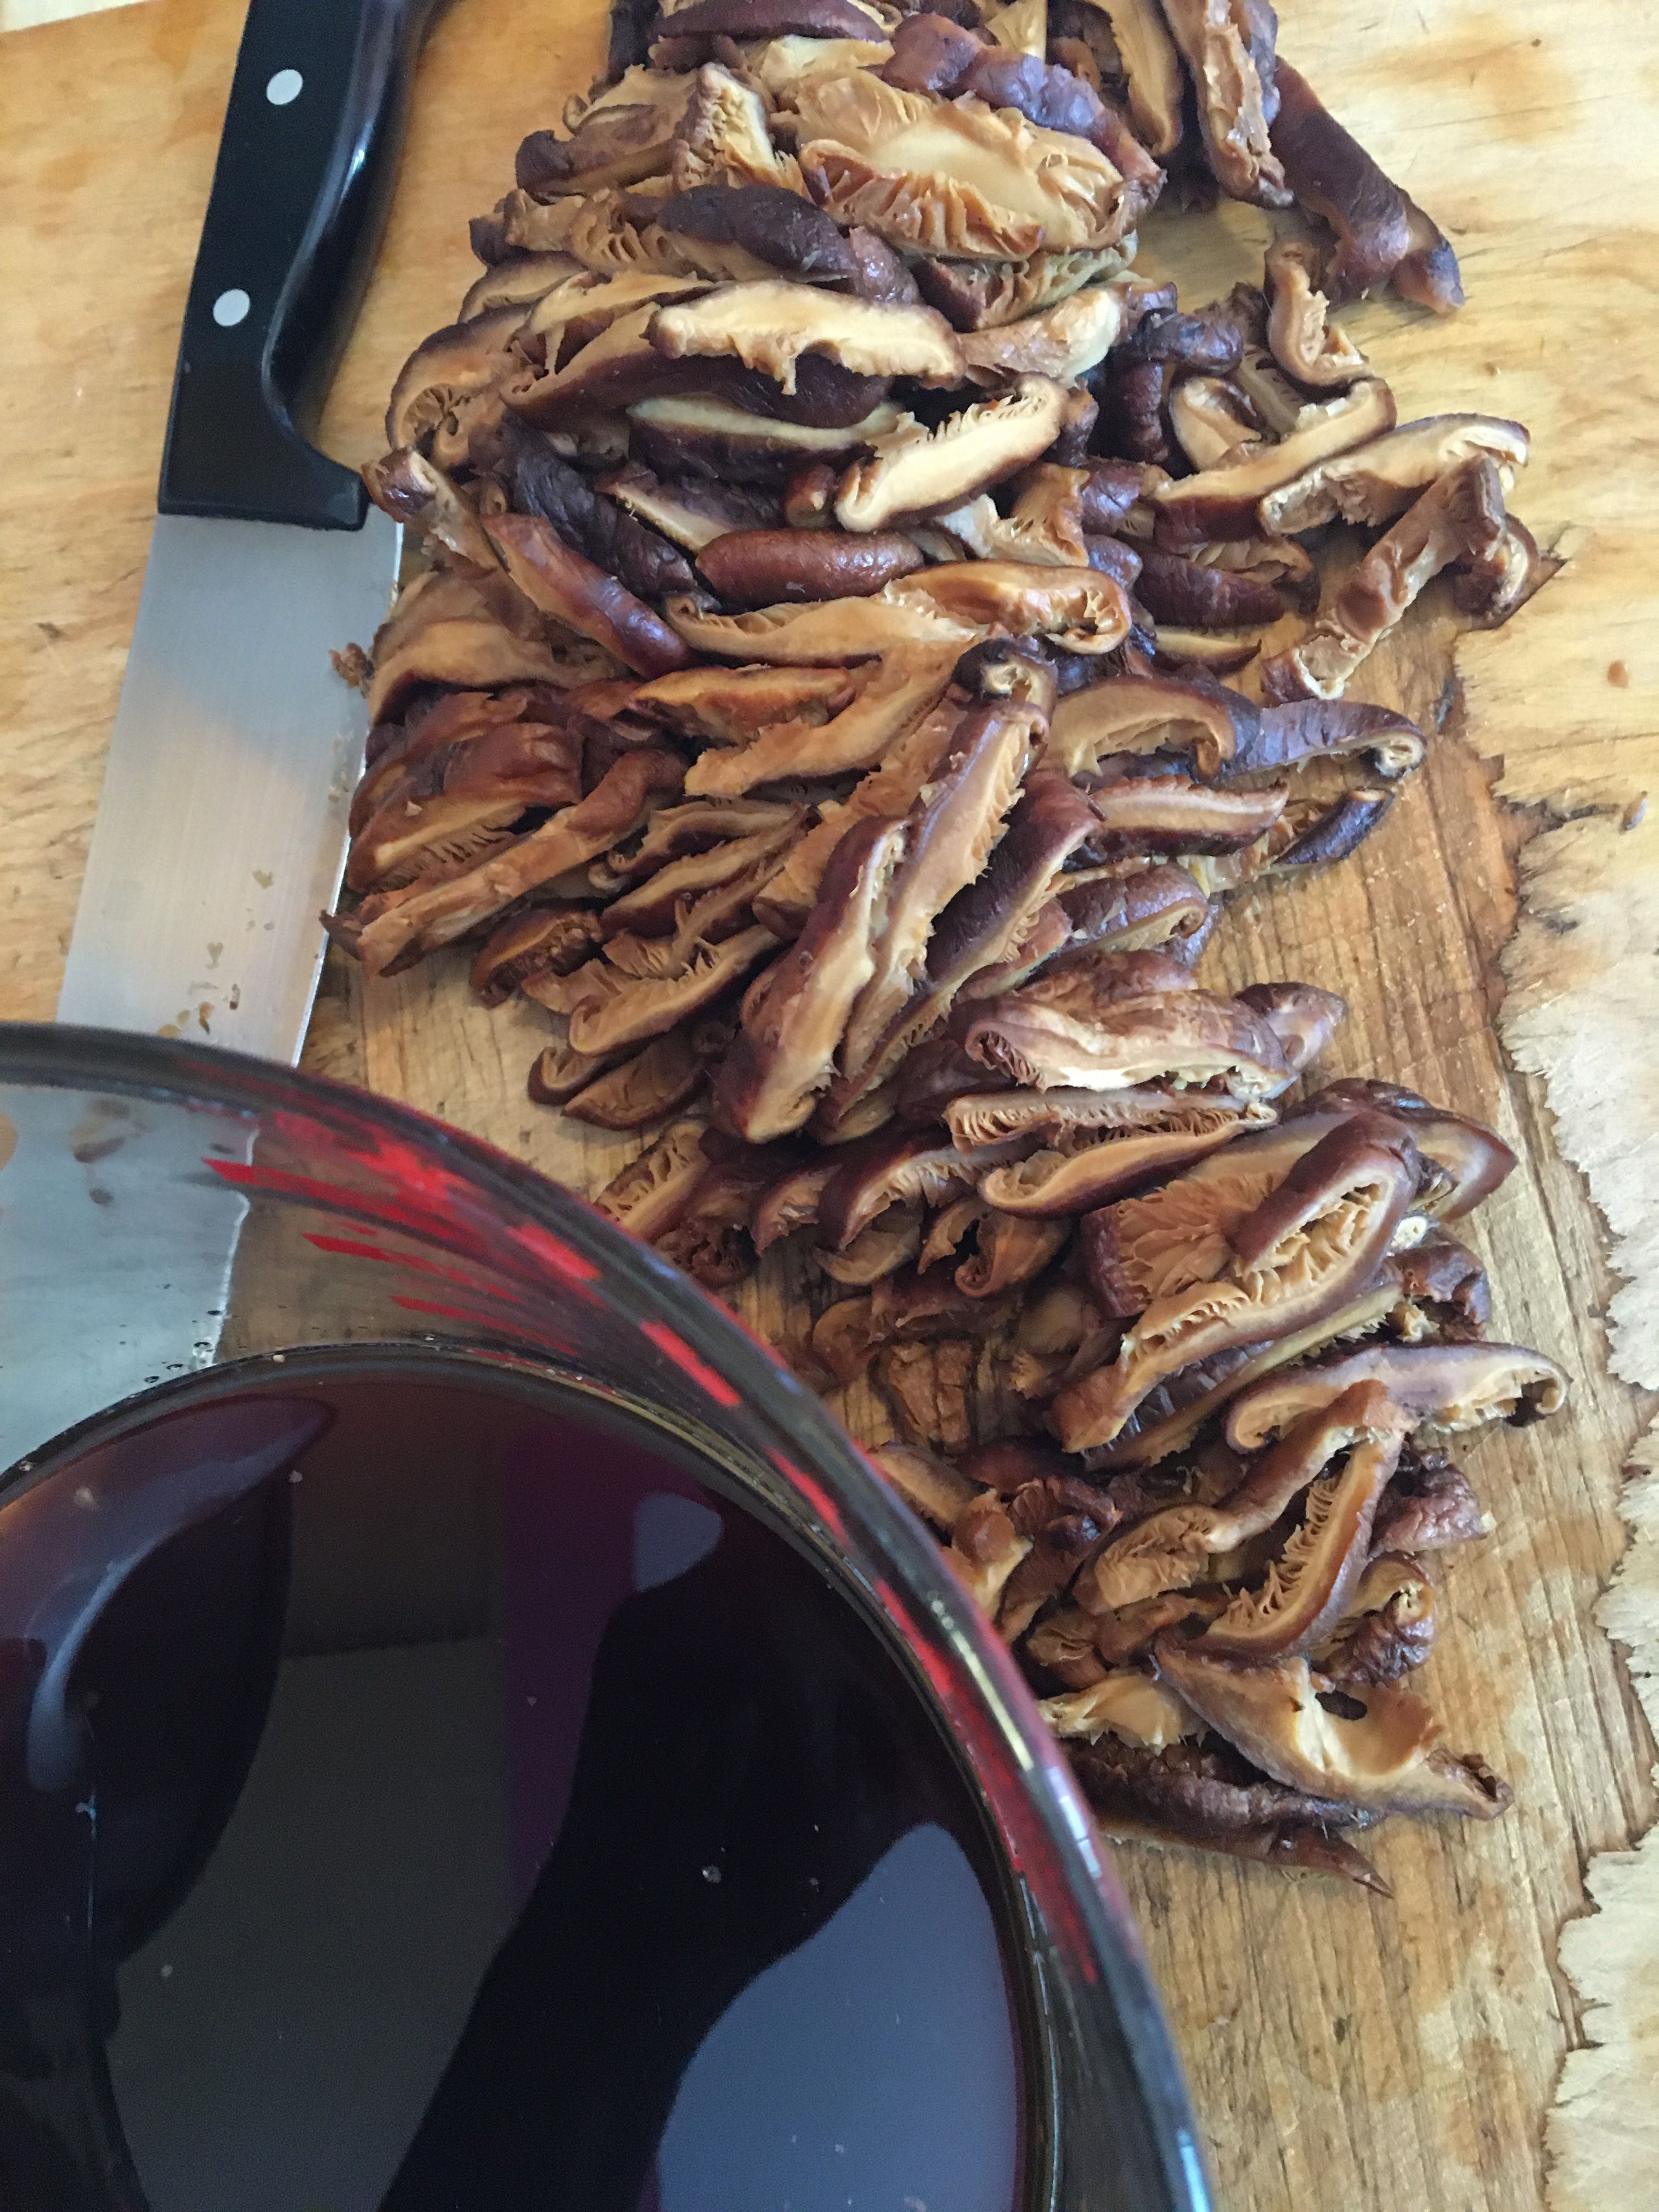
The other ingredient that makes amazing soup and goes well with beans is shiitake mushroom. I had a big bag of dried ones that had sat in my pantry for years after buying them at an Asian market.
Soak the mushrooms for around 10 minutes in water to loosen them enough so you can wash off any dirt left from before they were dried. Discard that water and put them back to soak in fresh drinking water. Warm or hot water works great but cold is just fine. Let them sit (I put a plate over the bowl to keep them submerged) for a couple of hours.
Drain and squeeze them but keep the liquid. Now remove the stems (they’re too hard to eat) and discard or throw into your stock bag (vegetable bits in the freezer to make soup stock with).
Slice the remaining mushrooms thinly. Too thick still tastes good but it makes the soup a bit more chewy than you might like. I started off with 5-6 cups of whole dried mushrooms and ended up with 3 cups of deep brown soaking water and 2 cups of sliced rehydrated mushrooms.
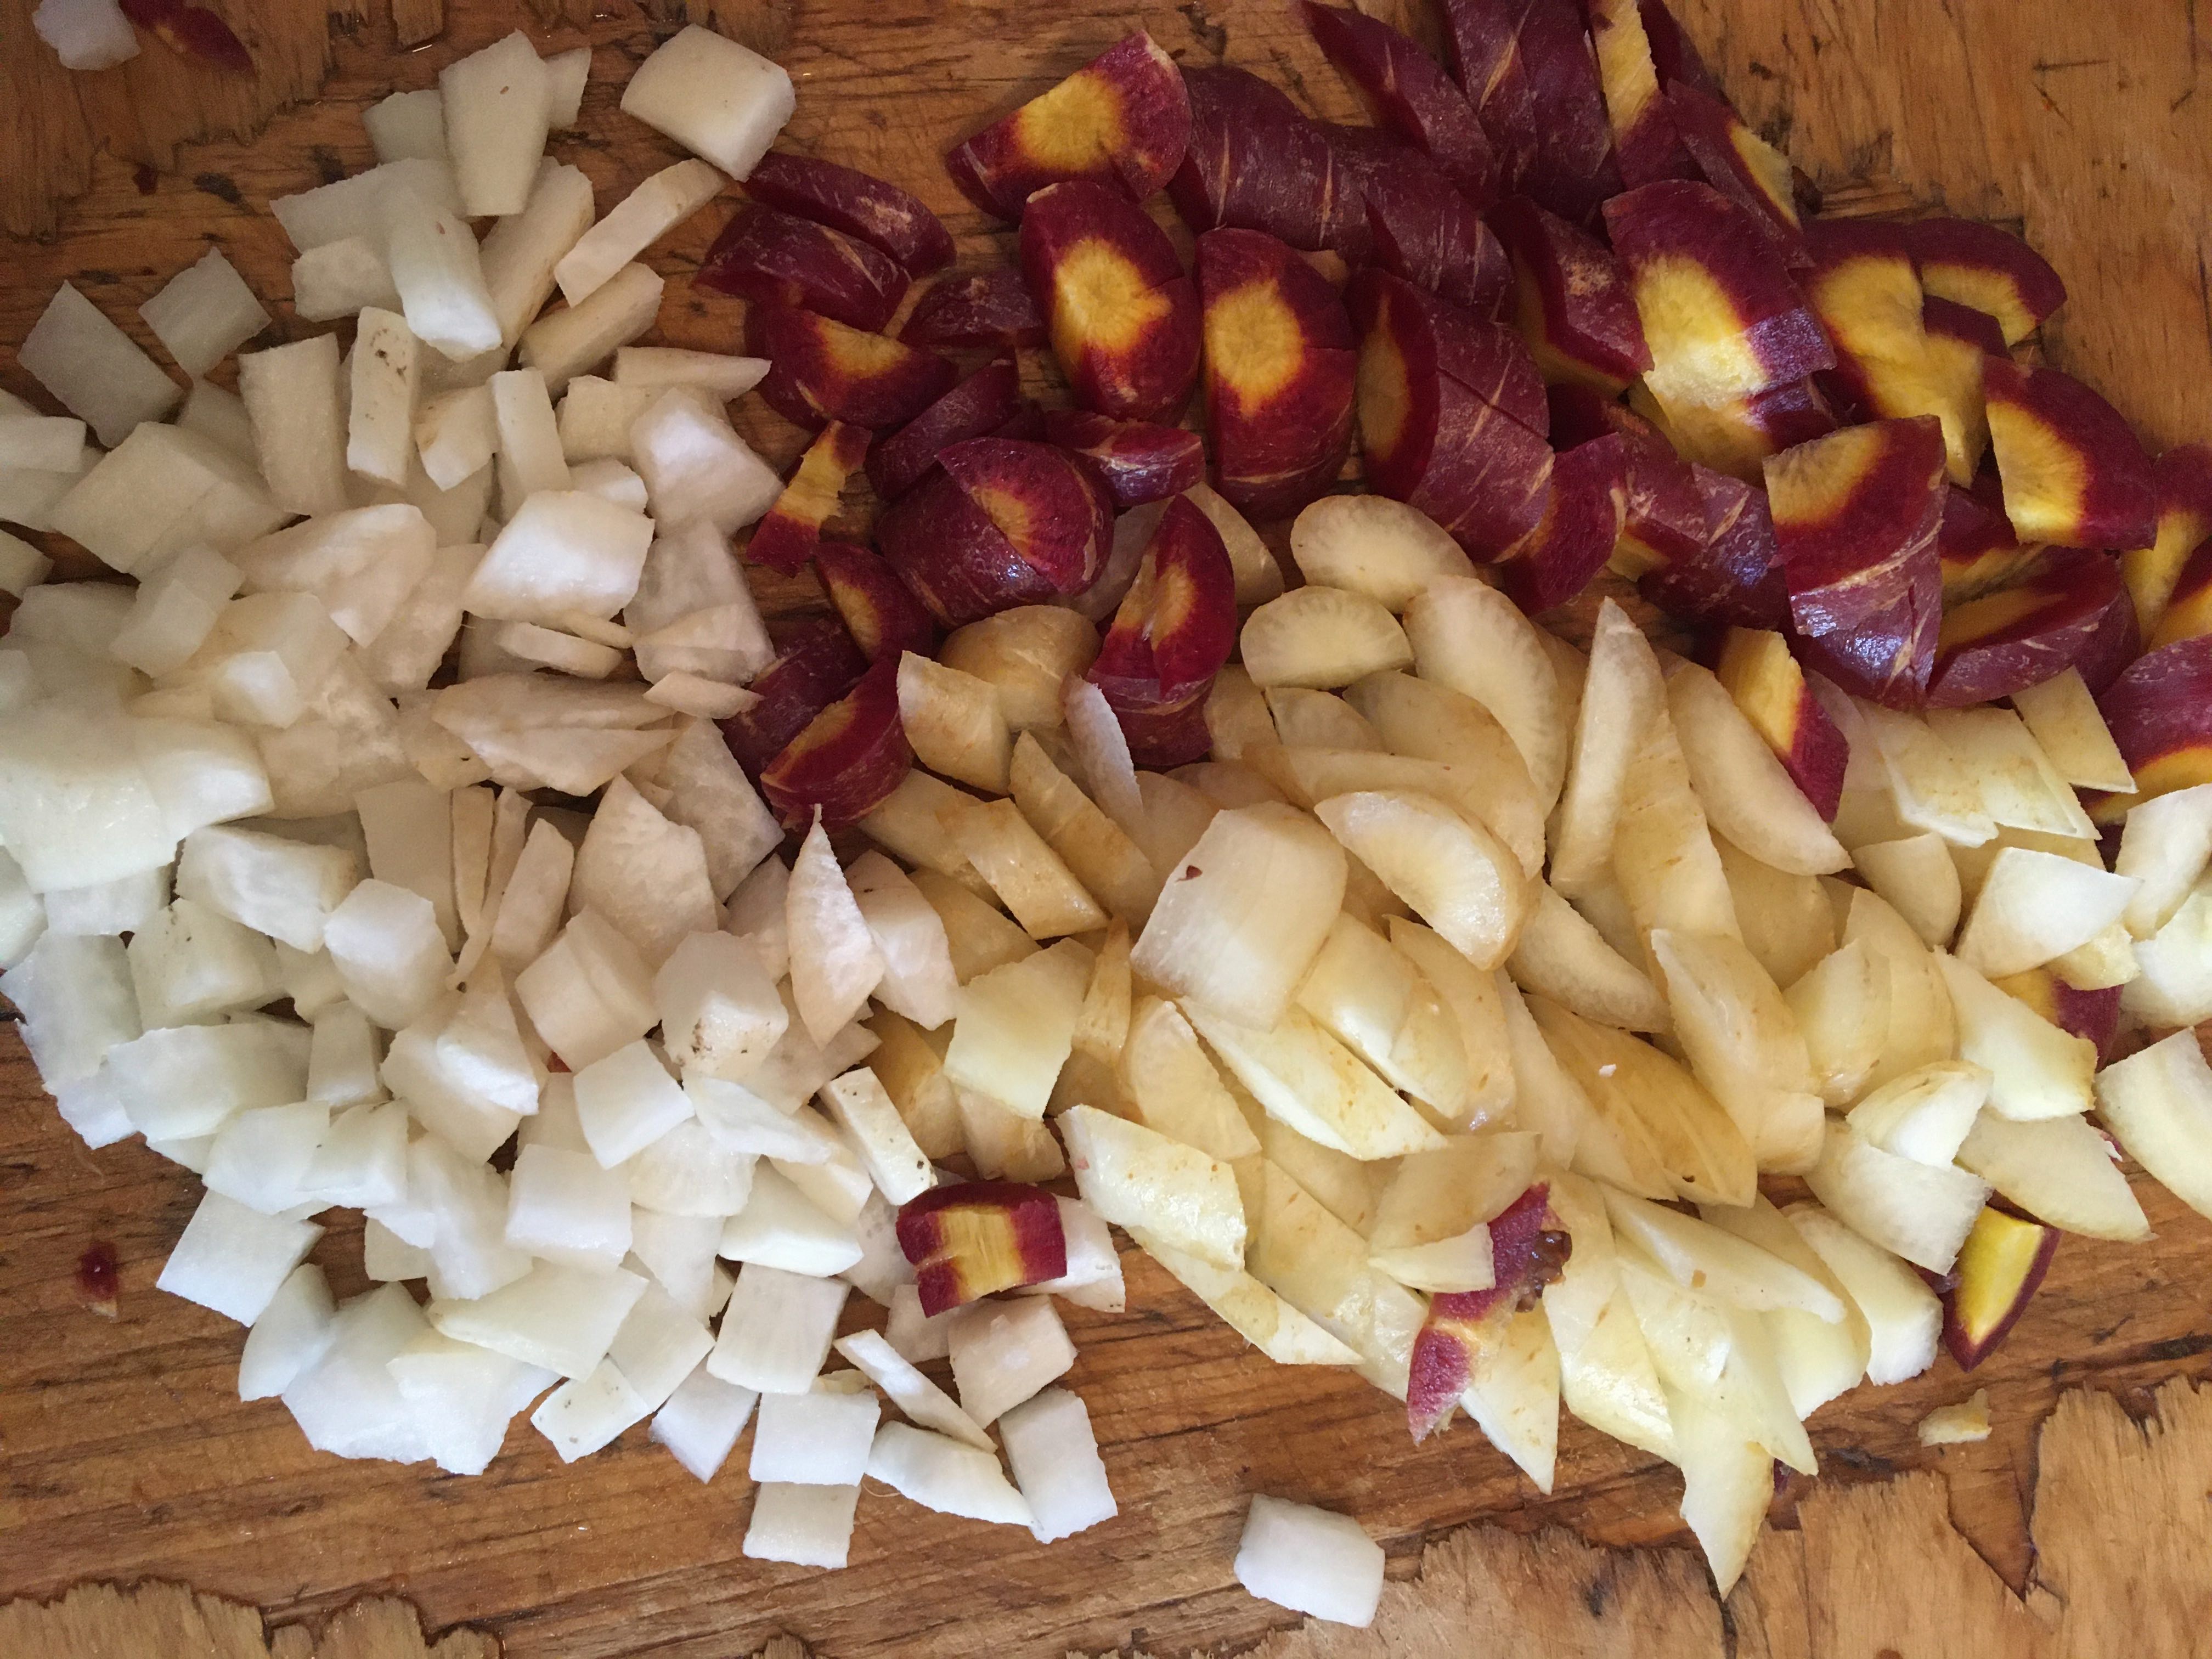
Last time I added a cup of caramelized onions to the pot (I make them in bulk and freeze them in half pint jars) and some chopped carrots. This time I had the carrots but no precooked onions. But I did have some daikon radish we used as a substitute for the missing horseradish at last week’s Passover seder.
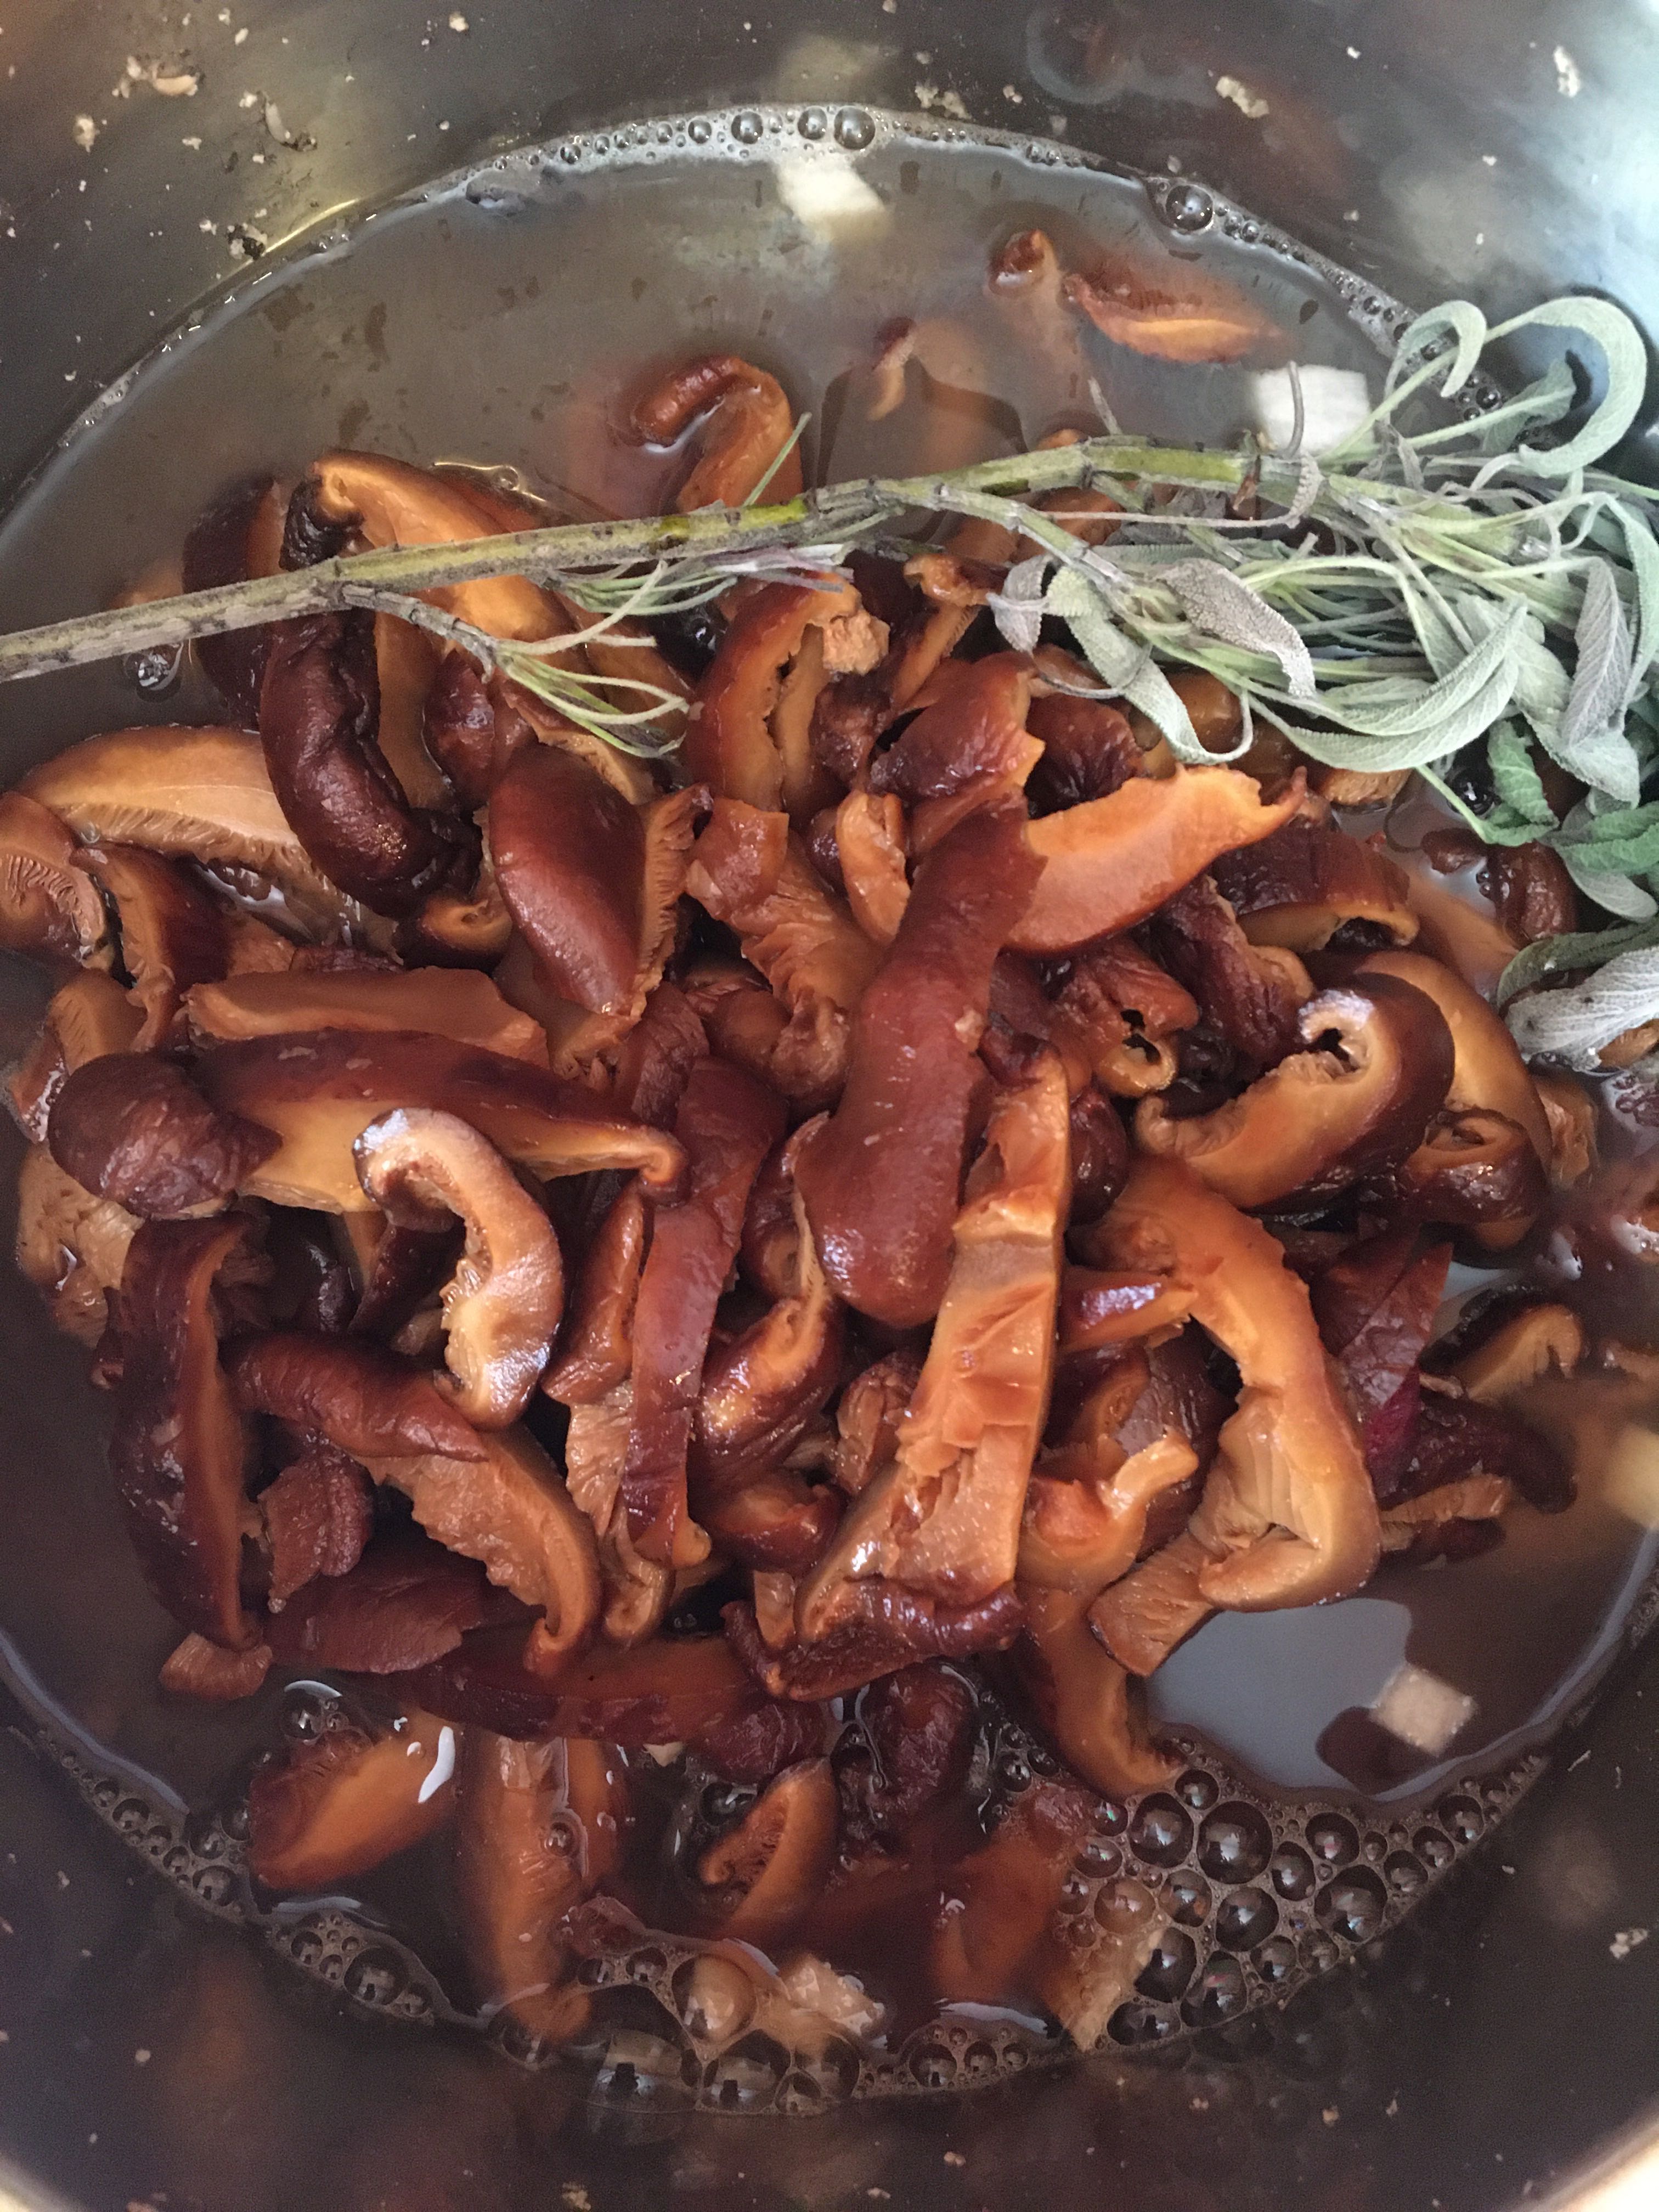
It all went into the pot along with several grinder twists of salt (don’t add if your broth has salt and go easy, you can always add more salt later). For good measure, I tossed in the leftover sage I’d picked to cook with the seder’s main course.
Enough liquid to cover, up to the max line in the pressure cooker (6 quarts total on mine). I used the mushroom soaking water and plain water
Salt to taste (unless broth has salt)
Herbs if desired (if you are using water instead of broth, add some bay leaf and other easy to fish out herbs to add flavor to the soup and/or things like onion, garlic cloves, ginger root, lemongrass, etc)
Instructions
Night before, soak your beans (can shorten or skip) and set your stock to defrost (if frozen)
A few hours before, soak dried mushrooms for 10 minutes to remove dirt, then soak for a couple hours in fresh drinking water
Drain beans, put in Instant Pot with enough liquid to cover
Pressure cook 20 minutes then immediately release the pressure
While beans are cooking, drain and squeeze mushrooms, save liquid
Remove stems from mushrooms, discard
Slice mushrooms thin
Chop/prep vegetables and any other ingredients you wish
Add all ingredients to the cooked beans still in the Instant Pot
Pressure cook 40 minutes with natural release
This soup lasts several days in the fridge or you can freeze it. Makes 6 quarts.
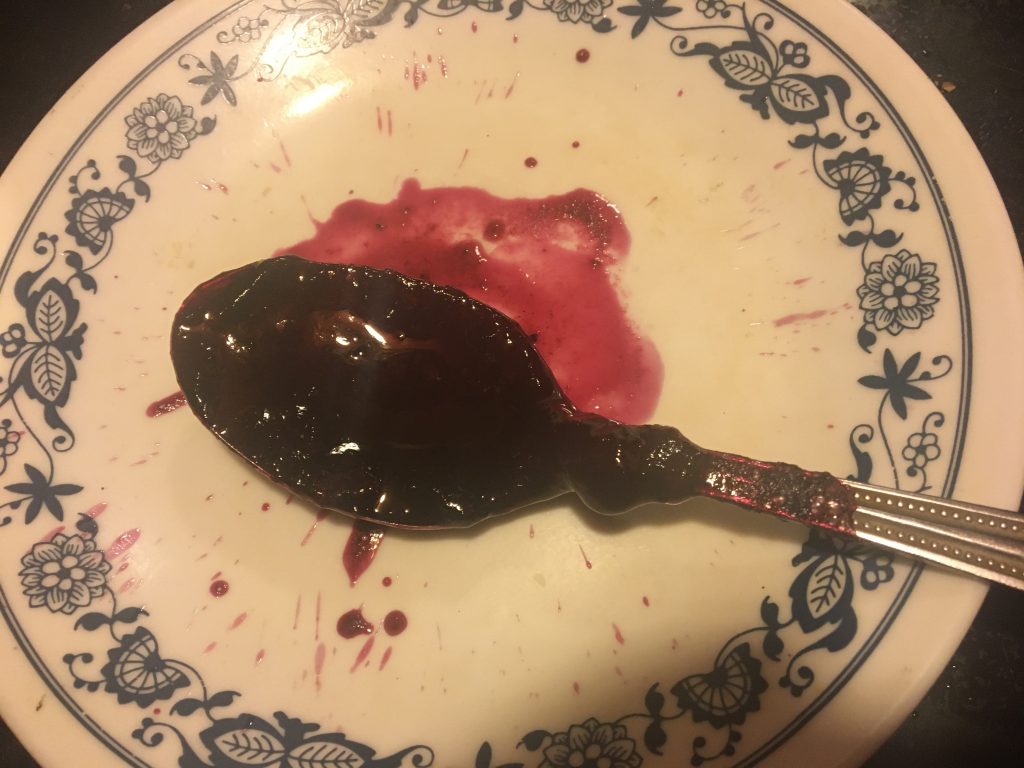
My husband has been in search of blueberry (or other berry) syrup for years. Nothing satisfies. He wants a sugar-based recipe, though maple is okay. It has to be completely natural, preferably organic. And it has to taste good with a strong fruit flavor.
There were some decent brands in the past, but he hasn’t had any luck lately. So I made some. It’s very easy but my version was a bit too sweet. He ate it though, and just ran out.
So today I made some more and it came out perfect. It also freezes beautifully. I use half pint mason jars with the plastic twist-on lids.
Recipe:
2 cups sugar 2 cups water 6 cups frozen blueberries
Put the sugar then water into a cooking pot. Heat on low and stir until the sugar dissolves.
Add the blueberries and cook until they’re soft and the mixture has gone down a bit.
Stick blend the pot until the consistency is smooth (or chunky if you prefer). If you don’t have a stick blender, you can pour it into a regular blender, though you may need to do it in stages.
Continue to cook on low heat until the water level goes down about an inch.
April 28, 2018
Congregation Ner Shalom
Cotati, California
This is a private web page. Please do not link to it (or to the links below) or share in groups. You may pass along the web address to individuals you know well. If not sure, ask us at family@norwitz.net
Party: Miriam Norwitz and Maia Kramer sing karaoke version of I Know What You Did Last Summer by Shawn Mendes & Camila Cabello. Jordan Rupprecht background dancer.
Jewish Cemetery in Žilina, Slovakia
Sorted by Surname
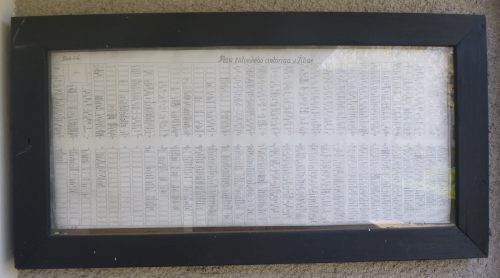
I visited the very well-kept Žilina cemetery in May 2017. At the entrance are two framed maps of the cemetery, painstakingly hand drawn to scale, each grave listed with the name found on the headstone. This document is my transcription of these maps.
The cemetery is divided into 4 blocks and each block has multiple numbered rows. Using the same orientation as the map, we have:
The first map shows blocks 2 and 1 and the second map shows blocks 4 and 3. For the transcription, I’ve preserved the map order by block (2, 1, 4, 3). Then I have done each row, which all go from front to rear (left to right). Within the rows, the transcription goes from top to bottom.
There will be errors!!
I guarantee you there are errors. First of all, as careful as the mapmaker was, there are errors in the documents. Then there are my errors. Some are ordinary mistakes but others come because the maps can be confusing. Because the graves span a large period of time, there are differences in how names appear. In some, women’s surnames have “ova” on the end. In most, they do not. Some graves give the maiden name for married women and these may or may not be on the map, but aren’t indicated as such, so I had to guess (many women may be listed with their maiden names). Some women had no given names on the map (they may or may not be on the stones) but were “Pani” (“Mrs.”) with their husband’s names.
One common practice for stones made during or just after the Holocaust was to include the names of family members who died in the Shoah and could not be buried. The map includes these but it’s unclear at times which name is that of the person buried there and also which surname belongs to which given name. It’s clear on the graves but the map had limited space to work with.
Some of my photos have blurry parts and some of the handwriting on the maps is unclear (though most is impeccable). Unfortunately, some of the graves are so old that the information on the stones is lost forever. A large percentage of graves have “not given” for the surname and/or given name. These were blank (or numbered) on the map. In some cases, the grave was not used but, for most of these entries, the headstones are just so worn that there is nothing left to read. I don’t know if the cemetery has this information in their books.
Yes I did walk the entire cemetery while I was there. Mostly it’s easy to navigate with clear rows. In some places the rows are narrow and crooked and it’s not always clear which row a grave belongs to (my choices from those sections may not always match what the mapmaker intended, or what the cemetery records show). I took many photos, but only of graves with surnames from my family or those of my cousins who accompanied me on the trip. I have not matched these photos with the information the maps. My transcriptions are solely of the maps.
Žilina Cemetery Statistics
1420 — Individual names listed on headstones
480 — Graves that are missing a surname
Total Entries = 1900
Surnames with at least 10 entries: ADLER 11
BAUMHORN 10
BOCK 10
BRAUN 24
BRICHTA 15
DONATH 12
GLASEL 32
GROSS 24 (including 6 for GROSZ)
HOFFMANN 20 (including 2 for HOFFMAN)
HOLZMANN 10
KLEIN 32
KOHN 37
LANGFELDER 13
LEIMDORFER 12
LOWY 11
MARMORSTEIN 12
MULLER 15
NEUMANN 22 (including 1 for NEUMAN)
PICK 12
POPPER 21
PORJES 15 (including 7 for PORGES)
ROTH 12
SCHLESINGER 21
SPITZER 15
STEIN 11
STEINER 17
TROSTLER 13 (including 2 for TROSZTLER)
WEIL 24 (including 2 for WEILL)
WEISS 15 (including 5 for WEISZ)
If you’d like my original Excel document, it is below. Note the two sheets inside it, one for sorting by plot location, one for sorting by surname.
Jewish Cemetery in Žilina, Slovakia
Sorted by Location of Grave
I visited the very well-kept Žilina cemetery in May 2017. At the entrance are two framed maps of the cemetery, painstakingly hand drawn to scale, each grave listed with the name found on the headstone. This document is my transcription of these maps.
The cemetery is divided into 4 blocks and each block has multiple numbered rows. Using the same orientation as the map, we have:
The first map shows blocks 2 and 1 and the second map shows blocks 4 and 3. For the transcription, I’ve preserved the map order by block (2, 1, 4, 3). Then I have done each row, which all go from front to rear (left to right). Within the rows, the transcription goes from top to bottom.
There will be errors!!
I guarantee you there are errors. First of all, as careful as the mapmaker was, there are errors in the documents. Then there are my errors. Some are ordinary mistakes but others come because the maps can be confusing. Because the graves span a large period of time, there are differences in how names appear. In some, women’s surnames have “ova” on the end. In most, they do not. Some graves give the maiden name for married women and these may or may not be on the map, but aren’t indicated as such, so I had to guess (many women may be listed with their maiden names). Some women had no given names on the map (they may or may not be on the stones) but were “Pani” (“Mrs.”) with their husband’s names.
One common practice for stones made during or just after the Holocaust was to include the names of family members who died in the Shoah and could not be buried. The map includes these but it’s unclear at times which name is that of the person buried there and also which surname belongs to which given name. It’s clear on the graves but the map had limited space to work with.
Some of my photos have blurry parts and some of the handwriting on the maps is unclear (though most is impeccable). Unfortunately, some of the graves are so old that the information on the stones is lost forever. A large percentage of graves have “not given” for the surname and/or given name. These were blank (or numbered) on the map. In some cases, the grave was not used but, for most of these entries, the headstones are just so worn that there is nothing left to read. I don’t know if the cemetery has this information in their books.
Yes I did walk the entire cemetery while I was there. Mostly it’s easy to navigate with clear rows. In some places the rows are narrow and crooked and it’s not always clear which row a grave belongs to (my choices from those sections may not always match what the mapmaker intended, or what the cemetery records show). I took many photos, but only of graves with surnames from my family or those of my cousins who accompanied me on the trip. I have not matched these photos with the information the maps. My transcriptions are solely of the maps.
Žilina Cemetery Statistics
1420 — Individual names listed on headstones
480 — Graves that are missing a surname
Total Entries = 1900
Surnames with at least 10 entries: ADLER 11
BAUMHORN 10
BOCK 10
BRAUN 24
BRICHTA 15
DONATH 12
GLASEL 32
GROSS 24 (including 6 for GROSZ)
HOFFMANN 20 (including 2 for HOFFMAN)
HOLZMANN 10
KLEIN 32
KOHN 37
LANGFELDER 13
LEIMDORFER 12
LOWY 11
MARMORSTEIN 12
MULLER 15
NEUMANN 22 (including 1 for NEUMAN)
PICK 12
POPPER 21
PORJES 15 (including 7 for PORGES)
ROTH 12
SCHLESINGER 21
SPITZER 15
STEIN 11
STEINER 17
TROSTLER 13 (including 2 for TROSZTLER)
WEIL 24 (including 2 for WEILL)
WEISS 15 (including 5 for WEISZ)
If you’d like my original Excel document, it is below. Note the two sheets inside it, one for sorting by plot location, one for sorting by surname.
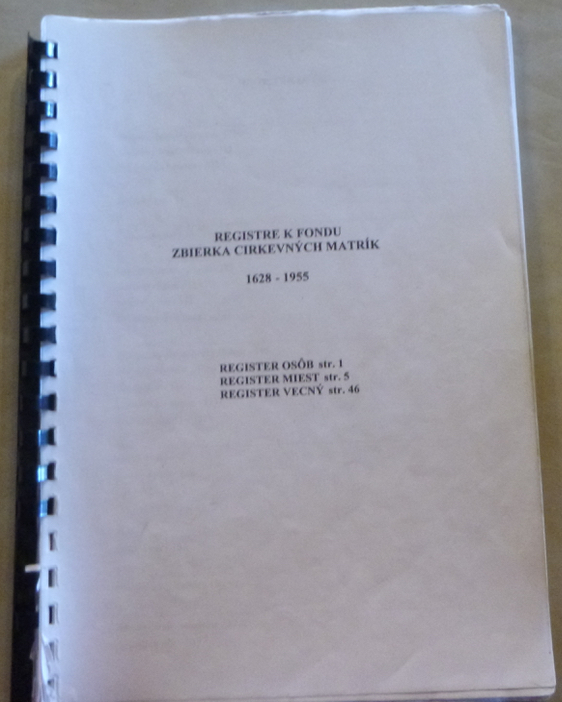
Bytča Archives Jewish Records
Sorted by Microfilm Number
On a recent trip to Slovakia, my cousins and I visited the Slovakian state archives in Bytča, one of 7 regional archives in the country. Their paper documents are generally for researching the nobility and other things not relevant to Jewish history. The main records are on microfilm. They have a book listing their microfilm holdings, mostly sorted by place name (they also have listings by person’s name, with no obvious Jewish entries, and by subject, which might have topics of interest).
Each place name entry gave the religion of the records, as they are generally recorded by the local place of worship. Žid means Jewish and there are a lot of them. There are also records without any religion mentioned. I don’t yet know if these are civil records (which could include Jewish residents) or non-vital record information on the given town. A few of the towns with no religion mentioned records do not have religiously-based records, but most have both.
Below are the Jewish (Žid) entries, organized by microfilm number (given as a small group of films). I’ve also sorted them by place name, the same order as in the book, in a separate post. In many cases, the same location is represented in more than one set of microfilms. I put those as separate entries, listed as such under Notes.
There are 129 microfilms of Jewish records.
If you’d like my original Excel document, it is below. Note the two sheets inside it, one for sorting by place name, one for sorting by microfilm number.
Bytča Archives Jewish Records
Sorted by Place Name
On a recent trip to Slovakia, my cousins and I visited the Slovakian state archives in Bytča, one of 7 regional archives in the country. Their paper documents are generally for researching the nobility and other things not relevant to Jewish history. The main records are on microfilm. They have a book listing their microfilm holdings, mostly sorted by place name (they also have listings by person’s name, with no obvious Jewish entries, and by subject, which might have topics of interest).
Each place name entry gave the religion of the records, as they are generally recorded by the local place of worship. Žid means Jewish and there are a lot of them. There are also records without any religion mentioned. I don’t yet know if these are civil records (which could include Jewish residents) or non-vital record information on the given town. A few of the towns with no religion mentioned records do not have religiously-based records, but most have both.
Below are the Jewish (Žid) entries, organized by place name, the same order as in the book. I’ve also sorted them by microfilm number (given as a small group of films) in a separate post. In many cases, the same location is represented in more than one set of microfilms. I put those as separate entries, listed as such under Notes.
There are 129 microfilms of Jewish records.
If you’d like my original Excel document, it is below. Note the two sheets inside it, one for sorting by place name, one for sorting by microfilm number.
This is the drosh, the Torah commentary, I wrote for my Bat Mitzvah on June 14, 2014. My Torah portion was Sh’lakh L’kha, specifically Numbers 15:14-16.
I gave a shorter, and less technical version, at the actual service. The only changes were to the genetics portion in the beginning (I also did not read anything in boxes). Below is the full version, with appropriate links.
D’var Torah Cyndi Norwitz June 14, 2014
Today I am a woman!
Yesterday I was a woman. And the day before that. And so on back nearly 35 years. Still, today means something. It doesn’t change who I am physically, but it does change me.
Today I am a Jew!
I’ve been a Jew my whole life. So were my parents. And their parents. And their parents. And back as far as my genealogy hobby *cough* obsession can take me. Today though, I’m a different Jew. A year of study and the accomplishments of this ceremony mean something. I’m not more Jewish, but I am more Jewish.
The stories my family told me are that I am Jewish all the way back. DNA tests confirm that. 94-100% [spoken version: nearly 100%], depending on the algorithms. After the initial influx into Europe about 1-2000 years ago, Jews have been mostly marrying each other to the point that “Jewish” shows up as separate as Italian or Finnish. You can’t tell one Jew from another though. Even Ashkenazi vs Sephardic is hard. A Jew from Romania looks like a Jew from Latvia. We just moved around too much. When you look to see which populations this “Jewish” group matches best, it’s not other Europeans. It’s non-European Jews, Palestinians, Druse, and other folks from the Middle East.
One way to get more precise is to look at the paternal line (through Y-DNA) or the maternal line (through mt, or mitochondrial, DNA). Each of us gets our mtDNA from our mothers, and only women can pass it on. [Beginning of section I removed, see end of page for replacement text.] Every generation gets exactly the same sequences. Except sometimes, every few thousand years, there is a mutation. Those mutations allow us to track groups through time by location.
Imagine two sisters. One has identical mtDNA to her mother and passes it on to her daughters, and their daughters. The other sister has a single letter in the DNA that is different, a mutation. She passes that on to her daughters and their daughters. Those two groups are related but no longer the same. Repeat the process over hundreds of generations and you will end up with dozens of groups, each differing from the other by a small handful of mutations. Some of the groups migrate, then split up and migrate again, and you end up with different mtDNA’s all over the world.
My mtDNA is U6a7a1b. The U’s were one of the early splits in human history, after a bunch of us left Africa 60-70,000 years ago. A group of U’s moved from Western Asia into Europe. About 35,000 years ago, U’s split up. The ones that stayed in Europe became the U5’s. U2’s moved into India. The ones that went back to Northern Africa are my people, the U6’s.
Over the next 30,000 years, the branch of my maternal ancestors split another 5 times, mostly within the Maghreb, Northern Africa west of Egypt. My branch became Jewish and eventually moved to Spain. With the Inquisition 500 years ago, this branch, now Sephardic, spread over Europe, back to Africa and the Middle East, and to the Americas. The furthest back I can take my maternal line, the line I have the least information about, is to my great grandmother Hermina Goldberger of Kosice, Slovakia. I am the only known U6a7a1b from Slovakia outside my immediate family. [end of section I removed]
Years before present
U6 35300
U6a 26200
U6a7 Maghreb 29000
U6a7a 7600
U6a7a1 4700
U6a7a1b Sephardic 1400
“On mtDNA grounds, it is known that after the Out of Africa migration around 59–69 kya [thousand years ago], the U branch of macro-haplogroup N spread radially from somewhere in western Asia around 39–52 kya. This reached Europe, signaled by haplogroup U5, North Africa by haplogroup U6, and India by haplogroup U2. Coalescence age for U5 correlates closely with the spread of Aurignac culture in Europe and, from an archaeological perspective, it has been argued that Central Asia, not the Levant, was the most probable origin of this migration. In absolute agreement with this vision, we propose that, in parallel, U6 reached the Levant with the intrusive Levantine Aurignacian around 35 kya, coinciding with the coalescence age for this haplogroup.”From: The history of the North African mitochondrial DNA haplogroup U6 gene flow into the African, Eurasian and American continents. BMC Evolutionary Biology 2014
So how did my maternal ancestors become Jewish in the first place? One theory, not that we can ever prove or disprove it, is that we were part of the “mixed multitudes.” Torah, in Exodus 12:38, says that as the children of Israel left Pharaoh, “And a mixed multitude went up also with them; and flocks, and herds, even very much cattle.” The word for mixed multitude, עֵרֶב רַב (Erev’rav) even shares a root with Maghreb. Related also to words for west, evening, and mixed grill.
The mixed multitudes get a bad rap. We see the term again in Numbers 11:4 when the people had nothing but manna to eat. “And the mixed multitude that was among them fell a lusting; and the children of Israel also wept on their part, and said: ‘Would that we were given flesh to eat!’”
But are these the same people? “Mixed multitudes” in Exodus, sometimes translated as “rabble” or “many other people” or “hoard,” is עֵרֶב רַב (Erev’rav). But in Numbers it’s הָאסַפְסֻף (asafsuf), sometimes translated as “some foreigners,” “foreign rabble,” “contemptible people,” “the vulgar,” and “riff-raff.” The root, אָסַף (asaf) means gather. So asafsuf means a gathering or assembly.
The asafsuf aren’t the mixed multitudes as most Rabbinic commentators assume, but rather, as one modern commentator puts it “charismatic Israelite trouble-makers.” So when God gets fed up with the kvetching and punishes the asafsuf with a plague, God isn’t killing off the outsiders, but the Jews keeping the people from God’s plan.
We have a similar story in this week’s portion. Twelve men representing the 12 tribes of Israel go out to spy upon the land of Canaan and 10 of them come back thinking the entire venture is a bad idea. Their crime isn’t their fear of failure, but the dissent they spread among the people through “evil reports.” God kills them off with a plague and everyone else gets an extra 40 years of wandering in the desert.
“Erev” is in the Torah 10 times. With the exception of “mixed multitude” from Exodus, every use refers to the warp and woof of weaving. Specifically to the woof, the thread drawn through the warp yarns to make cloth. When applied to people, most commentators take this to refer those of mixed heritage. Not quite Jews perhaps, but family they could not leave behind.
The only other time we see “Erev” in the Bible is Nehemiah (13:3), where it is translated again as “mixed multitude” and clearly refers to people engaging in intermarriage and their children. It’s a bit of an understatement to say Nehemiah hates intermarriage—he curses Jewish men who married non-Jewish women. He pulls out their hair, even kills some of them. Many commentators cite this passage as proof that God is against intermarriage too. Nehemiah doesn’t compromise; he wants Jews to marry other Jews, period. But what he’s going on about is the effects intermarriage often has: people stop obeying God’s laws. They work on Shabbat, they fail to give their tithes to the Levites, and they don’t teach their children Hebrew.
We see this throughout the Torah as well. Plenty of non-Jews marry Jews (Moses’ wife Zipporah is but one example) and God is fine with it. But others cause problems. The difference is in their behavior, not their birth. My Torah portion today (Numbers 15:14-16) says “the same Torah and justice shall apply to you and to the stranger who resides among you.” In other words, if you live with the Jewish people, you have to follow the same laws. And if you do that, you’re the same as us. And if you break God’s laws on purpose, “whether [you] be home-born or a stranger…that soul shall be cut off from among [your] people.”
Ezekiel (47:21-23) tells that when the Jews came to their land they should divide it by tribe. “This is the territory you are to divide among the tribes of Israel. You are to divide it by lot as an inheritance both to you and to the foreigners living among you who give birth to children living among you; for you they are to be no different from the native-born among the people of Israel — they are to have an inheritance with you among the tribes of Israel. You are to give the foreigner an inheritance in the territory of the tribe with whom he is living,’ says Adonai Elohim.”
And what is that word “stranger?” It is not the erev, the mixed multitudes, or the asafsuf, the gatherings, but something completely different. Here it is גֵּר(ger) and it is mentioned dozens of times throughout the Bible. We were strangers in Egypt but, by the time of the Exodus, we were no longer strangers yet strangers lived among us. The verb form is often translated as “sojourn” but it is different from mere traveling. The contrast is between a stranger and one who is “home-born.” So a stranger is an immigrant, an alien. Their children are no longer strangers. And children are the point…a ger is someone who isn’t just visiting; they plan to stay. They are converts.
Leviticus (19:34) says “the stranger that dwelleth with you shall be unto you as one born among you, and thou shalt love him as thyself; for ye were strangers in the land of Egypt.”
Jews, like nearly every other population on this planet, often married their neighbors. European Jews look different from Indian Jews who look different from Ethiopian Jews. Each group looks more like their neighbors, but still has more in common with other Jews than those neighbors. I may look Eastern European to a large degree but, when I look at my many thousands of DNA matches over several different companies, matches that generally don’t show up if more than 6-10 generations back, I don’t match a single non-Jew without significant Jewish ancestry, not one. But I match nearly every European Jew I come across, regardless of ancestral location, usually through both my mother’s and my father’s lines; even my husband and I are 7th cousins.
Throughout Torah and Haftorah we have countless examples of Jewish men marrying non-Jewish women and bringing them into the community. This bears out historically too. It’s not just Jews; we see “erev,” mixture, in nearly every population on this planet. We have periods of just marrying ourselves too. No geographic isolation to explain it here, just political. The initial influxes of (mostly male) Jews to Europe with the Romans 2000 years ago, as well as immigrations a bit later, involved much intermarriage. And this shows up in deep analysis of DNA as well as our looks. After that, until the 20th century, intermarriage was rare. Jews throughout most of Europe were limited in where we could live or in our professions. We often had to wear distinctive clothing and were frequently kicked out of towns or entire countries, invited back, then kicked out again as regimes changed.
Through it all, we chose Judaism. If our spouses were not Jewish, they chose to be a part of our community. We taught Judaism to our children, and their children. Certainly, many Jews left. They converted or lived with the community of a non-Jewish spouse. Some Jews converted by force and Judaism was lost over the generations. Some just drifted away.
Somehow, over thousands of years, we still exist as a people. We’ve survived oppression, genocide, and periods of calm with intermarriage and children who barely know they are Jewish. One phrase we sometimes hear is that Jews are the “chosen people.” Certainly many Jews see this as a badge of superiority. Many others simply excise the language. But I want to embrace it. There are multiple paths to God. Some evil, some unjust. But many valid, righteous, paths. We as Jews are chosen to take our particular path. The path I was born to. The path I chose voluntarily years ago. The path I traversed with a year of study to bring me to my bat mitzvah today. I am chosen. And I choose Judaism.
Alternate text I read during the service June 14, 2014:
The stories my family told me are that I am Jewish all the way back. DNA tests confirm that, nearly 100%. After the initial influx into Europe about 1-2000 years ago, Jews have been mostly marrying each other to the point that “Jewish” shows up as separate as Italian or Finnish. You can’t tell one Jew from another though. Even Ashkenazi vs Sephardic is hard. A Jew from Romania looks like a Jew from Latvia. We just moved around too much. When you look to see which populations this “Jewish” group matches best, it’s not other Europeans. It’s non-European Jews, Palestinians, Druse, and other folks from the Middle East.
One way to get more precise is to look at the paternal line (through Y-DNA) or the maternal line (through mt, or mitochondrial, DNA). Each of us gets our mtDNA from our mothers, and only women can pass it on. After leaving Africa, my maternal line went to Western Asia, briefly to Europe, then settled in Northern Africa, mostly within the Maghreb, Northern Africa west of Egypt. My branch became Jewish and eventually moved to Spain. With the Inquisition 500 years ago, this branch, now Sephardic, spread over Europe, back to Africa and the Middle East, and to the Americas. The furthest back I can take my maternal line, the line I have the least information about, is to my great grandmother Hermina Goldberger of Kosice, Slovakia.